Results 1 to 10 of 10

Thread: Learn-by-Example Modelling 02: Composite UV-Mapping

  1. #1

    Icon1 Learn-by-Example Modelling 02: Composite UV-Mapping

    Version: 29/04/2013 - added additional information on fixing split-mesh seams (Part 2 -> Step 5)
    Version: 21/01/2013 - first posted

    Introduction When I just started learning modelling for M2TW, I found UV-mapping the most difficult part of modelling, especially complicated models such as body or head. Although, most models such as weapons can be UV-mapped satisfactory in a single step, parts like main body or head need more tinkering. Hence, in this tutorial we will be creating a composite UV-map of a head model with all its parts. The composite UV-mapping here means the model consists of several UV-maps for complete 360 degrees texture wrapping without overstretching or jamming of textures.

    Now, before we start, I suggest you read this article about UV-mapping on Wikipedia. Also, I assume you have some basic knowledge about modelling. This tutorial is written for beginners and those modellers who are not very comfortable with UV-mapping.


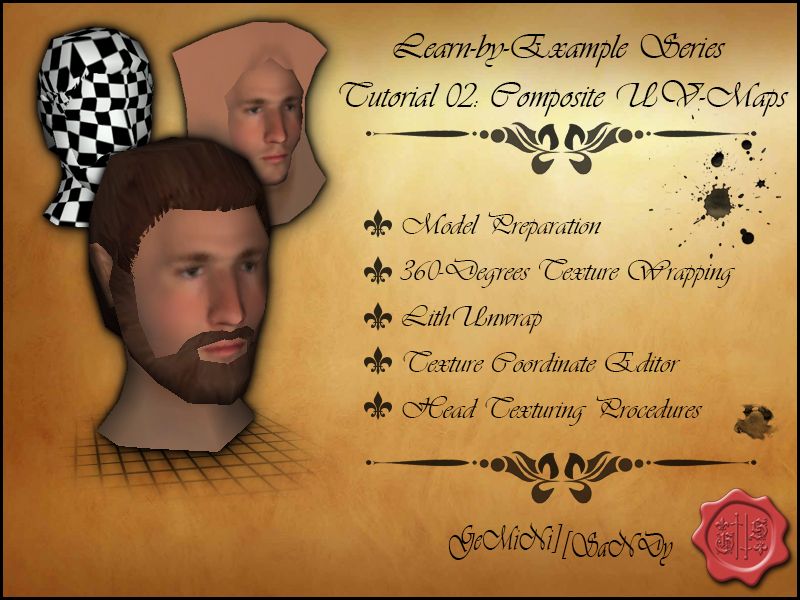
    Part 1: Model Preparation
    Step 1 First, we need to prepare the model for UV-mapping. Separate main parts from each other so we can work with one at a time. In this case, we have main head model (just a bald head), hair, beard, and ears that together form our head model:


    Step 2 We will start with main head. I hid all the other groups we separated in Step 1 for the time being. When first created, the model was mirrored alongside symmetry line in the middle. It is always a good idea to work with one half of the model until most of the modelling, including UV-mapping, is done. We can always mirror it again, so we will only work with one half for convenience purposes. In this step I deleted the entire left half of the head.

    Step 3 Face is the part that needs to be most well UV-mapped and detailed. That is why we need to UV-map it from the front. The other parts of the head can be UV-mapped from the side. I duplicated the head and hid the duplicate, deleted the face part, revealed the duplicate and deleted everything other than face. I then named all the parts and groups and save the file. Now the head consists of two parts. This is what we got after Step 2 and 3:


    Part 2: UV-Mapping the Head
    I took the liberty to attach LithUnwrap to this post. It is a freeware and has not been in development for many years.

    Step 1 To load the model file, open LithUnwrap -> go to File -> Model -> Open -> choose your file.

    Step 2 On the right side find "groups" tab, expand it and find your face group (whatever you named it in MilkShape). Right click -> Select. Now go to Tools -> UV-Mapping -> Decal. Choose axis-alignment as "z-front" and scaling options as "scale to mapping space", press ok. Now we need to make the model smaller, right click on the screen -> scale -> arbitrary -> hit 0.5 three times.

    Step 3 Similarly select the other part, use decal to UV-map, but this time use "x-right" to UV-map from side. Scale down three times by 0.5. Place the resulting UV-map near the face. Then start place the vertices on top of the corresponding vertices of the face. To place them perfectly on the same spot: select the two vertices -> right click -> collapse -> all. Repeat until all the corresponding vertices are connected. Then slowly adjust the remaining vertices by placing them closer to the face. Note that other parts do not require much detail, so I moved them closer to the face and saved space. To save, go to File -> Model -> Save -> choose .ms3d format and overwrite.


    LithUnwrap Info Familiarize yourself with selection, zooming, moving modes etc in LithUnwrap. Most of the time you will be using selection mode, which is the white cursor. Then you have select by vertex, select by face, select by group options. Use select by vertex.

    Step 4 Now we need to go to MilkShape and apply UV-map to the texture. I used Texture Coordinate Editor to fit the UV-map into the head texture. Ctrl + A to select all, then Ctrl + T to open the editor. Here is the animation showing the fitting procedure in Texture Coordinate Editor:


    Step 5 We can now regroup the two parts together. Duplicate the regrouped half-head, select the duplicate and go to Vertex -> Mirror Left - Right. Merge the two half-heads together to get the full UV-mapped head. Notice how the merged head has weird highlights and mesh seams are revealed. To fix we use Align Normals extension for MilkShape, a must-have utility. Here is the bald UV-mapped head:


    NOTE: There is another method of fixing split-mesh seams. This is done by welding vertices (Ctrl + W), which is literally making two vertices become one. Before doing this you must be sure that the two vertices are at the same location. Select the vertices and press Ctrl + N. I would generally avoid this method because it may cause discontinuous UV-mapping. If two vertices have different location on UV-map, after merging they will be fixed relative to each other and you won't be able to separate them easily. This is suitable if the vertex has same location in both 3D space and on the texture. Otherwise its better and easier to go with the above-mentioned method.

    Part 3: UV-Mapping the Ears
    If we simply UV-map the ears from right side, the inner side will have same textures and look ugly. In this case, since ears are not noticeable on a battlefield, we can avoid complicated UV-mapping procedure. But for the sake of this tutorial, I separated the inner and outer ear pieces by duplicating it and deleting corresponding parts. I then applied decal UV-mapping in LithUnwrap and merged the UV-mapped ear pieces together, duplicated and mirrored to get the second ear:


    Part 4: UV-mapping the Hair
    Step 1 Following similar procedures with hair group we get the starting UV-map. We can then move the vertices around in LithUnwrap to give it a nicer shape so that when hair texture is applied it will fit better. You will see the texture I am using later, and understand why we are changing the shape this way:


    Step 2 I saved the model in LithUnwrap and opened in MilkShape. Now, we need to fit the UV-map nicely into the texture I made earlier. Use scale, rotate and move functions to do this:


    Step 3 We now need to do some minor adjustments to make sure textures do not overstretch and jam in any place. We try to minimize inconsistencies in texture density. Here is the final result, which in my opinion turn out to be quite good:


    Part 5: UV-Mapping the Beard
    Nothing special here. I simply used side decal and then adjusted the vertices a little in Milkshape's Texture Coordinator. Here is the final outcome:


    Part 6: [Optional] Checkerboard Texture
    In this particular case, I already had previously made texture. However, most of the time you will need to UV-map the model first, and then make textures for the UV-map. In such cases, it is a good idea to use a checkerboard pattern to ensure that textures are not overstretched or jammed together in certain areas. This is completely optional, but I will just show how it look like on our model:


    Part 7: [Bonus] Head Texturing Procedure
    I figured it could be difficult to make textures. There are many ways you can make one. Here I will show the steps used to make the texture used in this tutorial:

    1. Find a decent face in the web (Google is your friend). This one is actually a 3d generated database made by some researchers, who allowed free use of their faces for non-commercial use (I have hundreds of these...)
    2. Erase borders with smooth eraser and use Smudge tool to spread the skin. This way it looks more natural and consistent with the face color. If you simply use brush the color tones may be different. Well it is up to you.
    3. Completed the skin
    4. Ear drawn using basic brushes
    5. Used basic brushes to draw beard with 2-3 tones of brown and sharpen tool
    6. Used a more special brush to draw background
    7. Applied lighter tones of brown with the same brush
    8. Sharpened
    9. More steps I did not bother replicating. I made this texture a few months ago. Used eraser, sharpen, changed saturation/contrast and so on, the usual things. You get the basic idea.


    I hope you can now make better UV-maps and apply textures to more complicated models. Please let me know which area is the most difficult, and depending on my knowledge I could make another tutorial.

    Attached are LithUnwrap and the model and texture files just in case.

    In pursuit of higher quality modifications,
    Sandy

    Last edited by G|I|Sandy; January 24, 2016 at 09:39 AM. Reason: Fixed inconsistencies in style

  2. #2
    T&D's Avatar Vicarius
    Join Date
    Dec 2009
    Location
    Shoe store...
    Posts
    2,843

    Default Re: Learn-by-Example Modelling 02: Composite UV-Mapping

    I would love one year ago but now i am on retire man... hehe
    Seriously great work man each modeler will enjoy it.
    One thing make eyes more sharper(textures).

  3. #3

    Default Re: Learn-by-Example Modelling 02: Composite UV-Mapping

    For a better performance in game is a good idea delete the not showed triangles, example head skin. With this tutorial you can make many many variant of face in game, but the game engine don't have advantage because it rebuild all variant as singular mesh. Some time is useful create only 4-5 different head without detaching all head's component (no normals issue) : "one model one variant" sometime is simple strategy

    Another strategy that can you write: in a lot of situation you can mapping only half of objects because is mirroring, in this case you can put double variant of head in the same texture size and economise space for other objects.

    Last suggestion: if head model are used by many soldier of different faction you can insert the texture into attachment texture file, not in Figure, as vanilla game done. Less texture = better engine performance.
    Last edited by johnwhile; January 28, 2013 at 03:52 AM.
    Forums:............freeforumzone - mtwitalia - twcenter
    Works:.....worldcollision file - ModelReferencePoints files - MaxScript Building Editor
    Other:.............siege-engine(video) - new-animations(video) - buildings
    Have to take the money where it is: at the poor. They have little, but they are many. Alphonse Allais

  4. #4

    Default Re: Learn-by-Example Modelling 02: Composite UV-Mapping

    Update: added additional information on fixing split-mesh seams (Part 2 -> Step 5).

    johnwhile,

    This is probably a very late reply, but your suggestions are very sound. Regarding merging all variations into several models (under same group) is something I only understood recently. This is definitely better for game performance. Regarding the rest, I follow some of these practices myself but since this was a UV-map tutorial I didn't mention them. However, I will quote them in related tutorials.

    Sandy

  5. #5
    Lifthrasir's Avatar "Capre" Dunkerquois
    Patrician took an arrow to the knee

    Join Date
    Jan 2010
    Location
    City of Jan Baert
    Posts
    13,950
    Blog Entries
    4

    Default Re: Learn-by-Example Modelling 02: Composite UV-Mapping

    I'm interesting by the part 6 particularly. I'm working on a unit model on which I have that stretching issue on some faces. where can I find some info about the Texture Coordinate Editor?

    Many thanks in advance.
    Under the patronage of Flinn, proud patron of Jadli, from the Heresy Vault of the Imperial House of Hader

  6. #6

    Default Re: Learn-by-Example Modelling 02: Composite UV-Mapping

    Lifthrasir ,

    The texture coordinate editor is the utility in Milkshape. Press ctrl+A and then ctrl+T. That will open the texture coordinate editor. There you can select the group you want to UV-map. You can move vertices around and immediately you will see changes made on your model. It is quite straightforward.

    Sandy

  7. #7
    Lifthrasir's Avatar "Capre" Dunkerquois
    Patrician took an arrow to the knee

    Join Date
    Jan 2010
    Location
    City of Jan Baert
    Posts
    13,950
    Blog Entries
    4

    Default Re: Learn-by-Example Modelling 02: Composite UV-Mapping

    Once again, many thanks for your quick answer Sandy.
    Under the patronage of Flinn, proud patron of Jadli, from the Heresy Vault of the Imperial House of Hader

  8. #8

    Default Re: Learn-by-Example Modelling 02: Composite UV-Mapping

    WHY I CANT SEE ANY PICS ANYWERE THIS IS !!!!!

  9. #9
    paleologos's Avatar You need burrito love!!
    Join Date
    Feb 2011
    Location
    Variable
    Posts
    8,496

    Default Re: Learn-by-Example Modelling 02: Composite UV-Mapping

    The site that was hosting the images gotrid of them.
    Try some other tutorials that also exist in pdf format.
    For example this one.
    Last edited by paleologos; January 24, 2016 at 05:07 AM.

  10. #10

    Default Re: Learn-by-Example Modelling 02: Composite UV-Mapping

    I had these images on my drive. Reuploaded.

    Sandy

Tags for this Thread

Posting Permissions

  • You may not post new threads
  • You may not post replies
  • You may not post attachments
  • You may not edit your posts
  •