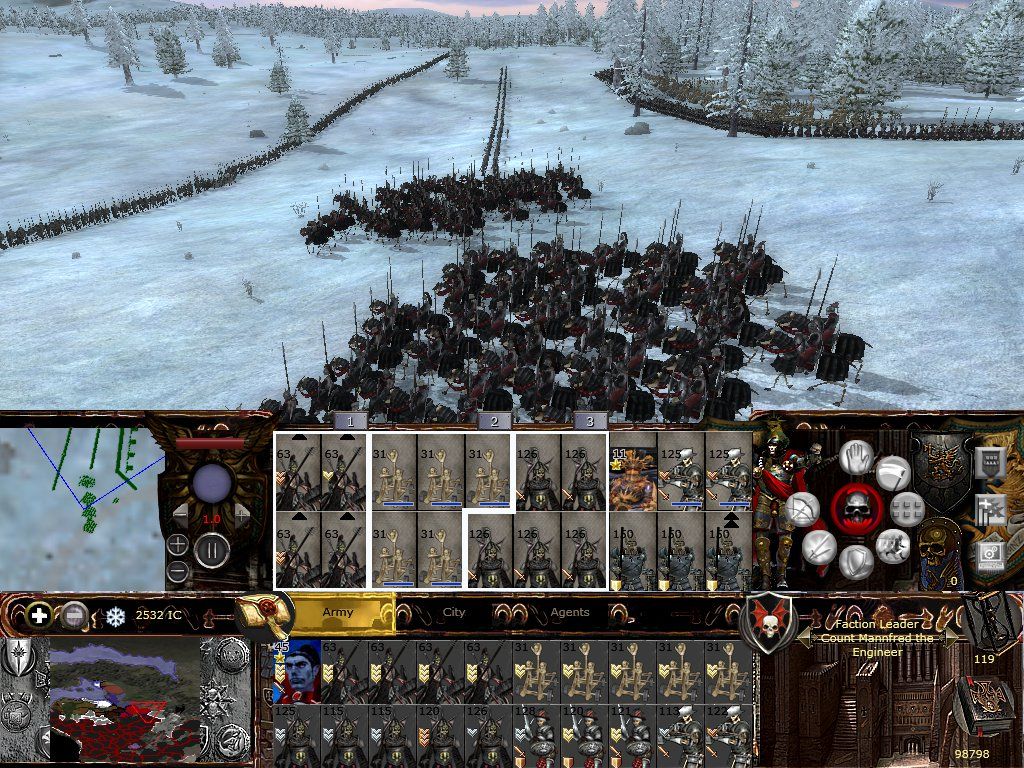
Here are the dwarf unit stat guide I just made . It's also have Kurgis's dwarf campaign guide for 1.44
Kurgis , hope you don't mind


Here are the dwarf unit stat guide I just made . It's also have Kurgis's dwarf campaign guide for 1.44
Kurgis , hope you don't mind
Last edited by Maha Moggalana; May 22, 2012 at 09:31 PM.
░░░░░███████ ]▄▄▄▄▄▄▄▄▃
▂▄▅█████████▅▄▃▂
I███████████████████].
◥⊙▲⊙▲⊙▲⊙▲⊙▲⊙▲⊙◤
This is Total War !!!

Hochland
Hochland starts with 3 relatively well developed regions in the NW central region of the Empire and 1 castle which is not well developed. There are several nearby rebel and Beastmen regions that offer both a threat and opportunity.
This guide is for playing on VH-VH but should be able to be adopted for other difficulties quite easily. Version 1.4.4 with no other submods.
Difficulty- Normal for experienced player, maybe Hard if only due to relatively weak unique units in roster but the victory conditions are relatively easy so if measured by that then its easy campaign.
I don't use assassins as I think that makes things too easy so keep that in mind as I won't mention it again.
Overview of units-
Standard Empire units are useful deep into the campaign but I will highlight the most useful units for Hochland in my opinion.
1. Swordsmen- Versatile, deadly when used well, and CHEAP, can stand up quite well against even higher tier enemies if upgraded and having some XP.
2. Halberdiers- Cheap, hold the line well but need support, absolutely murder weak enemy units but can have their line broken by more powerful Chaos units.
3. Free Company archers- relatively low cost though they are not the cheapest, can be thrown into the line when arrows run out or just to stem the tide. Can sometimes get very high kill ratios as they are about as good archers as Empire archers but with the higher melee abilities can actually make a difference when thrown into melee after expending all their arrows. Especially with upgrades they are a lighter cheaper version of high elves. Only criticism is no stakes but most Empire armies can get by with only 1 row of stakes in front of cannons.
4. Pistoliers- Versatile and cheap for their usefulness, can weaken enemy knights though don't count on them to stop heavy cavalry on their own, quite powerful charge for basically a skirmisher unit. very fast- use them to draw off enemy cavalry so your cavalry can fight 2 or 3 on 1.
5. Spies- yes... they deserve a spot, not only keep track of enemy movements and open gates, but protect from enemy spies, assassins, and can sometimes cause rebellion in enemy settlements.
Hochland Marksmen are the foremost unique unit but unfortunately are not worth the cost in most battles. Very low kill rate for their high cost, and LoS requirements mean that occasionally the Marksmen are useful but archers high angle attacks and high rate of fire tend to be much more useful. Hochland Marksmen do have long range but seem quite inaccurate even at high levels of XP. Several battles in campaign as I test them they fired at least 3 volleys before scoring a single kill on the flank of an advancing Chaos Knights unit which was as long as the Chaos Knights needed to more than come into melee. The Marksmen can fight decently in melee but the expense to use them this way is wasteful. Traveling with many in your army is unlikely to be a good idea. 1-2 is ok to move to the flanks or rear of enemy army once it has engaged your line as a steady barrage on high armor units does work over time but generally the kill rate is too low to justify even situations like that and it is far more effective to have another unit which can help kill enemy general like Pistoliers as that breaks morale much more quickly. Thunderers from Beder work better though the starting high XP Marksmen should last you quite awhile. AI does like to focus on missile units if it can reach them so using them as bait can work but archers/crossbow work just as well and are more effective for the cost.
Drakwald Patrol the most useful unique unit. Not as powerful as some other units but when upgraded and given free reign on an enemies flank or rear can chop down all but the most powerful melee units. Also the relatively low cost and abundance where most cities can produce them means getting alot of them is relatively easy.
Knight Encarmine are incredibly useful. Their stats especially on charge are misleading. I've found them able to kill most enemy units though very heavy enemy units can resist their charge even when hit in the back. Their melee skills are amongst the best Hochland will get as well though be careful not to leave them in melee too long as they do not have the durability of some other heavy armor units.
Panther Knights are fast and one of the best charging cavalries in the Empire. Can absolutely exterminate low tier Chaos units but lacks some of the Encarmine's melee skills so best use to charge, retreat, charge and chase routers
Warpriest of Sigmar is a special unit that you only get 1 of and might come early or later in your campaign but is very useful. I advise to train them up on zombies or something similar before employing vs tougher enemies since you only get 1. If you fight against some of the special scripted armies which are full of elite units they are almost essential if you want to win with style(IE non catastrophic losses).
Bright Wizard is fun to use but honestly does less damage than a couple high XP mortars and are less durable. Maybe I've used them wrong but average battles they are making nice fireworks but only doing 100-200 kills while mortars average higher kills for less cost and much greater availability. Honestly if I were to rebalance Hochland roster I would make Hochland marksmen much much more powerful, Thunderers a little more powerful, and greatly reduce mortars. That would make setting the mortars to 'fire and forget' a bit less devastating and giving more of a reason to make an effort to use the handgun type units other than bait or a single company to help break morale of enemy.
Artillery- Hochland gets access to many cannon and these can be quite useful but don't overdo it. Chaos armies tend to move fairly quickly and only in a few situations will cannon have long enough opportunities to use their very long range well. Later in the campaign cannon probably are worth inclusion simply for the chance to take out Chaos champions and other dangerous vermin from long range. Mortars are really much more useful but it depends on situation as occasionally cannons make more sense(bridge, siege defense though using both is ideal). The Volley Guns and rockets are fun to use and I found rockets to be handy in siege defense while not as reliable as mortars but worth trying out.
Greatswords- The recruitable generals can be useful for a morale boost or to lead armies in a pinch as for some time it can be difficult to get enough generals but I find them lacking in battle vs the top tiers of most other factions. The best use is charging in on a flank attack or helping stabilize the center of the line with their bonus to morale. They are cut down by many of the better Chaos units and take much longer than the family member cavalry to gain XP and extra HPs for the general making them dangerous contenders to rely on leading armies. With good XP and upgrades they can take down Black Orcs and similar units but anything more and they will be the ones getting cut down. Since Black Orcs are a couple levels below the top melee troops... don't count on them to turn the tide in melee. Drakwald or Halberdiers are more useful in melee and with larger numbers more durable as well.
Mercenaries- any mercenary captains that offer service, buy them! The generals are worth the price alone. Ogres are also quite useful but don't expect them to win on their own. Nuln pikemen are also useful but the best mercenaries available are the special troops with the captains and Ogres.
The other special mention for Hochland are the dwarves available in Breder, Thunderers are better than the Hochland Marksmen at shooting while being weaker in melee but anytime Marksmen get into melee something has gone wrong anyway. Quarrellers are the crossbowmen and are quite useful for taking out well armored Chaos vermin and seem more accurate then the Hochland Marksmen while the warriors and axes are handy to keep for wall defense. The difficulty retraining means that only 2 units of each should be recruited and then by rotating retraining should be able to reach high levels of XP where shield wall and the armourer upgrades make them quite deadly. Perhaps even 3-4 of these guys can be rotating by the time Chaos Undivided begins but shouldn't not have more than that or send them far from Breder except in early campaign.
Turn 1-20 general guide coming update soon!
AAR up to turn 40 in progress- http://www.twcenter.net/forums/showt...1#post10443061
Turns 1-5
Spoiler Alert, click show to read:
After turn 5 you can have a wider choice depending on your build order. Hergig as the most advanced city might be made to produce more military buildings while leaving taxes higher earlier as alternate to what I choose. I suggest definitely focus all other cities on growth but Hergig starts large enough it can easily reach largest size even if not growth focused in the earlier turns. Halberdiers, archers, cavalry, and ogres might be the best choices early. Leave cannons and swordsmen until more advanced facilities are built. One of the paths I took in playthru was to ignore the lesser cities and just go for the largest. This can work but I found the cost in casualties, marching time, and retraining time made this a poor overall strategy though capturing Marienburg might be worthwhile if you capture some Beastmen cities on the way there and with reinforcements on the way back.
Just 2 other notes-
Take any targets of opportunity like wandering Shaman or Beastmen generals... even if it doesn't directly benefit Hochland it weakens the enemy and might help other factions. In fact I think due to repeated targeting of Beastmen generals is the main reason I was able to eliminate them by turn 14.
BTW- this guide is based on playing without assassins. I think assassins are a bit of exploit in CoW. I don't mind using them in some other mods but defeating a Champion of Chaos with an assassins blade seems rather unrealistic and also robs Chaos armies of some of their strongest fighters which are more fun to overcome in battle.
Last edited by Ichon; November 28, 2011 at 12:37 AM.
STAINLESS STEEL Historical Improvement Project (SSHIP) - v0.8.2 Beta released!
Recent AARs/Guides
Norway 180 turn SS/BGR AAR- http://www.twcenter.net/forums/showt...71#post8479471
Lithuania SS/BGR AAR- http://www.twcenter.net/forums/showthread.php?t=369607
1390 SS submod WIP
http://www.twcenter.net/forums/showthread.php?t=479539
Border Princes
So this faction might seem boring at first and while they do not have very unique units their position and neutrality make them compelling.
Basically you have 3 ways you might try and play them- stay neutral and take what rebel settlements you can and continue on the wars with forces of Chaos and the Orcs.
You could join the Conclave of Light offered after the 2nd turn and pledge to join the Dwarves, Empire, and High Elves... its not a bad way to go but due to position not very satisfying either.
My favorite option is to use the neutrality and starting wars to expand carefully and then turn on the Empire. Going north into Sylvania is relatively easy especially early before Sylvania has expanded much. Build up power taking the rebel settlements in the area- especially Mordheim and then take out the Empire factions 1 by 1. You'll need about 20 turns to get ready and also hope that the Empire builds some dogs of war camps you can capture as ogres come in very useful as heavy infantry. I actually did this half way... took on the Empire starting turn 18 and had about 20 turns of constant battles eliminating 3 factions then when Chaos Storm started settled with the Conclave of Light and started fighting Chaos. No reason not to join with Chaos either but it is fun to try out the Border Princes army against Chaos as they proved the most challenging to fight.
Basic points:
You'll start with decent amount of cash but quickly go into debt. I would recommend disbanding about half the spearmen and archers. The spearmen are basically fodder while the archers are surprisingly useful. Better than both Empire archers and the mercenary archers. It is a long journey to the east to capture poor Orc settlements and battling the Dwarves and Empire is not recommended so early. North to the closest Goblins on Black Lake is the most direct route to Sylvania which makes a perfect staging area to take on the Empire as well as capture the necessary rebel settlements to be able to conquer the Empire or/and fight Chaos.
The main advantage of the Border Princes roster is that you have access to decent charging cavalry at rather low prices and high availability while the archers can hold up in melee better than most other missile units in CoW. Dzurhina make decent heavy infantry with upgrades but take some time to get going with armor upgrades and xp.
There are fewer scripted battles with Border Princes than most of the other CoW factions I have played. The other important note is to make sure and use priests as you'll need to convert large parts of majority of the regions you capture.
STAINLESS STEEL Historical Improvement Project (SSHIP) - v0.8.2 Beta released!
Recent AARs/Guides
Norway 180 turn SS/BGR AAR- http://www.twcenter.net/forums/showt...71#post8479471
Lithuania SS/BGR AAR- http://www.twcenter.net/forums/showthread.php?t=369607
1390 SS submod WIP
http://www.twcenter.net/forums/showthread.php?t=479539
Dark Elves 1.4.4
The dark elves are a raider faction just like their 40k counterparts and I am surprised by how well this was translated on to M2TW. As a feared and hated raider faction the DE have:
- Limited economy. Aside from the slavery based economy, they have no way to upgrade their economy in settlements other than the occassional jewellry shop, they cant even grow crops or any buildings to upgrade population growth. You also have no merchants.
You are forced to take and sack settlements or take settlements with facilities that you were unable to build yourself. (i.e. mines)
- All Buildings Available. Youre a raider pirate faction and have no time to wait till your settlement grows to send in more troops. All barracks, ranges, stables, etc. re available whether in a huge city or a village.
- Expedition Force. Just like their High elven counterparts they are limited to troop recruitment only in coastal regions, cities that can build ports. In addition to that, if its winter youre not getting any new recruits.
Note: In taking inland regions, do keep building at least first level barracks since it lets you keep a free upkeep garrisson in inland settlements. You can also retrain in inland settlements sometimes but not recruit.
Note 2: Im not sure but itss possible that if you lose your last settlement you become a horde just like the high elves [needs clarification]
- Extremely limited alliances. Not as bad as Sylvania but you still have no diplomats and only 1 scripted alliance in the entire game which also makes you go to war with 1 other faction.
- Only 1 starting faction you are at war with. You are the immediate problem of only 1 faction, the High elves. Everyone else is busy with everyone else, a perfect situation for backstabbing and raiding.
- Dreaded armies. You have one good unit that causes fear, use this along with a dreaded general to break morale, win quickly and minimize your losses.
Other features of the faction include:
- Poor siege. You should rely on spies or sallies to get into a city. Nothing you have can feasibly break through even a large towns wooden wall.
- Repeater crossbows. Most of your ranged units use these. They have limited range (wherein they can be outranged by almost every one elses ranged units) but high rate of fire. Probably higher than even your standard archer.
Units
Melee
DE Warrior Its youre standard sword and board unit, better than most other sword and board. Can go into shield wall. Can garrison.
DE Spear Same as above but with a spear but cant shieldwall. Can garrison
Black Ark Corsair - Its like a DE warrior with 2 swords and no shield. Has higher damage but lower defenses. They can do well on the front but prefferrably used to flank or be a 2nd line troop.
Har Ganeth Executioners Its your usual 2handed weapon elite melee infantry. As with the others of its kind its basically charge infantry.
Black Guard of Naggarond Elite spearwall infantry with halberd type weapons. Inspires troops. Has a high charge bonus so you can use it similar to the executioners then put them back into spearwall once theyre engaged.
Witch Elves of Khaine 2 hitpoints, causes fear using an activated ability, moves very fast. Its THE DE unit. With a high dread general its possible to cause an early rout with these. It can either turn the tide and/or reduce a lot of casualties on your side. Try to have at least one in every army.
Ranged
DE Crossbows Youre standard ranged unit. Uses a repeater crossbow (see above). dwarven crossbows, maybe even orc bows will outrange youre units. But get them into range and they will tear the enemy a new one until ammo runs out.
Shades Same as the above except it can hide anywhere, has no formation and seems to be more accurate.
Cavalry
Dark Riders Ranged Cavalry unit of the Dark Elves. Uses the repeater crossbow but not as dakka as the infanry version. Its pretty fast and can serve to charge into the rear of an engaged unit once it runs out of ammo. Also useful for going after routing units.
Cold One Knights Dark Elves lance cavalry. Causes fear in other cavalry units. Its heavier and slightly slower than horse riding cavalry. It feels very sluggish to use. Its the only charge and melee cavalry youve got though and it does petty well versus other cav units.
Siege
Reaper Bolt Thrower- The only siege weapon the dark elves get, absolutely useless for breaching settlements. You could waste its ammo on the wooden gates and you still wont get in. What its useful for is cutting a swathe through the enemys ranks. Each shot fires several bolts from each bolt thrower and each can go through several units at a time. It takes some time to reload though. Its also pretty accurate. In a way its similar to a ribault but with better range.
Special Units (One per game)
Sorceresses Very powerful ranged unit and probably the longest ranged unit you will get. Attacks with a powerful shadow magic blast thingy which can chew up whole formations of troops. Comes with a general unit with a DE warrior bodyguard, Vorhan. She casts a debuff which lowers morale. I havent tried accepting her as a family member yet so Im not sure if she can be given a wife.
Assassins Havent tried them much. Theyre a small sized troop. They can hide anywhere and throws daggers before charging. Comes with a general with a Corsair bodyguard, Shadowblade. He has a special ability that increaeses fighting ability of your units.
Starting Area
The dark elves start out in the Dark Elves Camp in the larger chaos wastes area up north and in a camp in the sarls land, a few territories away from Nordland and Kislev areas. You start out with two armies at the start with 2 Cold One generals and 2 infantry generals. The 2 Cold One generals both have special abilities that I think will buff your army temporarily so mke good use of them. You also have an assasin at the start regardless of your answer to the assasin script. You also get a free brochure on Marienburg.
Youre overall objective aside from gaining x terrtitories is to hold onto both the starting areas of the High Elves, and Nuln. Getting, Nuln is difficult since you can only recruit in coastal areas. The closest coastal city to it is Marienburg which will quickly become a major secondary objective for you as it is for everyone else.
Suggested Starting Moves (playing on H/M)
Spoiler Alert, click show to read:
Scripted Events
Spoiler Alert, click show to read:
Storm of Chaos
Spoiler Alert, click show to read:
Some notes on Battle Tactics
1. The witches are one of the best weapons in the DE arsenal and I cannot stress their importance to a DE army. Either chanting at the rear of a line or engaged with the enemy, they will still be causing fear once their chant ability is turned on. It really reduces casualties for you once the enemy routs early.
2. Repeater crossbows are more effective at taking down other melee units and not other ranged units. Because of their rate of fire they seem to be very good for skirmishing but keep them out of range of enemy fire. Also note that you should have a direct line of fire with their target since it maximizes the damage dealt by the crossbows.
You should try to get rid of the enemy ranged units before you engage with your own. Most of the time, the battle AI will move their own ranged units up front so you can actually take them out early with cavalry. This prevents a war of attrition with their ranged units and you can now skirmish their melee troops safely.
Most of the time though I usually end up just flanking the enemy battle line with them or placing them on an elevated portion of the terrain, just as long as they have a direct line of fire to the enemy. If they can cause sudden drops in troop numbers from their continuous fire they can cause the enemy to rout especially if you have witches in your army and a dread general.
UNIC UNITS and receiving conditions
EMPIRE
Bright Wizards
Came with 1% probability every turn if Altdorf in Empire hands
Сontents: General Tirus Gorman with dismounted Reiksguard knights as bodyguard, Bright Wissards unit
Retraining in Kurfurst palace. With lost of a general this feature become unavailable.
Empire steam tank
Came with 1% probability every turn if Nuln in Empire hands
Contents: General with bodyguards Engineers with long barrel guns. Platoon of tanks.
Retraining in Artillery factory with University building only in the capital. With lost of a general this feature become unavailable.
Engineers with repeater guns
Came with 1% probability every turn if Nuln in Empire hands
Contents: General with bodyguards Engineers with long barrel guns. Repeater gun engineers unit.
Retraining in University. With lost of a general this feature become unavailable.
Witchhunters
Came with 1% probability every turn if Grand Theogonist Residense in Empire hands.
Contents: General Yohan van Hal with Heavy Free Company bodyguards. Witch hunters unit. Two units of ordinary free company, two units of free company archers.
Retraining in the Cathedral. With lost of a general this feature become unavailable.
Sigmar warpriest
Came with 1% probability every turn if Grand Theogonist Residense in Empire hands.
Contents: General Luthor Huss with Coldflame bodyguards, Warpriest of Sigmar unit
Retraining in the Cathedral. With lost of a general this feature become unavailable.
Ulric Warpriest
Came with 1% probability every turn if Grand Middenhaim in Empire hands.
Contents: General with Teutogen bodyguards, Ulric Warpriests unit.
Retraining in the Cathedral. With lost of a general this feature become unavailable.
CHAOS
Nurgl Mages (only for nurgl player)
Came with 1% probability every turn.
Contents: General with Nurgl champions bodyguards, Nurgl Mages unit.
Retraining in the Chaos Temple. With lost of a general this feature become unavailable.
Chaos Sorcerers
Came with 1% probability every turn if player unite chaos.
Contents: General with chaos warriors bodyguards, Sorcerers unit.
Retraining in the Chaos Temple. With lost of a general this feature become unavailable.
Tzeench Mages (only for Tzeench player)
Came with 1% probability every turn if Citadel of changes is in a players hand.
Contents: Tzeench Mages on discs.
Retraining in the Chaos Temple
Minotaurs
Came with 100% probability if player unite Chaos and take Wolfenburg.
Contents: Minotaurs unit, Bestigor unit, two units of Gors, two of Ungors.
Retraining Minotaurs in Chaos Temple
to be cont/
KISLEV
Ice Mages
Came with 1% probability every turn
Contents: General Vladimir Stormbringer with Kreml Guard bodyguard, Ice Mages unit.
Retraining in the Palace. With lost of a general this feature become unavailable.
Chekist
Came at the beginning of campain with 100% probability
Contents: General Vladimir Pashenko - Bodyguards Chekist with blunt weapon, Chekist with long guns.
Retraining in Huge stables + leather workshop + alchemist lab. With lost of a general this feature become unavailable.
If you lost Vladimir the election of a new Head of CheKa happens with 15% probability each turn. Also you could hire one unit of Chekist after election event if you lost them too.
Droyashki
Came with 1% probability every turn
Contents: General Sasha Kazhetan with Grifon Legion bodyguards, Droyashki unit.
Retraining in the Guard Barraks. With lost of a general this feature become unavailable.
HIGH ELVES
Archmages
Came with 1% probability every turn
Contents: General with Swordmasters of Hoeth bodyguard, Archmages unit.
Retraining in Philosophy tower II (only not during winter storms)With lost of a general this feature become unavailable.
Dark Elves
Assassins
Came with 1% probability every turn
Contents: General Shadowblade with corsairs bodyguard, Assassins unit.
Retraining in the Tower of Assassins (only not during winter storms)With lost of a general this feature become unavailable.
Чародейки
Witches
Came with 1% probability every turn
Contents: General with DE warriors bodyguard, Witches unit
Retraining in Warlords Hall(only not during winter storms)With lost of a general this feature become unavailable.
SYLVANIA
Knights of Blood Dragons order
Came with 1% probability every turn
Contents: General Valah Harcon with Blood Dragon bodyguard, Blood Dragon Knights unit, Dismounted BD unit.
Retrain only in Blood Keep province, Guard Barraks. With lost of a general this feature become unavailable.
Necrarch
Came with 1% probability every turn
Contents: General with Graveguard bodyguard, Necrarch unit.
Retrain in Guard barracks+Graveyard IV With lost of a general this feature become unavailable.
Black Grail Knights
Came with 1% probability every turn if Drakenhoff in a hands of player.
If you dont have free room for them in the keep on a moment of their arrival - you lost them.
Contents: Black Grail unit
Retrain in Guard barracks
GREENSKIN
Shamans
Came with 1% probability every turn.
Contents: General with Savage Boar Boyz, Shamans tothem
Retrain in Big Gork n Mork temple. With lost of a general this feature become unavailable.
DWARVES
Doom Anvil
Came with 1% probability every turn.
Contents: General Kregg with hammerers bodyguard, Doom Anvil
Retrain in top level armorsmith. Only in Karaks and Chaos Dwarves strongholds. With lost of a general this feature become unavailable.
Greatbeards
Came with 1% probability every turn if player holds Zhyfbar (could came to Zhyfbar twice)
Or 100% if Karaz a Karak is under sige (enemy must hold the siege at least one turn)
Or 100% if Karak Eight Reaks is under sige (enemy must hold the siege at least one turn)
IF YOU dont have free slot for them - unit will be lost and you dont get anything.
Contents: Greatbeard unit
Retrain in Last Bastion
No matter how you get them you could have only one unit of them at once.
CHEERS!
Last edited by Timorfeys; March 31, 2012 at 02:21 AM.
CoW (Rage of the Dark Gods)team
From Russia with love.
Correct me if you find any mistake
Last edited by Maha Moggalana; May 22, 2012 at 08:02 PM.
░░░░░███████ ]▄▄▄▄▄▄▄▄▃
▂▄▅█████████▅▄▃▂
I███████████████████].
◥⊙▲⊙▲⊙▲⊙▲⊙▲⊙▲⊙◤
This is Total War !!!
NICE THANKS!
Bayonets for FoTS: http://www.twcenter.net/forums/showthread.php?t=538081
I've been playing a lot of Chaos Dwarfs lately, so I thought I'd make a guide on them, since they have a bit of a tricky start. Here goes, for the glory of Hashut.
Chaos Dwarfs
The Chaos Dwarfs haven't been getting a lot of love. They have no intro text, the UI and voices are largely the regular Dwarf ones. All the buildings and many units are recycled from Dwarfs, Greenskins, and Chaos. No Bull Centaurs either, sadly. But if you love explosions, and mass devastation (and honestly, who doesnt), they are great fun to play.
Difficulty: Hard in the beginning, easy later.
Strengths: Good mix of cheap greenskin slaves and elite units. Laugh maniacally as your fearsome Artillery and Blunderbusses wreak havoc among your hapless enemy. Chuckle as Empire and Chaos tear each other apart during the Chaos Undivided event.
Weaknesses: Weak starting position. No heavy cavalry. Cheap troops are undisciplined, and elite troops are very expensive. No friends or allies at the start. No merchants or spies. Artillery have slow rate of fire and are inaccurate.
Starting Position: You start with only two fortresses: Uzkulak, northwest of Karak Vlag, and Gorgoth's Tower, far southeast of the map in the dark lands. Both are not exceedingly well developed and hardly bring any money in. You'll also get three leaders in the north and two in the south, along with an assortment of troops.
Unit Types: (* = free upkeep, unit size in brackets)
Infantry:
Goblins *. (126) Same unit the Orcs get: 120 goblin slaves, weak, but cheap. There's not much reason to buy them unless you're desperate to get some numbers on the battle field and have no Hobgoblin units to recruit.
Goblin Spears *. (126) Also the same the Orc player gets. You have better reason to recruit these than with normal goblins though, since you can't get Hobgoblin spears.
Hobgoblins*. (100) A slightly smaller unit size, but better stats and morale than goblins, and almost as cheap. I would buy these as cheap cannon fodder rather than regular goblins, especially since your level one Chaos Barracks gives you a 3 Hobbo pool compared to 1 of everything else, so theyre easier to retrain as well.
Orc Boyz*. (75) Regular Orc unit with the same stats. Compared to Hobgoblins, they are slightly more expensive, have the same attack, but twice the defense, so they'll last longer.
Orc Spear Boyz*. (75) Spearorcs. Not much to say - they're only slightly more expensive than gobbos, but with far better stats.
Hobgoblin Archers*. (100) Hobgoblin Archers. Not terrible in close combat, but best used ranged. I like to use them as a last defense against enemies flanking my Artillery too.
Goblin Archers*. (125) They are more expensive than Hobgoblin Archers, but have lower stats. Their advantage is their larger unit size, meaning bigger volleys of arrows, and the ability to skirmish. This is your only infantry unit that can skirmish by the way. They can also hide in long grass, if you can make use of that.
Orc Arrer Boyz. (75) Orc archers. They have the same melee attack as Hobgoblin Archers, but higher ranged attack and higher defense - about the same as the Sneaky Gits. Only worth if you want a strong defense unit as garrison core IMO.
Hobgoblin Sneaky Gits. (100) Slightly stronger than regular Hobgoblins, but a little weaker than Orks. They have the Hide Anywhere ability, which makes them theoretically useful for flanking and attacking an enemy in the back, but personally I have never been able to make it work without them being discovered.
Black Orcs. (63) Your prized Black Orc slaves are great warriors and inspire nearby greenskins. Same as for the Orcs.
Black Orc Destroyers. (63) Less regular attack, but higher charge bonus, these are charge-retreat troops.
Chaos Dwarf Warriors. (62) The high attack value of Dwarf Axemen with an even higher defense than Dwarf Warriors, these guys are great, durable elite warriors. Cant get armor upgrades though, and dont form shield walls.
Chaos Dwarf Blunderbuss. (62) This is your true weapon of mass destruction that absolutely must be present in all your stacks. You might look at their stats and notice they have only ranged attack 4, but remember, they do AOE damage to an entire unit. Its not uncommon to kill half or more of a single HP enemy in one volley.
Cavalry:
Hobgoblin Wolf Riders. (35) Light cavalry. The dont hold up well in combat, so I mainly use them to hunt down routed units, and make sure they stay routed.
Hobgoblin Wolf Rider Archers. (35) Light cavalry with good ranged attack. One of two units with the ability to skirmish, the other being Goblin Archers.
Artillery:
Hellcannon of Chaos. Needs line of sight. One cannon with a demonic cannonball that does loads of damage, but is inaccurate. If you have it behind your troops, the shot may burn through your lines as well though, so watch out for that.
Earthshaker Cannon. Two mortars that cause enemy troops in range to fall down, breaking their advance. Theoretically, this slows their faster units down so you can get more volleys from the Blunderbuss in, but the low rate of fire and the short duration of the earthquake means that it likely makes little difference. It can disturb a coordinated charge though, and make the enemy filter in a bit slower. It fires in an arc, so no danger for your troops, and theoretically doesnt need LoS, but Ive had a few cases where it refused to shoot at units behind a hill.They are also great against walls.
Death Rocket. No line of sight required. Highest range of all your artillery. Four rocket launchers, so you can launch devastatingly effective volleys on horde armies such as Orcs or Night Gobbos.
Mercenaries:
Chaos Ogre. (10) Theyre Ogres - whats there to know.
Chaos Troll. (5) One of the most fearsome units in the game IMO. Insanely high attack, defense, HP, and speed, these are a must have if you can afford them. The only disadvantage is that once you can afford them, youre probably not going to need them as much any more.
Random mercs. There are probably more, but these are the ones that I got and have experience with.
Mighty Throg's Hobgoblin Despoilers of the Black Lands. Slightly stronger than regular Hobbos, but cant be garrisoned. Not worth the money IMO.
Golgfag's Mercenary Ogres. (15) Compared to the regular Chaos Ogres you get, these are a little more expensive, and have a bit higher attack and lower defense. Their big advantage is that you dont need to wait for them to randomly show up to recruit, like with the Chaos Ogres.
Mudats Mercenary Half Orc Maniacs. (75) A bit higher defense and lower attack than regular Orcs. Not worth the money either.
Rugluds Armored Orcs. (62) The only Crossbow unit you have access to, but these guys can really hold their own in melee as well - they have better stats than Melee Hobbos. Fantastic wall defenders in a siege.
Ogla Khans Wolfboyz. (35) They have much higher defense than ordinary Wolf Riders, so theyre more useful in sustained combat.
General Advice
Hellcannons need a Large Manufactory to build or retrain, which is only available at Citadel level. Protect them at all cost. Other artillery and Blunderbusses need a normal Manufactory, which is only available at Fortress level. Guard them well. Chaos Dwarf Warriors need Armorer 2 and Warrior Watchpost; Black Orcs and Black Orc Destroyers only need Armorer 2 and Chaos Barracks, but they refill their pool slowly, so you shouldnt use these carelessly as well. All other greenskins are expendable. Use them to tie up troops for your heavier units to flank, shoot
Remember that all your generals have Blunderbuss bodyguards, and that generals bodyguards refill automatically over time as long as the general stays alive. So dont be afraid to use them on the front lines, especially for the first turns where you have no money to retrain.
Artillery is your great strength, so unless youre a master at making them work from within a city without trashing your own walls, its probably best to meet the enemy in the field, or sally.
I like to have a setup with Blunderbusses in the front, Hobbos behind, Chaos Dwarfs on the flanks, and Artillery and Black Orcs in the back. Try to have at least a Death Rocket and Earthshaker in each offensive stack. If the enemy sets up on a hill and waits for you to attack, you could try to draw them out with skirmishers, but I wouldnt recommend it. Instead, slowly edge closer until they are in range of your Death Rockets, then blast away. High level Rockets are capable of destroying about 40% of an average enemy stack before running out of ammo. They will charge eventually when they have lost a certain amount of troops, at which time they will walk directly into the fire of your blunderbusses. If you are up against heavily armored enemies, or big guys, focus fire on the weak units to make them rout, while you hunt them down with Wolf Riders. Once the heavy troops are mostly alone, you can crush them with your infantry. If youre up against very fast units, such as Winged Lancers, or Silverhelms, consider leaving your Blunderbusses in the second line, then as the fast guys are engaged in melee, move them out on the flanks and blast in their flank. The Blunderbusses have a fairly short range at which they start to shoot, but the shots actually travel way beyond that. Use closer units to trigger a shot at an angle that travels through the bulk of the approaching army. Dont rely on the Fire at Will mode, they will often focus heavily decimated units that are no danger any more if they are close to you.
While you need Armorer 2 to build Chaos Dwarf Warriors and Black Orcs, no armor smith above that does anything at all. Save yourself some money and dont build them. The Inventors Guild allows you to upgrade your archer units and blunderbusses, but it seems to only affect their melee stat. The weaponsmith upgrades only Chaos Dwarf Warriors.
General advice on buildings, since youre capturing Dwarf Karaks, most places give great income from mining, so you should build mines as soon as you can afford them. Aside from that, Chaos Barracks and Orcz Range are a must have, so that you can garrison and retrain. After that, go Warrior Watchpost and Armorsmith upgrades, so that you can (re)train warriors, and Manufactory for Blunderbusses. The ideal place for you to cap is a Dwarf fortress, that was held for some time by Greenskins or Chaos, they will have Mines, Watchpost, and Barracks already, maybe even Range and Stables. Remember that the Dwarf smith does nothing for you though, youll have to build your Armorsmith from scratch.
If Chaos Undivided hits, you will get an alliance with them. Its cool because Archaon wont attack you, yet for me, they had some stack loitering close to my Fortresses, probably hatching some devious scheme. OTOH, it kind of sucks because by this point, they will probably hold Karak Dum in the Chaos Lands, which you need to win, and since you cant build Diplomats, you cant break your alliance. If they dont break it on their own, you can seek out a faction allied to Chaos, but not to you (Beastmen for instance), and attack them, this will also break the alliance. Sometimes you can also attack a place and thereby break the alliance, but I never understood under what conditions it works. Maybe its possible to capture Karak Dum before Chaos hits you as well, but if you manage that, youre a much better player than I am, and probably dont need to read this guide in the first place.
First Turns
As mentioned above, your starting position isnt that good. Even though youre neutral with most evil factions, Warriors of Khorne might prey on you if your northern regions arent well defended. Night Goblins will eventually attack you there too, when they think youre weak. In the south, Orcs may attack you for the lulz, and your treacherous Dwarf brothers would like nothing better than to wipe you off the face of the mountains for good.
You can get an alliance with Khorne and with the Orcs as random events, but its not guaranteed to happen, so I wouldnt count on it. Also, the Orcs may ally with the Night Goblins as well. Those, in turn, hold a lot of the regions you need for victory, so you will have to declare war on them sooner or later, voiding your alliance with the Orcs.
My advice for the first few turns is to build a watchtower at each road in the south and then turtle in Gorgoths tower. When Orc stacks enter your region, you can launch a preemptive attack, because they will probably attack you anyway. Build the artillery youre still missing, especially Death Rockets, maybe a Black Orc in the north. For buildings, I recommend a Chaos Barrack in the South, so you can get free upkeep and eventually replenish your slave troops. In the north, maybe a Mining Network, although it doesnt make much of a difference.
In the north, gather all your forces except for one general, march on Karak Vlag, and start a war with the Night Goblins. Why you may ask? Several reasons. First, you need their regions eventually. Second, they will attack you sooner or later anyway, and if they havent expanded in the North, it is easier to crush them. Third, you absolutely need to capture Karak Kadrin to get you out of the red, and the way is past the gobbo fortresses. And finally, its great fun to fight night goblins with Blunderbusses. Theres nothing like the sight of five charging 120 Night Gobbo spears being decimated to 30 each and then rout.
Once youve captured their fortresses, leave behind only enough troops to keep the populace from rioting, and move on as fast as you can. Youll notice that the Gobbos really ran the Dwarf fortresses into the ground, they dont even have mines and scarcely give any money. You can demolish a few buildings, but it wont be enough to buy reinforcements, not to mention build anything. Also, check the buildings before you destroy, some Gobbo buildings enable you to train/garrison troops as well. Move to Karak Kadrin as soon as you can, this will save your economy and give you some breathing room.
In the south, you could try to capture Silverspear with your stack, but I wouldnt recommend it, since you will incur losses and leave Gorgoths Tower defenseless against the Orcs. Also, Silverspear needs heavy investments before it is even remotely profitable. Instead, turtle in Gorgoths until you have enough money to make a new stack, then send that out to attack the southern Night Goblin holdings, and eventually the Dwarfs.
If youve made it to that point, youll be filthy rich, Chaos Undivided hit the good factions, and you just have to mop up the rest and wait out your cap times for the victory conditions. Good luck, and may the Bullfather always guide your aim.

")
")
This is not a guide to any single specific faction but rather to some army compositions centred on blowing things up from afar and winning that way. Eventually I hope to be able to highlight all factions artillery and gunpowder parts.
The Screaming Skull Catapult Army of Sylvania
Spoiler Alert, click show to read:
The Chaotic Dwarf Siegers
Spoiler Alert, click show to read:
Last edited by Maltacus; February 18, 2013 at 01:49 AM.
The Misadventures of Diabolical Amazons - Completed.
An Orcs Tale, a Third Age AAR - Completed.
Reviewed by Alwyn in the Critics Quill
My Dread Lady, a Warcraft Total War AAR - 27 chapters done.
Home to Midgard, a Third Age AAR about two dwarves, a spy and a diplomat - Completed (pictures remade up to chapter 19).
Reviewed by Boustrophedon in The Critics Quill
Mercenary antypathy\sympathy table
https://docs.google.com/file/d/0BzQM...lhd2lMeTQ/edit
Red-antypathy
Green-sympathy
White-neytral
CoW (Rage of the Dark Gods)team
From Russia with love.

hello to all
awesome guideI was helpful with sylvania in v1.5.1 !!
a question please, you could make a guide on the Dwarves of Choas ??
Thanks in advance
oh lol ,already thereOriginally Posted by Robert Nesta Marley

I have not noticed
Thanks for these!
 Posting Permissions


 Reply With Quote


 Basically, Reikland kicks their butts, and becomes youre immediate problem so theres something of a limit to your opportunistic sacking spree. You can probably extend Chaoss hold some more by going to war with Reikland, acting as a psuedo ally. At this point you just have to help chaos along enough while trying to make your way to Nuln, to take it and hold it for the x number of turns to win.