Page 6 of 8 FirstFirst 12345678 LastLast
Results 101 to 120 of 145

Thread: (DMUC AAR) Hail Caesar!

  1. #101
    Tim1988's Avatar Vicarius
    Join Date
    Dec 2009
    Location
    England
    Posts
    2,786

    Default Re: (DMUC AAR) Hail Caesar!

    Quote Originally Posted by Darth Napoleon View Post
    Need for money so they try to get weak factions to pay tribute?
    Oh, I can understand why countries would want a protectorate. I just don't understand why Mysore would ever have accepted the offer from the plains nation. They would be giving away half their income for nothing in return.

    Quote Originally Posted by BLIP99 View Post
    Great story, i love it! It was exactly what i was hoping to do haha
    You are playing with DMUC are you not? i was just wondering whether it would make good sense to get a flag mod for this AAR, the old papal one is surely a disrespect to the glorious new Roman Republic!!! You should try to incorperate the "minor nations missing flags mod", i play with it and it has a kinda cool modern-esque italian flag for the republic (but with imperial like features). Give it a try, it will furthur the awesomeness of this AAR sir!!! Well done again, i shall surely vote for you in any MAARC you enter.
    Yeah I'm using DMUC. Once the revolution occurred I had actually looked into flag mods, but all the ones I could find weren't save-game compatible. Its something I should have thought about before I started, but oh well... Thanks for your support. Its much appreciated.

    Quote Originally Posted by crucify_ego View Post
    this aar rules. Epic!!!
    Thanks mate. Much appreciated.


    I'm working on the next update at the moment as the Britannia campaign continues. The battles have been fought, so its now just a case of taking screenshots and writing it up, so hopefully should be ready soon.
    My Old AARs:
    Uniting a Kingdom - A M2TW:Kingdoms Britannia Campaign
    The Greatest Battles of General Sir Lionel Townshend - A DarthMod Empire Campaign
    Tales of an Old Soldier - A series of DMUC Battles
    My Image Gallery:
    .

  2. #102
    Jingo Eugene's Avatar Vicarius
    Join Date
    Apr 2011
    Location
    Colorado, USA
    Posts
    2,831

    Default Re: (DMUC AAR) Hail Caesar!

    Oh, I can understand why countries would want a protectorate. I just don't understand why Mysore would ever have accepted the offer from the plains nation. They would be giving away half their income for nothing in return.
    Mysore never expands and is always weak, it is just the weakling AI at work. :p
    Jingo Eugene
    "A wise man in times of peace, will prepare for war. Peace is boring, and the wise man has nothing better to do with his time." -Anon

  3. #103
    Tim1988's Avatar Vicarius
    Join Date
    Dec 2009
    Location
    England
    Posts
    2,786

    Default Re: (DMUC AAR) Hail Caesar!

    Sorry for the lack of updates. Real life has been kind of busy recently. Not sure when the next one will be out, but this AAR's not dead.
    My Old AARs:
    Uniting a Kingdom - A M2TW:Kingdoms Britannia Campaign
    The Greatest Battles of General Sir Lionel Townshend - A DarthMod Empire Campaign
    Tales of an Old Soldier - A series of DMUC Battles
    My Image Gallery:
    .

  4. #104
    joker8765's Avatar Civis
    Join Date
    Jun 2011
    Location
    Perth, Australia
    Posts
    184

    Default Re: (DMUC AAR) Hail Caesar!

    Good to hear I thought that it was dead for sure after all this time I look forward to the next update it's been great so far

  5. #105
    Tim1988's Avatar Vicarius
    Join Date
    Dec 2009
    Location
    England
    Posts
    2,786

    Default Re: (DMUC AAR) Hail Caesar!

    Quote Originally Posted by joker8765 View Post
    Good to hear I thought that it was dead for sure after all this time I look forward to the next update it's been great so far
    Thanks. After the end of next week I should have a bit more spare time, so hopefully it will be out shortly after then.
    My Old AARs:
    Uniting a Kingdom - A M2TW:Kingdoms Britannia Campaign
    The Greatest Battles of General Sir Lionel Townshend - A DarthMod Empire Campaign
    Tales of an Old Soldier - A series of DMUC Battles
    My Image Gallery:
    .

  6. #106
    Merula's Avatar Campidoctor
    Join Date
    Aug 2010
    Location
    Australia
    Posts
    1,840

    Default Re: (DMUC AAR) Hail Caesar!

    Good news indeed I think you should conquer the east now, and maybe after you have reunified the Roman Empire you could create some colonies in the Americas? Have you thought what you will do when Vasari dies?

  7. #107
    Tim1988's Avatar Vicarius
    Join Date
    Dec 2009
    Location
    England
    Posts
    2,786

    Default Re: (DMUC AAR) Hail Caesar!

    After I've taken Britain, the East will be my next target. I'll probably head through North Africa and try and take Alexandria, given its significance with Caesar (Cleopatra and all that).

    When Vasari dies, the AAR will unfortunately end. I've tried to set out the AAR as a biography of the man, from his rise as a low ranked officer in a pike regiment, to Emperor of Rome. If I was to keep it going, it move away from this, and I feel detract slightly from it. Hopefully he's still got a while left in him yet, though I doubt it will be long enough to expand into Americas.
    Last edited by Tim1988; July 06, 2011 at 03:59 AM.
    My Old AARs:
    Uniting a Kingdom - A M2TW:Kingdoms Britannia Campaign
    The Greatest Battles of General Sir Lionel Townshend - A DarthMod Empire Campaign
    Tales of an Old Soldier - A series of DMUC Battles
    My Image Gallery:
    .

  8. #108

    Default Re: (DMUC AAR) Hail Caesar!

    Best AAR i've ever read! ++
    My Mods:
    Earth 35 Civilizations Mod v2.5 Sid Meier's Civilization IV Beyond The Sword 3.19
    Modular United Mods v1.3 Sid Meier's Colonization 1.01
    Two Sicilies Mod v1.0 Europa Universalis III DW5.2 - Death&Taxes Mod 9.1

    My AAR:
    King Etgar the Conqueror AAR Medieval II Total War Stainless Steel 6.4

  9. #109
    Tim1988's Avatar Vicarius
    Join Date
    Dec 2009
    Location
    England
    Posts
    2,786

    Default Re: (DMUC AAR) Hail Caesar!

    Thanks. Glad you enjoyed it.
    My Old AARs:
    Uniting a Kingdom - A M2TW:Kingdoms Britannia Campaign
    The Greatest Battles of General Sir Lionel Townshend - A DarthMod Empire Campaign
    Tales of an Old Soldier - A series of DMUC Battles
    My Image Gallery:
    .

  10. #110

    Default Re: (DMUC AAR) Hail Caesar!

    this is more addictive than heroin, hurry up i've got the shakes
    you may like not like us, but at least we dont have jersey shore

  11. #111

  12. #112
    Biarchus
    Join Date
    Jan 2009
    Location
    Chicago, Illinois
    Posts
    647

    Default Re: (DMUC AAR) Hail Caesar!

    Tim1988, this is an absolutely amazing aar. Detailed, graphic, and very well written. I commend you. +rep. Great job

  13. #113
    Tim1988's Avatar Vicarius
    Join Date
    Dec 2009
    Location
    England
    Posts
    2,786

    Default Re: (DMUC AAR) Hail Caesar!

    Chapter 20: The Invasion of Britannia, Part 2

    It was a two day march before Vasari and the Italians met up with the British Army just south of the port of Bristol. Vasari took with him 3000 men, consisting of Legion I, the Guardie di Nostre Signores, Legionary Cavalry I, Mounted Auxilia XII, XIII and XIV and Artillery Auxilia IV, V, VII and VIII. Just under 3000 men under the command of Jethro Reynolds opposed them, a force which included two artillery batteries, and several cavalry regiments: a dangerous force that had the ability to give the Italian Legions a bloody nose if they were not careful.

    The Battle of Bristol, 7th July 1744
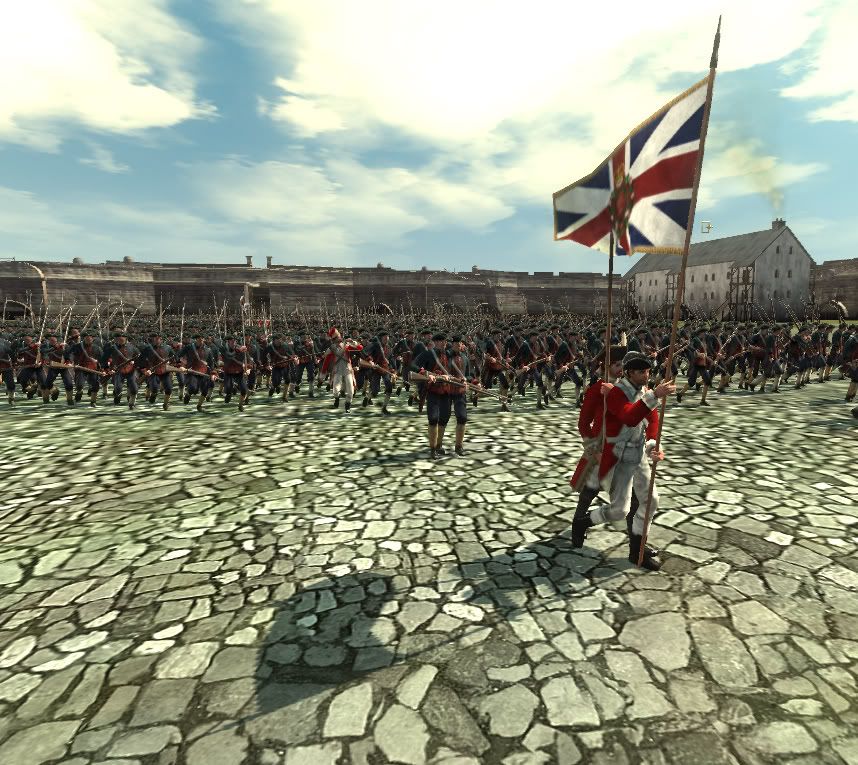
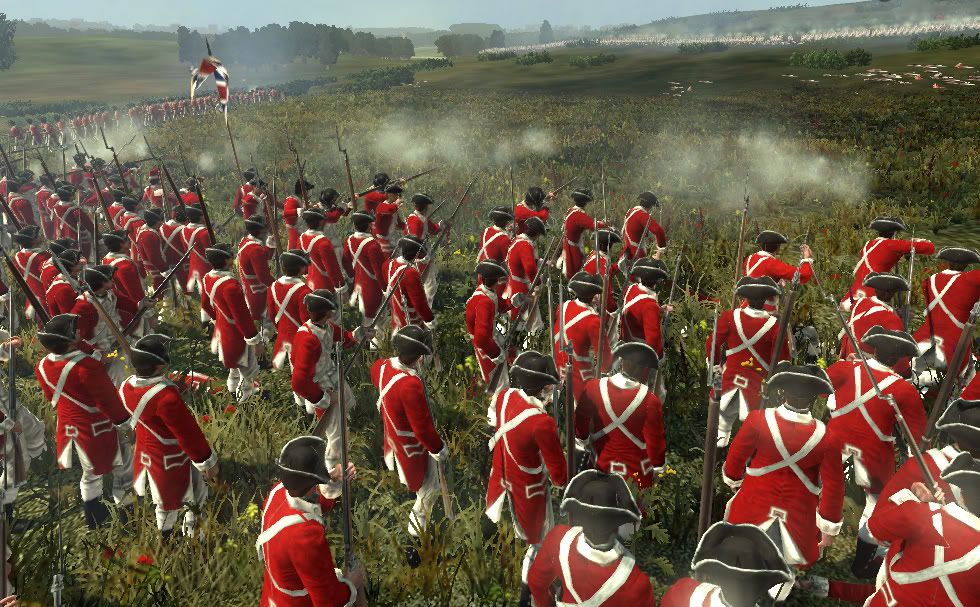
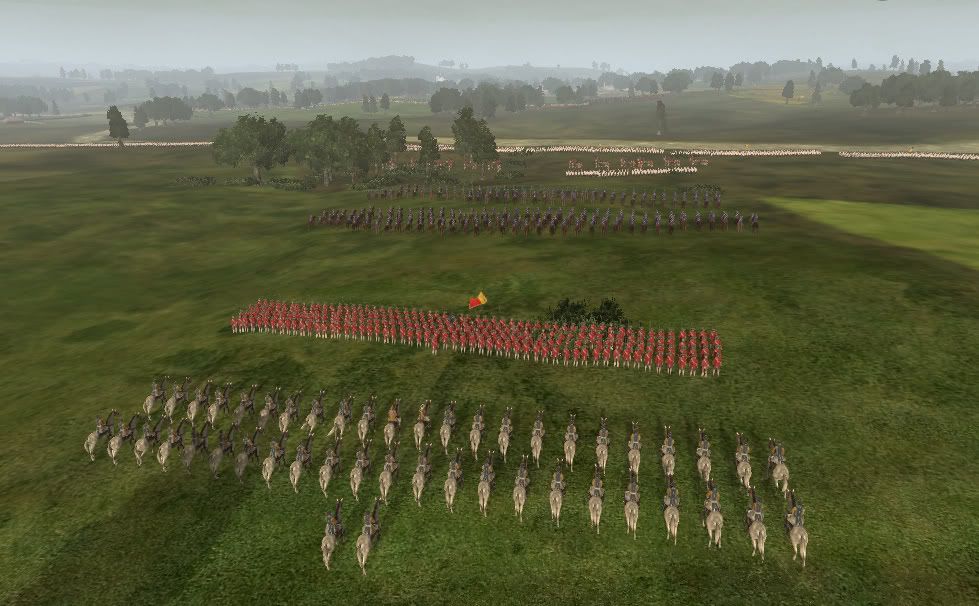
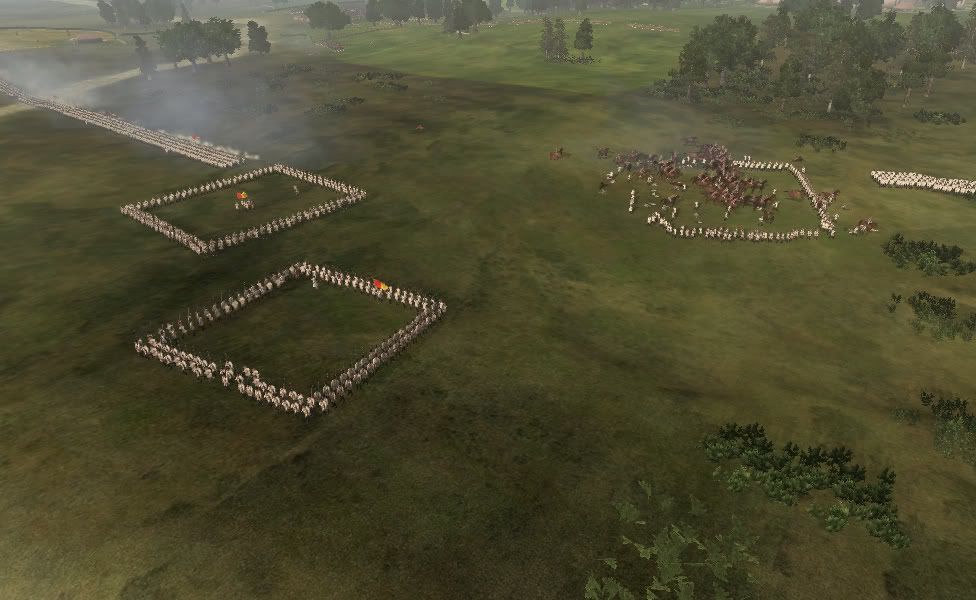
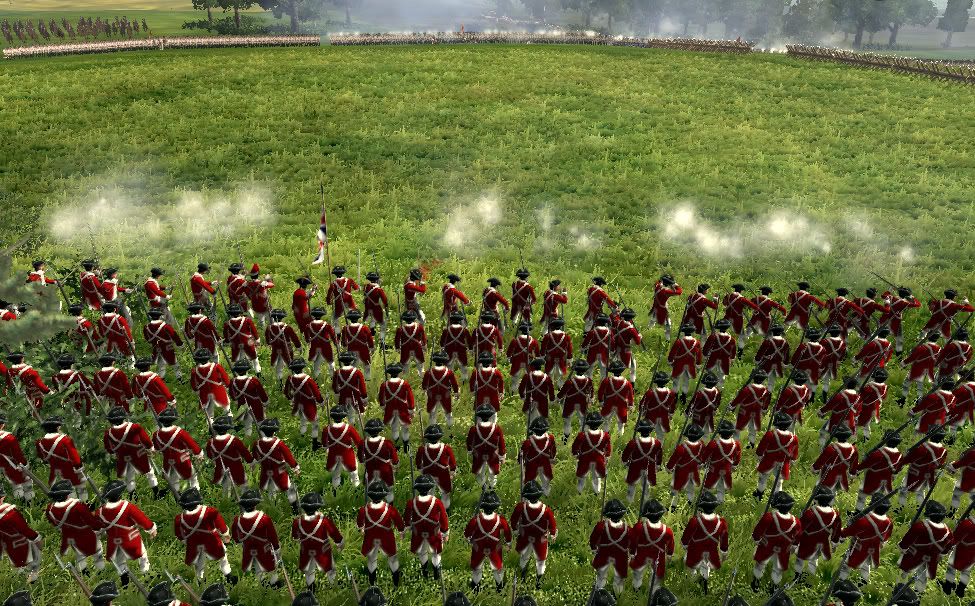
    The British had formed up on a slight rise overlooking a road, preventing the Italians from marching any further without engaging them. In addition, they had erected several simple defence works to further hamper the Italian advance, placing sandbags around their guns to protect them from any counter-battery fire, and also forming makeshift barricades from sharpened stakes to limit the effectiveness of the Italian cavalry and slow down any infantry advance.

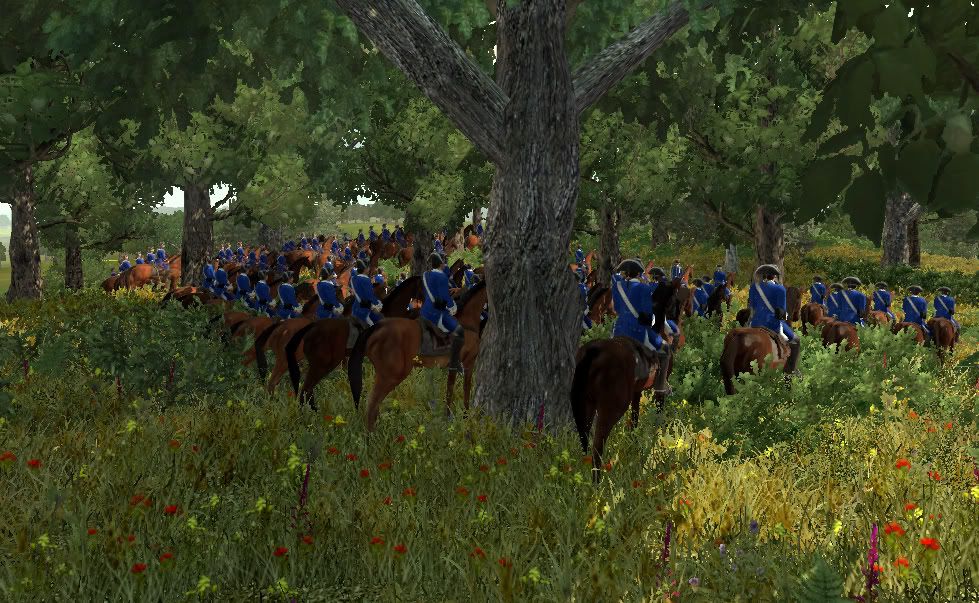
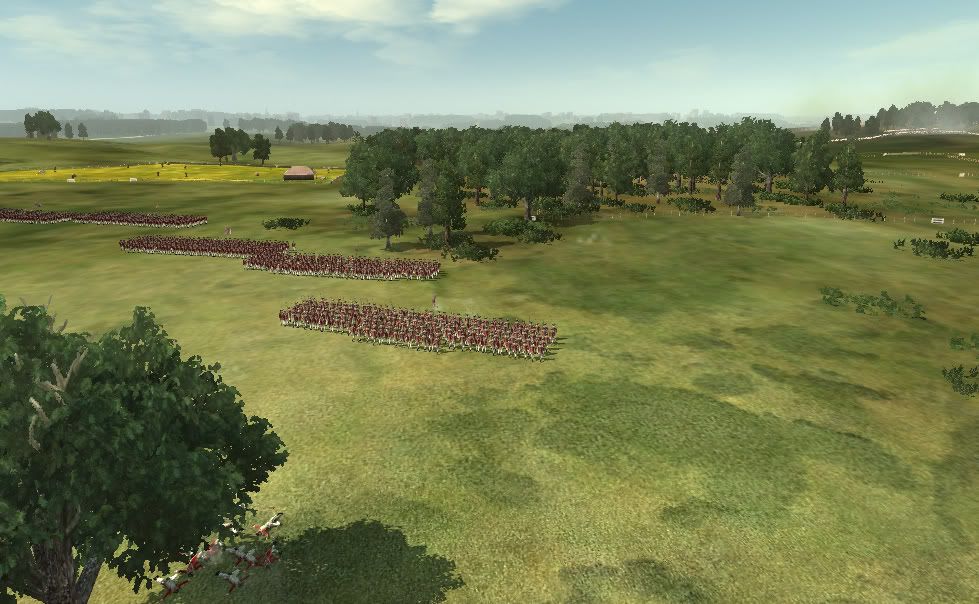
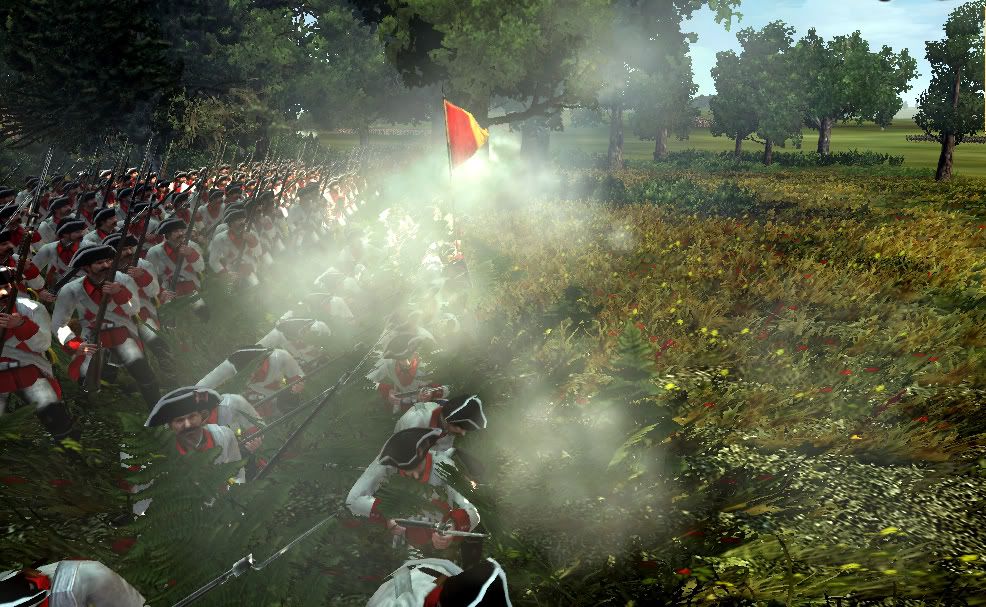
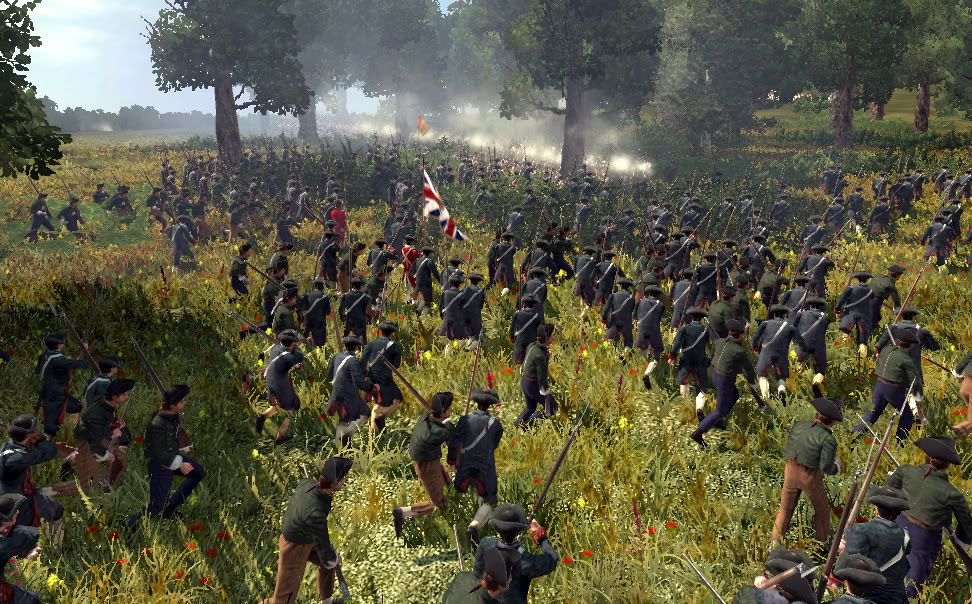
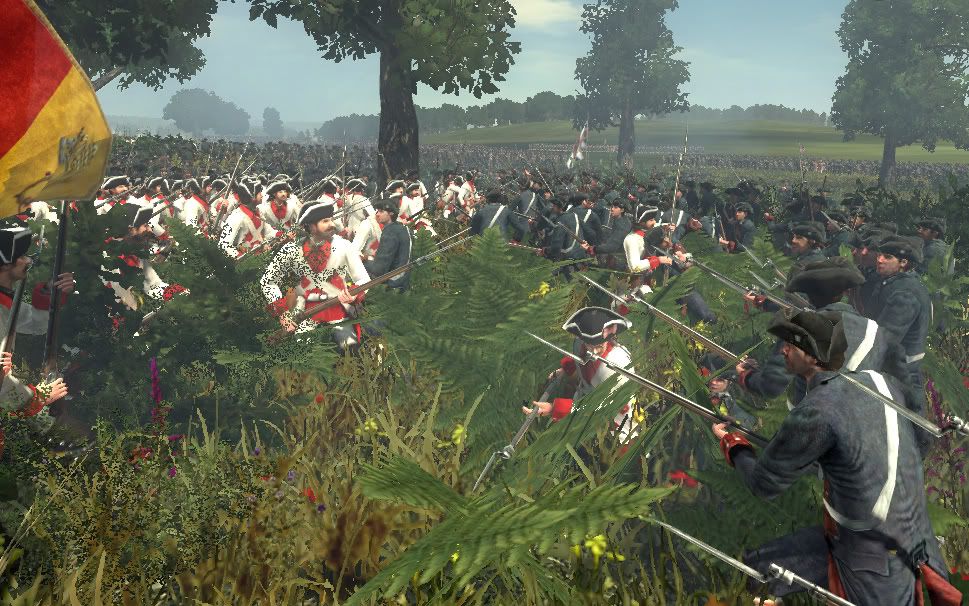
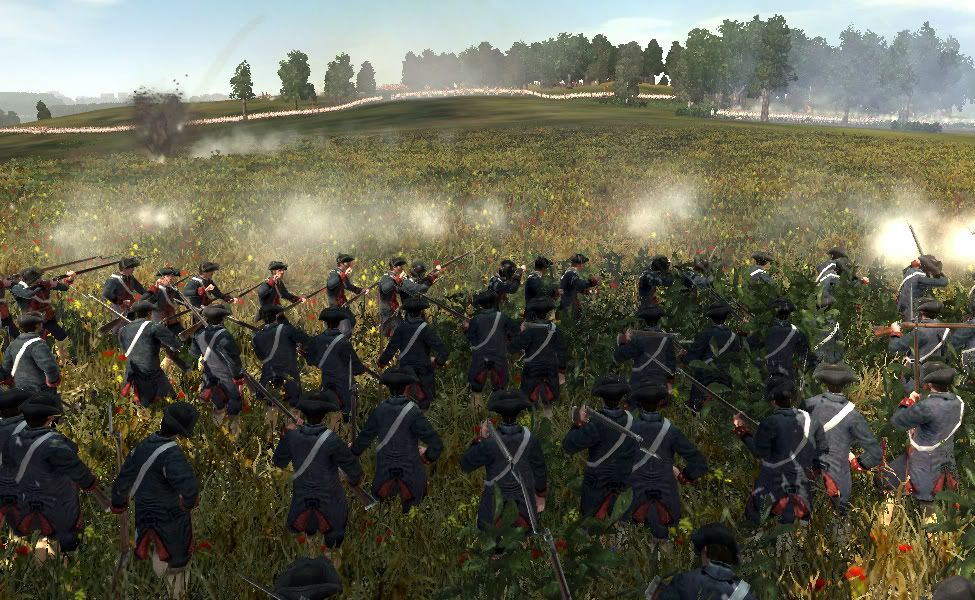
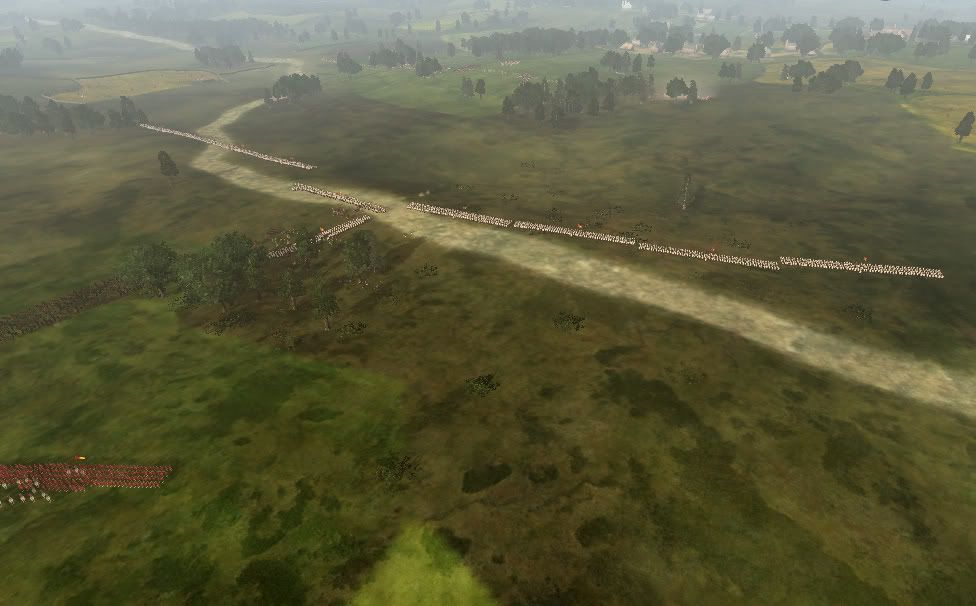
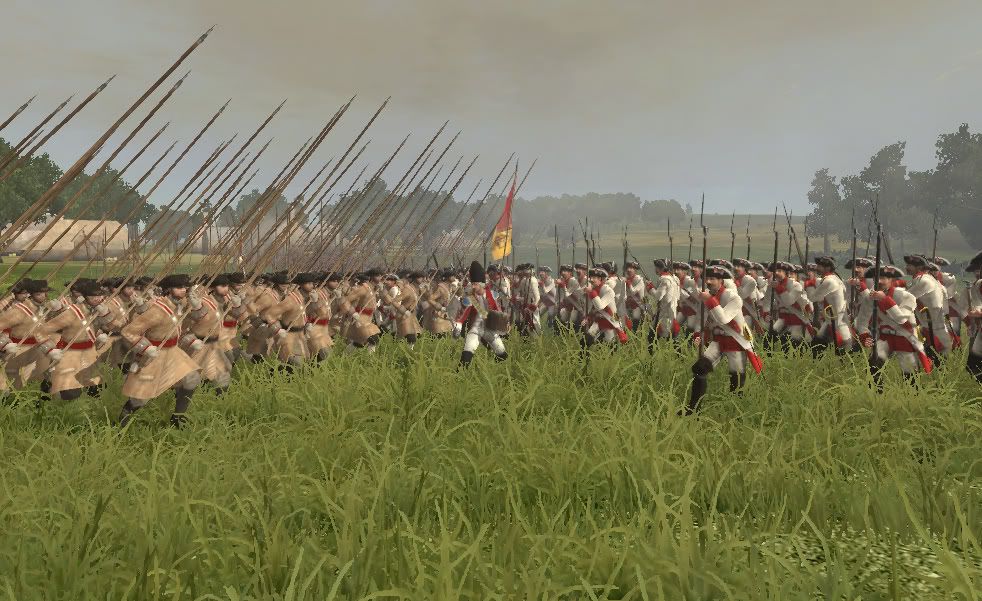
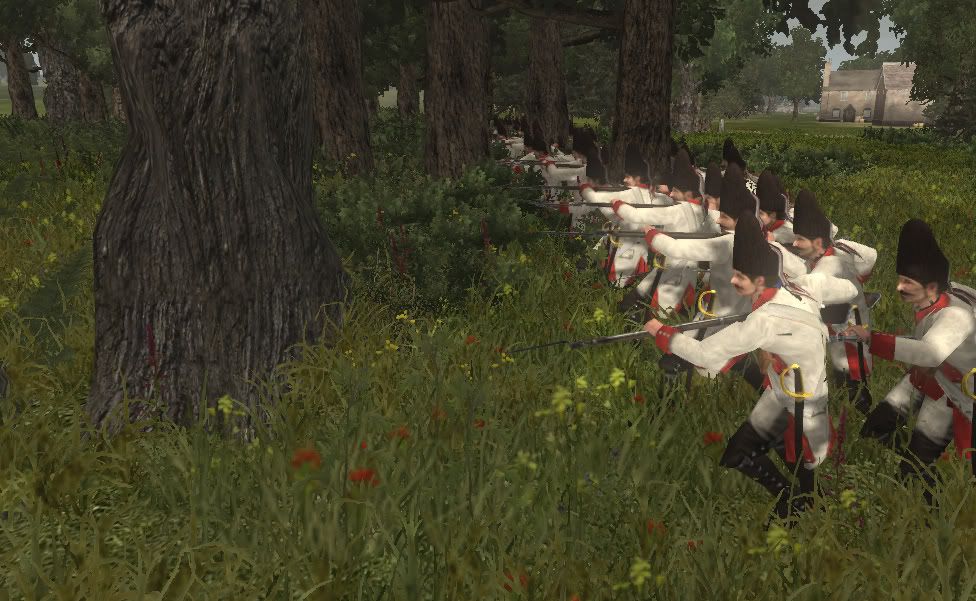
    Once the Italians caught sight of the British positions, they immediately switched from their marching formation into a battle line, the experienced Legionaries knowing almost instinctively by now where they were needed. A significant reserve was held back, ready to be thrown forwards wherever they were needed if the assault began to stall.


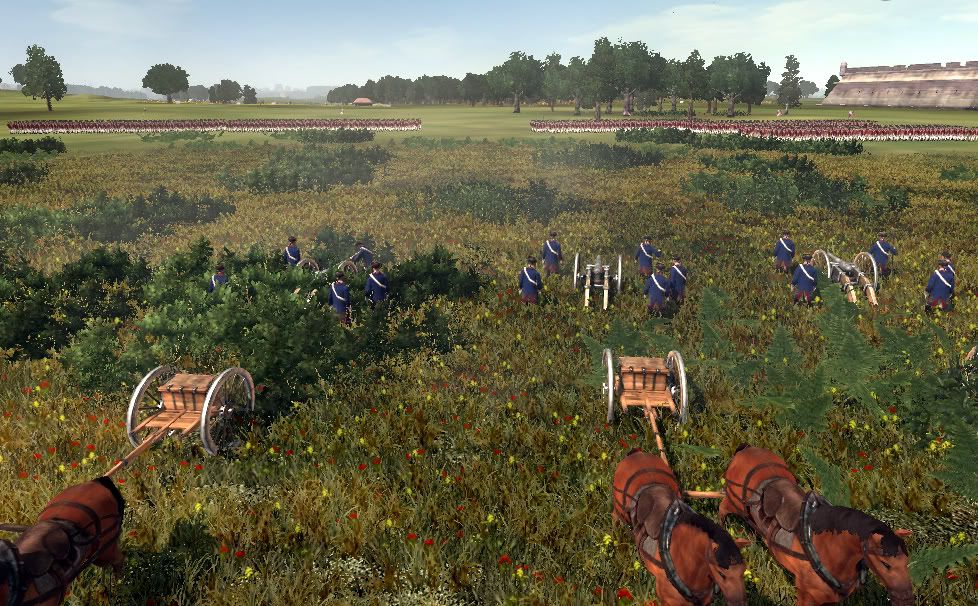
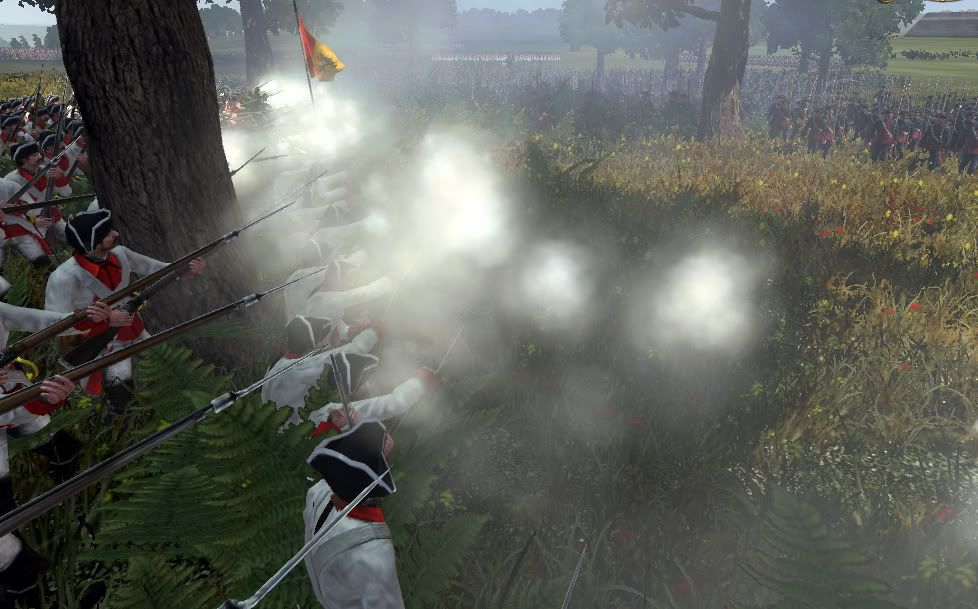
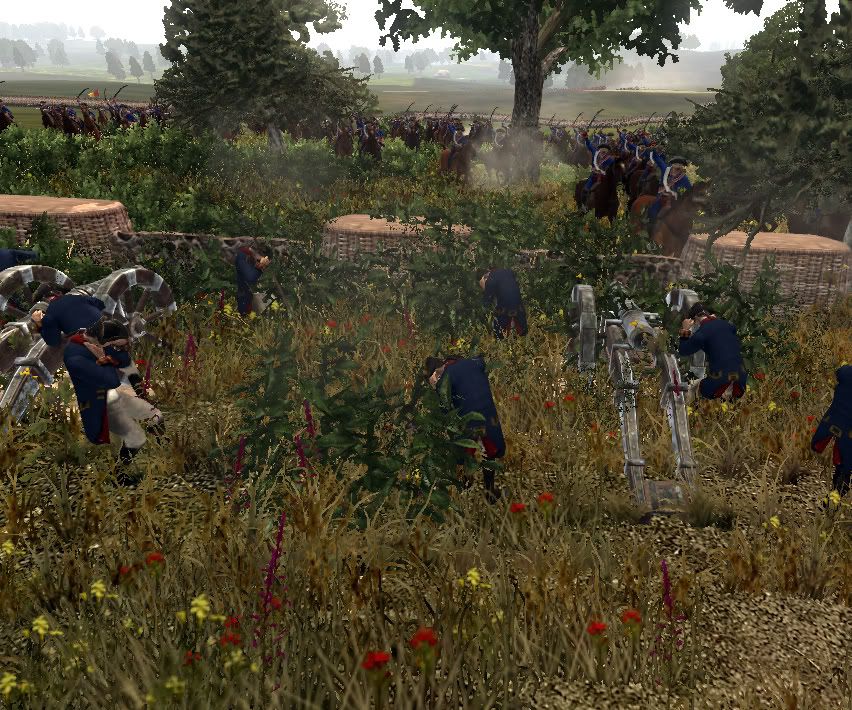
    Immediately they came under fire from the British guns. In a single devastating barrage, Artillery Auxilia V was wiped out as they moved into position, whilst Artillery Auxilia IV also suffered significant casualties, preventing them from taking any further part in the battle.


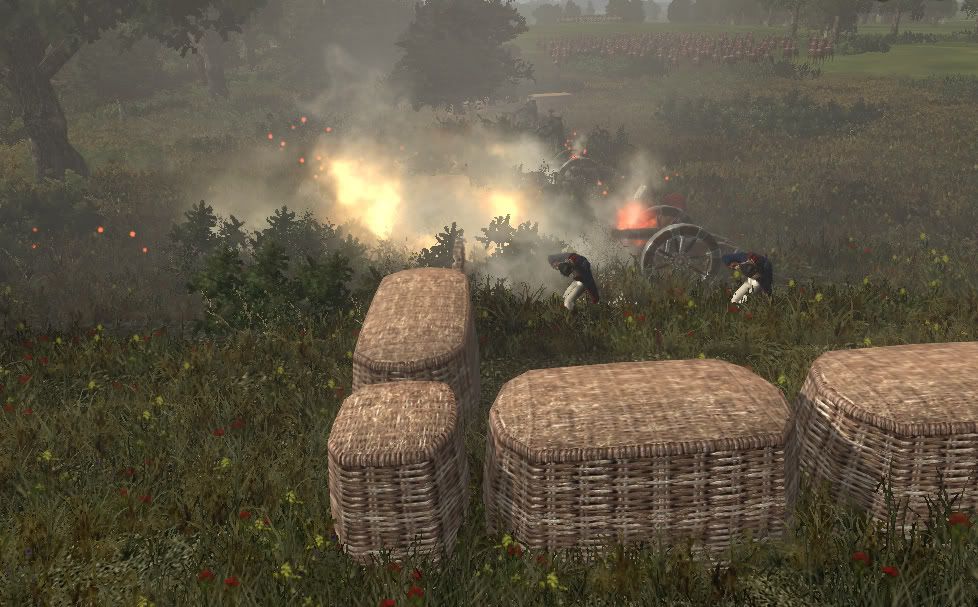
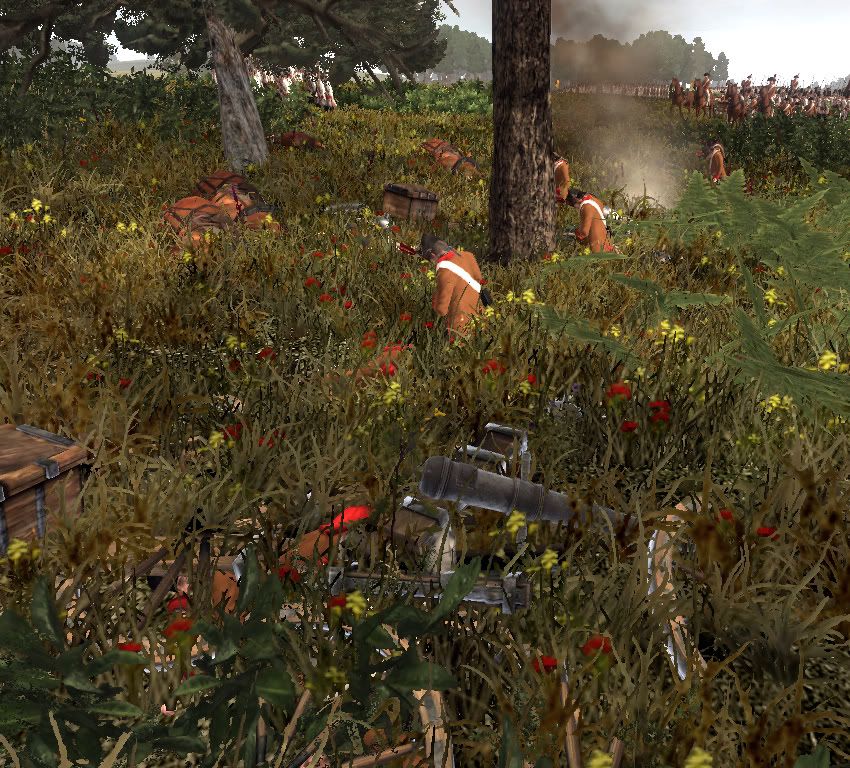
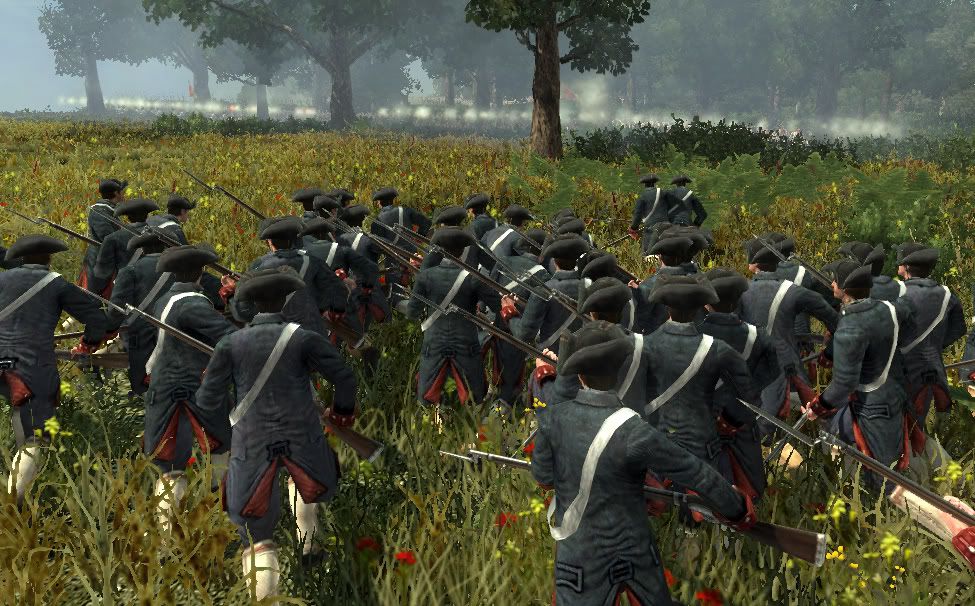
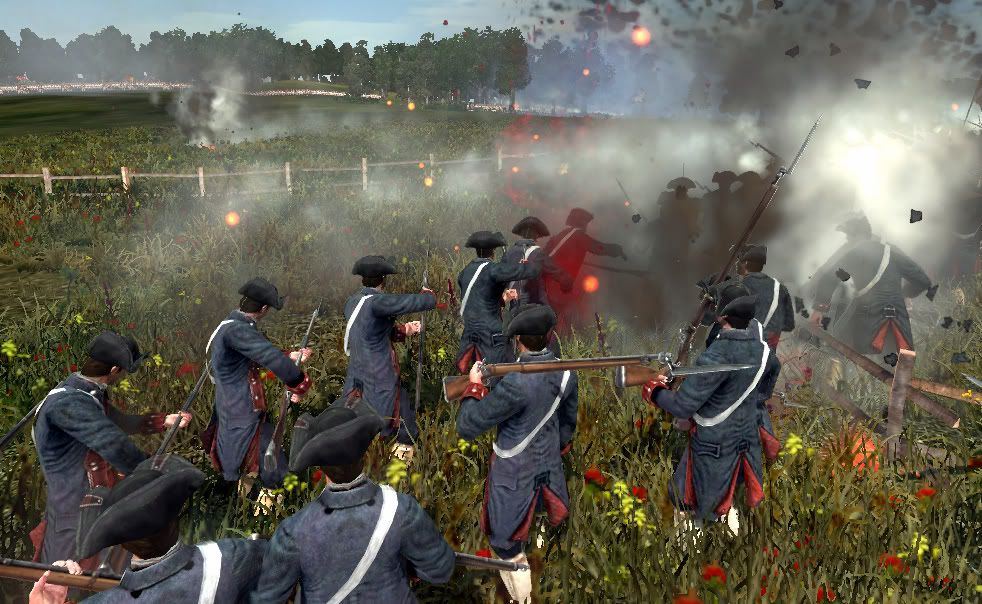
    In one moment, the Italians' had lost half of their artillery, seriously hampering their ablility to dislodge the British from their positions, though their howitzer batteries had survived, so they weren't completely toothless. As the Legionaries marched past the mangled remains of the cannon by the side of the road, it became increasingly clear to them that the British were not going to be a pushover, and it was going to take all of their skill and experience to defeat them.


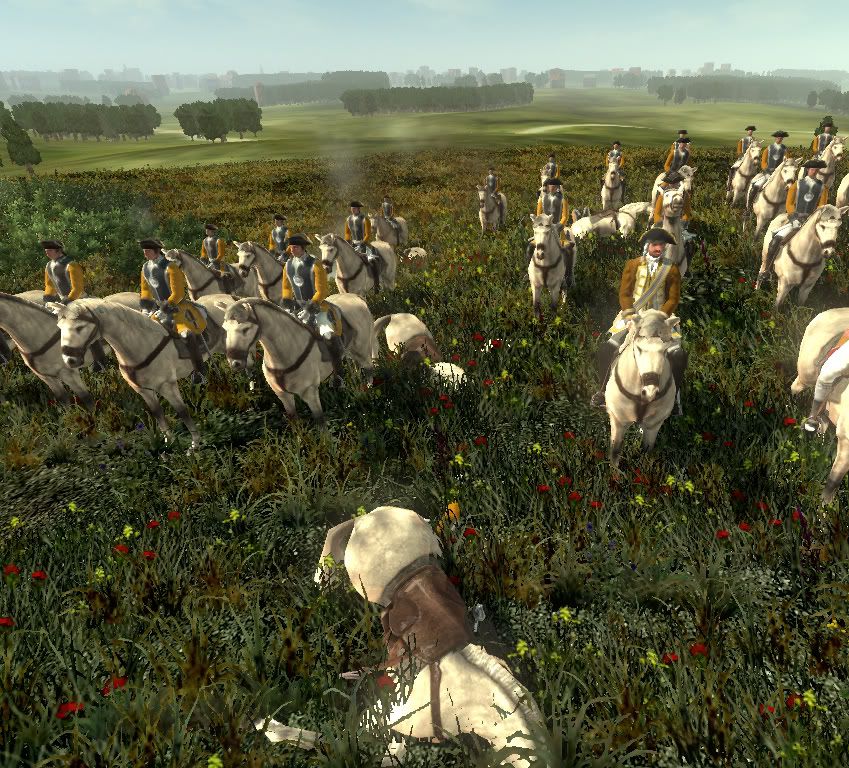
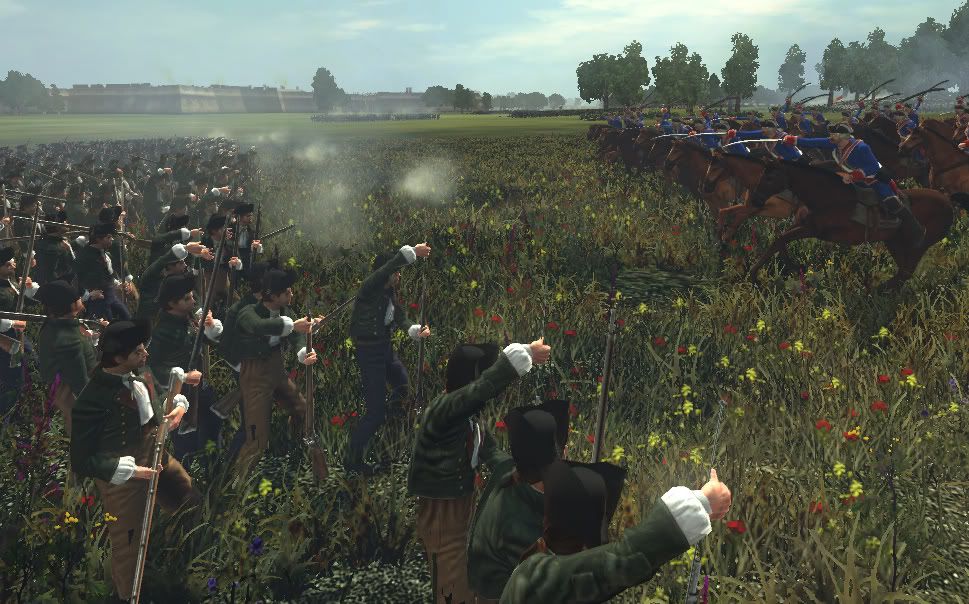
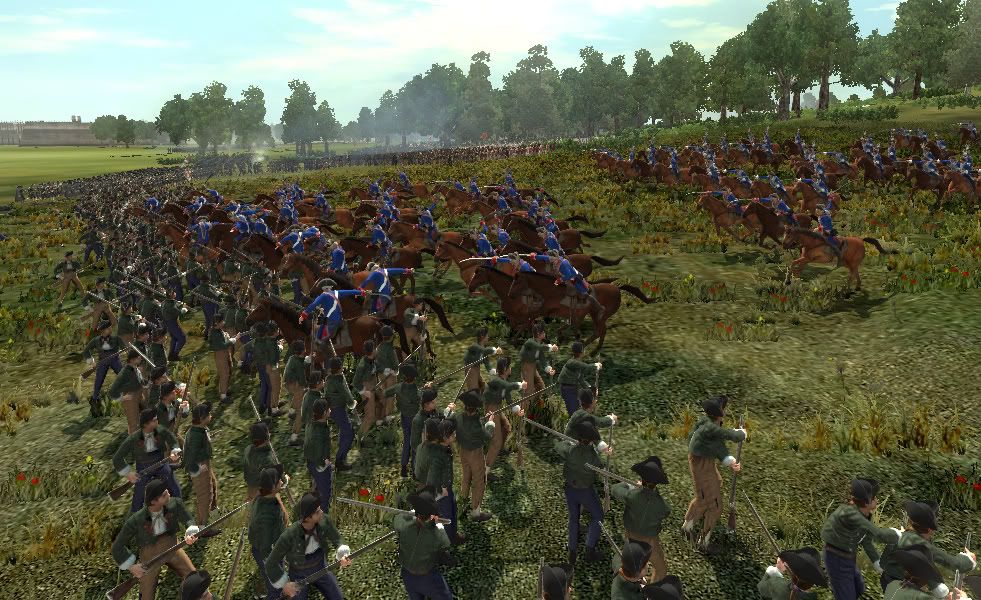
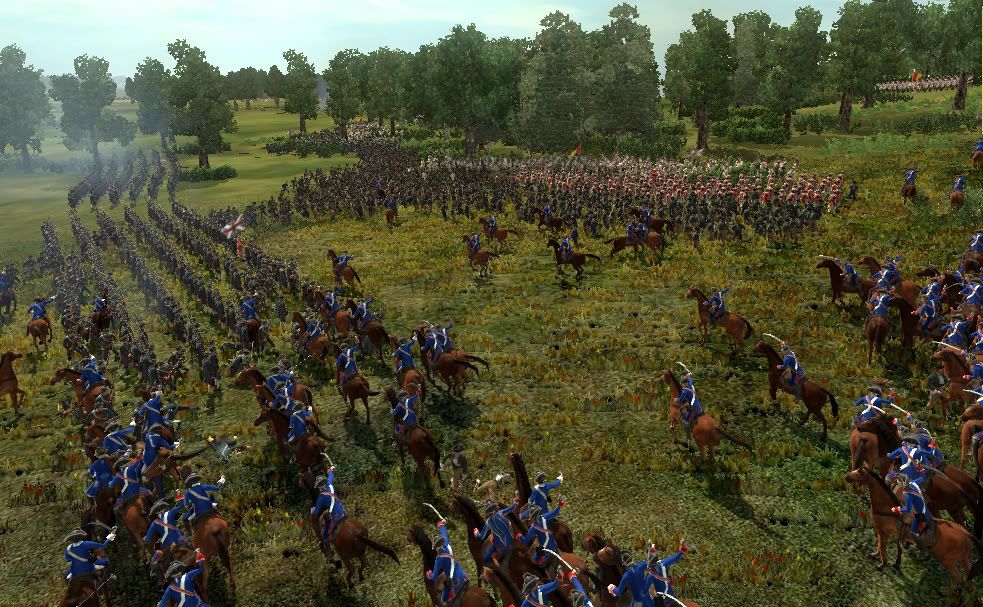
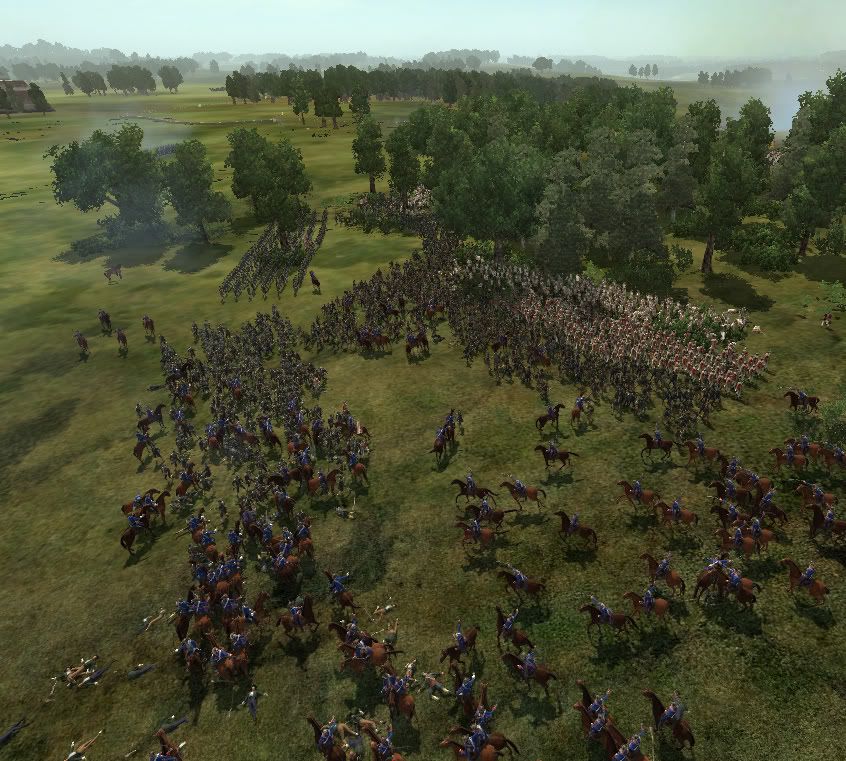
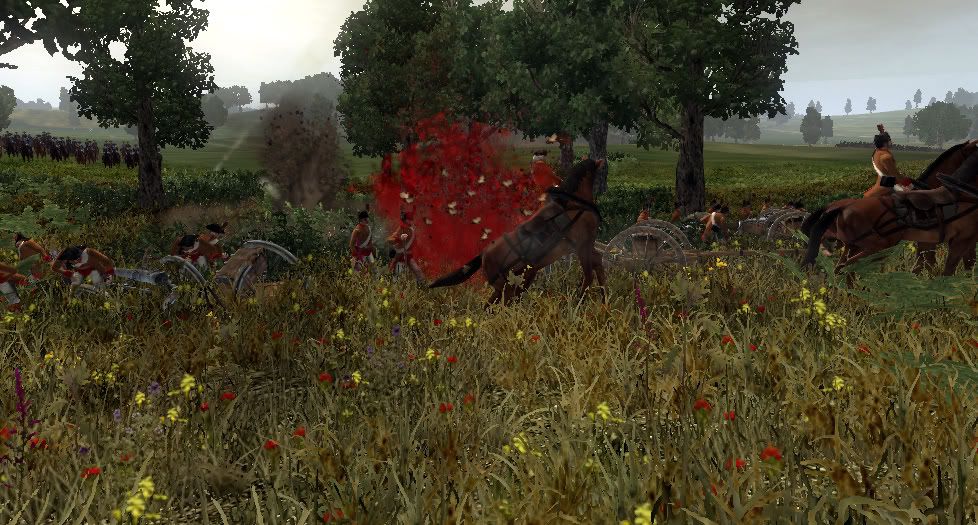
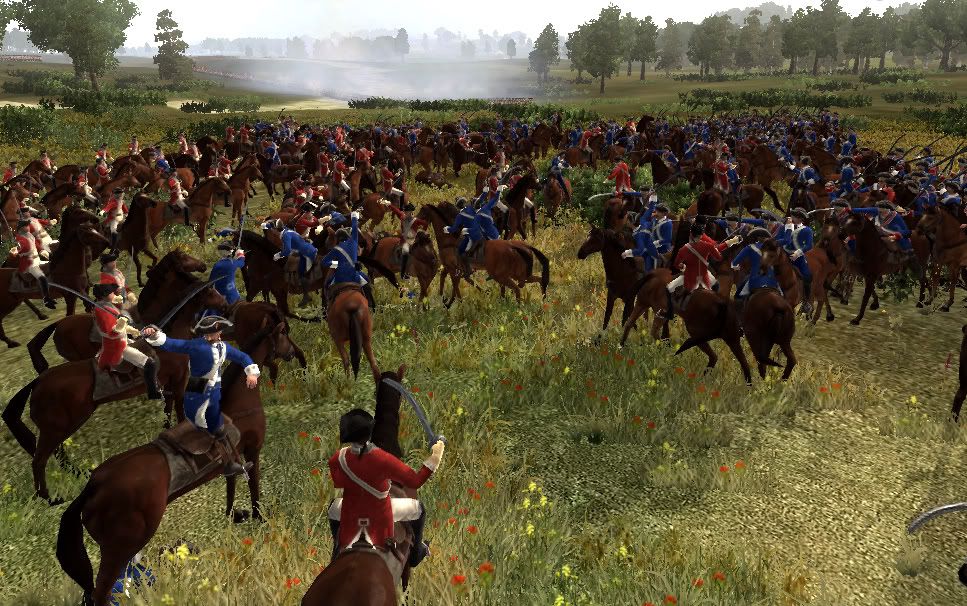
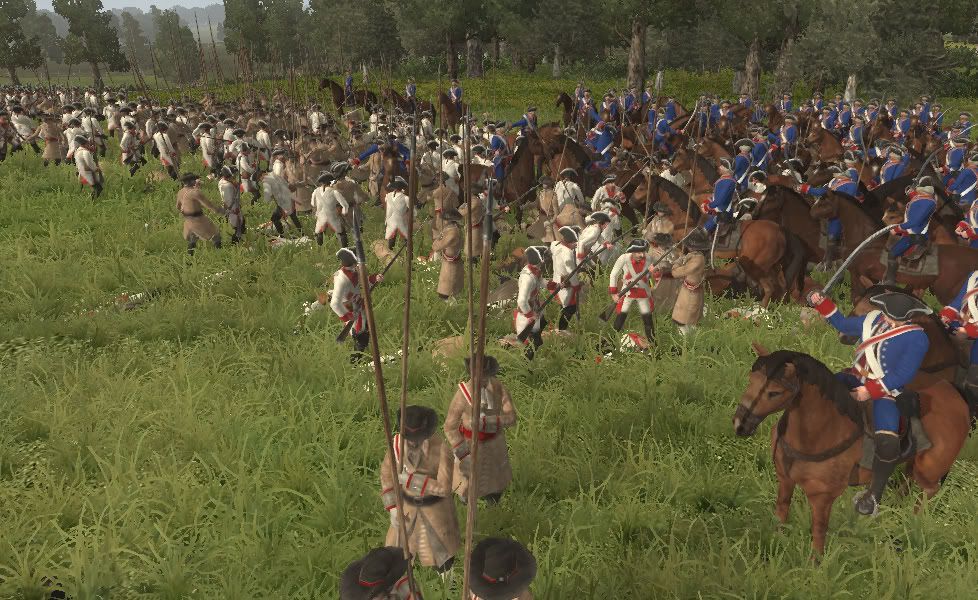
    Realising that the British artillery were doing some serious damage to the advancing legionaries, Vasari sent forwards Mounted Auxilia XII and XIV on the Italian right. Reynalds, the British General, saw the Italian cavalry move out, and counted with the 2nd Regiment of Horse in order to protect the guns. The two groups of cavalry clashed in the middle ground between the flanks of the two armies, crashing into each other at speed and forming a whirling mellee. The British Cavalry were heavier that their Italian counterparts, riding larger horses and wielding larger swords, but there were more of the Italians, and the numbers told, as they pushed back the British horsemen, eventually routing them and leaving the way to the guns free.


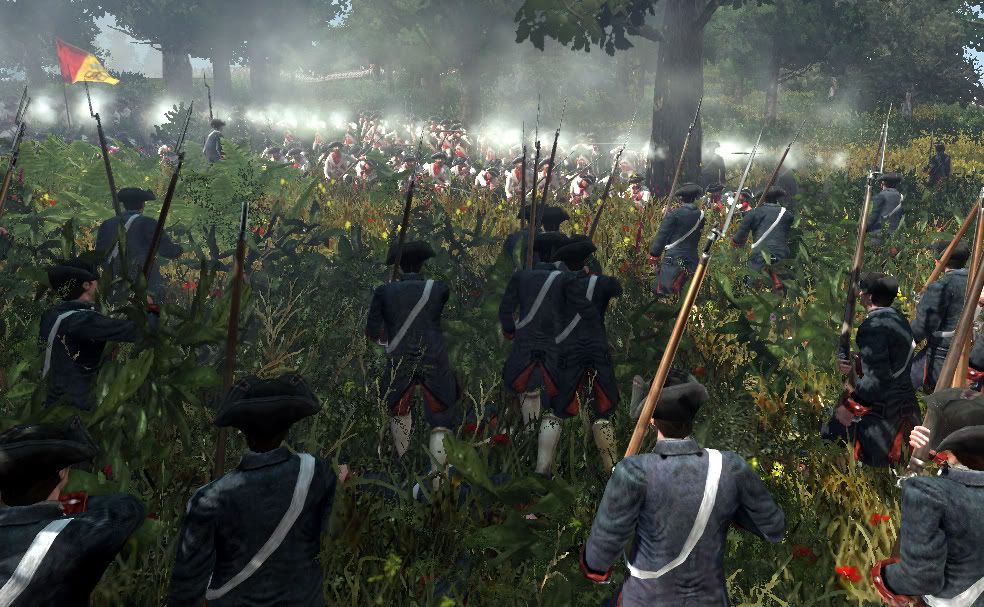
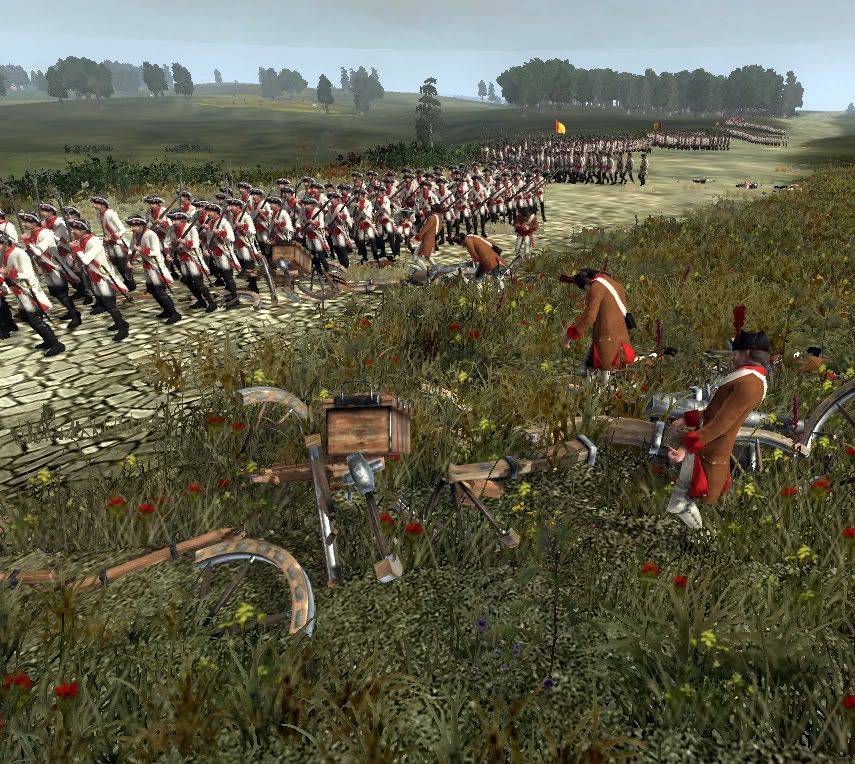
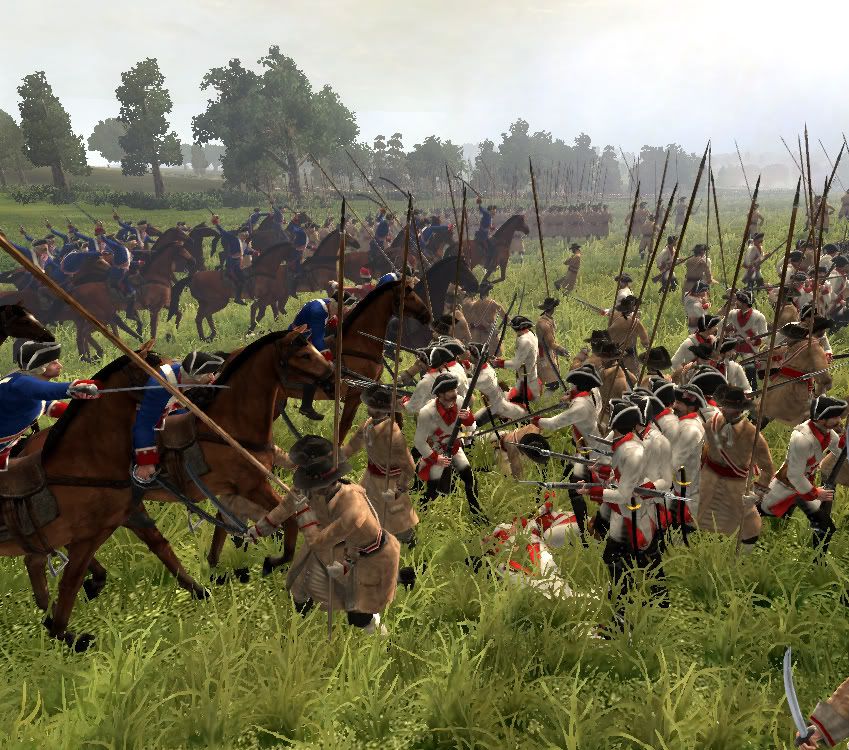
    The Italians charged forwards, leaping over the sandbag emplacements, cutting down the artillery crew and showing them no mercy, gaining a small amount of revenge for the casualties they had caused amongst their friends and comrades already in the battle.


    As the Italian advance continued, Reynalds sprung a trap on them. Hidden in a small forest, was the 3rd Regiment of Horse, concealed from the advancing Legionaries by both the trees and a slight dip in the land. As the Italians neared the trees, Cohorts VI and VII parted, so that one could pass either side of them, rather than losing order by going through the forest. This was what Reynalds had been waiting for, and the British cavalry charged forwards, hoping to exploit the gap in the line, and sow confusion amongst the Italian ranks. Against many armies, this plan would have been devastating. However, the Italian Legionaries were veterans of many campaigns, and their discipline and experience paid off, allowing them to form up into squares just in time before the charge hit home. Instead of finding themselves crashing into a unit in chaos, the British horsemen found a neat line of bayonets, stalling the charge dead. Despite this, the sheer weight of the charge carried them into the Italian lines, and for a moment it looked as though the square would collapse. In the end though, the Italian formation held, and the British cavalry were forced to withdraw, having taken heavy losses.


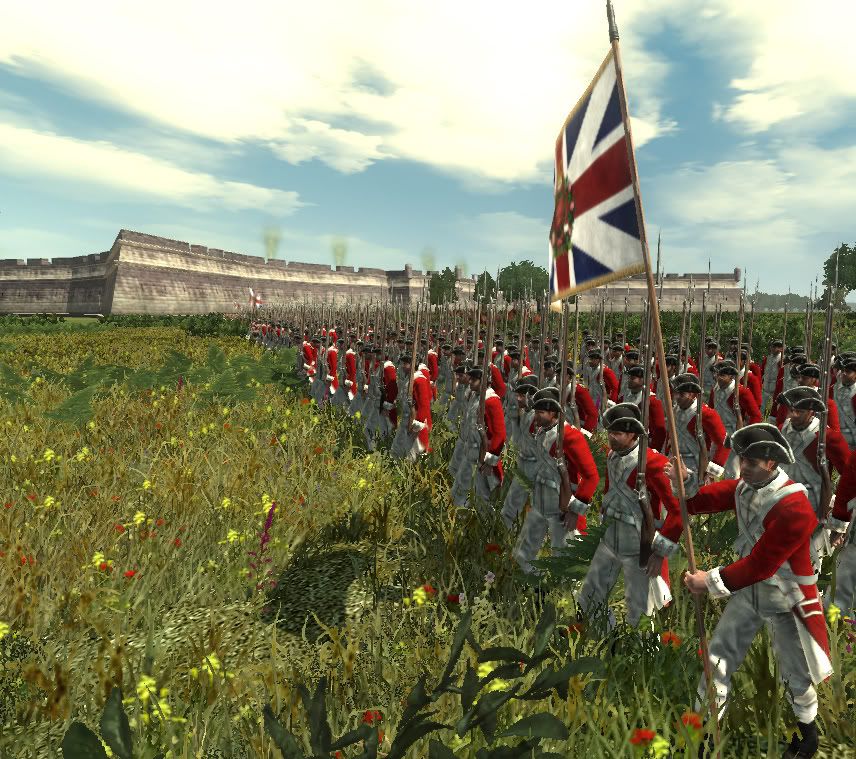
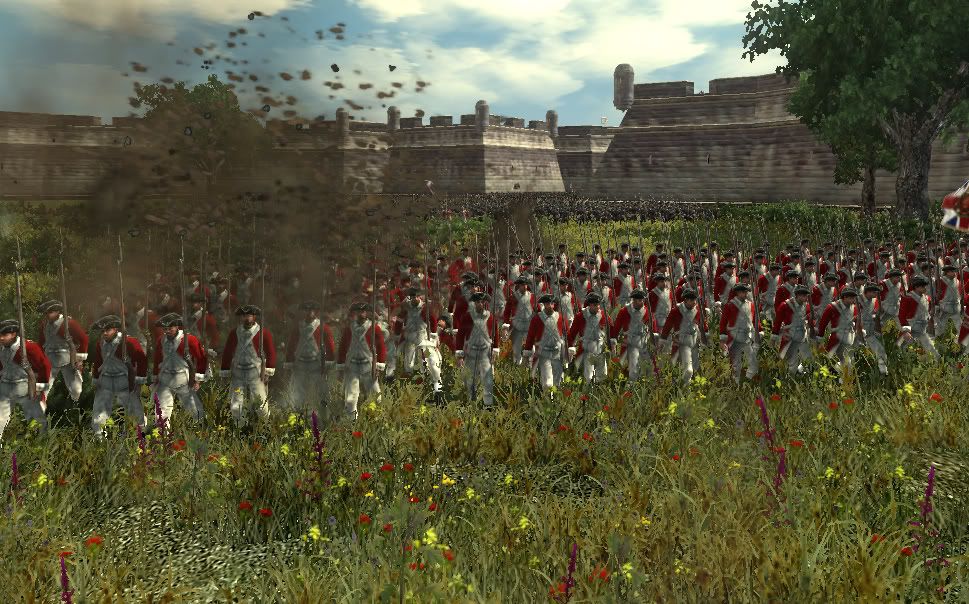
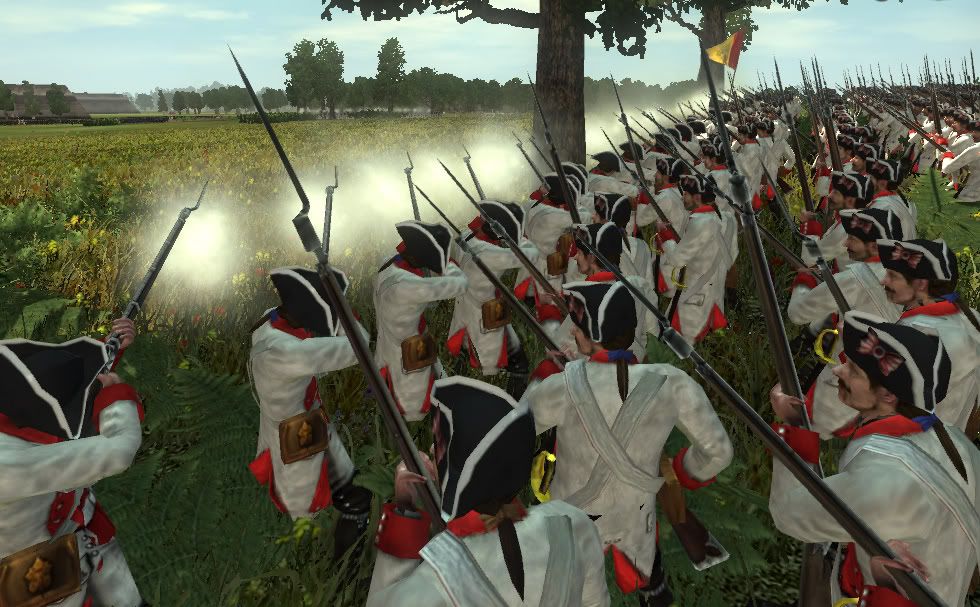
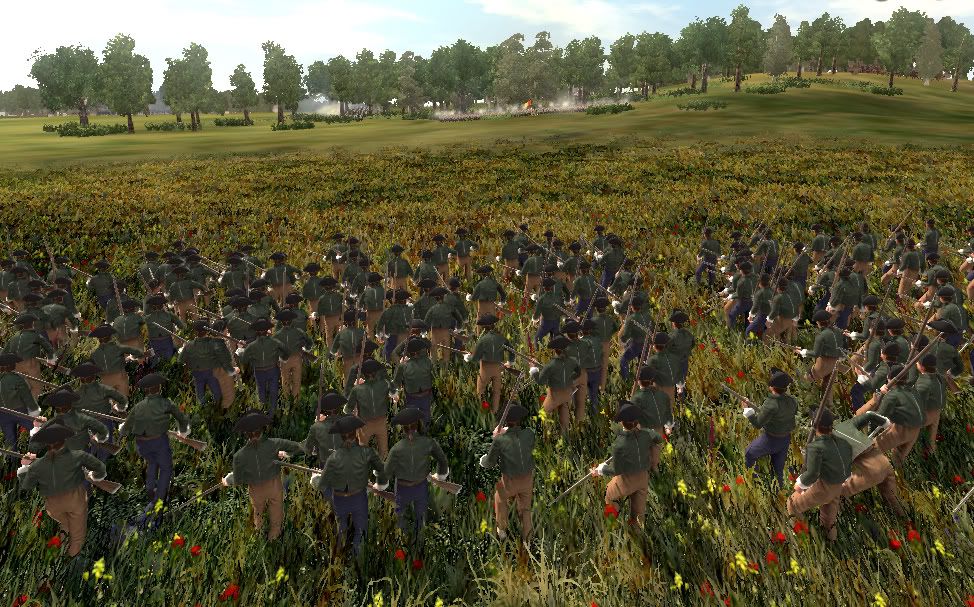
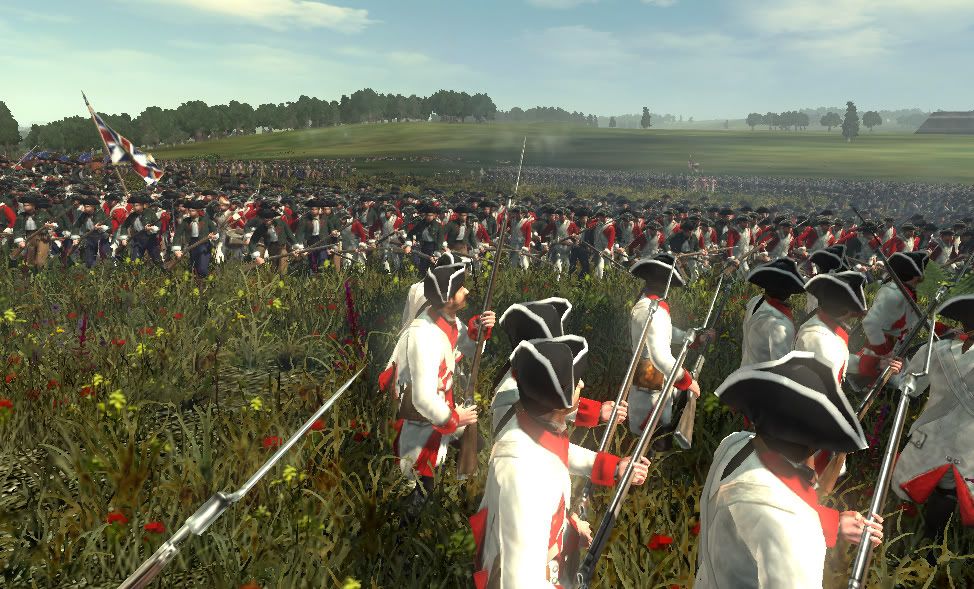
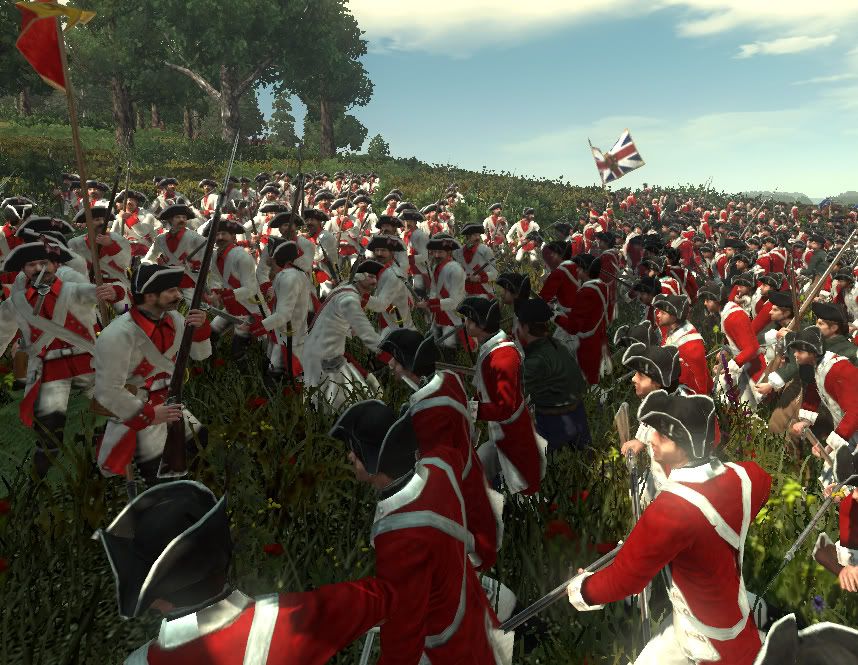
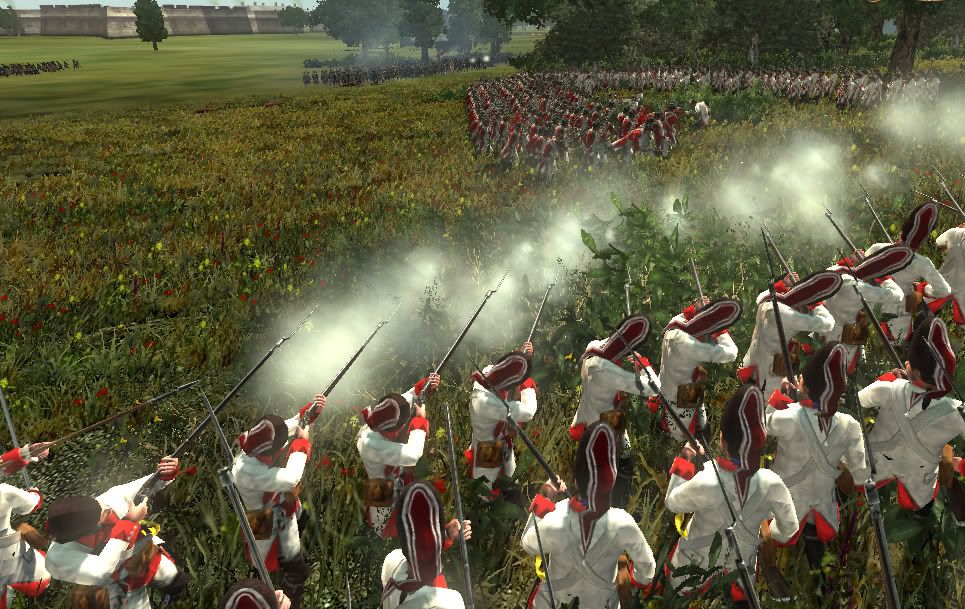
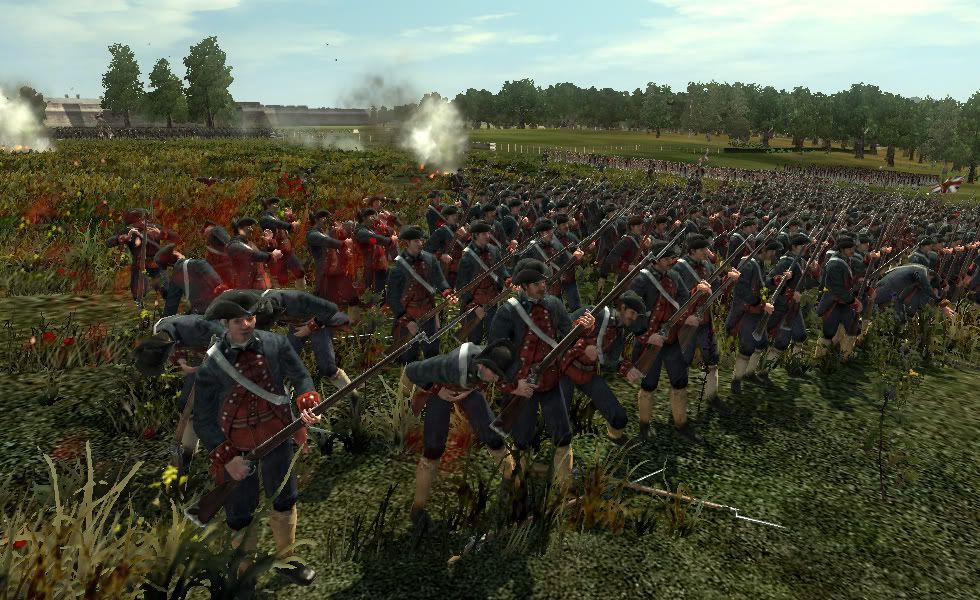
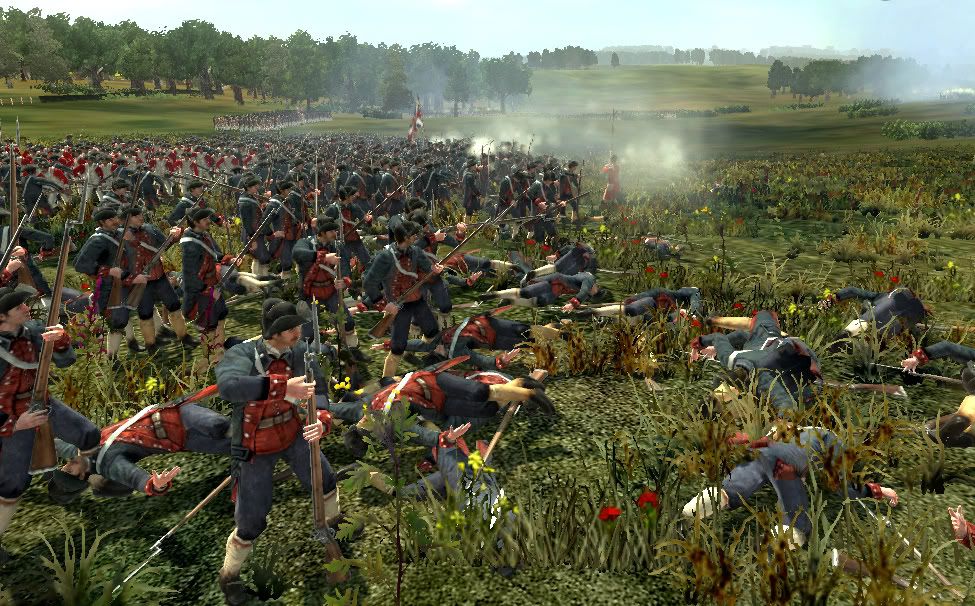
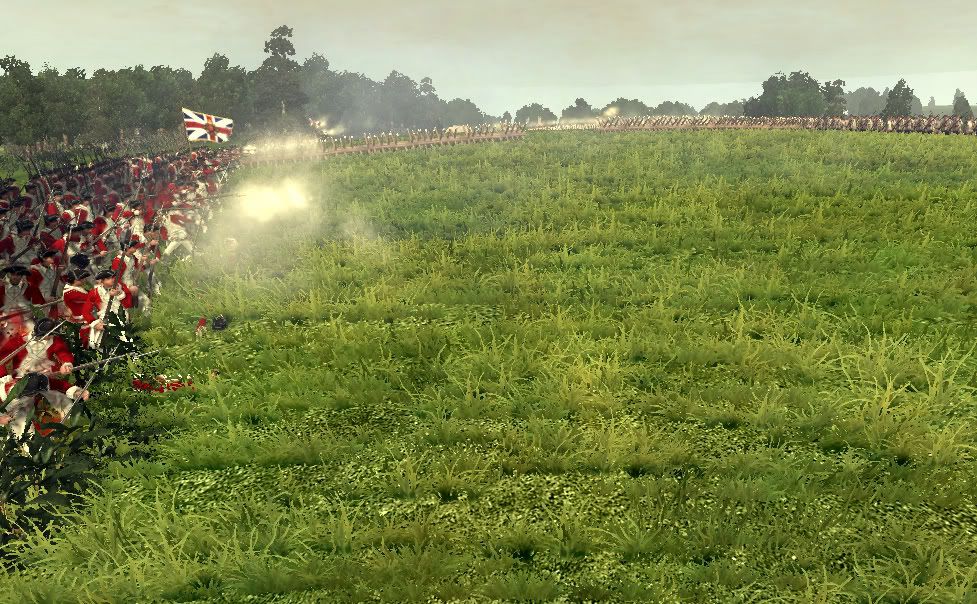
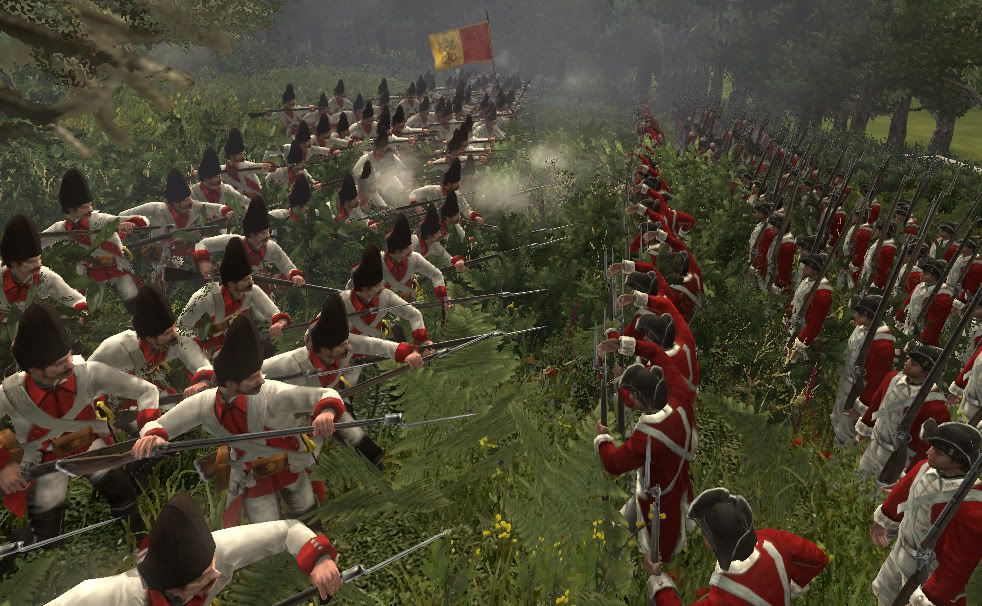
    With this new threat out of the way, the Italian legionaries once again began to advance, a long line of white and red marching onwards in unison. Soon they came into range of several of the British regiments of foot, and firefights broke out between the two armies. The fiercest fighting occurred on the Italian left, where the British, led by the 3rd Regmient of foot, put up some stiff resistance, holding up the Italian advance for quite some period of time.

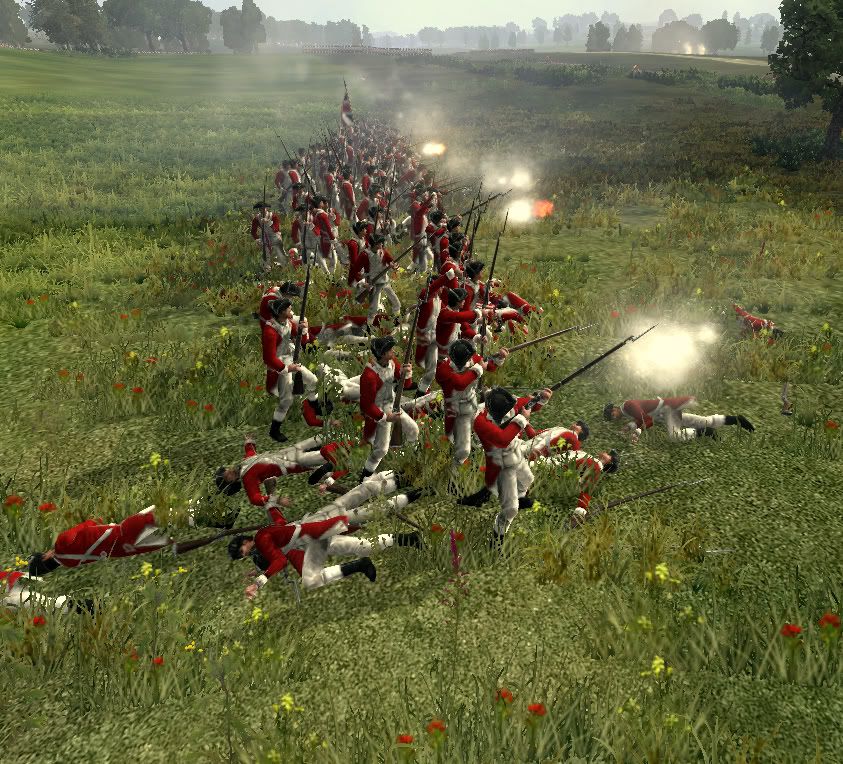
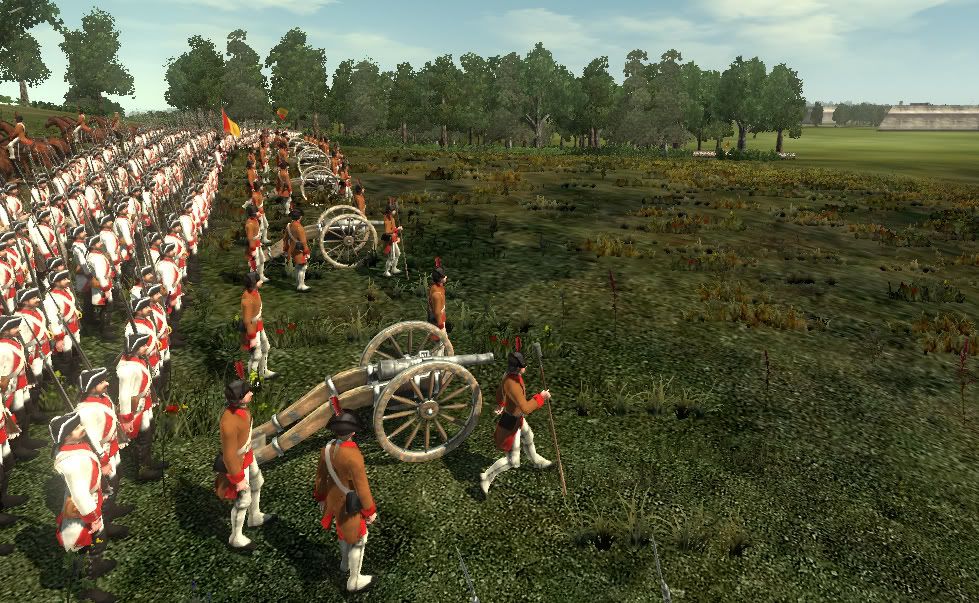
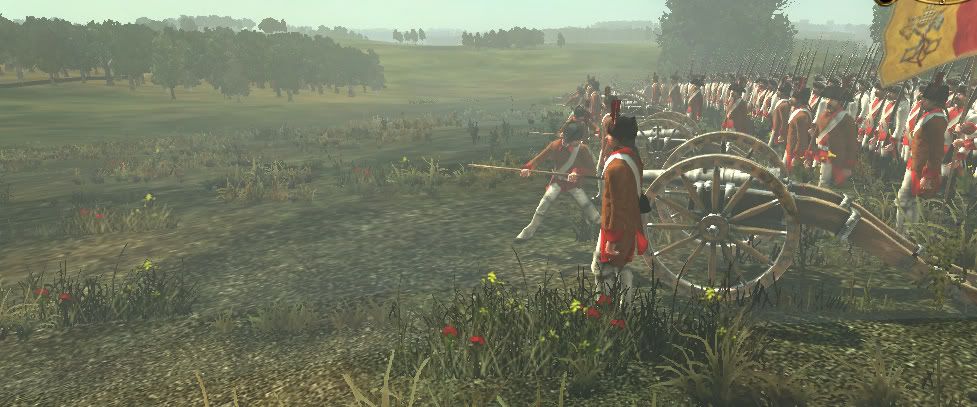
    Meanwhile, more and more British troops came rushing to the aid of the 3rd, causing significant casualties among Cohorts II, III and IV, who bore the brunt of this counter attack. By now, the Italian howitzer batteries of the Artillery Auxilia VII and VIII had unlimbered their guns, and begun shelling of the British positions, causing several casualties amongst the advancing British troops. One of the shells exploded near to Reynalds as he was spurring his men on for the attack, a piece of the casing flying through the air and catching him in the stomach, knocking him from his horse and fatally wounding him.


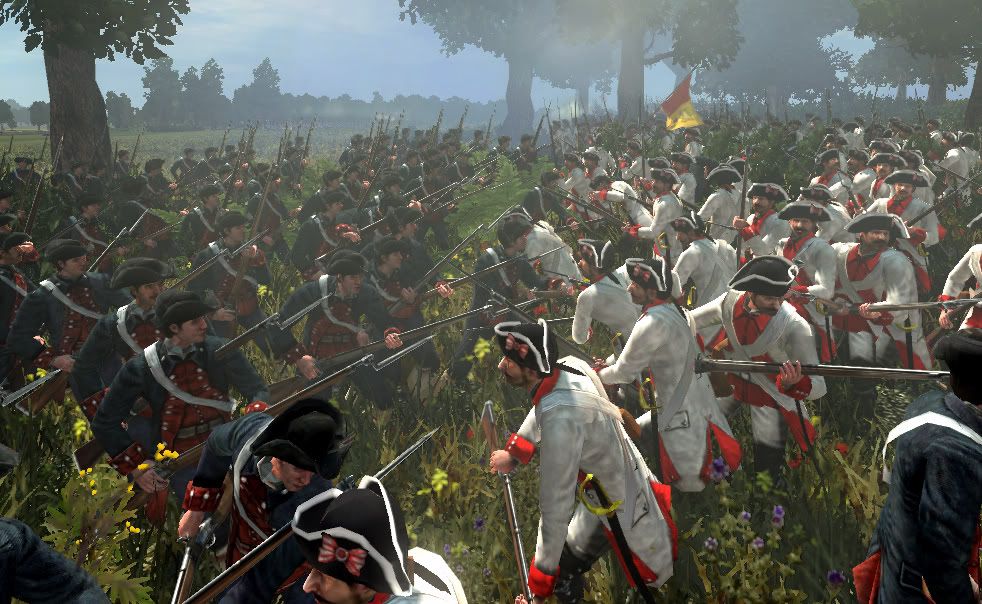
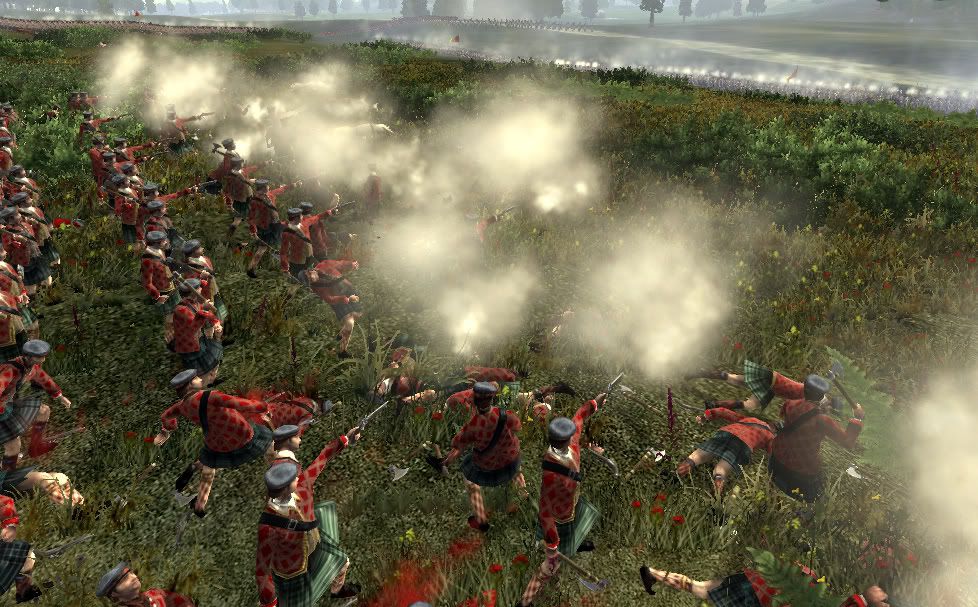
    A regiment of highlanders rushed forwards into the fight, firing off their pistols at the enemy ahead of them, before charging with their axes and shields, much like in the days of old. However, they were soon driven back by a close range volley from Cohort IV which managed to kill almost half their number in an instant, proving too much even for these brave men.


    The Italian right faced much less resistance than the left, with the cavalry having taken out the guns, and the opposing British horsemen, and most of the infantry being focused on their left. This allowed them to pivot around Cohort VI, forming up in a line perpendicular to the British positions. They were now perfectly placed to advance on the British left flank and roll up their line, ending their resistance.

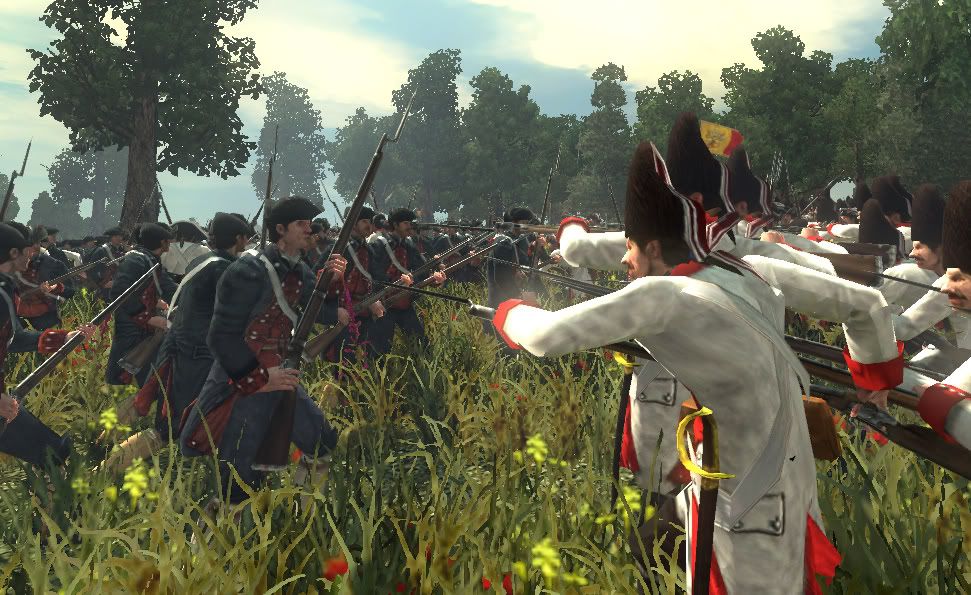
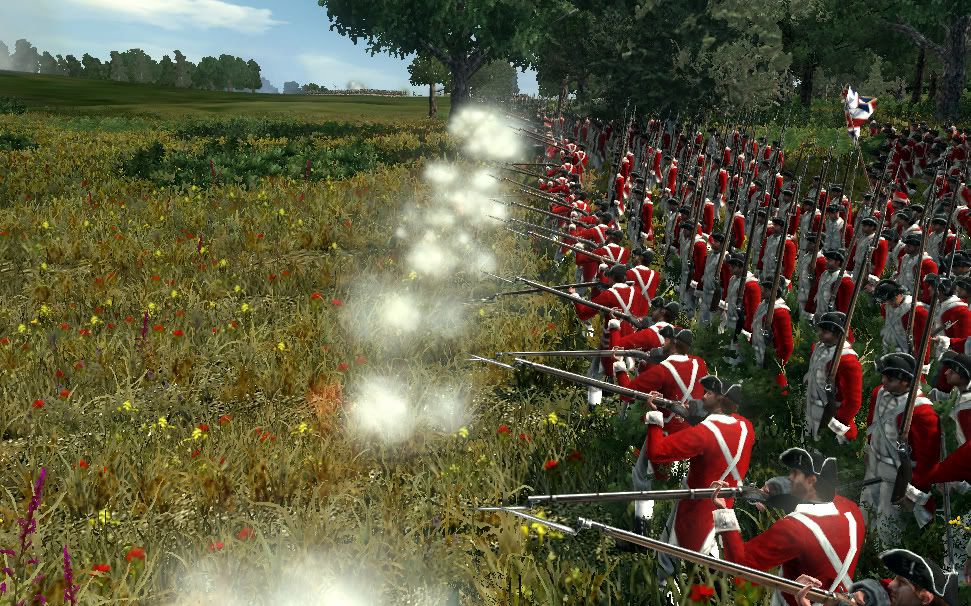
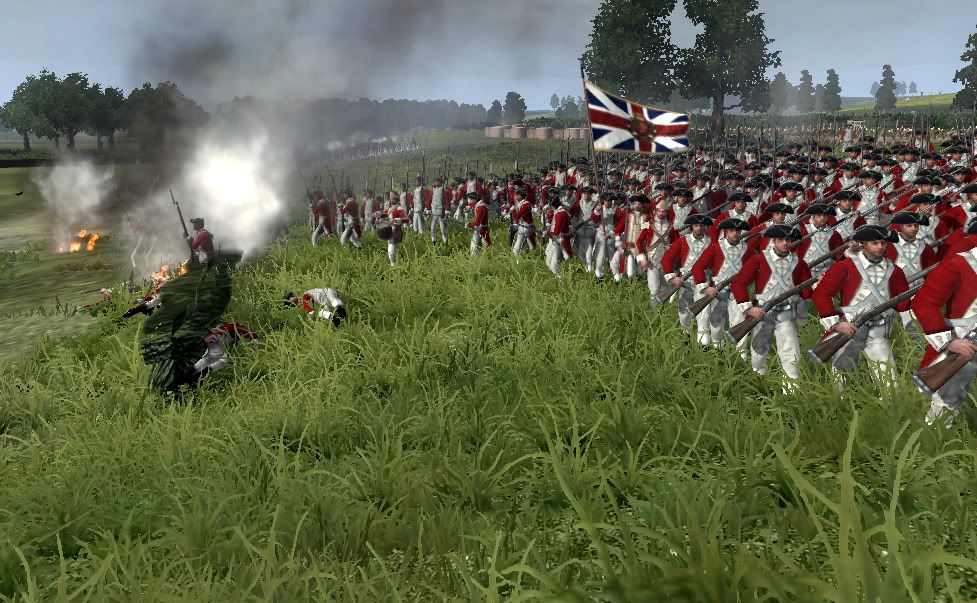
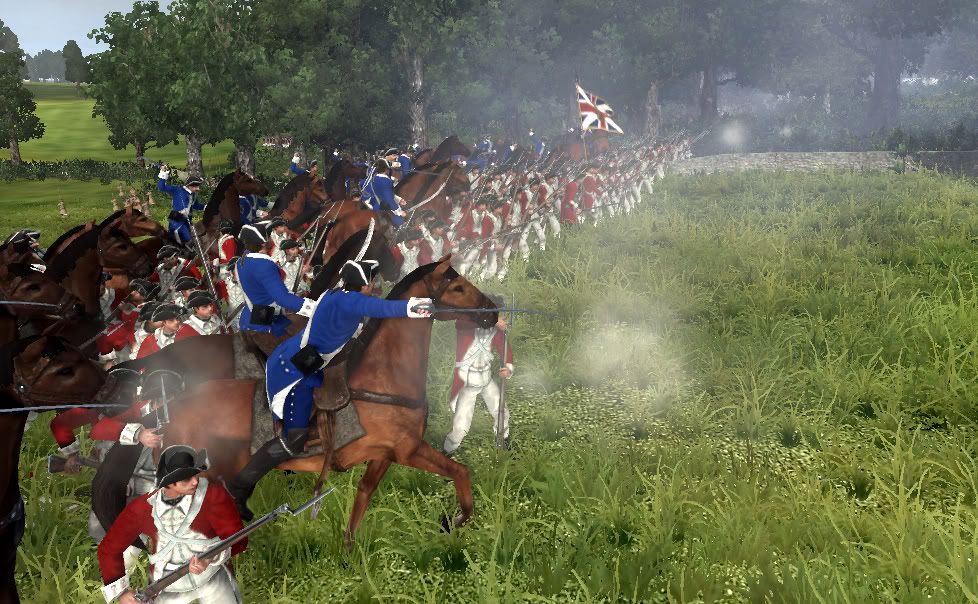
    Seeing this danger, Colonel Fairfax, who had taken over command of the army in the absence of Reynalds due to his injury, sent the 6th, 11th and 17th Regiments of Foot to counter this threat and hold the Italians off long enough for their right flank to push through. These regiments advanced in good order, and engaged the Italians at a range of around 20 yards.

    Whilst the Italians were focused on the immediate threat directly in front of them, a regiment of pike militia, consisting of locals desperately trying to defend their homes from the foreign invaders with whatever weapons they could find, charged forwards out of some trees into Cohort VII, taking them completely by surprise, pushing them slowly back.

    Seeing that they were struggling, Vasari ordered the remains of Mounted Auxilia XII and XIV to charge forwards to their rescue.


    This swung the fight back in the favour of the Italians, and soon the British pikemen broke and fled back into the forest where they had come from.

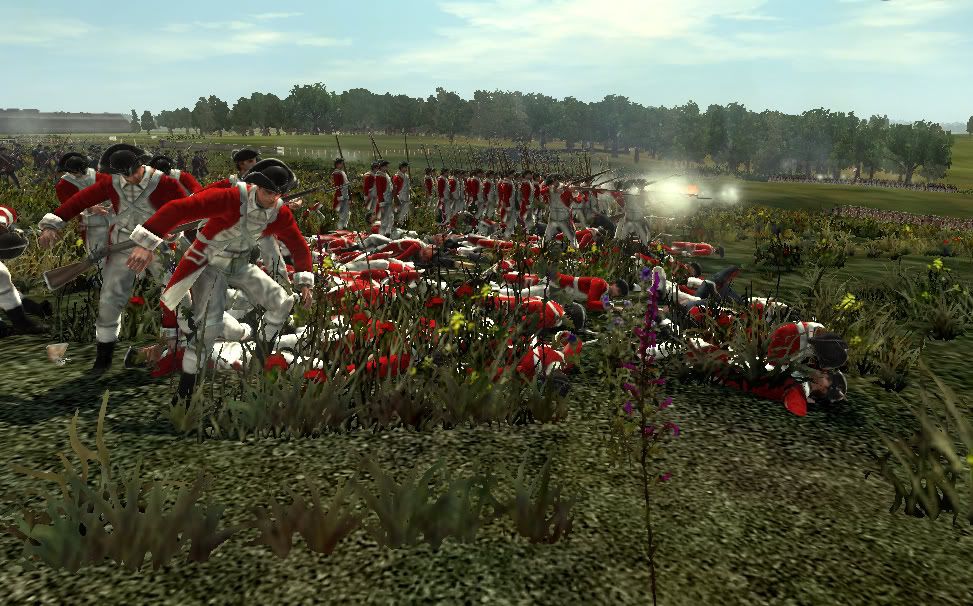
    Much of the British resistance was now beginning to crumble under the overwhelming Italian onslaught. Though they fought bravely, many of the troops were new and inexperienced compared to the veteran Italians, and they were unable to match the rate of fire, or the accuracy of these men. Soon the British left had completely collapsed, whilst on the right, only the 19th Regiment of was still putting up any resistance, bravely standing firm whilst others around them fled. Seeing this resistance, Vasari ordered in the Legionary Cavalry, who charged into them from behind, catching them completely unprepared while they engaged the threat to their front. This was finally enough to break them, and they too joined many of their comrades in fleeing the field.


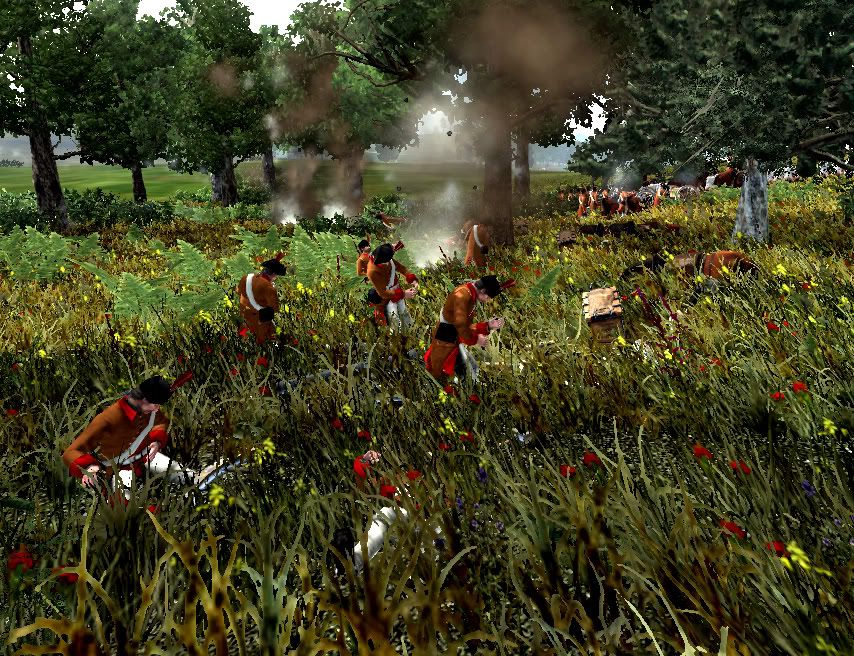
    With the battle all but won, the pursing Italians suddenly found themselves under fire from the forest. The 28th Regiment of Foot had been on their way to reinforce the British army at Bristol, but arrived just too late to take part in the battle before it was over. Neverless, they were not going to just let their comrades be cut down as they ran, and so fired on the Italians from the cover of the trees, buying time to allow their comrades to escape.

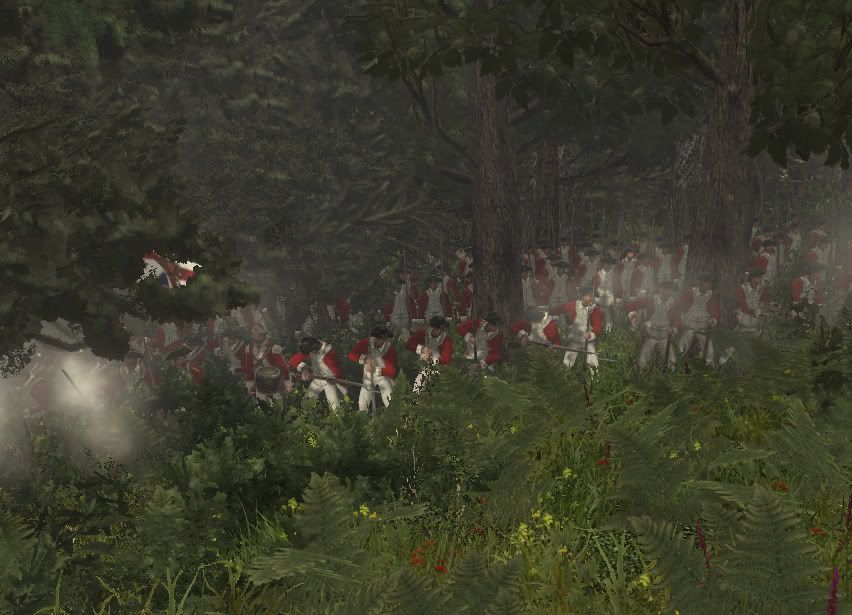
    Vasari ordered that they be cleared out using cold steel, leaving the job for the giants of Cohort I to do. These men rushed forwards into the trees, shouting their warcries, and crashing into the British troops. Few soldiers were able to stand up to these giant veterans at close quarters, and these British soldiers were no different, many meeting a gruesome end on the end of an Italian Bayonet before the rest chose to flee rather than face them.


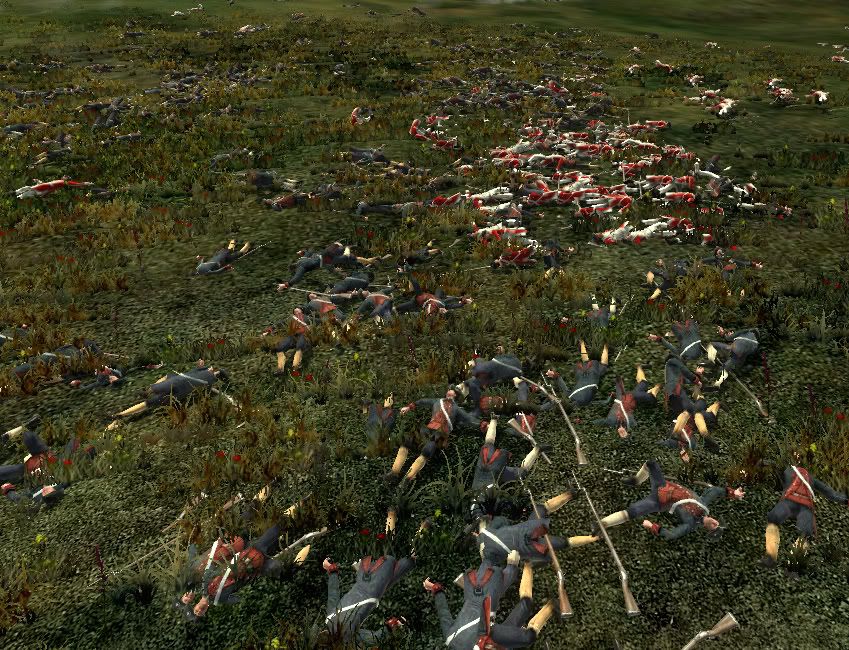
    In total, the British had caused over 600 casualties amongst the Italian troops, though they had paid a heavy price for it, losing over three quarters of their numbers as either dead, wounded or taken prisoner. It is said that the dying Jethro Reynalds wept as he learnt the outcome of the battle, before giving up the fight himself a few minutes later.


    The Battle of Bristol was now over, with the British field army destroyed, and the way to London open. However, the next day, whilst the Italians were still burying their dead, Vasari received some terrible news: A second British fleet had sailed from Liverpool and engaged the Italian fleet off the coast of North Devon. There they had inflicted a crushing defeat on the Italians, destroying or capturing their entire fleet. Vasari, Baiano and their legions were now stranded on enemy soil, amongst a hostile populace. There were only two options now: Victory and glory, or defeat and death.
    Last edited by Tim1988; April 19, 2012 at 06:55 AM.
    My Old AARs:
    Uniting a Kingdom - A M2TW:Kingdoms Britannia Campaign
    The Greatest Battles of General Sir Lionel Townshend - A DarthMod Empire Campaign
    Tales of an Old Soldier - A series of DMUC Battles
    My Image Gallery:
    .

  14. #114
    Tim1988's Avatar Vicarius
    Join Date
    Dec 2009
    Location
    England
    Posts
    2,786

    Default Re: (DMUC AAR) Hail Caesar!

    There we go, the next update as promised. Sorry for the long wait - as I said, work got a bit busy and I wasn't able to find the time to do it.

    Thanks for your patience and comments. Hope you all enjoy.


    Edit: Just noticed this AAR has got over 10,000 views!!!!


    Quote Originally Posted by killervomit2 View Post
    this is more addictive than heroin, hurry up i've got the shakes
    Sorry to feed your addiction, lol.

    Quote Originally Posted by Zarniwoop View Post
    Can't wait for the next update
    Thanks.

    Quote Originally Posted by ztrain909 View Post
    Tim1988, this is an absolutely amazing aar. Detailed, graphic, and very well written. I commend you. +rep. Great job
    Thanks, much appreciated. Glad you enjoyed it.
    Last edited by Tim1988; July 04, 2011 at 04:50 PM.
    My Old AARs:
    Uniting a Kingdom - A M2TW:Kingdoms Britannia Campaign
    The Greatest Battles of General Sir Lionel Townshend - A DarthMod Empire Campaign
    Tales of an Old Soldier - A series of DMUC Battles
    My Image Gallery:
    .

  15. #115

    Default Re: (DMUC AAR) Hail Caesar!

    amazing, its like a novel
    you may like not like us, but at least we dont have jersey shore

  16. #116
    Ganbarenippon's Avatar Protector Domesticus
    Join Date
    Mar 2011
    Location
    London, United Kingdom
    Posts
    4,201

    Default Re: (DMUC AAR) Hail Caesar!

    Finally finished everything! A great read, all the more entertaining because I have no real knowledge of ETW or any of the subsequent titles! Top stuff mate!

  17. #117
    joker8765's Avatar Civis
    Join Date
    Jun 2011
    Location
    Perth, Australia
    Posts
    184

    Default Re: (DMUC AAR) Hail Caesar!

    A great update definetly well worth the wait
    + rep

  18. #118
    Tim1988's Avatar Vicarius
    Join Date
    Dec 2009
    Location
    England
    Posts
    2,786

    Default Re: (DMUC AAR) Hail Caesar!

    Quote Originally Posted by killervomit2 View Post
    amazing, its like a novel
    Quote Originally Posted by Ganbarenippon View Post
    Finally finished everything! A great read, all the more entertaining because I have no real knowledge of ETW or any of the subsequent titles! Top stuff mate!
    Quote Originally Posted by joker8765 View Post
    A great update definetly well worth the wait
    + rep
    Thanks guys. Your comments and support means a lot.

    Thanks also to anyone who voted for me in the MAARC. For those of you who haven't noticed, there was a four way tie for first place, so the vote has gone to a second round!

    The other submissions are all superb pieces of work, and I thoroughly suggest that you check them out if you haven't already.


    I'm currently working on the next update at the moment, so it shouldn't be too long a wait - hopefully one day this week if I don't get sidetracked by anything else.
    My Old AARs:
    Uniting a Kingdom - A M2TW:Kingdoms Britannia Campaign
    The Greatest Battles of General Sir Lionel Townshend - A DarthMod Empire Campaign
    Tales of an Old Soldier - A series of DMUC Battles
    My Image Gallery:
    .

  19. #119
    Tim1988's Avatar Vicarius
    Join Date
    Dec 2009
    Location
    England
    Posts
    2,786

    Default Re: (DMUC AAR) Hail Caesar!

    Chapter 21: The Invasion of Britannia, Part 3

    Following the Battle of Bristol, Vasari gave his battered and weary troops a single day to rest and recover before marching East towards London. Now that their supply lines had been cut due to the seas being reclaimed by the British, it was important to move fast and strike at the heart of the British territories as soon as possible. Vasari was banking on the fact that if London fell then resistance would crumble, giving the Italians time to bring over more ships from Italy to reopen trade, whilst living off the land in the mean time.

    The remains of the British army defeated at Bristol fled North, hoping to regroup with forces currently mustering in Scotland. Baiano was ordered to pursue them, harrying them all the way and preventing them from intercepting Vasari's forces as they attacked London. The exception to this were Artillery Auxilia III and VI who joined up with Legion I to replace the losses suffered in the earlier battle, and give Vasari more punch when the siege started.

    The Italian army, two and a half thousand strong, reached London a week later on the 15th July. Before they reached the city itself, they had to take the giant fortress blocking their route. The fortress was garrisoned by the London militia, several thousand well armedblue coated men and boys ready to fight for their homes against the foreign invaders.


    The Italians began to set up their siege lines, getting their guns into position to begin firing at the walls. The next morning when they woke up, however, it became clear that a siege may not be needed after all as, in the distance, a force of British regulars could be seen marching towards the fort to relieve the siege. Combined with the militia inside the fort, this meant that over 5000 men now faced the Italians, outnumbering them 2:1


    The Battle of London, 16th July 1744
    The Italians had a strong defensive position on the slope of a hill overlooking the fortress with their left flank protected by a small forest. Vasari decided to use this forest to his advantage, positioning Cohorts III and IV in an advanced position, where they were hidden from the view of the enemy. They would then be able to engage the British flank from the treeline, falling back through the forest should they need to. Cohort II was also placed in the forest, but facing off towards the left, protecting their flanks from any British attacks.


    The main Italian line was placed on the slope itself, giving it a clear field of fire over the advancing British troops, with Artillery Auxilia III and VI in one large battery ready to shred any British foolish enough to advance straight towards them. The howitzers of Artillery Auxilia VII and VIII were positioned behind the main infantry line, where they could fire their explosive shells over their heads.


    The Italian cavalry, still understrength following the casualties it had sustained at Bristol was held back in reserve, remaining hidden from sight by the forest, from which it could spring from when required.


    The British had brought with them artillery themselves, and these guns began firing on the Italian positions, covering their advance.

    This fire was returned by the Italian guns on the ridge, firing down into the advancing infantry off in the distance.

    Though the range was long, both sides were still able to cause casualties among the ranks of their enemies. Vasari himself was lucky to survive as a cannonball missed him by mere feet, striking his aide next to him and going on to cut a bloody swathe through his bodyguard.


    The British advance had now begun, splitting into three main attacks.

    On their left, a large force of regulars consisting of the 4th, 14th, 18th, 28th and 35th regiments of foot advanced. Using a small forest for cover in order to keep them hidden from the Italians, they marched forwards attempting to outflank their lines.


    In the center, the majority of the militia garrison supported by a regiment of regulars, exited the fort, and began to advance on the Italian center, which, at that time, they believed to be their flank, not knowing about the troops that Vasari had placed in the forest.

    The aim of these troops was to hold the Italian line in place whilst a third column of troops consisting of the 23rd Foot, the 10th, 11th and 13th Militia and two units of armed citizenry attempted to outflank them. Had this succeeded, the Italians would surely had collapsed as the British troops rolled up their line.

    Instead, these flanking troops were met with a volley of fire from the trees. The Italians waited until they got to a range of around 30 yards before standing as one and unleashing three volleys.


    Though the range was long and didn't cause a massive number of casualties, the surprise attack threw the British into disarray. The forces on this flank were largely made up of militia and citizenry, not battle hardened warriors, and they struggled to know how to react to this new, unexpected threat. Sensing their panic, Vasari decided to take a gamble and commit his cavalry reserve, despite the battle having barely started. These men charged forwards out of the trees at the top of the ridge, crashing into the citizenry regiment that was bravely returning fire with Cohort II.


    However, the gamble didn't pay off, and the British held their ground against the depleted numbers of the Italian cavalry despite taking heavy casualties, forcing the cavalry to pull back to their original positions or risk getting bogged down in a fight they were heavily outnumbered in.

    This attack just seemed to sow even more chaos in the British ranks on their flank, and in the end, the inexperienced militia officers panicked and ordered a mass charge to clear the Italians out of the forest. The Italian Legionaries of Cohorts III and IV held their nerve, firing at the onrushing horde right up until the moment the charge hit home, dropping many of the attackers before they got close.


    But there were too many enemies to stop with fire alone, and the two sides found themselves locked in a chaotic hand to hand fight, shrouded in smoke amidst the tangled undergrowth. Initially the experienced Legionaries were able to keep the British at bay with their bayonets, but slowly they found themselves being pushed further and further back under the weight of numbers, as their casualties slowly started to mount up.


    Slightly to their left, Cohort II was unable to move to support them, for it too was busy engaging the enemy infront of them. In this case it was the remains of the citizenry that had been on the end of the cavalry charge, though the 23rd foot was moving up fast to support them, along with one of the militia regiments. When these two units had arrived, they too decided to use the bayonet, and rushed forwards in one great mass to force the Italians out of the forest and clear the way to the rear of the enemy lines.


    With Cohort II held in place, a second regiment of citizenry began to make its way around the fight, with the aim of hitting the Italian Cohort in the rear. Vasari had seen the struggle that was going on over on the left already, and had ordered the veterans of Cohort I to double time it across to provide assistance. It soon became clear, however, that they wouldn't make it in time, and so the cavalry, which had by now regrouped, was ordered into the fray once again.

    This time their charge was more successful and the citizenry broke under it. Without reigning in, the horsemen continued their charge, crashing into the rear of the great melee that was occurring right next to them.


    The sudden emergence of this new threat proved too much for the militia fighting their. They were already suffering at the hands of the veteran Italian Legionaries, and this new attack on their rear convinced them that discretion was the better part of valour, and they fled from the fight. The regulars of the 23rd Foot however, proved much tougher, holding firm and driving the cavalry back, whilst keeping Cohort II at bay.

    However, the cavalry had lasted long enough for Cohort I to arrive on the scene. Marching in good order, they advanced to within 10 yards of the British, before unleashing a devastating volley into their flank at near point blank range. This finally proved too much for the 23rd, and they too broke and ran.

    This now freed up Cohorts I and II to rush to the assistance of Cohorts III and IV still fighting in the forest nearby. Keeping their bayonets fixed, the two Cohorts charged into the fray, finally ending British resistance on the left, and keeping the center safe from the risk of being outflanked.


    Whilst this had been happening, the battle in the center was also raging. The militia from the fort advanced steadily towards the Italian positions, coming under heavy artillery fire as they came. One within range, they opened fire on the Italians up on the ridge, causing a number of casualties, and preventing them from reinforcing either of their flanks, where the fighting was fiercest.


    However, now that they were closer, the Italian gunners switched to loading cannister shot, which tore through the British ranks, halting the advance in it tracks.

    Off to the Italian right, the British regulars had advanced unseen through a forest, and now they emerged to attack the end of the Italian line. Cohorts VIII and IX bore the brunt of this attack, having to re-angle themselves to meet this new threat.


    Casualties soon began to mount in the two cohorts as they struggled to hold back the British troops.

    It was now though, that the British commander made perhaps his greatest mistake of the battle. Seeing the militia in the center struggling under the Italian cannister and musket fire, he ordered some of his flanking force to move over and help in the center. This eased the pressure on Cohorts VIII and IX who had been almost at the point of breaking under the onslaught, and instead put more of his troops into the sights of the Italian cannon. Had he not ordered this move, the Italian right would surely have crumbled, leaving the British with a route to the Italian artillery, and Vasari himself.

    The guns now turned themselves to the more valuable target, cutting down the regulars with just as much ease as they had done the militia.

    This eventually proved too much for the British, and they broke and fled, leaving behind them hundreds upon hundreds of dead and horrifically wounded on the slope of the hill.


    The battle had been bloody. The Italians had lost almost 1000 of their army: a third of their number, whilst the British had suffered over 4000 losses in the defence of their capital. Of the Italian casualties, over 200 were from Cohorts VIII and IX who had held the right flank, losing almost half of their men, showing just how close that flank had been to collapsing.


    The defeat was a bitter blow to the British hopes of holding out. With so few troops left, defeat was inevitable, and the next day the city of London surrendered to Vasari. England was far from defeated however, with several small forces roaming the country to the North that would have to be put down, whilst the Royal Navy still controlled the seas surrounding the country.
    Last edited by Tim1988; April 19, 2012 at 06:48 AM.
    My Old AARs:
    Uniting a Kingdom - A M2TW:Kingdoms Britannia Campaign
    The Greatest Battles of General Sir Lionel Townshend - A DarthMod Empire Campaign
    Tales of an Old Soldier - A series of DMUC Battles
    My Image Gallery:
    .

  20. #120
    Merula's Avatar Campidoctor
    Join Date
    Aug 2010
    Location
    Australia
    Posts
    1,840

    Default Re: (DMUC AAR) Hail Caesar!

    Great Update!!!
    But i just thought i'd say im actually starting to feel sorry for the british, you may want to justify this war a bit more, cos at the moment the italians are the bad guys in my mind haha

Page 6 of 8 FirstFirst 12345678 LastLast

Posting Permissions

  • You may not post new threads
  • You may not post replies
  • You may not post attachments
  • You may not edit your posts
  •