")
")
")


")
Introduction
- In this lesson we will complete a retexture of the Feudal Knight as well as its appropriate attachment_set and view the changes in the game engine.
File Setup
- Please ensure that you have downloaded alpaca's dds/texture converter which can be found here.
- Also ensure that you have downloaded the dds plugin for your image editing program of choice as well.
Let's begin, shall we?
First open en_lmail_hmail_template.psd. This should open in Photoshop as well as The Gimp. Your file should look like this.
Spoiler Alert, click show to read:
Now open final heater_template_diff.psd. This should open in Photoshop as well as The Gimp without issue as well. It should look like the diagram below.
Spoiler Alert, click show to read:
Now using your knowledge gained from Lesson One, complete the texture set for both en_lmail_hmail_template.psd and final heater_template_diff.psd. Feel free to add symbols, patterns, or anything else to your texture. Remember your texture will only be limited by your creativity. Here is how I have completed my texture sets.
Spoiler Alert, click show to read:
Spoiler Alert, click show to read:
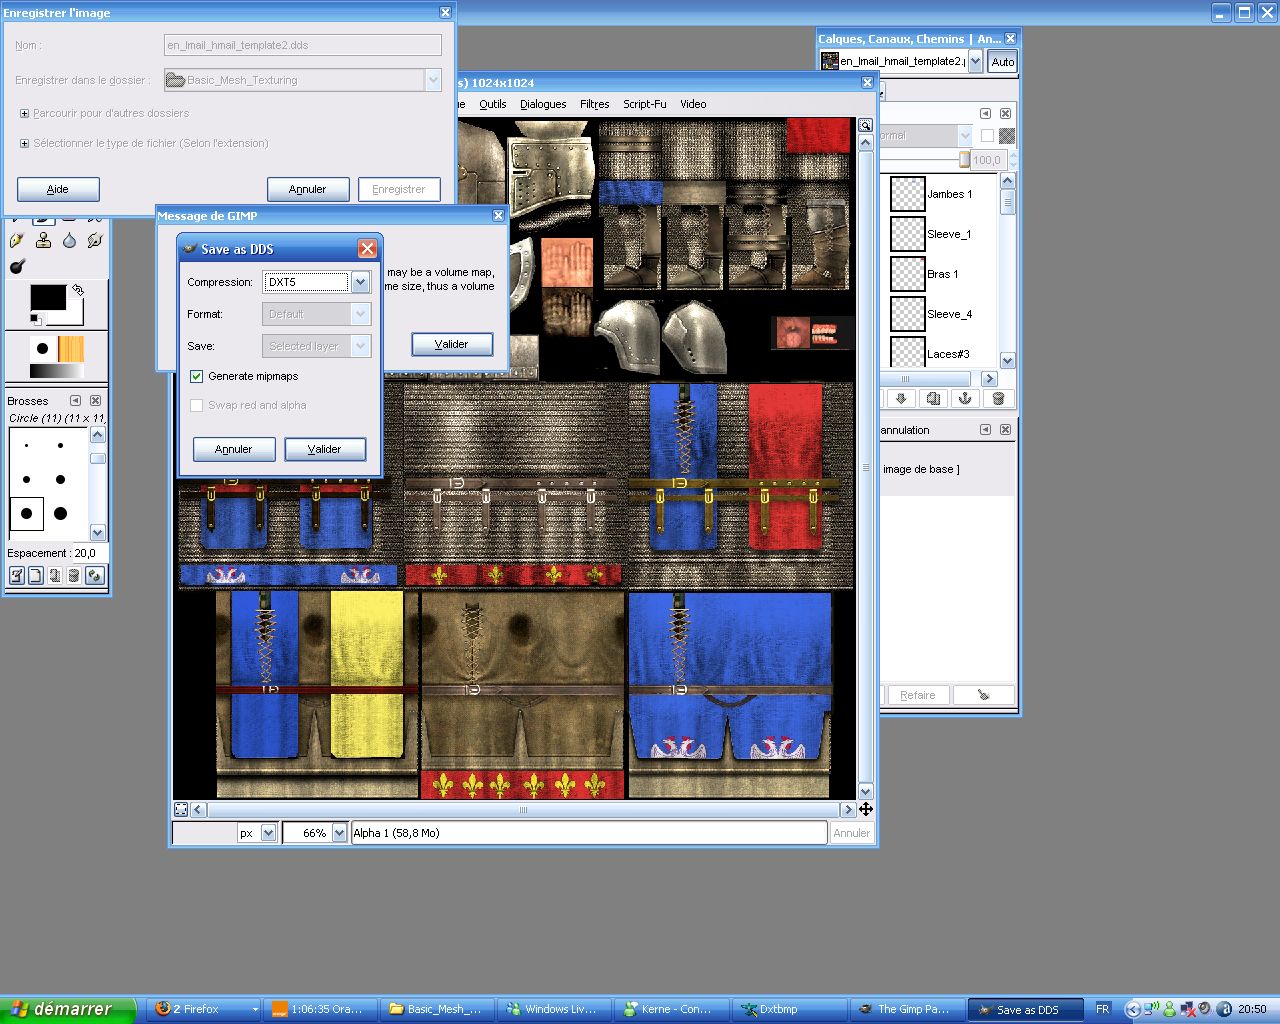
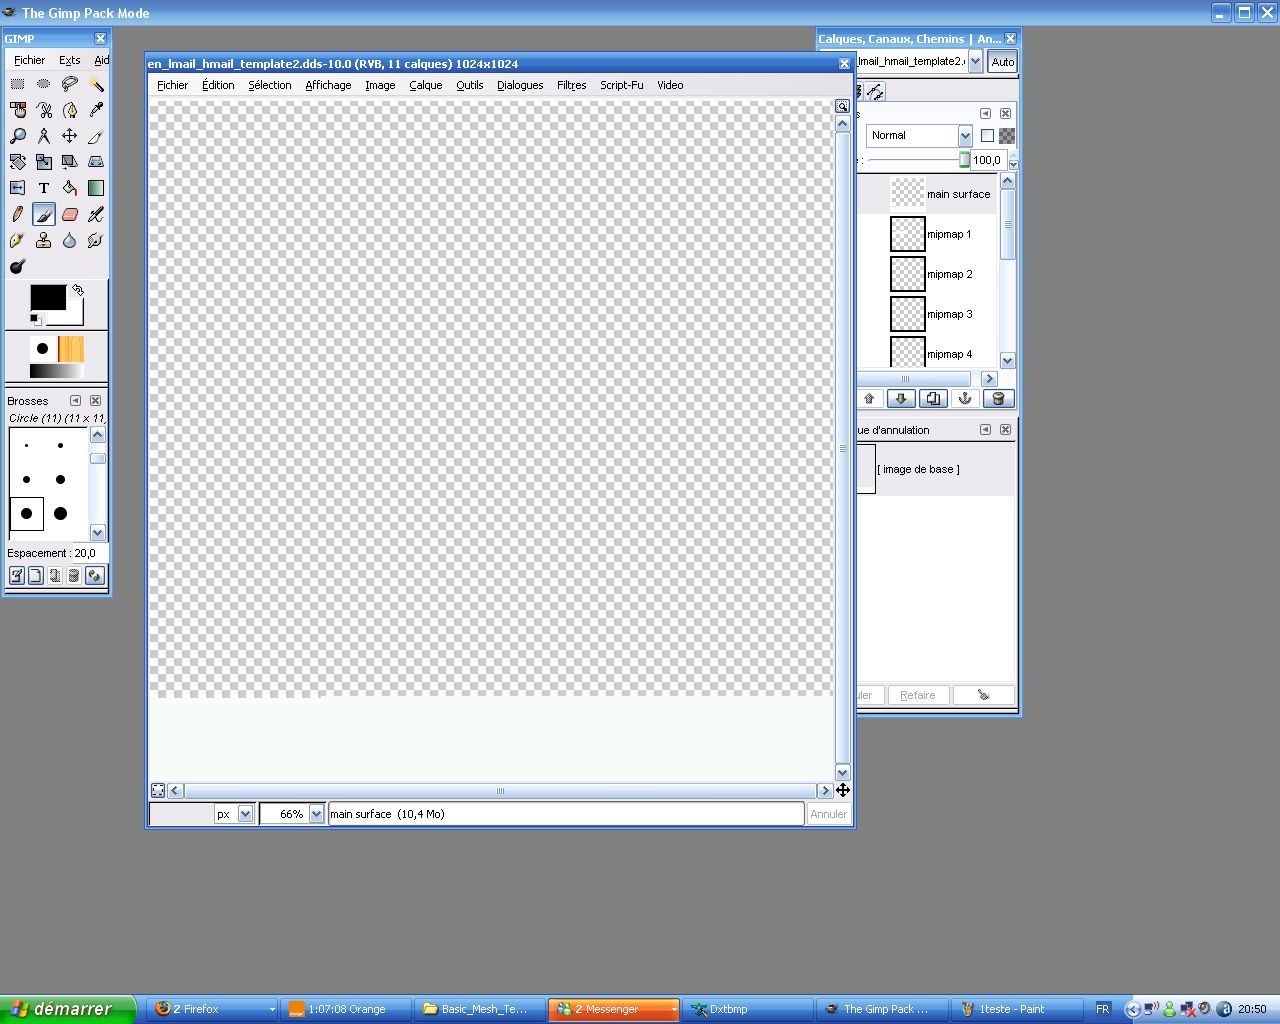
Now we must save our files and prepare them for game engine integration. You should have the .dds plugin for your image editor installed and ready to go. Examine your file to make sure you are happy with the results and 'Save As' (Ctrl + Shift + S). Make sure you select to save it in the .dds format and the nVidia dds box should come up with a host of saving options. Follow the graphical guides below for either Photoshop or The Gimp below.
- Compression = DXT5
- Generate MIP maps
- Mipmap Filter = Box
Spoiler Alert, click show to read:
Spoiler Alert, click show to read:
Once you've saved your files, you will need to convert them to .texture files so the game engine can read them. The use the converter you will need python installed on your system. You can download that for free here. You will need your files in the same directory as the converter to work. I'm sure we all know how to create a folder to place your files in, so I'm not going to go through that process. Once you have your .dds files in the same directory as the converter, run 'convert_all_dds.bat' and it should create .texture files of your .dds files as seen below. Also note that I've renamed the files to 'en_lmail_hmail_england.texture' and 'final heater_england_diff.texture' as should you.
Spoiler Alert, click show to read:
Now we're ready to place our new files in our mod folder and see them in action in the game engine. Unpack the mod folder to your Medival II Total War directory like the diagram below.
Spoiler Alert, click show to read:
Next, we have to place our two files in their appropriate destinations so the game can properly detect them. The file en_lmail_hmail_england.texture will go into the following directory: Basic_Mesh_Texturing\data\unit_models\_units\en_lmail_hmail\textures\ and the file final heater_england_diff.texture will go into the following directory: Basic_Mesh_Texturing\data\unit_models\attachmentsets\. Create these directories if they do not exist already. Once you have completed that, go back to your Medieval II Total War directory and run 'Basic_Mesh_Texturing_cfgFixer.bat' to create up your .cfg file based on your current preferences. Once you have completed this, we are ready to run our class mod and see our in game changes. So let's run our mod by running the .bat file 'Basic_Mesh_Texturing.bat' and start a custom battle using England. You should be able to set up a custom battle without issue, so there will be no screens for that process. Now give your army one unit of Feudal Knights and one unit of Dismounted Feudal Knights. Load up the custom battle and view your brand new textures Feudal Knights. Mine can be seen in the screens below.
Spoiler Alert, click show to read:
Spoiler Alert, click show to read:
Spoiler Alert, click show to read:
And there you have it. Your brand new textures showing up in game. Now that wasn't so hard, now was it? Feel free to try out new things with your textures and just let your creativity take hold. Your creativity is the biggest aspect of texturing. Following a few basic steps will get you past the technical aspect, the rest is up to you. This concludes Lesson Two and at this point in the course you should have the basic working knowledge to retexture an existing vanilla .mesh and get it working in the game engine. Please post if you have any problems and please post your results in this thread. I would like to see your actual texture and then how it looks in the game engine. Happy modding.
Cheers,
B.Ward


")


")