Page 1 of 3 123 LastLast
Results 1 to 20 of 49

Thread: Lesson 3 - Climates and Features using layers

  1. #1
    GrnEyedDvl's Avatar Liberalism is a Socially Transmitted Disease
    Artifex Technical Staff

    Join Date
    Jan 2007
    Location
    Denver CO
    Posts
    23,844
    Blog Entries
    10

    Default Lesson 3 - Climates and Features using layers

    Lesson 3
    Do NOT start this unless you have a working map!
    By now you should have a good idea of how things work and what will cause your map not to load. You should already have all 10 settlements renamed, now we are going to add the other factions and buildings and change some settlement sizes around. Add the other factions first. I am going to add France, HRE, and Spain as they are the first 3 in the vanilla files after England. Make sure each faction has at least one settlement.

    faction france, balanced smith
    ai_label catholic
    denari 8000
    denari_kings_purse 1500

    faction hre, balanced smith
    ai_label catholic
    denari 6000
    denari_kings_purse 1500

    faction spain, balanced smith
    ai_label catholic
    denari 9000
    denari_kings_purse 2500

    You can change the balanced smith line to anything listed here:
    Spoiler Alert, click show to read: 
    balanced - biasses towards growth, taxable income, trade level bonusses (roads), walls and xp bonus buildings
    religious - biasses towards growth, loyalty, taxable income, farming, walls and law
    trader - biasses towards growth, trade level, trade base, weapon upgrades, games, races and xp bonus buildings
    comfort - biasses towards growth, farming, games, races, xp bonus and happiness
    bureaucrat - biasses towards taxable income, growth, pop health, trade, walls, improved bodyguards and law
    craftsman - biasses towards walls, races, taxable income, weapon upgrades, xp bonusses, mines, health and growth
    sailor - biasses towards sea trade, taxable income, walls, growth, trade
    fortified - biasses towards walls, taxable income, growth, loyalty, defenses, bodyguards and law

    These biasses are towards building properties, rather than buildings themselves. The game does not know what a "Blacksmith" is, for example, it only knows that it is a building which provides a weapon upgrade, and hence a Craftsman AI would be more likely to build it than another AI personality type.

    These are then combined with a troop production personality, as follows:

    smith - exactly level
    mao - biased towards mass troops, light infantry
    genghis - biased towards missile cavalry and light cavalry
    stalin - biased towards heavy infantry, mass troops and artillery
    napoleon - biased towards a mix of light and heavy infantry, light cavalry
    henry - biased towards heavy and light cavalry, missile infantry
    caesar - biased towards heavy infantry, light cavalry, siege artillery


    Delete map.rwm and run the game to make sure your new factions show up. Once everything is ok then go ahead and at at least one character with an army. Add other characters if you want. Open your vanilla descr_strat and use those examples. If you are going to use different names then the name you use HAS to be in descr_names.txt. Use the show_cursorstat feature to pick a spot on the map to place your units.
    Change some of the settlement sizes and buildings too. I want to see a variety of settlement types and sizes on your map. Use the vanilla descr_strat for a reference.

    Once all your factions, armies, and other characters run in the game then we will start using layers to finish ground_types, climates, and features.
    About map_climates, I found a way to separate the land from the water so you have a better reference of where you are on the map without messing up the climates. There are two unused climates in the game, we are going to color the water with one of the unused colors and leave the land that awful pink. Delete or rename your current map_climates and make a copy of map_heights. Set your color in Gimp to 255 242 0 which is one of the unused colors. Change all the water to that yellow, then change all the land to the 236 0 140 pink and save the file as map_climates. Delete map.rwm and run the game to make sure it loads. Your new map_climates.tgs should look like this:
    Spoiler Alert, click show to read: 


    Working with Layers.
    Layers are pretty simple to understand, they are just images stacked on top of one another that you can move up and down. If the top layer is transparent then you can drawn on it, and the layer underneath will show through. When you save the stack is merged giving you a new image. We will be using 3 layers for map_features and map_climates. You can draw the climates and features without using layers, but its much easier to place them on the map this way.
    First make backups of all your map images just in case you screw up, you are too far along now to start over.
    Open map_climates in Gimp. This will be the bottom layer.
    Then click File, Open as Layer and select map_ground_types. This will lay map_ground_types directly on top of map_climates.
    Spoiler Alert, click show to read: 


    Then click Layer, New Layer:
    Spoiler Alert, click show to read: 

    This will give you a window with some options. Make sure that Transparency is checked and that the file size is the same as map_climates:
    Spoiler Alert, click show to read: 

    You now have 3 layers, map_climates on bottom, then map_ground_types, then a transparent layer on top. Save this file as Climates.xcf, this will preserver the layers so you can manipulate them later in case you dont finish this lesson all in one setting:
    Spoiler Alert, click show to read: 

    Now that you have your layers, you need to learn how to switch between them. The top layer, the transparent one, is selected by default, but you can make sure by clicking Layer, Stack. If Select Top Layer is greyed out then you already have the top layer selected:
    Spoiler Alert, click show to read: 

    Clicking Select Next Layer will select map_ground_types, clicking Select Bottom Layer will select map_climates. Whatever layer you have selected is the one you will be drawing on, so always make sure you have the right layer selected.
    Australia has a huge desert, so first we want to draw that in. We will draw that right on the map_climates layer. So click Layer, Stack, and select Layer to Bottom. This puts the transparent layer on the bottom. Note that you still have that layer selected. Then click Layer, Stack, Select Next Layer and layer that one to the bottom too, you should then be looking at map_climates, with map_ground_types on the bottom and the transparent layer in the middle. Always keep in mind where you have the transparent layer. Click Layer, Stack, Select Top Layer to draw on map_climates.

    Spoiler Alert, click show to read: 


    Draw in the desert areas using 102 45 145 sandy_desert. For large areas its best to draw right on map_climates instead of drawing on the transparent layer as we will do later. Save the file as map_climates.tga You will get a warning about Exporting files, click Export and Gimp will flatten the image:
    Spoiler Alert, click show to read: 

    Now you can draw on map_climates all day long and be just fine, but when you want to have specific placement of climates and ground types you need to use the layers. Each of the ground_types has a different look depending on what climate is used. There are examples here:
    http://www.twcenter.net/forums/showthread.php?t=116998

    Once you pick the look you want, you can set the ground_types, then use a transparent layer to draw the climate right on top of it so you get it in exactly the right spot, then merge the layers to get map_climates. When you make changed to the maps_ground_types image, remove that layer from the Climates.xcf file by selecting it then clicking Layer, Delete Layer. Then add in the new map_ground_types by adding it as a layer again. This way you always keep Climates.xcf current. Do the same thing with map_climates.
    Back to our layers, get map_climates on the bottom, map_ground_types in the middle, and a transparent layer on top. On the right side of my map of Australia I have a bunch of forests, but they are in the mediterranean climate and I want to change that to semi arid. I am going to change my color to 0 114 188 and draw on the transparent layer. Since the layer is transparent it looks like I am drawing right on map_ground_types:
    Spoiler Alert, click show to read: 

    I am not going for perfection here as I am trying to demonstrate how the layers work, so I will leave that shape as it is so you can see the results in the game. Once your new climate type is drawn in, selecy the bottom layer which should be map_climates, and raise it.
    Layer, Stack, Select Bottom Layer
    Layer, Stack, Raise Layer
    Spoiler Alert, click show to read: 


    You should get this:
    Spoiler Alert, click show to read: 

    Save that image as map_climates.tga and run the game. This is the result. You can clearly see the differences in climate.
    Spoiler Alert, click show to read: 


    Using this method you can place stuff exactly where you want without guessing. If you stop for the night and start again another time, you can build a new .xcf file by inserting the current files as layers, throw a transparency on top and draw away, or you can save your layers in Climate.xcf and start where you left off.

    I will post features in a few minutes I have some stuff to finish on that too and I have to grab some FOOD!

  2. #2
    Gruver's Avatar Laetus
    Join Date
    Sep 2007
    Location
    Kansas U.S.A.
    Posts
    20

    Default Re: Lesson 3 - Climates and Features using layers

    my roads went away and none of the factions showed up?

  3. #3
    GrnEyedDvl's Avatar Liberalism is a Socially Transmitted Disease
    Artifex Technical Staff

    Join Date
    Jan 2007
    Location
    Denver CO
    Posts
    23,844
    Blog Entries
    10

    Default Re: Lesson 3 - Climates and Features using layers

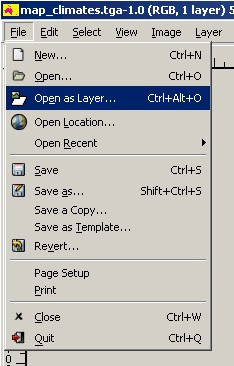
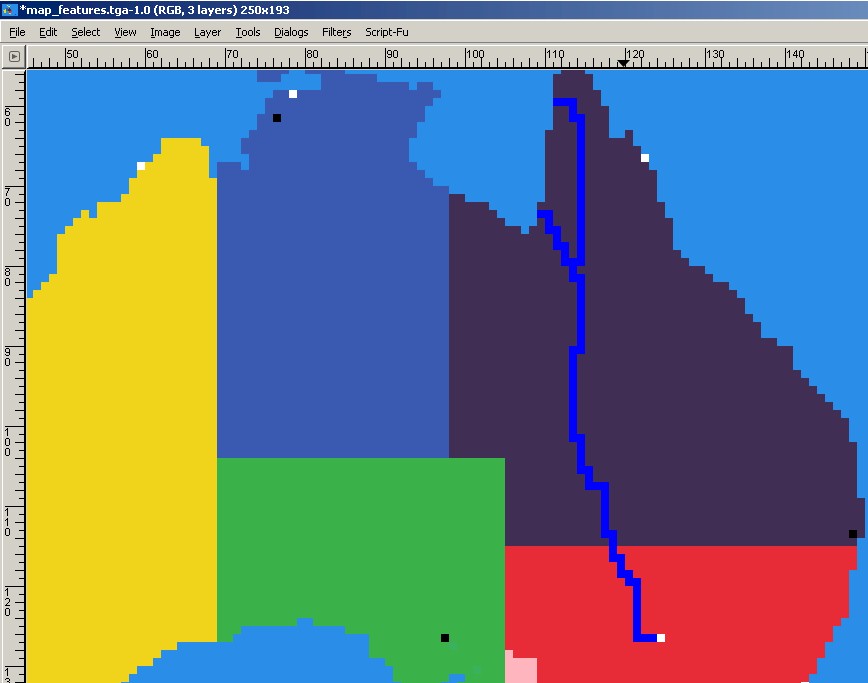
    Part two, sorry its late. Life gets in the way sometimes.

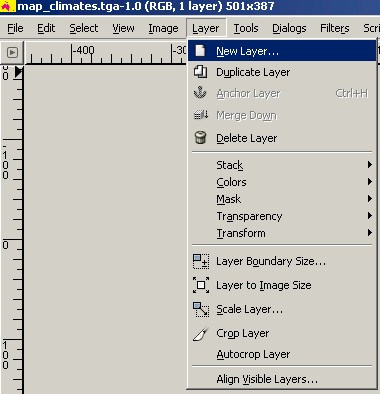
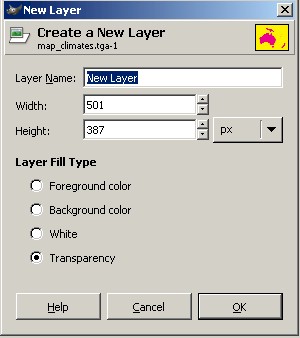
    Features is easier, but its still three layers. Open map_features.tga with Gimp, add map_regions as a layer, and add a transparent layer. You should have black layer that is map_features on the bottom, then map_regions in the middle, and a transparent layer on top. Draw the rivers in blue 0 0 255 and the source in 255 255 255. Rivers have to be drawn in solid lines, no diagonals. You can split rivers like I did here.

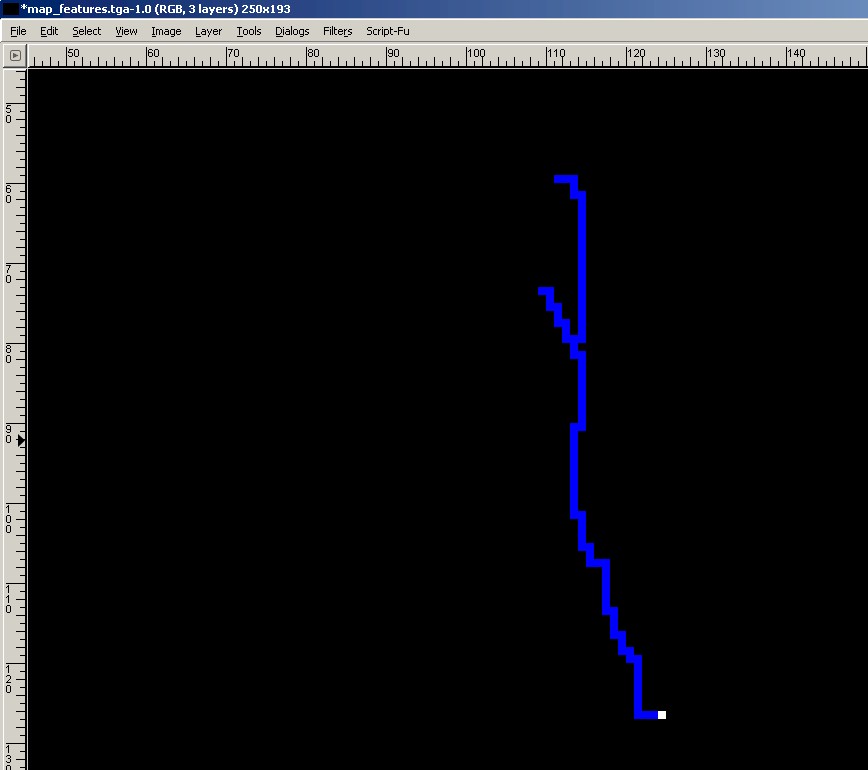
    Draw it right on top of map_regions:
    Spoiler Alert, click show to read: 


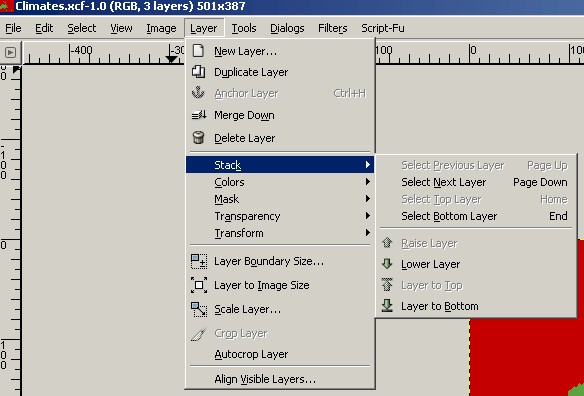
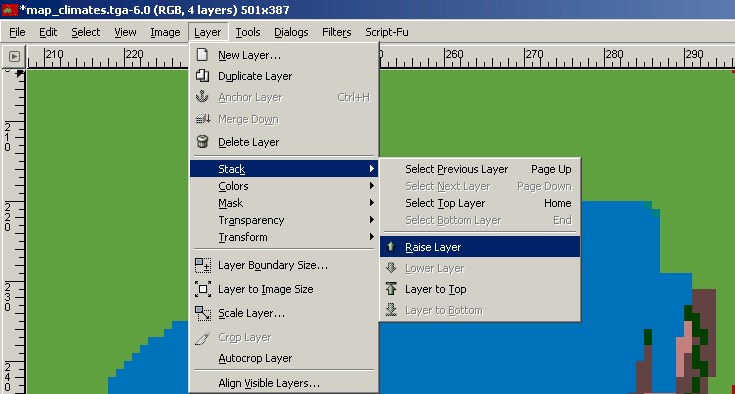
    Then raise map_features:
    Spoiler Alert, click show to read: 


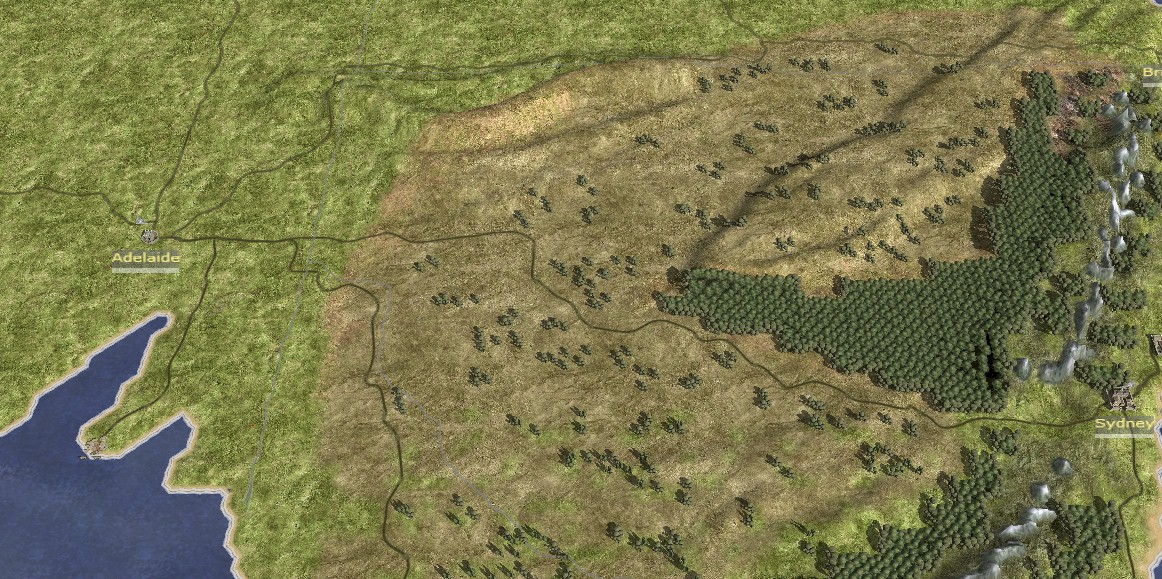
    Save and Export the file as map_features.tga and run the game:
    Spoiler Alert, click show to read: 


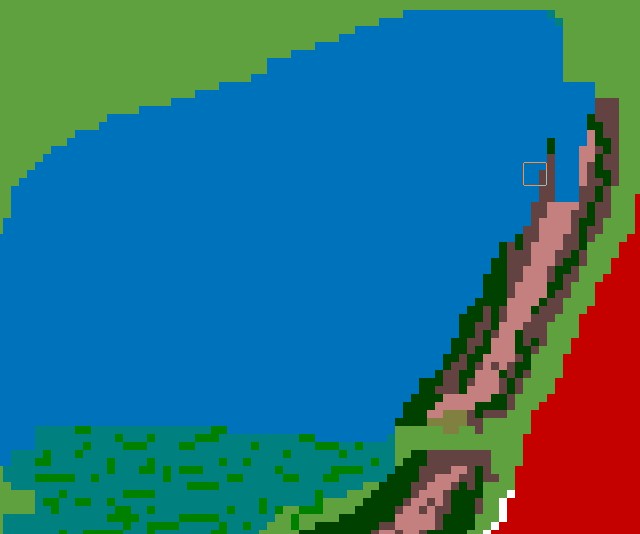
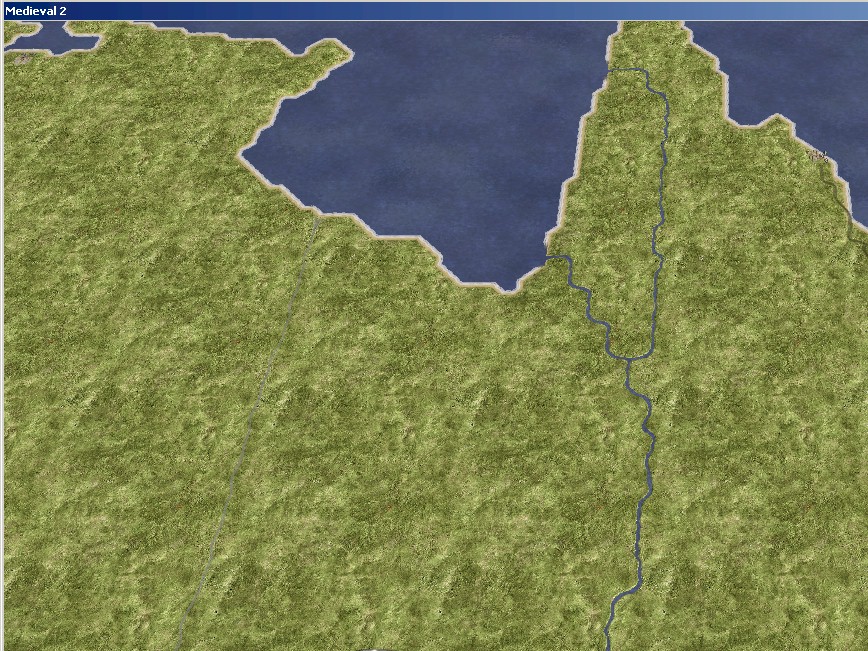
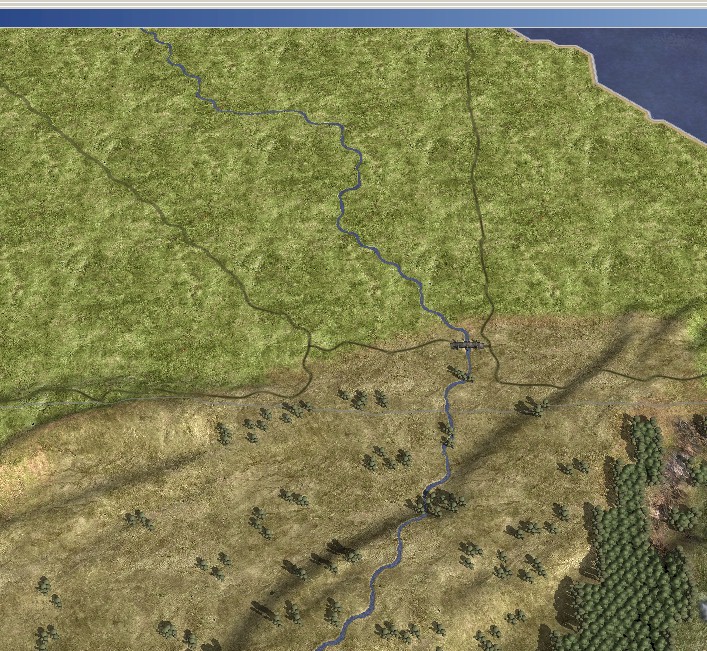
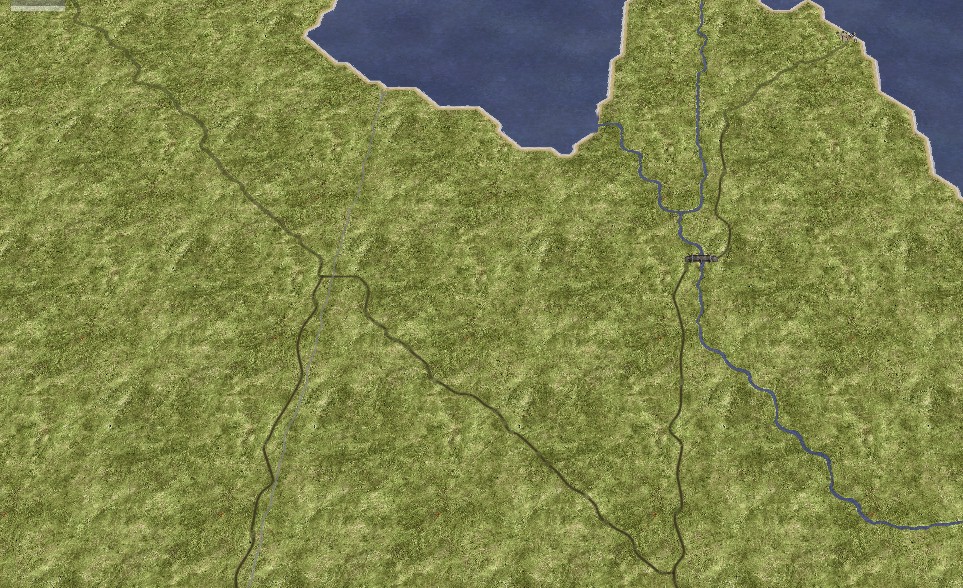
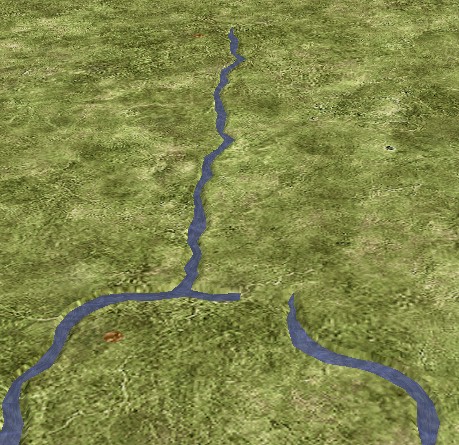
    Notice a few thing here, first the map source isnt quite right, it needs to be on top of that little plateau I made. Then a bit farther north it actually runs uphill. There are two ways to fix that, either edit map_heights so there is a valley where the river flows, or move the river. Third it killed the road from Brisbane ti Adelaide, because we havent added a river crossing yet.

    Spoiler Alert, click show to read: 


    First I am going to move the source to the right a few pixels, then I am going to route the river around that little hill. You can do that by selecting the top layer and blacking out the parts that arent right and drawing the new ones in. No need to switch layers for this. I am not trying to be totally accurate here or I would adjust map_heights, instead I am just going to move the river.

    Spoiler Alert, click show to read: 


    Spoiler Alert, click show to read: 


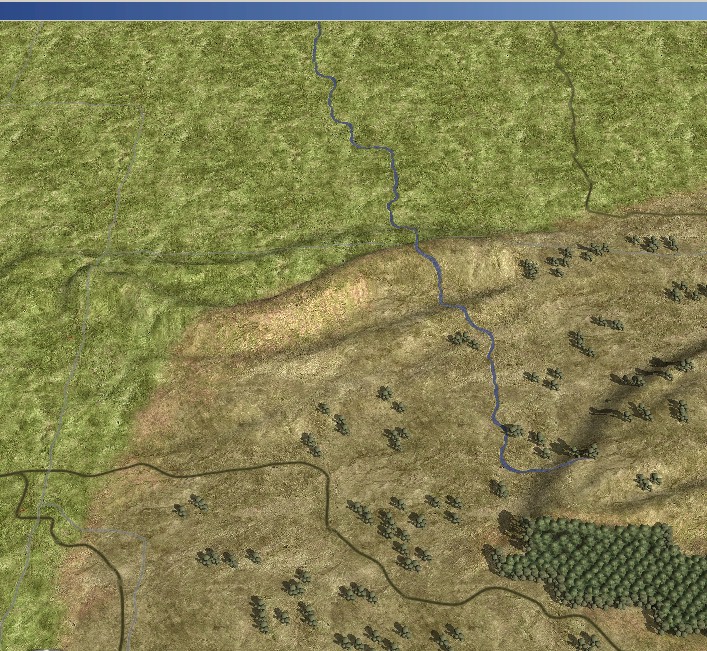
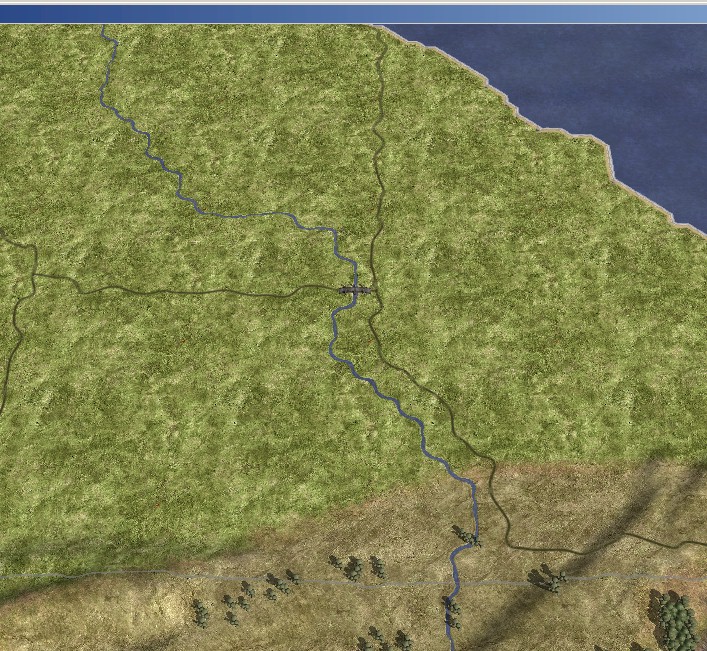
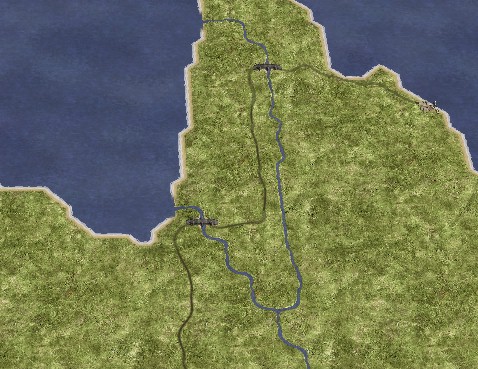
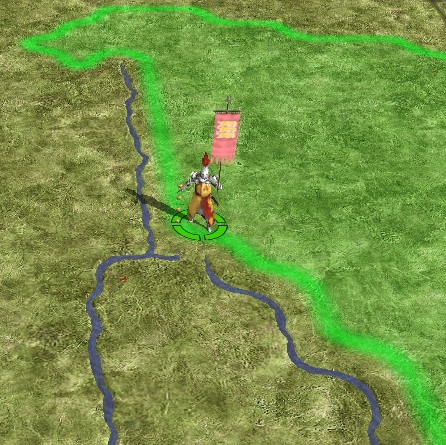
    Now that I have no more problems with the river running uphill, I can add a crossing point. I want it as close as I can get to where the road is right now. The way I keep track of where I am on the river is by counting the curves from the source and then putting the crossing as close as I can get to that. The color for a crossing is 0 255 255. Note that this is another method of controlling where the roads go. I place my crossing in two different spots to show this:

    Spoiler Alert, click show to read: 


    Spoiler Alert, click show to read: 


    That road that goes off to the left and up goes to Darwin, but we want that road to go to the port in the upper right hand corner.

    Spoiler Alert, click show to read: 


    First I will add a crossing just below the fork in the river.

    Spoiler Alert, click show to read: 


    Spoiler Alert, click show to read: 


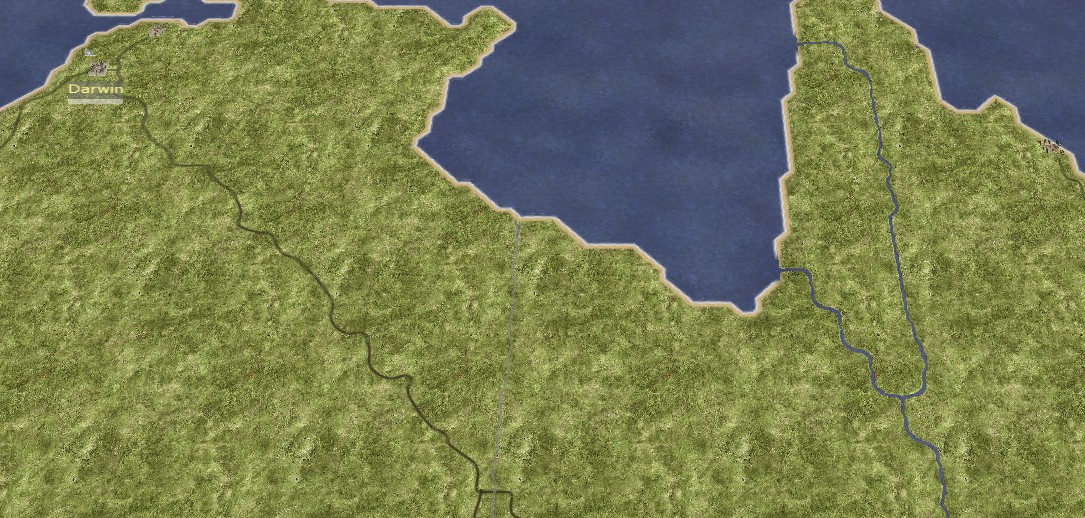
    Well that worked, but the road looks goofy now, so I will move the crossing and add two, one for each section of the river.

    Spoiler Alert, click show to read: 


    Spoiler Alert, click show to read: 


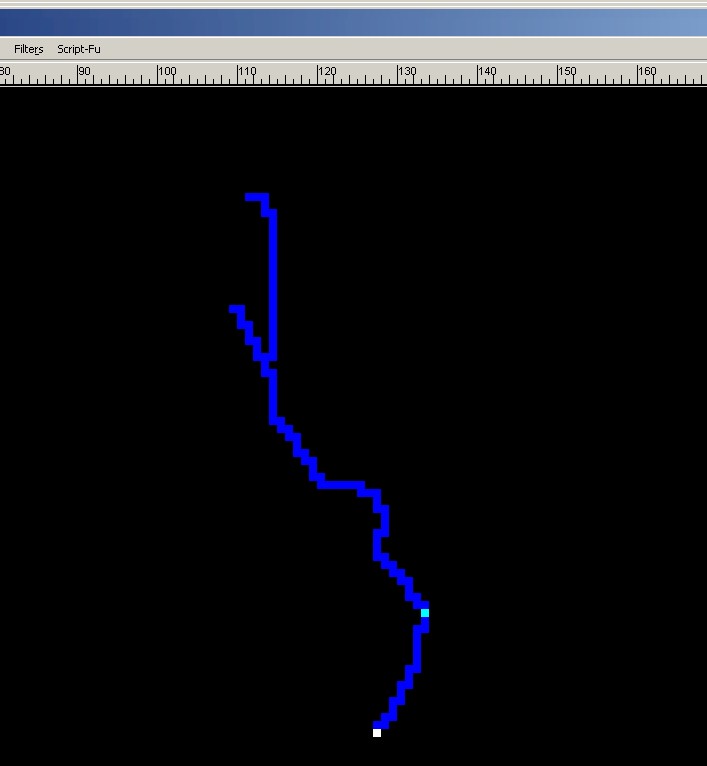
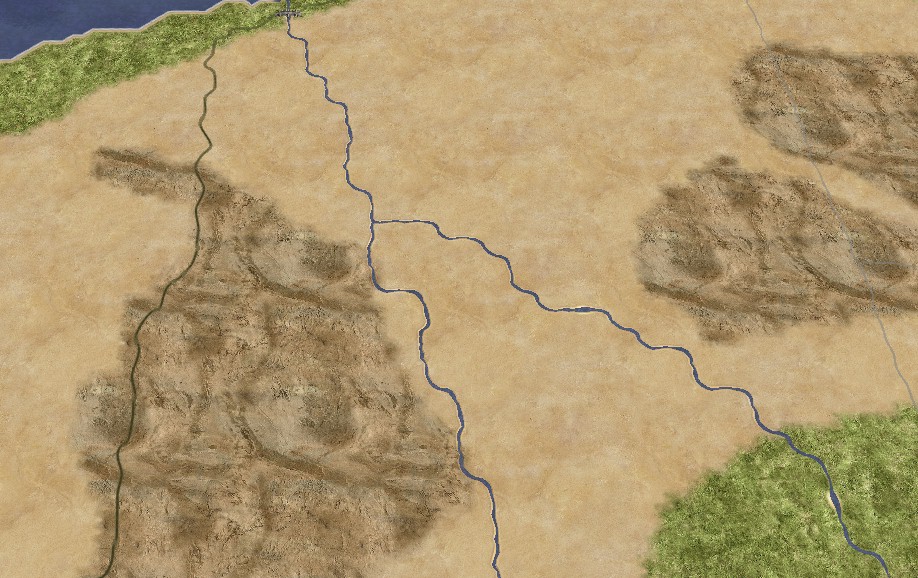
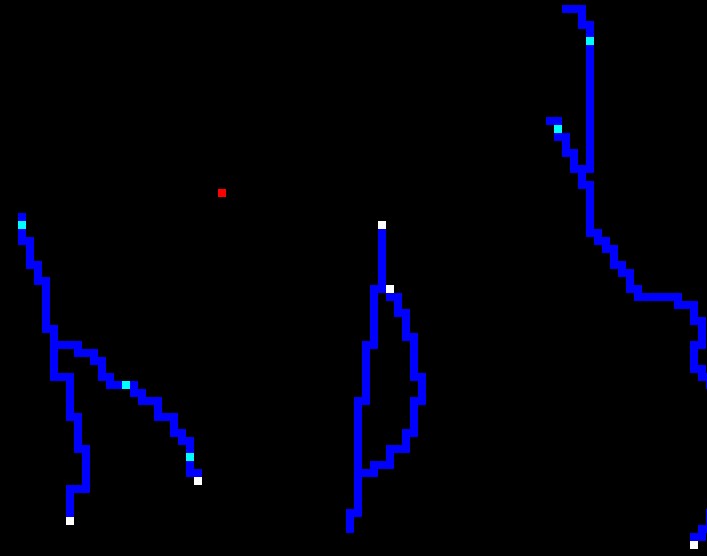
    You can also merge two rivers by having two sources and one end point as in the river on the left. I need to move one of them off my rocky area because I plan on elevating that later, and I need to add a few crossings, but you get the idea.

    Spoiler Alert, click show to read: 


    Spoiler Alert, click show to read: 


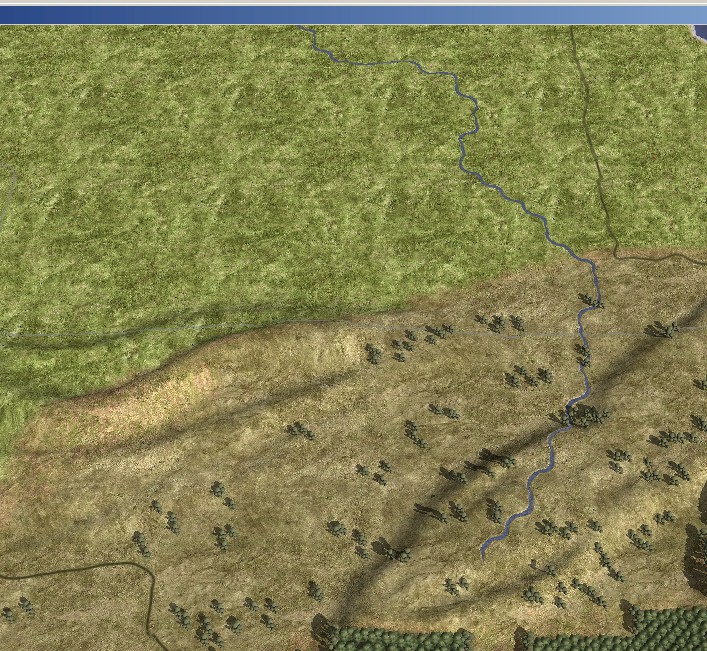
    River moved with crossings added in. The crossing in the north moved the road back, but if you look closely there are two other crossings on the right hand river. Roads dont go over these, but armies can cross them and they will show up in the battle map as a ford.

    Spoiler Alert, click show to read: 


    Spoiler Alert, click show to read: 


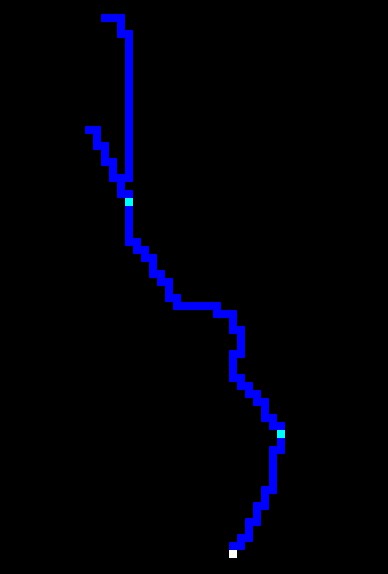
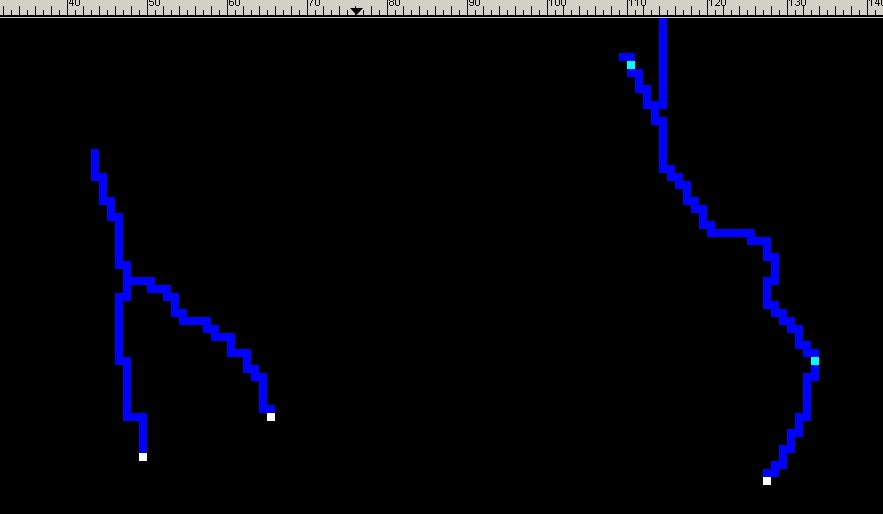
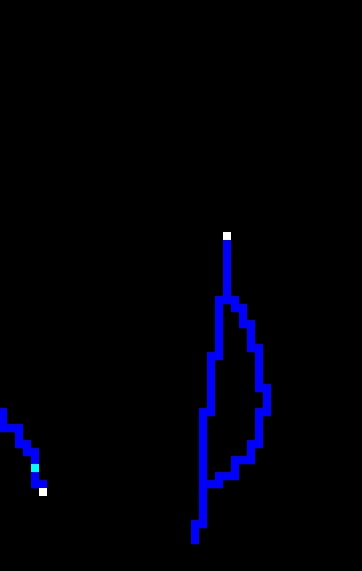
    One thing you CANT do is split a river and then merge it later like this:

    Spoiler Alert, click show to read: 


    This will give you a CTD and an unspecified error message in your log:

    18:31:09.683 [system.rpt] [error] Medieval 2: Total War encountered an unspecified error and will now exit.


    What you can do is add another source like this:

    Spoiler Alert, click show to read: 


    Spoiler Alert, click show to read: 


    This isnt perfect but its close, it leaves a little space in the game:
    Spoiler Alert, click show to read: 


    But characters cant pass through it:

    Spoiler Alert, click show to read: 


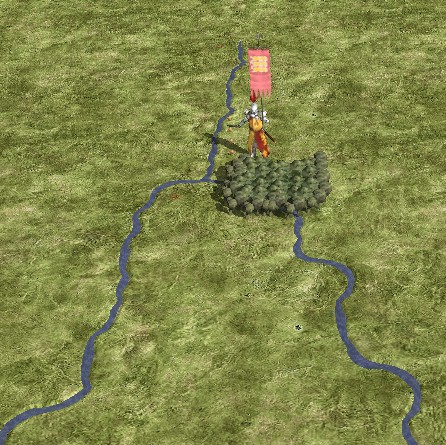
    If that little space bothers you, then disguise it with something, I used dense_forest:

    Spoiler Alert, click show to read: 


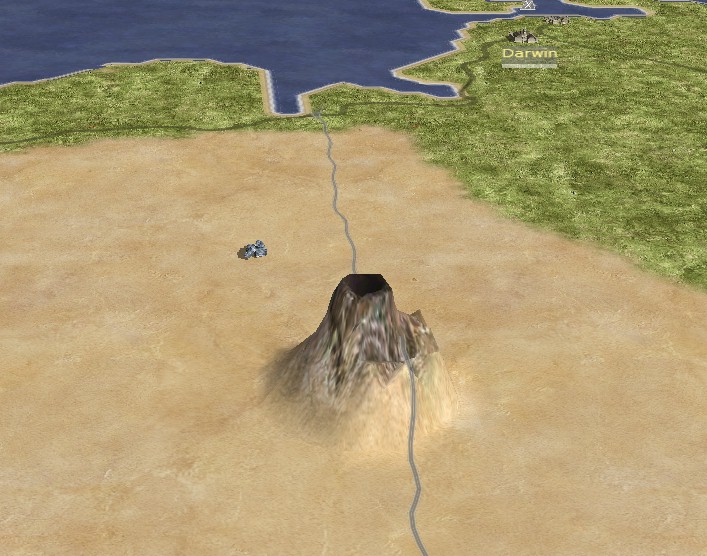
    Volcanoes can be added by placing a single pixel of red 255 0 0 on the map. After you have it where you want it you will need to adjust map_heights so it looks good.
    Spoiler Alert, click show to read: 


    Spoiler Alert, click show to read: 


    Spoiler Alert, click show to read: 


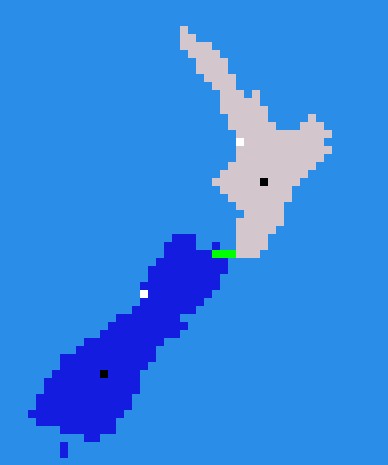
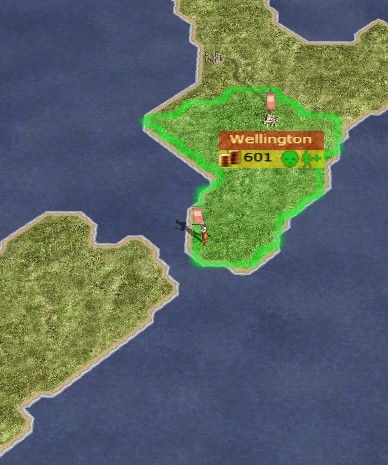
    Landbridges are easy. A green color 0 255 0, draw a straight line between the two pieces of land you want to connect. Do this with map_regions visible then raise map_features again.

    Spoiler Alert, click show to read: 


    Spoiler Alert, click show to read: 


    Before Land Bridge inserted:
    Spoiler Alert, click show to read: 


    After Land Bridge inserted:
    Spoiler Alert, click show to read: 


    A few more things about land bridges. They have to be straight, and keep them as short as possible. If you make them too long your characters wont be able to cross them if they run out of movement points.


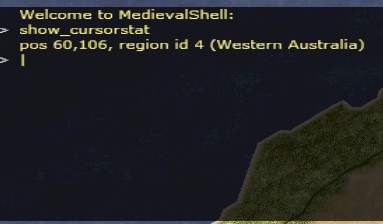
    Once you have your map the way you want it, the last thing to do is place resources and fine tune the starting points for your armies. Place your cursor on the map, bring up the console and type show_cursorstat:

    Spoiler Alert, click show to read: 


    Then edit descr_strat to put your resource on that location. I have commented out the resources in the MapClass files so you need to remove the semicolon and change the X Y coordinates. I stuck two lumps of coal on mine:

    Spoiler Alert, click show to read: 


    That concludes the course lessons. I am sure many of you will have questions especially with the layers, and I will be here to help you with any problems. The rest is up to you, maps are in the details so be picky about how you place stuff and they will look great. Over the course of the next week I will be doing some fine tuning to a few map projects I am working on and will post some screen shots to give you some other ideas about how to mix heights, types, climates, and features.

    To earn your University Degree your map does not have to be completely finished, I know some of you are working on huge maps that you plan to use in a mod and it will take more than a couple of weeks to finish them. This is what I will want to see:

    Minimum of 10 regions
    Minimum of 4 factions
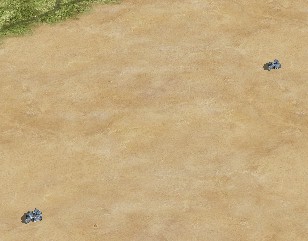
    A few armies scattered about
    A variety of settlement sizes and types and buildings
    Roads that make sense
    Coasts that are smoothed
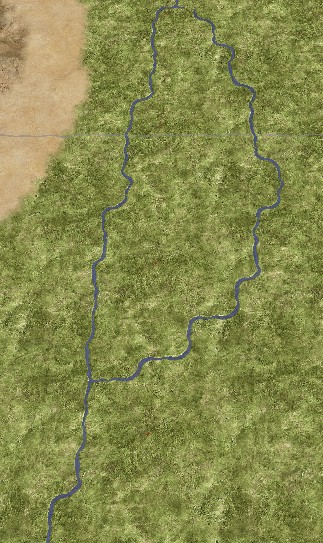
    Rivers that flow well
    Several resources on the map
    At least 3 sections of the map that have heights, ground_types, climates and features that look good together. These can be islands or portions of the mainland whichever you prefer.

    I have also come up with a halfway decent method of doing the radar/mini maps that I will post as a bonus lesson later this week. Its not required that you complete the bonus lesson to earn your University Degree, but I thought you guys would be interested.
    Last edited by GrnEyedDvl; October 05, 2007 at 09:11 PM. Reason: Typonese

  4. #4
    GrnEyedDvl's Avatar Liberalism is a Socially Transmitted Disease
    Artifex Technical Staff

    Join Date
    Jan 2007
    Location
    Denver CO
    Posts
    23,844
    Blog Entries
    10

    Default Re: Lesson 3 - Climates and Features using layers

    Quote Originally Posted by Gruver View Post
    my roads went away and none of the factions showed up?
    You made an error someplace when you changed descr_strat. If you cant find it remove the changes and try again. If that still doesnt get it then post your descr_strat and I will look at it.

  5. #5
    Roman Knight's Avatar Campidoctor
    Join Date
    Sep 2007
    Location
    Melbourne, Australia
    Posts
    1,815

    Default Re: Lesson 3 - Climates and Features using layers

    Not important, but I noticed every Vanilla faction is balanced smith.

  6. #6
    Gruver's Avatar Laetus
    Join Date
    Sep 2007
    Location
    Kansas U.S.A.
    Posts
    20

    Default Re: Lesson 3 - Climates and Features using layers

    O.K. got my roads back. { sneaky little things. anyway my added factions still don't show up and I can't find any more errors.

  7. #7
    GrnEyedDvl's Avatar Liberalism is a Socially Transmitted Disease
    Artifex Technical Staff

    Join Date
    Jan 2007
    Location
    Denver CO
    Posts
    23,844
    Blog Entries
    10

    Default Re: Lesson 3 - Climates and Features using layers

    Yeah Roman I dont know if they did that for a reason or just because they are lazy.

    Gruver, those will get you every time lol

    Did you add a settlement for each faction you added?

  8. #8
    Nevada's Avatar Domesticus
    Join Date
    Jun 2007
    Location
    Bavaria
    Posts
    2,197

    Default Re: Lesson 3 - Climates and Features using layers

    do i need a starting army for every faction i include?
    or runs the game also when i give them just a settlement?


  9. #9
    GrnEyedDvl's Avatar Liberalism is a Socially Transmitted Disease
    Artifex Technical Staff

    Join Date
    Jan 2007
    Location
    Denver CO
    Posts
    23,844
    Blog Entries
    10

    Default Re: Lesson 3 - Climates and Features using layers

    You can just run the game when you give them a settlement to make sure they faction spawns ok. Once you see that they actually own the settlement click end turn and their symbol should now show up at the top as the AI cycles through.

    Then you need to give them an army so they dont die on the first turn. Basically I just want you familiar with how to place characters/armies on the map once its created.

  10. #10
    Nevada's Avatar Domesticus
    Join Date
    Jun 2007
    Location
    Bavaria
    Posts
    2,197

    Default Re: Lesson 3 - Climates and Features using layers

    ok, i added venice, HRE, spain and france. i gave them armies and the map works.
    even when my heights look a little bit blocky.

    edit: i created the 3 layers, but i can't change between them!
    Last edited by Nevada; October 06, 2007 at 05:10 AM.


  11. #11
    GrnEyedDvl's Avatar Liberalism is a Socially Transmitted Disease
    Artifex Technical Staff

    Join Date
    Jan 2007
    Location
    Denver CO
    Posts
    23,844
    Blog Entries
    10

    Default Re: Lesson 3 - Climates and Features using layers

    You can lol you just have to know where each layer is, it took me a while to get used to it too. Try using two layers and swapping them back and forth for practice before you add the third.

  12. #12
    Gruver's Avatar Laetus
    Join Date
    Sep 2007
    Location
    Kansas U.S.A.
    Posts
    20

    Default Re: Lesson 3 - Climates and Features using layers

    O.K. I can't find what's wrong. Here is my descr_strat. I'm listing the factions only.

    faction england, balanced smith
    ai_label catholic
    denari 10000
    denari_kings_purse 2500
    settlement
    {
    level village
    region New_Guinea

    year_founded 0
    population 800
    plan_set default_set
    faction_creator aztecs
    building
    {
    type hinterland_roads roads
    }
    }

    character William, named character, male, leader, age 50, x 109, y 147
    traits Factionleader 1 , GoodCommander 1 , Intelligent 2 , VictorVirtue 3 , PublicFaith 2 , BattleDread 2 , StrategyDread 2 , ReligionStarter 1
    army
    unit NE Bodyguard exp 1 armour 0 weapon_lvl 0


    faction france, balanced smith
    ai_label catholic
    denari 8000
    denari_kings_purse 1500
    settlement
    {
    level town
    region North_Island

    year_founded 0
    population 2000
    plan_set default_set
    faction_creator england
    building
    {
    type core_building wooden_pallisade
    }
    building
    {
    type hinterland_roads roads
    }
    }

    settlement castle
    {
    level village
    region South_Island

    year_founded 0
    population 1000
    plan_set default_set
    faction_creator england
    building
    {
    type core_castle_building wooden_castle
    }
    building
    {
    type hinterland_roads roads
    }
    }

    faction hre, balanced smith
    ai_label catholic
    denari 6000
    denari_kings_purse 1500
    settlement
    {
    level village
    region Tasmania

    year_founded 0
    population 700
    plan_set default_set
    faction_creator england
    building
    {
    type hinterland_roads roads
    }
    }

    settlement castle
    {
    level village
    region Victoria

    year_founded 0
    population 800
    plan_set default_set
    faction_creator russia
    building
    {
    type core_castle_building motte_and_bailey
    }
    building
    {
    type hinterland_roads roads
    }
    }

    faction spain, balanced smith
    ai_label catholic
    denari 9000
    denari_kings_purse 2500
    settlement
    {
    level city
    region New_South_Wales

    year_founded 0
    population 4000
    plan_set default_set
    faction_creator russia
    building
    {
    type core_building stone_wall
    }
    building
    {
    type barracks town_guard
    }
    building
    {
    type market corn_exchange
    }
    building
    {
    type temple_orthodox small_church_o
    }
    building
    {
    type hinterland_roads roads
    }
    }

    faction slave, balanced smith
    ai_label slave_faction
    denari 5000
    denari_kings_purse 500
    settlement
    {
    level town
    region Western_Australia

    year_founded 0
    population 2500
    plan_set default_set
    faction_creator russia
    building
    {
    type core_building wooden_pallisade
    }
    building
    {
    type hinterland_roads roads
    }
    }

    settlement castle
    {
    level village
    region Queensland

    year_founded 0
    population 1300
    plan_set default_set
    faction_creator russia
    building
    {
    type core_castle_building motte_and_bailey
    }
    building
    {
    type hinterland_roads roads
    }
    }

    settlement
    {
    level village
    region Northern_Territory

    year_founded 0
    population 800
    plan_set default_set
    faction_creator russia
    building
    {
    type hinterland_roads roads
    }
    }

    settlement
    {
    level large_town
    region South_Australia

    year_founded 0
    population 3800
    plan_set default_set
    faction_creator denmark
    building
    {
    type core_building wooden_wall
    }
    building
    {
    type barracks town_watch
    }
    building
    {
    type port port
    }
    building
    {
    type market corn_exchange
    }
    building
    {
    type hinterland_roads roads
    }
    building
    {
    type city_hall town_hall
    }
    }

  13. #13
    GrnEyedDvl's Avatar Liberalism is a Socially Transmitted Disease
    Artifex Technical Staff

    Join Date
    Jan 2007
    Location
    Denver CO
    Posts
    23,844
    Blog Entries
    10

    Default Re: Lesson 3 - Climates and Features using layers

    I am not seeing it either. Is there nothing in your error log?

    I think if I was you I would make all the settlements look like new_guinea, then start changing buildings one at a time. When it fails to load right you know exactly where its at.

    If you have a building listed that has a requirement in the EDB of another building, and you didnt include that building as well, it will cause issues. Also make sure your populations are right for the size of wall.

    Example: Say you have port in descr_strat, but port has a requirement of stone_wall, and stone_wall isnt listed in descr_strat, then you will have issues.

  14. #14
    Nevada's Avatar Domesticus
    Join Date
    Jun 2007
    Location
    Bavaria
    Posts
    2,197

    Default Re: Lesson 3 - Climates and Features using layers

    it doesn't even work with 2, that's my problem.
    i can't switch between them.
    i click lowest layer, the same layer stays there and it's the other way round, too
    Last edited by Nevada; October 06, 2007 at 03:48 PM.


  15. #15
    GrnEyedDvl's Avatar Liberalism is a Socially Transmitted Disease
    Artifex Technical Staff

    Join Date
    Jan 2007
    Location
    Denver CO
    Posts
    23,844
    Blog Entries
    10

    Default Re: Lesson 3 - Climates and Features using layers

    hm I dunno. You cant raise or lower either one? Reinstall gimp maybe.

  16. #16
    Gruver's Avatar Laetus
    Join Date
    Sep 2007
    Location
    Kansas U.S.A.
    Posts
    20

    Default Re: Lesson 3 - Climates and Features using layers

    O.K. I found out that my added factions were dieing before the turn started. So I added a unit and that seems to be doing the trick.

  17. #17
    Nevada's Avatar Domesticus
    Join Date
    Jun 2007
    Location
    Bavaria
    Posts
    2,197

    Default Re: Lesson 3 - Climates and Features using layers

    ok, i'll do that.

    edit: i reinstalled and tested it with 2 layers of a different size.
    it changes the layers, but the second one is always upon it.
    Last edited by Nevada; October 07, 2007 at 04:22 AM.


  18. #18
    GrnEyedDvl's Avatar Liberalism is a Socially Transmitted Disease
    Artifex Technical Staff

    Join Date
    Jan 2007
    Location
    Denver CO
    Posts
    23,844
    Blog Entries
    10

    Default Re: Lesson 3 - Climates and Features using layers

    Might be something to do with an alpha channel, I had it give me an error about that once but dont remember exactly what it said.

    Do it this way, open map_ground_types and put a transparent on top of it, draw your new stuff on the transparent layer, then open as layer map_climates and see if it will let you lower.

  19. #19
    Nevada's Avatar Domesticus
    Join Date
    Jun 2007
    Location
    Bavaria
    Posts
    2,197

    Default Re: Lesson 3 - Climates and Features using layers

    how did you fix the alpha channel error?
    ok, i'll try that...


  20. #20
    Gruver's Avatar Laetus
    Join Date
    Sep 2007
    Location
    Kansas U.S.A.
    Posts
    20

    Default Re: Lesson 3 - Climates and Features using layers

    O.K. doing what you said with gimp and I'm not transparent and I only have two layers as far as I can tell

Page 1 of 3 123 LastLast

Posting Permissions

  • You may not post new threads
  • You may not post replies
  • You may not post attachments
  • You may not edit your posts
  •