Isnt that a good thing?Originally Posted by Petrov

We dont whant it to end NO?


Isnt that a good thing?
I sure don't!
i think you will find hes playing the way alot of us like to play. Which is liberating where possible, and gifting regions to other nations.
Few people find it enjoyable to just steam roll the map and occupy every region. I like to liberate, and keep a wide mix of nations and powers on the map
just how I wold like to play the game if I ever gett it


")
")

")
")
Yeah, I prefer to take things slow, anyway this update and the next are quite interesting.
_____________________
In reference to: http://www.twcenter.net/forums/showthread.php?t=337275
New Update
LIBERATION
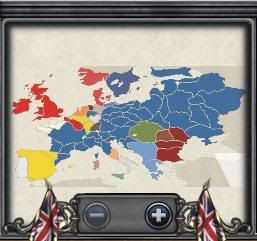
Europe in mid December 1811
December 1811 - Part 35 – Moncey’s Horsemen
John Moore lay dead on the fields of Paris and George Townshend Walker, said to be the protector of Reims for many months has also fallen on the outskirts of Paris. The Garrison of Reims was lacking a leader, although it was no long until Geerard Ouwater, the Belgian General who was replaced by Walker after a devastating defeat in the woodlands close to Reims had returned from Brussels to the frontline into active service yet again.
As Bon-Adrien Jeannot de Moncey and his army, who had already caused so much suffering and disappointment for the British approached the city, Ouwater managed to get inside the Fort to mobilise the garrison to fight against Moncey once more in North-West Europe.
- The Siege of Reims Part II 1811
It was a chance for Ouwater to redeem himself after his disaster earlier in the year, he awaited Moncey's army as it approached from the southern roads.
Spoiler Alert, click show to read:
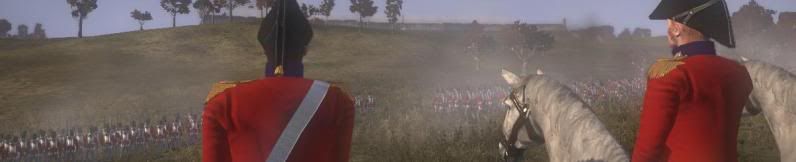
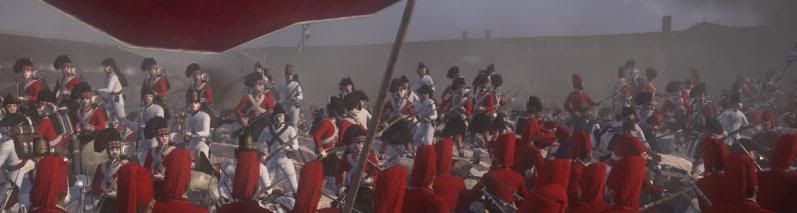
Armed Citizenry from Ouwater’s tall fort walls started the battle as they bombarded Moncey’s army, which was strangely primarily composed of Cavalry. Moncey was clearly far too confident and perhaps even arrogant after his recent victories as he did not make the order for his army to move due to his superior numbers, despite the British cannon fire. It was not long until a line was formed from Ouwater’s army, as Moncey’s infantry did the same in return. Ouwater’s men held their ground waiting for whatever the French Marshal may throw at them as they were continuously battered by the fort’s cannons.
Moncey looks upon the fort of Reims
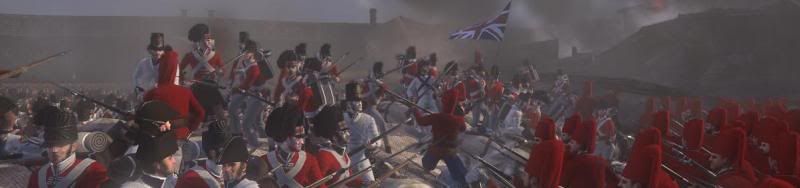
Eventually, Moncey started to use his cavalry to strike fear into Ouwater’s men and suddenly he ordered two massive cavalry charges to take place on both flanks of the British garrison force. Dragoons, Hussars and Cuirassiers charged both right and left with tremendous agility and endurance. Geerard quickly recognised the threat that the French Cavalry provided, and quickly ordered the two Highlander Foot Regiments to form squares in order to oppose Moncey’s Horsemen.
The French Cavalry charged both flanks several times despite the heavy musket fire, they were not fearful as they continued to smash through the British lines, each time retreating, turning and galloping towards the British squares for a devastating attack. However, the French Cavalry were slowly broken down as Geerard Ouwater’s Highlanders withheld the attacks, firing upon what was left of Moncey’s Cavalry as they fled the field.
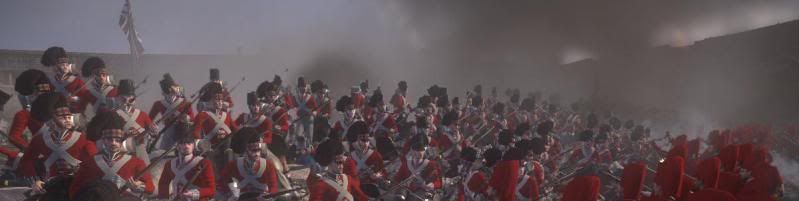
With the Cavalry dealt with, The British Army advanced forward towards Moncey’s infantry, without the protection from their cavalry, the French lines were left opened on the flanks with several regiments from Ouwater’s army opening fire on the right flank as they were being distracted by continuous fire from light infantry rifles in nearby woodlands.
The British Infantry kept their fire rate steady, and eventually Moncey and the remainder of his army retreated, unable to occupy Reims due to the work and skill of Ouwater and his men.
Moncey and his army flee
Bon-Adrien Jeannot de Moncey had been defeated, and returned back to Paris. Geerard Ouwater had proved himself as a capable commander and leads the forces of Belgium and Britain in Reims.
December 1811 - Part 36 – The Heroes of Hungary
Ferdinand Ernst Gabriel has expanded from Greece through the Balkans after the fierce Battle in Belgrade. He has moved further north towards Hungary, where much of Napoleon’s southern Regiments have fled in order to protect the former capital of the Austrian Empire, Vienna.
After gathering arms, supplies and resources in Belgrade, Gabriel and his army advanced towards Budapest in final days of 1811 with the aim of ending the year with a marvellous accomplishment. Instead of being overshadowed by the defeats to the West in Paris and the deaths of several British Generals.
- The Battle of Budapest 1811
Shortly after leaving Belgrade, only a few days later he arrived outside Budapest, besieging what was left of France's last line of defence before Vienna in order to Gabriel and his Greek allies.
Spoiler Alert, click show to read:
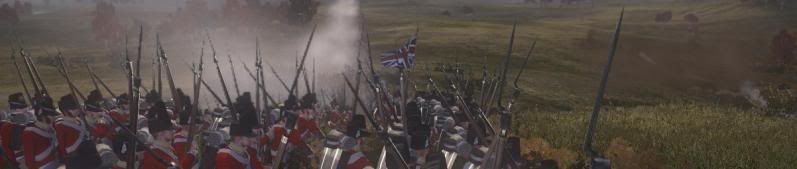
Two lines formed on either side of the eastern road outside the city of Budapest, a traditional battle scene was set. Both lines slowly advanced towards each other as Gabriel’s Artillery fired upon their French foes. French Hussars Charged the British right flank, galloping down a nearby hill, shattering a unit of British line infantry, leaving little less than half of their original strength. They were eventually annihilated however as British Dragoons from the rear were brought in to support.The Swiss Grenadiers were the first of the French army to meet the British lines shortly followed by several regiments of Line Infantry.
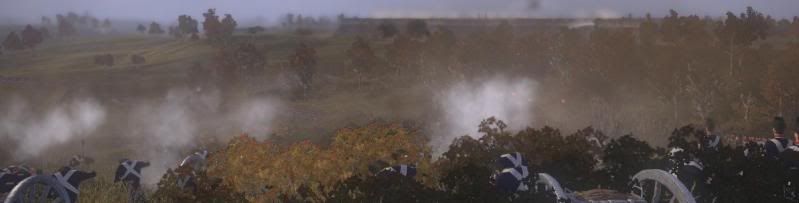
The huge line battle ensued; musket smoke shadowed the Hungarians fields with the occasional muzzle flash of musket fire. The Smoke could be seen for several miles as the both the British and French managed to hold their ground with volley after volley fired again and again.
Eventually the French were beginning to weaken without their artillery support and Gabriel’s artillery were constantly shattering the French army, demoralising their line as cannon shots and explosions hit their lines. It was only a matter of time before they started to flee with those of the least experience to the left flank fleeing as British Dragoons drove them off field. Shortly afterwards, the rest of the French Army began to retreat with several bodies overflowing the eastern road as Gabriel’s army advanced forward.
The Lines
Budapest was occupied by Ferdinand Ernst Gabriel, and yet another state was now free from Napoleon. The German General is proving himself to be quite the leader as he liberated the Kingdom of Hungary, arising from years of oppression.
With the Kingdom of Hungary now liberated, free from Napoleon’s grand empire and his men. Ferdinand Ernst Gabriel and his army are now within sight of Vienna, the capital of the former Austrian Empire before their collapse in 1808. Only days after the Liberation at Budapest, he moved west towards Vienna, besieging the capital in late December with hopes of reviving the Austrians, key friends of the United Kingdom. Meanwhile, the Belgians have managed to take Strasbourg from the French themselves, with Wellington arriving after a long rest in Stuttgart. A perfect end to 1811
To be continued.
Last edited by LuckyLewis; April 06, 2010 at 06:02 PM.
Muh signature is so out of date all muh pictures died.
ahahahhahahaaahaha thats not what i meant LoL, Just saying by the time this ends the new TW woulda been announced and maybe just about to com out! But who said it WASN'T a good thing?
Great as allways and keep Ferdinand Ernst Gabriel safe I think he could become the Wellington of the East, if I may you should make more stacks to help Wellington and Gabriel if you can, play like the AI with a biger army
Haha, na I must have missunderstod you then
@LuckyLewis
Good as always
Question: Do the units place themselfs in sutch straight lines often(vanilla game) or are you using some kinda mod?
I would but I don't want to concentrate on too many characters in the AAR or make it too easy for myself.
I saw it occasionally in Vanilla but with Luntik Battle AI mod, the AI seems to form them much more often.
Thanks chaps.
Lewis.
Muh signature is so out of date all muh pictures died.
Something interesting in second half of the update
___________________
In reference to: http://www.twcenter.net/forums/showthread.php?t=337275
New Update
LIBERATION
Europe at the end of December 1811
January 1812 - Part 37 The Walls of Vienna
With Ferdinands liberation of the Greeks, Balkans and Hungarians, one could say the final months of 1811 were great for the British war effort. However, the last few months have also shown great despair and desperate times in the west with severe casualties including the two leaders claimed in the Paris siege, John Moore and George Townshend Walker.
It is now 1812, two years since the Duke of Wellington first stepped on the European mainland, liberating the Belgians and Dutch. We have made much progress with our new friends but the threat still remains, and it is certainly still a large one.
Ferdinand Ernst Gabriel besieged the city of Vienna in final days of 1811 after his liberation of Hungary. Gabriel has the ambition and skill to take the city with his strong experienced army with hopes of re-establishing the Austrian Empire once more, producing yet another ally against Napoleons Empire. In January 1812, Gabriel started his assault on Vienna.
- The Battle of Vienna 1812
1812 started with the Battle of Vienna, the capital of the former glorified Empire of the Austrians, Ferdinand Ernst Gabriel quickly deployed his troops on the eastern hilltops and the battle began.
Spoiler Alert, click show to read:
Like most of Ferdinand Ernst Gabriels battles, Vienna started with a bombardment of cannons from his artillery regiments. This time however, his men did not advance. Gabriel concentrated his artillery onto a section of the grand walls of the former Austrian Capital towards the right with hopes of breaching it. An artillery battle occurred with French Cannons from the Fort walls pounding the British lines, as they anxiously awaited for Gabriels order to advance towards the French fort.
Eventually, the walls fell with a cloud of rubble and dust, the French Position was no longer as strong as they rushed regiments to meet the British forces, who started to advance upon sight of the breach. The British Army sprinted towards the gap with several regiments climbing up the now weakly defended walls on all sides of the Fort.
The French were already weakened from their defeats further south by Gabriels men and their army was nothing in comparison to Gabriels disciplined force. French Militia rushed out of the breach as artillery from both sides focused on the breach. A massive melee battle occurred in the thick smoke and fire with heavy roars, screams and shouts from both sides as the French Garrison attempted to hold back the British force.
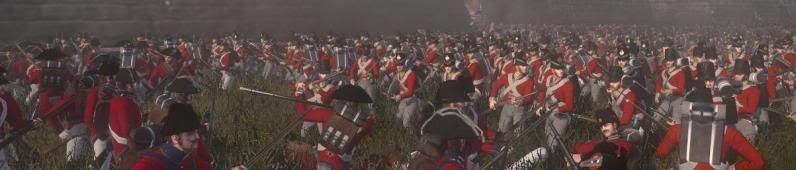
Meanwhile, several regiments of Foot had climbed the tall walls of Vienna, and were now right behind the French forces, opening fire into the backs of their foes. It was not long until the soldiers from the French flanks and rear were directly behind them in close proximity, they were surrounded.
The British surround the French Garrison
In the shock and panic of the battle, the French Garrison started to flee but did not realise they had nowhere to flee. French Grenadiers were brought down as they fled alongside the inexperienced armed citizenry and militia. They could not retreat to no safe haven, and the French army was massacred in Vienna. Many bodies, French, British and Austrian Mercenaries laid dead in the breach of the Fort of Vienna as the heavy smoke raised far above the walls.
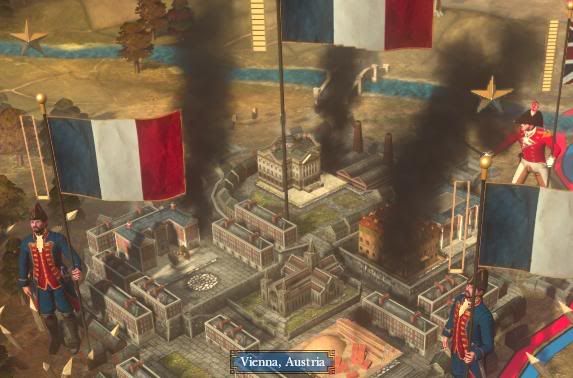
The Aftermath in the breach
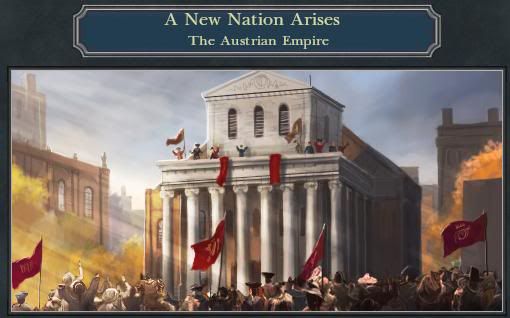
The French Army was defeated, Ferdinand Ernst Gabriel was victorious. The Austrian Empire rose up from their oppressive state after the liberation of Vienna; the city was free after 4 dreadful years of Napoleonic rule. The Austrian Empire had returned.
January 1812 - Part 38 A Surprise in Scotland
Since the destruction of an Ottoman Army last year in Athens, everyone in the British Isles expected the Ottoman Empire to be at the start of their end. They have remained quiet in Istanbul for several months after the loss of their Greek territories and no one would have expected them to do such a thing.
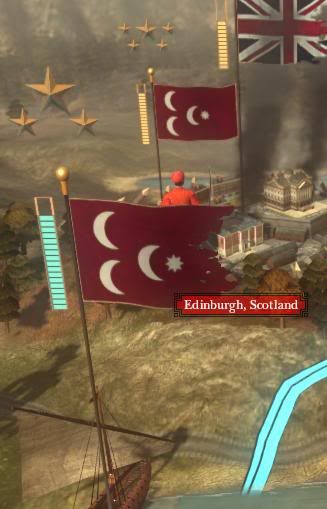
An Ottoman Naval Force had travelled from the Mediterranean sea, through the Gibraltar Strait, heading north up the Atlantic Sea towards the British Isles! The Ottomans had repeated what Sir Sidney Smith had accomplished last year but only in the opposite direction! An Ottoman Army under the commander of Cezayirli Arifi had landed from the Irish Sea on the Scottish Coast, and within only a week of landing they were besieging the poorly defended city of Edinburgh.
- The Battle of Edinburgh 1812
The Scottish quickly organised armed citizenry, militia and one regiment of Highlander Foot, the 7th. With the only other main army of the British in the South near London, the garrison of Edinburgh stood alone against Arifis Ottoman Army.
Spoiler Alert, click show to read:
British Citizenry took control of the cannon emplacements on the walls to soften up the Ottoman assaulting force as the 7th Foot Guard and Several Militia units garrisoned the buildings within the Fort and defended the central area of the Fort.
It was not long until the superior Ottoman Artillery breached the walls of Edinburgh, as Ottoman Infantry sprinted towards the walls, climbed them and fought their Scottish foes. The undisciplined, inexperienced armed citizenry on the wall simply couldnt hold their position on the wall as they fled down to the safety of the buildings and the 7th Highlander Regiment.
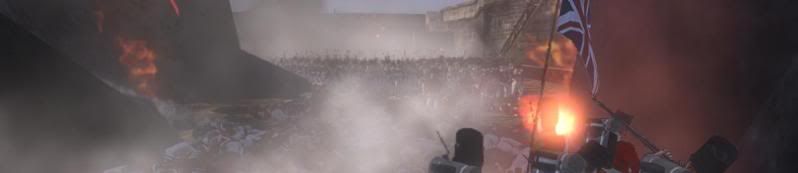
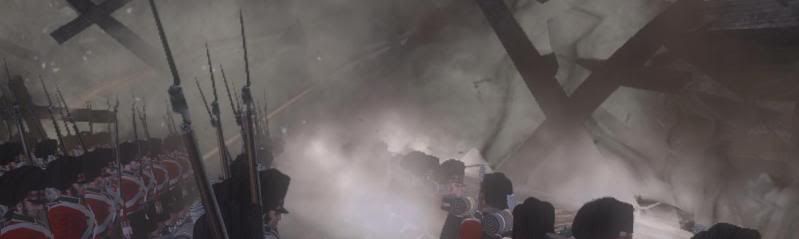
As Ottoman Forces were assaulting the walls, several units of Arifis army rushed through the breach in the walls creating by the Ottoman Artillery, charging towards the 7ths position as more Turks poured into the gap with the Highlanders desperately firing from the buildings. Suddenly, Ottoman Artillery concentrated their fire on the barracks, where a regiment of Militia was firing at the approaching Ottoman Infantry and Cavalry.
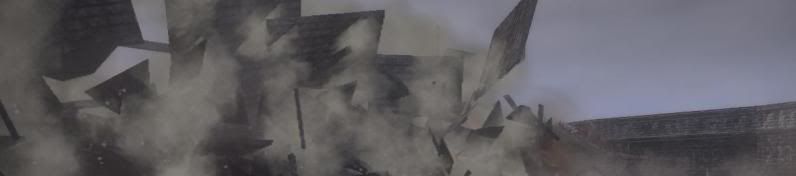
As the Ottoman Artillery bombarded the building, it collapsed killing some 300 men inside leaving most of the fort covered in dust and smoke blinding both friend and foe. With the disruption of the collapsing building, musket fire dramatically decreased and the Turkish swordsmen smashed against the 7th Highlanders.
The Destruction of Edinburghs barracks
Militia continued to fire from the buildings that remained fire as armed citizenry reinforced the 7th Position. The 7th did not break, they held for several hours and the musket fire, the fearful Highlanders and the blinding smoke was too much for those far away from their homelands, they fled as Arifis was struck down by a Scottish Bayonet in the thick of the battle.
Edinburgh was saved as the rest of the Ottoman army retreated back to their ships. The Royal Navy now hunts the Irish Sea for this Ottoman Fleet, wherever it may be.
To be continued.
Last edited by LuckyLewis; April 08, 2010 at 09:16 AM.
Muh signature is so out of date all muh pictures died.
 Ordinarius
Whhhhhhhhhhhhhhhhhhhhhhhhhhhhhhhhhhhhhhhhaaaaaaaaaaaaaaaaaaaaaaaaaaaaaaaaaaaaaaaaaaaaaaaaaaaaaaaattttttttttttttttttttttttttttttttttttttttttttt?
Surely the scots were too drunk to beat the turks!
Para Todos Todo, Para Nosotros Nada. - Subcommandante Marcos
I have never let my schooling interfere with my education. - Mark Twain
")


")
LOLOLOLOL!!! I can picture it...a bunch of Turk generals sitting around a table:
"OK guys, we're in a desperate situation."
"No kidding sir."
"Don't give me lip Emir...I'm not in the mood."
"Sorry sir."
"So, as I was saying...we're desperate. These Brits are the bane of our existence. We're going to be run out of our homeland soon...soooooooooo....any suggestions as to where we should attack?"
(silence)
(more silence)
"Well sir, I have a thought, but its a little crazy..."
"Well Ilhan, don't hold back."
"Nah. Its just too silly."
"No seriously...what is it?"
"No, you guys will all laugh."
"No! You always have good ideas!"
"We won't laugh, promise!"
"C'mon let's hear it!"
"OK, but promise?"
"We promise."
"Alright then....Scotland."
(silence)
"bwahahahhahahahhahhah!!!!!!!"
"Aw cmon guys, you promised..."
"...hahhahahhhahahahha..."
"Scotland??! That's your suggestion???"
"Yes. Well, you see, they have sheep..."
"ahhhhhhhhhhhhh. Shhh everyone...continue Ilhan."
Last edited by Nanny de Bodemloze; April 08, 2010 at 07:53 AM.
Ordinarius
Also Lewis, you've exceeded your bandwidth for your photos, I hope you can get that fixed.
Para Todos Todo, Para Nosotros Nada. - Subcommandante Marcos
I have never let my schooling interfere with my education. - Mark Twain
Oh great, does that mean you can't see them any more? I'll upload the latest update's images with my other photobucket account instead.
Thanks for bringing that to my attention.
Edit: Okay I replaced the last update with working images, previous updates will unfortunately have to wait until the 22nd when the bandwidth will be reset, you can still read them though of course, although my AAR isn't much without pictures. All future updates shouldn't have that issue.
Last edited by LuckyLewis; April 08, 2010 at 09:21 AM.
Muh signature is so out of date all muh pictures died.

More good stuff, keep it up.
pics or not, its a great story.
 Civis
Civis
great story, love the invasion of scotland.


")
Wow... I just wish stuff like the Ottomans invading Scotland would happen in my games.... geez I'm almost jelous of you man.
Great work though keep it up, easily the best AAR for me, because it's simple, has amazing pictures, awsome story telling and I'm really into your storyline now, just like a good book.
It's times like this I wish I could rep cause there would be bucket loads headed your way.

")
Very nice story.
The update before this one has no images BTW.
+rep
1. this is the BEST AAR
2. thanks for the rep, i am so happy now, SOmone gave me rep! someone COOOL!
3. Nanny, you are just HILARIOUS!


 Reply With Quote