OK, this is a basic tutorial to explain how to reset the effect related lighting in a settlement using IWTE (Parameters are all in IWTE_14_01_F)
Background
In a settlement you can add various types of effects (via IWTE) and Vanilla settlements contain lots of different effects. This tutorial is really only addressing the ones which are light emitting effects (i.e. not sound, smoke etc). The light emitting parameter is an attribute of the effect information held within the .world file.
Relationship with complexes in the .world file
These are the simple rules on how effects cast light :
- First is that a complex can only hold attributes for a maximum of 69 effects. If you add more effects they simply won't have any impact in terms of 'lighting' the buildings etc. If you take a shortcut when making .world files and only have 1 complex then that impact here is obvious.
- The next thing to understand is that the effects that do impact the complex do so by impacting the assigned vertices within the complex. Each vertex can only be impacted by a maximum of 3 effects.
- Each effect assigned to a vertex has its own intensity of light casting on that vertex.
- Each effect is assigned to a complex prioritised by the two column descriptions shown below (within a column its just by sequence in the effects lists)
- Animations also carry lighting information. If the complex has less lighting effects than the animation expects you will get a strange looking set of colours on the animated item. To counter this IWTE adds as many effects as it can up to the 69 maximum. The correct way to amend it is via individually lighted animations... but its too long winded to do to be practical.
OK thats the basics so what does this mean. Here are some example snapshots of stone fort C with a very light texture in a night battle to show the basic impact of the vanilla effect lighting.
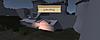
NE stone fort C at night : shows example of
A= Pixel lighting triangle that is not in direct line (i.e. pixel is but triangle isn't)
B= Impact of torch object culling a vertex.
another example of type B
How can I amend the effect lighting with IWTE?
In IWTE you need to first load a settlement (it always asks for all 3 files). Once loaded you need to go to the collisions tab and then press the Reset Complex Effects button. This will then display the following.
Once this has been displayed you can amend the parameters and then either Cancel (nothing will happen) or press OK. This will then reset the Complex Effects data based on those parameters. This should take anything from about 10 seconds to 10 minutes depending on size of the world, number of effects and parameters. Obviously the larger for any of those the more time it will take. If you go crazy on the parameters it will take take a long long time.
What do the various parameters mean?
Column Heading classifications
The parameters are split into two columns.
- Undamaged obj. Lights : These are the effects that have an impact when in an undamaged state eg the various lights/lanterns which are switched on at night.
- Damaged obj. Lights : these are the lights which only start to have an impact when the object they are assigned to has been damaged (i.e. it is now displaying object group level other than the first undamaged group). These are things like burning fires though not all fires are light emitting in vanilla settlements.
Effects which do not cast lights are not involved in this process.
Row parameters
Maximum effect Distance
This is simply the distance in metres from the effect to the vertex that a light can cast. If this is switched to a higher or lower value then all the lights assigned to this column will have their light casting amended to that distance. If you increase the default number this will significantly increase the time taken to calculate all the impacts.
Example with distance extended (light impact is low as angle to the light impact increases).
Example with default (less light on right hand side)
Prioritise effect Intensity
This is a yes no switch.
- No : Means that the first 3 effects that affect the vertex are assigned no matter their intensity assignment.
- Yes : Means that once 3 effects have been assigned to a vertex the lowest intensity one will get replaced by an effect of higher intensity (until the complex limit is reached).
Normally you should pick yes but you for the second columns effects you may decide to switch to no so they don't overwrite normal lights (remember the second columns refers to lights which only come on when something is damaged).
Type of Culling
This parameter has 3 parameters :
- None : This means there is no culling at all and vertexes are selected on distance only (regardless of what may be in the way). You shouldn't normally want this other than when trying to speed up some testing.
- Basic : This is as close to what I believe CA implemented in its vanilla settlements. It cross checks for an intervening triangle that is facing the light and therefore blocking the light reaching the vertex. If this is the case the vertex is culled and the effect has no impact.
- Advanced : This carries out further tests and so is slower. It checks if there is an intervening triangle regardless of the way it faces. Its most important on the lighting in the second column as often CA didn't add an inward facing triangle for some of the damaged objects and consequently the lighting bleeds through. It also performs a further check on the vertex to check if its really just that point that's unblocked and the triangle is blocked within a short distance.
NO culling
Basic Culling - - Still shows type A issue but green arrow shows culling impact.
Advanced Culling Removes type A lighting and any back facing triangle issues (not shown on screen shot)
Culling exclusion
This parameter is used to set a minimum distance at which any vertex encountered is not considered for the purposes of the culling tests. eg it is used to ignore the impact of the lit object in the first place. This removes unrequired blocking of light by the torch/lantern itself.
Vanilla showing no exclusion (at point B)
with exclusion set to default
Angle Weighting
The lighting Intensity is calculated both on distance and angle of impact. This weighting determines how much effect the angle has. The default seems reasonable though a purist may want the full value of 1.0. On the other hand if you have a lot of tall objects in a cave etc you may want to increase distance but need to reduce the angel impact for the distance to be noticeable (as obviously the angle will become more extreme as the length increases).
Angle intensity set to default
Angle intensity set to zero


 Reply With Quote


")


")