The Road to War: Defenestration of Ferdinand's representatives in Prague.
Introduction
Greetings, and welcome, to my humble Roll to Dodge experiment. The focus is Europe and the start date is 1619, when the Bohemian crisis is coming to the boiling point and the Holy Roman Empire is in tumult. The Peace of Augsburg in 1555 ensured, at least provisionally, that conflicts between Catholics and Lutherans would be abated in Germany, by granting to princes the right to decide the official faith of their dominions. However, many issues have been arising since then: The radicalisation of the reformation in the form of Calvinism and other denominations, the illicit secularization of ecclesiastical lands by Lutheran princes, and the ardent, ongoing Catholic Counter-Reformation, which aims to restore Catholicism to its previous position of dominance. Coterminous with this conflict is a greater political issue: The Habsburg Emperors are Catholics, and have not attempted to dissimulate their support of Catholic interests over those of Protestants, which has provoked discontent in the Protestant Union. Finally, there are above all in Germany fears that the Counter-Reformation will bring with it a universalization of Spanish power, and install Catholic absolutism in Germany. Although for most German princes rebellion against the Emperor is currently unthinkable, events in the Habsburg hereditary lands might have changed things forever.
Although it is still regarded as a local affair, the uprising of the Bohemian Estates carries with it the seeds for an expansion of the conflict: Both Habsburgs and Estates require support from abroad to overcome the other. Not only did the Bohemians defenestrate the representatives of the staunchly Catholic king-elect (and potential Emperor) Ferdinand, but they have since cancelled his election as king - which occurred in 1617 and sent invitations to the Palatinate, Saxony, Savoy and Transylvania to assume kingship. The Habsburgs intercepted these letters and published them for all to see, which provoked disgust from many yet each party still retains some form of interest in the conflict. As well as this, the death of Emperor Matthias has provoked another Imperial Election, which might bring the conflict further into the Empire itself. The squabbles between various branches of the House of Habsburg have been settled, and Spain has resolved to support Ferdinand's candidacy, yet there are forces within the Empire which are hostile to a Habsburg ascendancy, and may use the election to undermine them. The question is: Which side will emerge triumphant? Imperialist or anti-imperialist? Catholic, Lutheran or Calvinist? Or will the conflict expand to such an extent that a greater, dynastic struggle against the Habsburgs is initiated? The game is on, and at the command of one of the most important states of the crisis, you will decide which direction the struggle takes.
Last edited by Inkie; October 06, 2012 at 11:59 AM.
Under the patronage of the formidable and lovely Narf.
Proud patron of Derpy Hooves, Audacia, Lordsith, Frodo45127 and Sir Adrian.
Bohemian Estates: Count von Thurn - The Kybrothilian
(Light Blue)
Count von Thurn
Power: Strong Wealth: Affluent Faith: Predominantly Protestant (various confessions) Friends: Silesian and Lusatian Estates, Moravian rebels, Savoy, Palatinate, Anhalt, Austrian rebels, Hungarian rebels. Foes: Habsburgs, Papal States, Catholic League. Status: War, unstable. Priorities: War, Protestant dominance, anti-imperialist.
Description: The Bohemian nobility are currently the hard-core of resistance to the Emperor. Last year, they initiated the conflict by defenestrating the Emperor's representatives, and they have since come into open conflict with the Austrian Habsburgs. They have been joined by the Estates of Silesia, Lusatia, and Upper Austria. They may also look for support in Lower Austria, Moravia and Hungary, where Protestants (mainly Calvinists) are eager to take up arms in defence of their faith. Despite this, it is crucial for the Estates to secure alliances and support abroad, despite many foreign powers not being eager for an escalation of the conflict. The Estates have unofficially declared the Habsburg Ferdinand's election as King of Bohemia to be void, yet they have sent offers of the crown to many lands, none of whom will probably take kindly to becoming bidders for the crown, particularly with all the risks it brings. Perhaps it would be wise to look East, as well as West, for support...
Silesian and Lusatian Estates: Twilight Sparkle
(Orange)
Power: Weak Wealth: Moderate Faith: Predominantly Protestant (various confessions). Friends: Bohemian Estates, Moravian rebels, Palatinate, Anhalt. Foes: Habsburgs, Papal States, Catholic League. Status: War, unstable. Priorities: War, Protestant dominance, anti-imperialist.
Description: The noble and commoner Estates of the bountiful lands of Silesia and Lusatia have joined their Bohemian brethren in revolt against the Habsburgs, who – they fear – will seek to impose Catholic rule in their lands. And yet, the worries of these Estates are twofold: To the West, Saxony is eyeing their lands covetously. Their hopes lie in victory over the Habsburgs, yet they must ensure that their Bohemian allies do not sacrifice their own interests on the altar of war.
House of Habsburg
Austrian Habsburgs: Ace_General
(Beige)
Ferdinand II
Power: Mighty Wealth: Affluent Faith: Catholic Friends: Spanish Habsburgs, Electoral Saxony, Papal States, Genoa, Tuscany, Poland, Hungarian Loyalists. Foes: Bohemian Estates, Silesian and Lusatian Estates. Status: War, unstable. Priorities: Counter-Reformation, control of hereditary lands, imperialist.
Description: The Emperor is currently in a highly untenable position. Revolts are flaring throughout his hereditary domains, even within Austria itself! It is vital for the Catholic and Habsburg cause that the Emperor secures support from abroad and move quickly to crush the rebellion in the north.
Spanish Habsburgs: Kitsunegari
(Yellow)
Philip III (14th April 1578 - 1st March 1620)
Philip IV
Power: Terrifying Wealth: Spectacular Faith: Catholic Friends: Austrian Habsburgs, Genoa, Tuscany. Foes: United Provinces, France, Bohemian Estates, Silesian and Lusatian Estates. Status: War, stable. Priorities: Maintaining Habsburg hegemony in Europe, imperialist.
Description: Spain currently dominates Europe, but it has many worries: War with the Dutch is likely to resume in 1621 with the expiry of the twelve-year truce signed in 1609. Additionally, Spain's Austrian cousins are in a perilous situation, which threatens Habsburg influence in the empire and global Habsburg dominance as a whole. Spain must ensure that its reputation as a hegemon remains unblemished, and yet a greater European war is not in its interests, particularly the prospect of being dragged into war with the Dutch, the German protestants, France and England simultaneously. As such, Spain must decide which policy – between caution and resolution – will benefit her in the long run.
Don Gaspar de Guzman y Pimentel Ribera y Velasco de Tover, Count Olivares and Duke of San Lucar la Mayor, Royal Favourite of Felipe IV (yellow) : lolIsuck
As the new Royal Favourite after the death of his uncle, Don Balthasar de Zuniga, Olivares is the most influential statesman in Spain – and thus by extension in Europe. With the king he will shape Spanish policy in both internal and external affairs.
Albrecht von Wallenstein - Enarec
Protestant Union
County Palatinate of the Rhine: Paladin Vargas
(Light Green)
Frederick V (16th August 1596 - 3rd December 1619)
Description: The Palatinate is not a powerful state, but it has an extensive network of friends and allies in Protestant lands around Europe; however, it relies on the strong arm of the influential Prince of Anhalt for much of its concrete support, particularly from the Calvinist states of Germany. Elector Frederick V is currently at the forefront of Imperial politics: He is seen as the champion of Protestantism in Germany, and this appears to be a ripe opportunity for him to exploit Habsburg weakness. The militantCounter-Reformation threatens the security of Protestantism in Europe, yet the Austrian Habsburgs are currently more weak than ever. Additionally, Frederick has been offered the crown of the Kingdom of Bohemia by the Calvinist Estates there. Accepting the crown would mean war with the Emperor for the first time since 1546, as well as antagonizing the Lutherans, yet if victorious, Frederick would be the most powerful prince in Germany...
Description: Hesse-Kassel has long been one of the more important bastions of radical Protestantism in Germany, and has strong ties with the other Calvinist states which were excluded from the constitutional rights granted to Lutherans since the Peace of Augsburg. And yet, the Landgrave assumes a more cautious stance in the face of Anhalt's war-party. Does the interest of the Union lie in peace, or war? What of the interest of Calvinism in general? Hesse-Kassel could act as either mediator or rabble-rouser, depending on the choice of the Landgrave...
Principality of Anhalt-Bernburg: Lyra
(Eastern Teal)
Christian I of Anhalt-Bernburg (11 May 1568 - 4th August 1622)
Description: Anhalt is a very small territory, yet the fiery personality and strong influence of its prince have brought it an important role in the ongoing crisis. Anhalt's interests are for Habsburg supremacy to be broken and for an international Protestant alliance to reverse the tide of the Counter-Reformation, yet in order to achieve this he must ensure that support is gained for his undecided ally and personal friend, the Elector Palatine. For Anhalt, defence of German liberties and Calvinism is paramount in the face of Catholic, Habsburg ascendancy.
Description: Saxony is the leader of Lutheranism in Germany. Since gaining Electoral status and recognition of its faith, it has become an ardent defender of peace and stability within the Empire, and opposing Calvinism, thus finding support for the Emperor natural. However, in this time of crisis it is up to the Elector which path he will take: It is against his interests for either party, Habsburgs, Calvinists and rebellious Estates, or Catholics, to gain too much power, yet many will certainly be eager to gain the support of Saxony – the Bohemian Estates have offered Johann Georg their crown, and the Imperialists will most likely be open to the Elector's demands. Perhaps this is something that can be used to the Elector's advantage, in order to further increase his own, and indeed Lutheran, power in Germany.
Bishopric of Halberstadt (Northern light blue, map below): Glorious Gandalf
Description: Christian the Younger of Brunswick has replaced his late ally Frederick V as the strongman of militant Protestantism within the empire, and although last year he was defeated at Wimpfen, his determination has not been sullied. As the war between Confederates and Habsburgs continues to the south-east, he has taken it upon himself to defend German freedoms from the depredations of the Spaniards and those Catholics who are all too eager to invite the Iberians into the Empire. As an ardent foe of the Counter-Reformation, utterly intolerant of Catholics and allied to the universal Protestant agenda, he has the capacity to marshal the military muscle of northern-Germany, if he can convince it to become warlike. He must be careful, however, to maintain his influence among his fellow Lutherans, seeing as Albertine Saxony has so far made clear its desire to create a separate, Lutheran sphere detached from Calvinist and greater Protestant ambitions, thus making the two princes rivals, if not enemies...
Margraviate of Baden-Durlach (Southern light blue, map below) : Braeburn.
Description: Baden is a land fraught with both innovation and peril. In the south-west of Germany, it is surrounded by states of wildly varying faiths and alignments. It has also been divided many times in its history by joint inheritances, although the new margrave, Georg Friedrich, has come to inherit the entirety of Baden-Durlach, which makes him something of a regional power among the small imperial cities, minor ecclesiastical states and Swiss cantons which share his borders. Bavaria and France, however, lurk to the east and west respectively...
The margrave is an able ruler, and has brought administrative, financial, judicial and social-religious improvements to his territory. What matters is whether he will be able to make a stand against the might of Spain and her allies as they encroach ever further upon German liberties...
Spoiler Alert, click show to read:
Catholic League
Duchy of Bavaria:The Mysterious F
(Greenish-brown)
Maximilian I
Power: Strong Wealth: Rich Faith: Catholic Friends: Ecclesiastical states of the Catholic League. Foes: Protestant Union, Calvinists. Status: Peace, stable. Priorities: Counter-Reformation, gaining electoral status.
Description: Bavaria presides over the weaker ecclesiastical states of the Catholic League. It is a highly influential state, perhaps the foremost of the Empire's German states, and yet it has conflicting interests: It must defend Catholicism and champion the Counter-Reformation, as well as expand its position, perhaps even to electoral status. For this it requires the support of the Emperor, and yet Bavarian Wittelsbach interests have traditionally been of undermining the Habsburgs and curtailing their dominance wherever possible. The upcoming Imperial Election could be a chance for pursuit of such a policy, although of course that would mean cooperating with the Calvinists, distasteful for a Bavarian ruler, to say the least. Duke Maximilian's expert handling of finance and taxation means that Bavaria is very wealthy and can provide for a strong army, and yet the question is what will be made of such strength...
Description: Moravia is currently intensely divided. The most radical Calvinist Moravian Estates persuaded the Bohemians to start an open war against Ferdinand and annul his coronation as King of Bohemia, yet last year Moravia refused to openly join the revolt, staying neutral. The land is riddled with Lutherans, Catholics and other faiths, which are not favourable to war. It is likely Moravia will receive either overtures or invasion from the Habsburgs, the other rebel Estates, and Transylvania to the east. Its army is small, so careful diplomacy is the key to Moravian survival.
Description: Transylvania is an Ottoman suzerain with a tradition for plundering and raiding, and enemies to the north as well as west. The rebellion of the Czech and Hungarian estates presents interesting opportunities for Transylvania to expand, although war with Poland threatens. Bethlen Gabor is a strong ruler, and he can put myriads of light cavalry (Magyar hussars) into the field, but he will likely rely on military support from the more advanced states to his west if he wishes to make forays beyond the plains of Hungary. Therefore, although the Habsburgs must be crushed if he is to secure any gains in the long term, being dragged into an alliance with other powers might not be in his interest. A primary source of appeal, however, comes in the invitation of Gabor to become King of Bohemia...
Duchy of Savoy:Lord Inquisitor Derpy Hooves (Dark purple)
The Confederate army left Klattau in late February and started marching north-east. Thurn's strategy (with the approval of King Christian) was to avoid battle with the recovering Catholic League and instead focus on relieving Silesia from its struggle with the invading Saxons. To this end, the Bohemian King called for additional support from the Moravian and Hungarian confederate parties, and this was granted immediately by both. The designated meeting point was the town of Waldstein, but this was soon swapped with Bunzlau, on the Iser river. (2) Due to delays in marching, the three armies under King Christian, King Gabriel and Margrave Schlick only met a full month later. Even then, an immediate conflict arose in the upper echelons of the Confederate command: it was known that Klitzing and the Saxons had returned to Lusatia after a brief foray into Silesia, and were marshalling south-east of Bautzen. They were pillaging the countryside and extorting the Lusatian aristocracy, contrary to the lenient treatment they had been given for the past two months. Moreover, their forces appeared to be swelling, with reinforcements arriving from the west in large numbers.
Field-Marshal von Hohenlohe, who had been in de facto command of the Confederate army for months, favoured a cautious approach, sending requests for aid to Breslau and waiting for the Silesians under Brieg to arrive from the east, thus trapping the Saxons and cutting them off from their supply-line via Bautzen. The Hungarian faction immediately protested this choice, with their king using his irrefutable royal influence to push for a more direct approach. It was Heinrich von Schlick, however, the conqueror of Moravia, who emerged as the primary contender for command, seeing as he was not as much of a political presence as Gabor, yet agreed to an aggressive plan and was experienced. With King Christian eager to bring about a decisive battle and put an end to the Saxon occupation, Hohenlohe quickly fell out of power, and was demoted to Colonel, while Schlick took the reigns of command. His Moravian forces supplied the Confederate army with most of its non-hussar cavalry, and the hard core of its infantry. He did not expect the Silesians to be able to arrive in time for the battle, but was confident in the superiority of his army over the opposing Saxons.
As such, in early April the Confederate army started marching north, towards the Lusatian border. Meanwhile, the Saxon army had marched south to meet the advancing Confederates in the Sudetes mountain range, south-east of Zittau. Highly detailed intelligence reports provided him with information about the enemy strength: They outnumbered him at a rate of over 3 to 2, were generally superior in quality, had almost twice as many guns and – in appearance – almost three times as many cavalry. Furthermore, one of his infantry regiments was garrisoning Bautzen, and as such would not be available for battle, and he had to worry about Brieg to his east, although it didn't seem like the latter was making any moves.
Schlick dispatched the Transylvanian contingent to reconnoiter and harass the enemy position. It appeared to be largely successful, outmaneuvering the Saxon position and forcing Klitzing to give way without a fight, retreating steadily upwards along the highway towards Zittau. En-route, Schlick continued to have the “expendable” Transylvanians pursue enemy forces, while the more regular cavalry regiments were kept close to the main body. A spiked cannon which had been abandoned inside a gulley was evidence to the Confederates that Klitzing was hard-pressed by their assault. The Transylvanians continued to report back to Schlick that the Saxons were suffering losses and becoming more and more disorganized in their retreat. Less than a day's march behind Klitzing, Schlick decided to close the distance between them and engage the Saxon army near Lobau.
Inexplicably to the Confederate command, Klitzing seemed to share this intention, taking his forces off the road just outside of Lobau and marching them up the Löbauer Berg, a half-kilometre tall mountain just east of the city. Here he deployed his troops for battle, erecting laager wagon-forts and setting up his guns in pre-prepared defensive positions on cleared ground. Two miles to the south, King Christian summoned a council of war. Undeniably, in terms of sheer muscle the Confederates clearly had the advantage, yet the Saxon entrenchments were surprisingly formidable, and with woods covering their flanks outmaneuvering them seemed impossible. This significantly reduced the Confederate advantage in cavalry numbers and quality. Schlick expressed reservations about an assault, yet - under pressure from Gabor - Christian was eventually convinced to give battle, and Schlick duly prepared a plan for the assault.
Order of Battle:
The Saxon army had fought hard at Bautzen and seen its morale boosted by the crushing of the Bohemian contingent at Zittau, a few months previously. However, they remained of overall inferior troops to the generally more experienced Confederates. This fact was exacerbated by hurried Saxon attempts throughout February to increase the size of their army, at the expense of training and experience. The main Saxon advantages were positioning (which, it must be said, was an overwhelming one) and unity of command. Klitzing formed his troops up in a slightly unorthodox deep crescent formation, with wagons lining the front ranks and guns nestled among them. His personal regiment, along with the Schwalbach and Starschedel infantry regiments, formed the first line, while the untested Goslar and Brunswick-Halberstadt groups comprised the second line. His cavalry was amassed to the rear in a large reserve, which was prepared to turn about and bear down upon the northern side of the hill if the Confederates attempted a long flanking maneuver. His headquarters were in-between the second and third lines.
The Confederates did indeed plan to circle the mountain and simultaneously engage the Saxon rear, seeing as thick, uncleared forests shielded their flanks. Gabor volunteered to lead his hussars on the right flank. This was the traditional place of honour on a line, and as he was a king, it was granted to him. The left cavalry wing, comprising the Kien, Solms, Kinsky and Borseda cavalry regiments (almost all arkebusiers), was a joint Bohemian and Moravian force, operating under the overall command of Colonel Kien, a Moravian.
The larger Confederate guns (12 to 24 lbers) – of which there were half a dozen - would line up at a distance from the hill, so that they could fire on the enemy positions without damaging friendly troops. King Christian elected to establish his own command centre here with the 300-strong Leib Regiment, seeing as he had a favourable disposition towards artillery. The main infantry force was to move up to within 800 yards of the Saxon line, before commencing an hour of bombardment with the rest of the guns at close range. Once this was complete, they would push ahead slowly and carefully, overcoming the Saxon lines through weight of numbers and the confusion provoked by the planned cavalry attack to the Saxon rear. Two batteries of 3-lber regimental guns, which had been gifted to the Bohemians by the King of Sweden, would see their mobility put to the test, as they were to accompany the infantry in a firing-advance up the hill.
The Thurn and Schlick infantry regiments took up position on the right, while the Hohenlohe regiment and the “elite” Dutch force under Pithan were stationed on the left. Considering the small width of the battlefield (around a kilometre long) the Confederate main body was deployed very thickly, with companies of the Styrum, Sedlnicky and Bubna cavalry regiments interspersed between the first few lines of infantry, prepared to leap forth from them and launch attacks against the Saxon positions. The second, third, and fourth lines were made up of other disparate forces from Austria, Germany and the lands of the Bohemian crown (Leipnik, Anhalt, Breuner, Kaplir, Saxe-Weimar and Tschernembl regiments). Gabor was with his mass of Hussars on the right, Christian was with the siege guns in the rear (which will be referenced as the “Royal Battery”), Hohenlohe was with his regiment on the left, and Schlick was behind the third line of infantry.
Both forces fought in traditional, deep formations, although the Dutch were accustomed to fighting in a starkly opposite manner, which negatively affected their performance during the battle. The ground itself was deliberately left broken and uneven on the upward slope by the Saxons, while the flanks were heavily wooded and much steeper. Both armies were in good spirits and conditions before the battle.
The Battle of Löbau, 17th April 1621
At around 2PM, the Confederate leadership sounded the advance with a single volley from the Royal Battery, after which these heavy guns continued at their own rhythm. (2) Their effect was largely psychological, but they did succeed in hitting a few wagons in the Saxon line (Klitzing danger roll: 2+2 for inaccuracy and probability). Both cavalry wings set off on their separate flanking missions. Seeing this, Klitzing ordered his own cavalry to prepare itself for attack from the north, and it duly formed up in anticipation. He then had his guns concentrate their firepower on the approaching ranks of Confederate troops. Despite the massed formations providing an easy target for them and the advantage of higher altitude, (1+2) the results were at first desultory, and did not disrupt the Confederate battle-line (Schlick danger roll: 1; Survival roll: 5), although two of Schlick's aides were killed by a cannonball.
As per his battle-plan, Schlick had the army stop at 800 yards and bring up the guns. The ensuing artillery duel between equal numbers of cannons saw (S: 1+2; C: 6) the Confederate guns wreak havoc on the Saxon defences, smashing a great deal of wagons and destroying two Saxon cannons. Still, due to the inferiority of their position, Confederate casualties were racking up faster than those of the Saxons, and after a little less than an hour the order was given to commence the final advance. The plan to bring the 3-lbers up the hill was abandoned due to closer examination of the terrain, which was revealed to be uneven and heavily littered with tree-stumps. Instead, a screen of mounted arkebusiers of the Bubna regiment was sent forth to probe the Saxon line for weaknesses, while companies of musketeers were dispatched in order to attempt to outflank the Saxon defences. Meanwhile, Colonel Kien reported back to the Confederate centre that he was in position at the Saxon rear (the north foot of the mountain), and was facing off against a line of what seemed like all of Saxony's horse. He also reported that he was still awaiting the arrival of Gabor's hussars from his east.
Schlick replied that Kien should wait for the Hungarian king before launching his assault, and returned to organizing his own massed infantry push. His musketeers (3) returned without finding any suitable flanking opportunities along the steeper and impassable slopes at the sides of the Saxon force. The Bubna arquebusiers (1) were routed by a terrible salvo from the Saxon cannons, and retreated past their allies in disorder, slightly demoralizing them. Worse still, they had not gained any intelligence about the enemy position. Hohenlohe attempted to persuade Schlick to call off the attack, as their position was too strong. (1-2= Caution; 3-6= Aggressiveness) (3) Schlick refused, but made sure that he left his rearmost – and most unreliable – lines at the foot of the hill as a cautionary measure, while the rest (essentially Pithan, Hohenlohe, Thurn, Leipnik, Breuner and assorted cavalry) advanced. The Moravian Field-Marshal also dispatched a courier to locate and interrogate Gabor, whose delay was infuriating him.
As such, at around 3:30PM the Confederate main assault group started its long ascent of Löbauer Berg. As its battalions struggled to maintain cohesion and yet not lose momentum, the Saxon batteries redoubled their fire, eventually replacing roundshot with the much-dreaded canister.
The front rank of the Confederate thrust was, however, composed of their best troops, and despite grievous casualties they advanced under the constant exhortations of their Moravian commander. Hohenlohe was wounded and taken out of action, but the march was not halted for a second. The Cavalry were unleashed from among the ranks, and the musketeers and arquebusiers ranged ahead of the pike blocks, engaging in a heated, shifting firefight with the Saxon gunners, safe behind their barricade. German cavalry regiments which had been firing at close range into the Saxon ranks returned to the still-advancing Confederate lines in order to rest and regroup, before being ordered by Schlick to charge with cold steel and seize the Saxon guns. This regiment (Styrum), which had within it the most demi-cuirassiers among the generally light Confederate cavalry, obliged. Its attack (4) drove several Saxon gun crews back in despair, and engaged the waiting infantry squares behind, but were soon forced to retire. Still, it had gained the Confederate infantry considerable breathing-space, and it now stormed the redoubts in full-force.
This was when Schlick received word that the Hungarian king had refused to join in the attack, and was waiting in a shielded area at the eastern base of the hill with his 4000 men. “Rot, you coward!” was the reply he received from Schlick, who then gave Kien authorization to commence his assault alone. This was unfortunate for the Confederates, as Klitzing was on the verge of losing patience and sending his own cavalry fleet to the attack, which would have sacrificed the advantage of high-ground. As it is, the Saxon cavalry force outnumbered that of the Confederates 4 to 3 (around 2400 vs 1800), although the latter were either more experienced, better trained, or both. Still, fighting uphill the Bohemian and Moravian cavalry regiments were at a serious disadvantage – they entered skirmishing range and received several volleys from the Saxons (2-1 for low training) yet the rippling fire achieved little effect, having been released too early. The Confederates entered their own preferred formation, the limaçon, with the left file forming up in front of the first rank, firing, and then wheeling about to form the right file and starting to reload, while the Saxons adopted an advancing caracole, with each rank moving forward, firing, and halting to reload, allowing the next rank to overtake it in turn.
Saxon cavalry [2D6+3 for superior numbers and position] : 15 Confederate cavalry [2D6+2 for superior quality] : 5
After ten minutes of this skirmishing, which produced similar casualties for both sides yet gradually pushed the Confederates back with a demoralizing and disruptive effect, Klitzing ordered his main cavalry commander, Bindauf, to spring forth and annihilate his opponents. Bindauf's charge was so sudden and well-executed that Kien's entire force was thrown back, at first retreating without a mêlée but soon entering a full-fledged rout. Even the veteran Moravian Kinsky regiment followed in the disarray and general chaos.
Still, the Saxon cavalry were impetuous and so elated by their victory that they lost all cohesion themselves, galloping after the fleeing Confederates eagerly. While this resulted in greater Confederate losses and ensured that Kien's force no longer participated in the battle (Kien himself was captured), it almost meant as much for the victorious Saxon cavalry itself. Bindauf was alone in managing to bring order to his regiment, and Klitzing ordered him to return to the main army and defend its rear in case of further attack.
Hearing of this setback, Schlick (4) managed to keep cool, hoping that Gabor's hussars might at least pin the Saxon cavalry in a defensive position. Meanwhile, the Confederate regiments finally crashed against the Saxon laagers, forcing Klitzing's gun-crews and skirmishers to retreat back to the main lines, which started their own push to crush the Confederate infantry while their ranks were disrupted in attempting to pass through the fortifications.
Pithan regiment: (6-1 for unsuitable doctrine) Hohenlohe regiment: (6) Thurn regiment: (2) Schlick regiment: (6+1 for personal presence)
However, Schlick ordered his pikes to wait just behind the laagers, while his musketeers harassed the Saxon line, and men from the more trained Dutch regiment manned the Saxon guns, turning them on their own troops. Seeing what was about to happen, Klitzing rushed to order his men forward to repulse the Confederate troops.
Klitzing regiment: (3+1 for personal presence) Schwalbach regiment: (2) Starschedel regiment: (2) Klitzing danger roll: (6)
While Klitzing's regiment (showing his habitual personal courage, Klitzing led the attack himself) engaged the Dutch troops facing them and made some headway in pushing them back from the laagers, the other Saxon troops failed to dislodge their attackers - despite Thurn regiment's meek performance - and men started to trickle from their ranks.
It was at this moment that the decisive moment occurred, the card that the Elector of Saxony was counting on to win the war: Gabor's hussars finally emerged from the right flank of the mountain, but it was on the southern side. They filed into position behind the waiting Confederate infantry regiments at the foot of the hill, and promptly charged into their rear, sweeping about them like so many locusts. It was a betrayal of the highest order, and one which none of the Confederate field commanders could have anticipated. Gabor also sent 800 of his hussars under Colonel Kornis to attack the Confederate deep reserve in the form of the Royal Battery and the King's Guard.
The Confederate infantry had a slight numerical advantage, but this reserve was primarily composed of the lesser troops of their army: War-weary Germans and Austrians, along with inexperienced new recruits.
Two Confederate colonels were killed, including Count von Tschernembl, who had attempted to rally his Austrian troops as they immediately scattered in disgrace.
Transylvanian hussars: (4+3 for element of surprise and superior mettle). Confederate reserve: (6-1 for disruption and collapse.)
Although the Tschernembl regiment disintegrated, despite having their ranks lose cohesion the other regiments put up a valiant struggle, and a mêlée ensued, which was not to the Hungarian's advantage, and threw them back several times.
Seeing this, Schlick was taken aback. He was on the verge of crushing the Saxon line, yet if he did not respond adequately to this new attack his rear would be jeopardized. Fortunately, he still had many reserves still on the slope of the hill. He dispatched the Sedlnicky, Styrum and Solms cavalry regiments, in addition to the Leipnik infantry regiment from the rear of his line and ordered them to succour his endangered reserve.
Seeing the Confederate infantry and cavalry advancing down the hill towards him, King Gabriel was forced to disengage despite coming close to destroying his erstwhile ally's reserves. He attempted to join Kornis' attack on the vulnerable Royal Battery and King Christian but (disengagement roll: 1) his men dispersed in order to escape the incoming, heavier Confederate cavalry. The King joined them rather than risk capture by attempting to rally them or continue operating in the field.
As for Kornis' detachment, the King (6) witnessed their betrayal, and had his guns fire upon them as they rushed towards him. The cannon-fire (6) tore into the ranks of Kornis' detachment, (danger roll: 6) and he was forced to retreat without reaching his target.
Saxon cavalry return roll: 2
With his ace thus defeated, Klitzing could only hope that his cavalry would return from their pursuit in time to deliver a blow to the Confederate rear before his infantry collapsed. However, those which did return in time were a miscellaneous mixture of companies from various regiments, ill-suited to acting in cohesion. Klitzing had placed all of his hope in his barricade (which failed to quell the unstoppable Confederate advance) and Gabor's betrayal, which had also failed. Despite the Saxon commander's utmost efforts (Danger roll: 1; Survival roll: 5), his foremost pike squares fell into disarray and were routed. The less experienced units behind them threw down their weapons and joined in the flight. Had the northern side of the hill been sealed off by the Confederates, the Saxon army would have been annihilated, but as it was they still had an escape route open to them. Schlick took his time to assemble and re-order the cavalry he still had on the field, firing with his newly captured guns upon the Saxons as they ran (2) further scattering them but not inflicting as terrible a death toll as it could have due to his men's lack of training in gunnery.
When Schlick's cavalry fell upon the Saxons, only the Bindauf and Steinau regiments could provide a credible rearguard, and (S: 4; C: 2+3 due to superior numbers, morale, composure and quality) they were swiftly thrown back.
Although the advance up the mountain and Kien's defeat had cost the Confederates, they had captured an impressive amount of baggage and a dozen Saxon guns.
Pursuit roll: 5
The Saxon army lost thousands of men killed and captured during the retreat, and Klitzing's army was all but destroyed. The Hungarians rode east, before heading south – the Confederates reckoned Gabor must have been returning to his Hungarian possessions.
Battle of Löbau - 17th April, 1621 results:
Confederate crushing victory.
Confederate Strength:
King Christian I of Bohemia and Prince of Anhalt Field Marshal Heinrich von Schlick, Margrave of Moravia 14 350 infantry 4 500 cavalry 18 guns
Losses:
1600 killed and wounded. 200 captured.
Saxon Strength:
Field Marshal Count von Klitzing 9 500 infantry 2 800 cavalry 12 guns
Losses:
1200 killed. 2300 captured. 12 guns lost. All baggage lost.
Hungarian Strength:
King Gabriel Bethlen of Hungary and Prince of Transylvania 4000 cavalry
Losses:
470 killed and wounded.
Aftermath:
Schlick could not pursue the Saxon army as it retreated towards Bautzen – his army was heavily battered and many of his men had been scattered. In addition, he had pressing concerns to the south, which he could not ignore, no matter how tempting it was to invade Lusatia and bring Saxony to terms.
The Fall of Prague
Unfortunately for the Confederates, the threat of a renewed invasion from the Imperialists had led them to garrison Prague with a substantial amount of Hungarian and Transylvanian troops loyal to Bethlen Gabor. When these men received their orders, they promptly blockaded all gates, turned on the Bohemian soldiers defending the city and started to massacre all those who did not submit.
Orchestration: 2
Of the 5000 or so Bohemian troops inside the city, only 1500 were mobilized, and the Hungarians burned their barracks and quarters to the ground, flushing them out and quickly capturing them in droves, yet many inside surrounding forts and on the walls put up resistance. All upheaval inside the city was quickly snuffed out, but these isolated groups managed to hold out and provide an obstacle to the traitors. Despite shoddy orchestration by the Hungarians, the Bohemians had little hope of defeating them, and were quickly reduced. The undisciplined Hungarian soldiers looted everything and stole what they could from the inhabitants, rich and poor alike.
Thurn escape roll (5+) : 4 Pechmann escape roll (5+) : 2
Almost all of the leading Bohemian nobility was captured in a stroke, including the main Confederate field commander and de facto leader of the uprising, Count von Thurn, along with an Austrian proprietor-colonel, Pechmann.
A few days later the Imperialist army arrived from Budweis, 15 000 strong, sealing the noose on the Confederates and ending all resistance in and around Prague.
Although Saxony had been defeated, the fall of the Confederate capital nullified their gains, crippling their coordinating and logistical capacity and quashing their spirits. All hope now resides in Schlick's army.
The invasion of Moravia
Separate from the main Imperialist advance, in mid April a small army of Hungarians and Croats in Imperial service left Pressburg and marched into Moravia. The minute garrison there under Stubenvoll took refuge in the fortress of Brno, and is currently under siege. This only adds to the peril currently faced by the Confederacy.
The Campaign in Franche-Comté, November 1620 to May 1621
Events between November and March:
In November, the 5000-strong force of Margrave George Frederick of Baden-Durlach (under the command of Field Marshal Hunoltstein) invaded the Spanish territory of Franche-Comté. However, it was met by a Spanish garrison of superior numbers under the Count of Roccarainola, and was thrown back to the border where the two small armies wintered in close proximity. On the night of the 21st February, however, two infantry companies of Badener hand-gunners were dispatched to raid the Spanish camp during the night, while a mixed battalion was sent south-west, with both artillery and cavalry.
Miraculously, the enemy guardsmen mistook this attack as a general assault, and panicked. The Spanish leadership hastily roused their troops and sent them to man the battlements of the camp, while Hunoltstein's mainbody started marching north-east, towards the border. This was a feint, and the Field Marshal intended to turn around once the Spanish army had departed in pursuit of his diversionary battalion.
After a long night of intermittent skirmishing and (for the Spaniards) manning the defenses, the Protestant scout companies disengaged, and headed south-west - past the Spanish camp – to rendez-vous with the rest of the mixed battalion.
In the morning, the Spanish reconnoitered the Badener camp, only to find it empty. Roccarainola mistakenly believed that the main Badener body was what had passed them in the night, breaking camp and pursuing it with almost his full force, leaving 400 men to garrison the fort.
Meanwhile, the Badener mixed battalion started to loot and pillage the Burgundian countryside, leaving behind it a trail of wreckage. Most of the Protestant officers were inexperienced and failed to retain control over their men, who had gone without pay for long months during the winter. This seriously reduced the force's cohesion and slowed it down, allowing the Spaniards to catch up. As for Hunoltstein's corps, it was not aware of this development, and turned around as planned to double-back southwards. En-route, it was spotted by the Spanish camp garrison, which dispatched a messenger to inform their main body, before being surrounded. As Hunoltstein had no guns or siege equipment with him, he could not reduce the fort quickly, so he left 500 men to surround it and promptly resumed his hurried march southwards.
The camp was soon captured thanks to a skilled ruse, and the troops inside were revealed to be mediocre levies, who soon surrendered. Of the 500 Badeners, 200 remained to safeguard supply-lines, while the rest were sent south to catch up with Hunoltstein.
As for the diversionary battalion, which was supposed to wheel to the east and bring the Spanish army into the hills, it did not manage to achieve this manoeuvre, and instead of turning east, it was forced to enter Vesoul and hole-up there, awaiting relief from the main force under Hunoltstein. The Spanish blockaded the city, quickly bringing up their gun batteries and starting to fire on the northern walls.
Roccarainola was not not warned by the local populace of Hunoltstein's approach to his rear, but one of his outriders spotted him only miles away from Vesoul. The cautious Spanish commander promptly disengaged and broke siege, rather than risk fighting a two-way battle. However, he was forced to abandon two of his guns and much of his baggage in the retreat.
Spanish forces retreated towards Besançon, leaving the Badeners in possession of Vesoul, along with much of northern Franche-Comté. The city itself was sacked by Hunoltstein's men, who had gone for months with low pay.
Continuation of the campaign, March-May:
Upon marching to meet Roccarainola, Hunoltstein found him entrenched on the south side of the Doubs river, ten miles east of Besançon. Several attacks and probes failed to dislodge him, but (5) Badener forces eventually outflanked him, forcing him to retreat to the south-west. Several minor skirmishes and cavalry actions (4) maintained the pressure upon him, forcing him to abandon the city and continue his southward retreat, although the Spanish supply-line was not seriously threatened.
With the fall of Besançon, the Margrave's army now controls most of Franche-Comté, as the Spanish continue to retreat before it.
Other news:
The Protestant Grey Leagues have been defeated in the Valtelline by the might of Spain, and their revolt has been brought to a bloody end. The Spanish Road has been partially restored.
A Spanish army has disembarked in Genoa, in the hopes of relieving it from the Duke of Savoy's siege.
The Protestant courts of Europe are shocked by King Gabriel's betrayal of his allies. King Christian IV of Denmark said of the man "I would rather see a Turk or the Devil on the Hungarian throne."
Current map:
Public Update – July 1621
Public Update – September 1621
Second Imperialist invasion of Moravia, 1621.
After repulsing the Imperialist army, Schlick waited inside Brno with his army, hoping to hold out if a second invasion came. It did not: For several weeks Dampierre's army remained inert in Iglau, until in late July it was reinforced up to double his previous strength from the west. The Imperialist force – now under the command of Bucquoy – marched east, arriving at Popowitz in five days. He became more cautious during the advance on Brno, although on the 28th he arrived in Strelitz – four miles from the city – with still no sign of his enemy.
Action of Brno, 29th July 1621.
The next day, he dispatched several cavalry groups to reconnoiter the final approach to the city. They encountered strong resistance on the eastern bank of the Schwarza, with the capital in sight. Here Schlick had deployed Stubenvoll and Kien cavalry regiments in an attempt to block the Imperialist advance. An inconclusive skirmish erupted before Bucquoy recalled his outriders. They soon came under attack by Moravian cavalry fording the river from the north, east and south.
Moravian assault: (D6+6+5 for element of surprise and multiple directions) 15 Imperialist reaction: (D6+6-4 for indiscipline+6 for numerical superiority) 14 La Croix danger roll: 1; survival roll: 2 Rusinowski danger roll: 1; survival roll: 5 Stubenvoll danger roll: 5 Kien danger roll: 1; survival roll: 4
The attack was well orchestrated. Stubenvoll and Kien were both aggressive officers, and their assaults threw the indisciplined cossacks under Rusinowski into disarray. La Croix attempted to stand his ground – he was wounded, unhorsed and captured. Still, the cossacks quickly recovered after recognizing that the attacking force was inferior, and they instinctively started to outflank the engaged Moravians, who were forced to disengage towards the central crossing.
The cossacks pounced on them, driving them in a disorderly mass into the water, with some dozens drowning. The pursuit was relentless, the Poles chasing the defeated Moravians to the walls of Brno itself. It had been a good plan in theory, but Bucquoy's vanguard was too numerous and experienced for it to achieve its intended effect. La Croix (6) was abandoned by his captors during the rout, miraculously emerging from it alive and soon returning to his post.
Result: Imperialist victory.
Siege of Brno, 29th July-18th August, 1621
Bucquoy promptly brought up his army around the city and began siege works, preparing for a lengthy engagement. Schlick had a large army manning the walls, and was prepared to resist capably, but after only two weeks it became clear that he wouldn't have to: Following his defeat to the Hungarians, Chrstian of Anhalt's army had abandoned Silesia and now arrived in northern Moravia. It was a frustrating repeat of the previous invasion, in that the Imperialist commander did not feel confident enough to leave the siege in place whilst meeting the enemy relief-force. The Confederate commander, Hohenlohe, quickly brought the uprisings against Schlick's rule in the north to heel, and continued southwards. Bucquoy abandoned the siege pre-emptively, without any loss of supplies or cannon.
Result: Confederate strategic victory.
Retreat from Brno, August 1621.
Schlick launched some attacks upon the Imperialists as they headed west with his cavalry and light troops.
Moravian attacks: (D6+6+4 for high spirits) 13 Imperialist rearguard: (D6+6+8 due to commander's traits) 17
The Walloon Field-Marshal fought them off with skill, and eventually they ceased altogether, conflict among senior Confederate commanders back in Brno delaying an effective pursuit.
Bucquoy brought his army to Trebitesch, before moving south towards the long-standing pro-imperialist base at Budweis. The Confederates finally contented themselves with taking up a position at Kaunitz, and like such the two armies faced off against one another for the rest of the month.
Bethlen Gabor's armies have occupied much of Silesia, including Schweidnitz.
Christian of Anhalt's army has left Silesia and joined with Schlick in Moravia, leading the second Imperialist invasion of Moravia to fail.
John-George of Saxony has raised a new army, currently stationed in Lusatia.
The Dutch have abandoned their siege of Antwerp.
The Spanish army under Cordoba has laid siege to Grave.
Spain has signed a truce with Baden-Durlach, allowing the Badener army to withdraw from Franche-Comte but prohibiting any repeat of the invasion or any similar action against Baden-Durlach by Spain.
Spain and Genoa have signed a truce with Savoy, granting Savoy half of the Margraviate of Montferrat in exchange for a return of all (other) territories occupied by Savoy, and a truce effective for five years.
Both the Protestant Union and the Catholic League continue to gather more men on their borders. The Union states that its army is for the defence of German and Protestant freedoms.
A huge Ottoman army has invaded Commonwealth-held Moldavia, and engaged Polish-Lithuanian forces.
Public Update - December 1621
The Protestant Union has dissolved itself.
The Elector of Saxony has invaded the outlawed territory of Anhalt-Bernburg, occupying it and making most of it part of his personal domain. This has sparked outrage among many German princes.
After the bloody battle of Khotyn, the Ottoman army has retired, and a treaty has been concluded between Empire and Commonwealth.
The Hungarian army has left Silesia, its soldiers taking with them all the money and goods they could carry.
The Siege of Grave has been broken after the arrival of a Dutch relief force.
Third invasion of Moravia – October 1621:
Battle of Zelesice - 8th October 1621
For another month, both Imperialists and Confederates remained in their bases – Budweis and Kaunitz respectively – with the former starting to dig earthworks and trenches in preparation for an attack, but none came. Instead, the arrival of reinforcements in the form of Bethlen Gabor and 9000 of his Hungarians settled the matter: Ferdinand resolved on an attack, and dispatched the appropriate orders to his commander, Bucquoy.
Meanwhile, the Confederates were in a less than enviable position: A regiment had been recalled by its master and departed northwards, quitting the conflict, while more desertions crippled Christian's offensive capacity, due foremost to lack of pay. The Moravian party under its Margrave resolved on a defensive strategy and the splitting of the army into two detachments, heading a few miles north, to cover the northern side of the Jihlava river in Eybenschitz. When they received word that the Imperialist army had set out of Budweis, Hohenlohe advised a retreat into Moravia, where they would hold out in Brno until winter. Schlick and Christian, however, overruled him, stating that they had a strong position along the junction of the Jihlava river with its breakaways. The Confederate force entrenched itself during the next two days until the Imperialists arrived. At this point, Schlick headed north to Papovky and failed to answer any of Hohenlohe's ensuing correspondance.
Confederate intelligence roll: 4
Soon after, word came to Christian's camp that Gabor had appeared suddenly to his north with a large number of hussars. Communications between Schlick and Christian were now cut, and Hohenlohe hastily ordered an eastward retreat, to avoid entrapment between the Hungarians to the north and Imperialists fast approaching from the west. He hoped the Moravians would occupy Gabor and thus cover his withdrawal.
Hohenlohe march roll: 4-1 for harassment and substantial artillery train. Gabor march roll: 5+1 for speed. Bucquoy march roll: 4
As usual, Gabor's hussars were a thorn in the side of his enemies, and they continually harried the beleaguered Confederate troops as they marched – but these were not simply random harassment tactics: The rebel army was being pushed generally south-eastwards, towards the crossing of the Bobrava river, west of the village of Zelesice. Here, as he arrived, Hohenlohe's exhausted troops found the eastern ford blocked by Hungarians. The Imperialists were only a couple of miles behind them, and the general resolved on a frontal attack, hoping to smash the hussars and continue his retreat.
Confederate assaults: 1-1 due to fatigue Hungarian defence: 6
With most of the notable colonels having previously deserted or left, Pithan was selected to organize the main attack. While he prepared his men, he had several companies of cavalry skirmish with the Hungarians across the river. The hussars – lacking ranged weaponry – fell back, leaving skirmishers emerging from between their ranks to return fire. A firefight endured for ten minutes until Pithan led his infantry forward. However, his Dutch troops were ill-suited to deep-ranked assaults, and their formation was disrupted by the crossing. The Hungarian skirmishers inflicted losses until Gabor ordered a general assault – the Dutch mercenaries started to trickle back across the river before contact was made, and when it was, the effect was decisive.
Pithan danger roll: 1 ; survival roll: 4
Several hundred were lost – killed, drowned or captured along with all of their standards. The wounded colonel was practically carried to safety by his men on the west bank after he was wounded. To his west-facing rear, those of Hohenlohe's guns that had deployed were starting to fire on converging groups of Imperialist outriders arriving on the battlefield. Hohenlohe told Christian that they were lost; Christian scolded him. However, the “ex-king” had lost touch with reality: Men were abandoning their ranks and heading for the only available escape route, which was southwards, across some scarcely passable gulleys and a stream breaking off from the Bobrava.
The hills to the northwest presented an imposing wall, and access to them was soon cut off by companies of cossacks. La Croix reported back to Bucquoy the Confederate deployment and position, and the latter promptly dispatched Verdugo's Walloons to put an end to things.
Imperialist assault: 3+1 for superior quality. Confederate defence: 5+1 for cannons, -1 for demoralization. Verdugo danger roll: 5
The Imperialist infantry, however, was also tired from its forced march. It reached within musket range of the Confederate guns – hastily deployed as they were and dispersed between blocks of wavering infantry – but they were forced back with heavy loss by the onslaught of artillery.
Bucquoy had them reform, reinforced them with Wallenstein's cuirassiers and infantry battalions, and launched them to the attack again. He also ordered Rusinowski's cossacks, who were skirmishing with Confederate cavalry on the left, to launch a decisive strike once his regulars were in the field.
Imperialist second assault: 6+3 for superior quality, morale and flank assault. Confederate defence: 1+2 for artillery and reinforcements; -1 for increasing demoralization and desertion. Verdugo danger roll: 6 Rusinowski danger roll: 1; survival roll: 3 Wallenstein danger roll: 6
Hohenlohe tried to reinforce his rearguard with men from the center, but the latter was in a mess and only scattered, haphazard groups arrived to bolster the line. Wallenstein's cavalry rode casually up to the rebel line, forming up and discharging repeated volleys of pistol fire upon them. The intimidating cavaliers, outfitted in full three-quarters armour, destroyed the Confederate resolve and most of the left portion of their line collapsed, before the cuirassiers drew their “armour smasher” heavy swords and started to hack the remainder to pieces. At the same time, Rusinowski led his fierce Lisowczycy cossacks in a massed attack. He was wounded early in the attack by a stray shot, but the resultant chaos broke the Confederate right wing.
Essentially, the rebel line had ceased to exist by the time Verdugo and the infantry arrived for a mop up.
Christian escape roll (5+): 2 Hohenlohe escape roll (5+): 6 Pithan escape roll (5+): 2
Thousands of rebel troops simply surrendered now that they were truly encircled. Thousands more tried their luck with in an escape to the south.
Retreat roll: 6
Miraculously, the troops piled into the gulleys and across the stream without becoming a stampede, but Christian of Anhalt was soon captured in the rout, having lost his horse and being cut off by Imperialist arkebusiers. Two companies of Dutch still resisted on the field, their colonel lying wounded among them. Gabor asked them to surrender in exchange for a promise of safe treatment, they obliged.
For the clean up, Gabor sent his hussars south along the east bank, while Bucquoy dispatched his arkebusiers along the west, inevitably capturing wretched rebel infantry numbering in the thousands before the day was over, including (2) Hohenlohe, who had been dismounted and plundered by his own troops. The uprising was finished.
Imperialist-Hungarian losses: 200 cavalry and 700 infantry killed or wounded. Confederate losses: 1500 infantry and 450 cavalry killed. 3200 infantry, 200 cavalry and 26 guns captured.
Consequences:
Margrave Heinrich of Moravia has sworn fealty to the Kaiser, and has received a pardon from him.
Northern Moravia has been handed to Gabriel Bethlen.
Public Update - March 1622
The Dutch Siege of Bruges continues...
Margrave of Baden-Durlach has occupied the County of Isenberg with an army. No hostilities have occurred.
The Bishop of Halberstadt has raised an army.
Public Update – May 1622
The Ottoman Sultan, Osman II, has been deposed by mutinous janissaries.
Gabriel Bethlen has assembled a great host in Hungary, consisting of his own troops and a large Catholic League army sent by Maximilian of Bavaria.
With the end of the Bohemian conflict, a spate of demobilizations and dismissals of troops has occurred among debt-ridden combatants, such as Austria-Moravia, Silesia and Saxony.
Public Update – August 1622
Invasion of Ottoman Hungary – July-August 1622
After diplomatic delays and issues culminating in the withdrawing of a large portion of the Bavarian army in place, Gabriel Bethlen launched the invasion of Hungary still occupied by the Turks. He had divided his army into four forces, each with specific objectives. Seeing as Thurn had been the architect of the organization of the western-style corps within Gabriel’s army and had also been responsible for most of the strategic planning, he was appointed Royal Marshal and thus supreme commander, second only to the king himself. The local Ottoman commanders had had a fair amount of warning and time to prepare their soldiers and ensure that fortresses were well supplied, however these efforts were partially disrupted by a gradual outbreak of rebellion in various parts of (5) Hungary and (3+1 due to history of rebellion)Serbia.
The westernmost force, the Army of the Sava, advanced eastwards from Sisak, led by Gabriel and the senior Bavarian commander, Anholt. It met no opposition until the castle of Bosanska Dubica, garrisoned by several hundred Ottoman troops.
Initial attacks went poorly, and the Allied troops were repulsed in disorder. The army’s morale suffered, and Anholt decided that the best way would be to starve the defenders out, due to a paucity of siege equipment. Gabriel ordered Anholt’s Bavarian troops to mine the walls, but both attempts were unsuccessful due to skilled counter-mining by the defenders.
The Army of the West, under Field Marshal Kaplir, departed Nograd for Vacs. Although it was the smallest Allied army, it possessed more numerous and heavier guns than the Army of the Sava. Still, it had before it the greatest concentration of enemy fortresses, a daunting prospect for its commander.
Vacs castle, despite its relative weakness, held out against the attackers by the dogged ferocity of its defenders, among whom it was discovered that there was a surprising number of Janissaries. Kaplir bombarded the walls but to little effect, and entrenched his troops around it in the latter portion of the month.
Thurn’s personal force, the Army of the East, fared little better. The castle of Eger, famous for its heroic resistance to the Turks almost a century before, resisted the attack strongly.
Finally, Rakoczi’s Army of Temesvar headed for the border fort of Lippa. Though numerous, his army was the most “traditional” Hungarian force, lacking siege guns, engineering skills and shock troops.
Siege roll (-1): 2 Rakoczi danger roll: 2
Although the first month of campaigning was a major disappointment to the Allied command who had expected a swift series of conquests, they still held the initiative, and were greatly successful in using their light troops with the support of local insurgents to clear countrysides of Ottoman irregulars, helping them logistically.
Action of Stadtallendorf – 24th July 1622
Halberstadter army discipline roll: 2-1 due to erratic pay and conditions. Time of day (1-2=Morning; 3-4=Afternoon; 5-6=Evening): 4 Weather roll: (1=Raining; 2-5=Sunny; 6=Very sunny) 3
After a slow start due to organizational difficulties, the Bishop of Halberstadt marched westwards with his army, into Marburg. However, the Landgrave had foreseen an invasion, and taken measures to gather troops and prepare them, with an infantry regiment in place garrisoning Marburg itself along with support from a small regiment of arkebusiers. As the Halberstadter troops approached, dispersing to ravage the land – killing, looting, burning and raping – the Darmstadt cavalry regiment came into contact with several companies of Halberstadter outriders in the suburbs of Stadtallendorf, a town owned by the Archbishop of Mainz. The town had been sacked thoroughly, and the troops emerging from it were out of rank and wholly unprepared to deal with this new threat.
The Darmstadt cavalry, headed by Lt. Colonel Dohna, formed up and descended upon them.
Darmstadt attack roll: 6 Halberstadt defence roll: 1-2 for indiscipline.
The troops before them were not expecting any resistance, and scattered at the very sight of the enemy. Cavalrymen mounted their horses and fled as quickly as they could, while the hapless infantry poured back into Stadtallendorf, where the furious populace took arms and blocked their passage, butchering the stragglers they found. As the Halberstadter troops were isolated into pockets of resistance, they mostly surrendered, hoping to be spared from the townspeople by the fellow soldiers fighting them. Some 50 men barricaded themselves in the church and put up resistance, before realizing the hopelessness of their position and surrendering.
A fairly unscrupulous man, Dohna took the weapons of the defeated and handed the prisoners over to the population, who killed them all. This left the Darmstadt force’s hands free to continue the pursuit unhindered, which it did, killing or capturing several hundred more Halberstadters. These casualties, however, were not the worst of it – the stream of fleeing soldiers caused a panic among the invading troops, with several outlying detachments retreating in chaos towards the main army, and other portions taking to the closest villages and becoming inactive out of trepidation.
This small setback stopped Christian in his tracks for many days as he set to reorganize his troops and prepare them to continue towards Marburg in a more orderly fashion.
International News
- The Ottoman Sultan has been strangled by janissaries. Mustafa I is once again Sultan.
- The King of Hungary has declared war on the Ottoman Empire and invaded Ottoman Hungary.
- The Duke of Bavaria has pulled a large portion of his army from Hungary, instead sending it to Saxony across Bohemia. Saxony has raised its army and activated the defensive processes of the Lutheran Union. Silesia has raised troops.
- Bruges has fallen to the Dutch, shocking Europe.
- John Goerge of Saxony has given custody of Christian of Anhalt-Bernburg back to Ferdinand II.
- The Dutch prisoners from Pithan’s regiment captured at Zelesice have all been executed by order of the Kaiser. Count von Hohenlohe has been pardoned and released, as has Gabriel Pechmann. Both were senior officers in the Confederate army. The Count of Solms-Laubach-Sonnenwalde and the Baron of Hofkirchen – who had also served in the rebel army – have been executed on charge of treason. Many German Protestants have protested what they call a cruel massacre and unconstitutional treatment of the captured princes. The Dutch Estates General have written a letter of protest against the slaughter of over 1000 of their unarmed countrymen, and urge German princes to ignore Ferdinand’s bans, to oppose his motions and seek to rectify his tyrannical policies in the Reich.
- The army under the command of George Frederick of Baden-Durlach has occupied the County of Schwarzburg, close to the Saxon border.
Last edited by Inkie; October 10, 2012 at 01:32 PM.
Under the patronage of the formidable and lovely Narf.
Proud patron of Derpy Hooves, Audacia, Lordsith, Frodo45127 and Sir Adrian.
In the middle of October, Blankhart received orders from the Duke of Bavaria, instructing him to return to the Upper Palatinate for the rest of the winter. Blankhart promptly mobilized his dispersed troops and started to head southwards. In Heidelberg, Christian heard of this, and his officers deemed that Blankhart was either moving to attack the city or he was going to bypass it for whatever reason. To counter this, the bishop ordered the three local bridges across the Neckar River to be cut. For the two in Heidelberg, this was achieved easily, but there was another 7 miles to the north-west, in Ladenburg. Wildenstein Dragoon Regiment and Sax-Weimar Cavalry Regiment were dispatched to seize it, with the support of companies of musketeers and sappers sent behind them to conduct the demolitions and defend the bridge. Only if the bridge risked falling into enemy hands did the Protestant commander Lt. Colonel Budingen decide that it should be destroyed. When news arrived that the League army was marching for Ladenburg, the cavalry raced ahead in a flying column in order to secure the bridge before the arrival of the enemy.
Time roll (1-3= Night; 4-6=Evening): 1
Halberstadter Flying column march roll (+3 for speed and proximity): 6+3 Halberstadter infantry march roll: 5 Bavarian army march roll: 4
Only an hour before the Bavarian scouts arrived, the Protestants established a beach-head on the northern bank with the arrival of600 musketeers. Budingen ordered the infantry there to entrench itself around the bridge while the demolitions were to be conducted in full. The horse would act as a screen.
Soon enough, the Catholic cavalry and musketeer vanguard arrived. League commander Colonel Cronberg opted for caution, seeing as night had already fallen. He drew up his men but the two sides did little except face off for the rest of the day, before bivouacing. The rest of the Catholic League army arrived throughout the night, while the Protestants continued entrenching their position.
Weather roll (1-2=Rain; 3-4=Mist; 5-6=Bright): 2
On the morning of the 25th, the Catholic gun-batteries started to pound the Protestant positions. Wildenstein regiment had dismounted and was reinforcing the musketeers along the defensive line, which consisted of two trenches and a sconce (a sort of dry moat) formed in a demicircle outwards around the bridge. On the southern bank, Sax-Weimar cavalry waited as reinforcements, while the engineers hurried to complete their work. Word had been sent back to Heidelberg calling for reinforcements, and these were already en-route.
Catholic barrage (-3 for weather and strong enemy entrenchments): 3
Despite the poor conditions, the League artillery performed rather well its officers positioned it so as to fire upon the exposed cavalry south of the bridge. This continued for around an hour before Budingen granted its commander permission to withdraw further southwards. This had a slightly demoralizing effect on the troops defending the redoubt. Feeling satisfied with the result, Blankhart took over command from Cronberg and organized and assault.
Catholic assault (+1 for superior numbers and morale): 2 Protestant defence (+2 for superior defences): 5 Protestant danger rolls: 3;2 Catholic danger rolls (-2): 4;1;6 Catholic Survival roll: 2
The League tercios, composed of ragged veterans of the Schwarzburg campaign, made an ill-led attack upon the Protestant position. Colonel Schmidt was killed and the rest of the force retreated back in disorder. By the time Blankhart had regrouped his men, the reinforcements from Heidelberg had arrived, and the Protestant resolve had been bolstered. Blankhart decided to concede that taking the bridge was no longer possible, and withdrew.
Result: Protestant victory.
Protestant losses: 70 killed and wounded. Catholic losses: 150 killed and wounded.
Aftermath
Blankhart sulked in the north for the rest of the winter, his troops poorly supplied and resentful that they had been assigned such poor quarters by the Saxons, a sentiment that Blankhart made no effort to reduce. They plundered the area particularly viciously over the next month.
Subsequent skirmishes:
Protestants (+1): 6 Catholic League: 3
Protestants (+1): 2 Catholic League: 1
Protestants (+1): 3 Catholic League: 4
With the League army's discipline and morale eroding, the Protestant command decided to harass it with several more skirmishing probes, sent out across the Neckar from the fortified position at Ladenburg. At first these were highly successful, with a surprise night raid on the village of Lorsch resulting in the capture or killing of the League garrison there. Soon, however, the Protestant initiative petered out and successful counter-attacks by the League cavalry and skirmishers drove them back to the river. The conditions in this base were miserable due to bad weather among other things, and Halberstadt ordered Budingen's detachment to finally return to Heidelberg, destroying the bridge behind it.
The War in Hungary December 1622 to February 1623
December
Faced with the looming new threat of Suleiman's huge army in Serbia, Gabriel decided to seize the initiative by using the remaining months of winter to concentrate and destroy Hussein, who after his defeat had remained in central Bosnia. It is possible that either Suleiman wanted to keep Hussein as a pinning check on Gabriel's new gains, or that the mutual distrust between the two generals prevented cooperation between them. In any case, with Kaplir still besieging Vacs and Thurn licking his wounds in Eger, Gabriel had to call on his furthest detachment, the Army of Temesvar under Rakoczi, to come to his aid. Gabriel had just been reinforced by a respectable Spanish contingent led by Savelli, and his caution here in dealing with the diminished Hussein was uncharacteristic assumed by some to be the conservative influence of Anholt.
Rakoczi, who had increased the strength of his army with some local recruits, marched first southwest, to Gyula. Leaving a moderate garrison there, he started out on a planned parabolic march across Ottoman Hungary, which would allow him to reach his king quickly but without straying too close to the Ottoman main army in northern Serbia. Fortunately (6) the winter was past its peak and would not pose a serious issue to morale and supply...
Suleiman's response (5+1 for personal traits) was strong and immediate. Some of the Janissaries in his camp were unhappy with the prospect of a winter campaign, but he dispelled internal opposition and moved the whole army west, save a sizeable garrison left behind in Serbia. The Ottoman general had received reinforcements during the weeks precedent, and the army under him was well over 50 000 men despite what he had left behind. Marching along the north of the Sava parallel to Rakoczi, he intended to deny the Hungarians passage over the Drave river, which would allow them to head south, over the Sava, and to Gabriel.
Hungarian march roll (+2 for smaller size and greater speed, -1 for greater distance): 3 Ottoman march roll: 5
Rakoczi believed that Suleiman was marching against Gabriel, and didn't manage to rectify his error of judgement in time. His troops encountered enemy troops in the hills north of the Drave, immediately engaging in several skirmishes with them which soon developed into something more serious.
Action of Siklos, 24th December
Hungarians (+1 for greater experience): 6 Ottomans (+2 for vastly superior numbers and preparation): 6
The Hungarian hussars, who habitually marched in very dispersed order for foraging purposes, were surprised when they encountered enemy light infantry and cavalry raiders waiting for them in hills miles north of the Drave river, near the outlying town of Siklos. In different valley segments Hungarian cavalry groups were attacked and mauled by superior Turkish forces. However, as his men streamed back to him in disorder Rakoczi rallied them without difficulty, and led a concentrated force to dislodge the enemy. The Turks' discipline had relaxed and their numerical advantage had been neutralized, allowing the Hungarians to swiftly push them back in a shifting battle predominantly involving cavalry and skirmishers.
Hungarian danger roll (-2): 1 Survival roll: 6 Ottoman danger roll (-2): 2
Rakoczi was a fearsome warrior who did not shy away from personal combat, and the effect of his presence on the morale of his troops was considerable. Nightfall ensued, however, and along with it came a great number of confused firefights and mêlées, but to the advantage of neither side.
Result: Indecisive Hungarian losses: 300 cavalry and 100 skirmishers killed, wounded or taken prisoner. Ottoman losses: 250 cavalry and 350 skirmishers killed, wounded or taken prisoner.
Action of Szigetvar, 26th December
The next day, Rakoczi gathered most of his army, preparing to clear the area of Turkish presence and to drive them over to the southern bank of the Drave river. However, now Suleiman had crossed with the rest of the army. The land between the Drave and the Siklos hills was largely flat, and Rakoczi needed no persuading to realize that he could not force his way through such an obstacle.
Intelligence roll (+1): 6
However, refusing battle would prove nearly as difficult due to Suleiman's skilful kenneling: All of the surrounding territory was hostile and its strongpoints held by garrisons. He could attempt to retreat to friendly territory in the west and pass through it to Gabriel, but this would be hard seeing as the enemy army was to his south-west and scarcely passable mountains lay to his north. He could attempt to outmanoeuvre the Ottomans by rushing southeast and crossing the Drave there, but this was an unattractive plan for several reasons: Firstly, the Ottomans held Essek and with it most of the crossings there, second the local marshland would make swift progress difficult and finally, if victory was not attained quickly, the Hungarians risked being cornered by Suleiman, their backs to the mighty Danube.
Thanks to his good knowledge of the lay of the land, Rakoczi decided that such a manoeuvre would best be tried in the westward direction, through friendly territory. To achieve this, he would first have to break through the gap 3 miles wide between the left flank of the Ottoman army adjacent to Szentegati Forest, and the mountains to the north. In the centre of this flat, open pass between woods and enemies to the south and mountains to the north, lay the town of Szigetvar.
Hungarian leadership roll: 6
Rakoczi stayed in a strong position near Siklos for most of the 25th, using the nearby hills to his defensive advantage. For all of his strategic acumen, Suleiman could not see a way of effectively removing his enemy without risking great losses. In the evening, the wily Hungarian let slip that he intended to march east, dispatching several companies of hussars in that direction to add credibility to the leak.
Ottoman leadership roll: 2
Suleiman's officers and mullahs threw a fit, urging him to not let the Hungarian escape. Suleiman had already strained relations with his subordinates enough, and obliged reluctantly. During the night the bulk of the Hungarian army circumvented him via the Siklos hills and passed the Szigetvar gap without a hitch.
The following day, an enraged Suleiman sent forth almost all of his cavalry to catch up with the Hungarians and attack them in the rear as they retreated. They caught up to the Hungarian column ten miles west of the town. Rakoczi gathered up most of his own cavalry in order to protect the guns and baggage (essentially loot), but he was still greatly outnumbered. That being said, his troops although lighter than the Ottoman Sipahis were more experienced and the Turkish troops were tired after too much riding. Characteristically, almost all of the fighting was made by cavalry, with some Hungarian skirmishers supporting.
Hungarian left (Fekete) (+2 for greater experience, disposition and leadership): 6 Ottoman right (+2 for heavier troops and greater numbers): 3
Hungarian centre (Rakoczi)(+2 for greater experience, disposition and leadership): 5 Ottoman centre (+2 for heavier troops and greater numbers): 4
Hungarian right (Horvath)(+2 for greater experience, disposition and leadership): 4 Ottoman left (+2 for heavier troops and greater numbers): 3
The ensuing clash was settled fairly quickly, with the fatigue of the Ottomans revealing itself as a decisive factor. Fekete immediately routed the Akinci horsemen before him, before turning on the better-equipped Timariots in the centre, whose discipline collapsed, their flight carrying with them the rest of the Turkish force. Casualties during the brawl itself were fairly light, and it was during the retreat that the Ottomans suffered in earnest.
Result: Hungarian victory Hungarian losses: 120 hussars killed and wounded. Ottoman losses: 1000 sipahi and irregular cavalry killed, wounded or captured.
Aftermath
Suleiman lost the initiative, and had to spend several days reorganizing his broken cavalry. Rakoczi entered friendly Upper Slavonia, marched southwest to Sissek, and then cut eastwards along the Sava, finally meeting with Gabriel on the 8th of January. Rakoczi's march had been a miraculous success despite the odds, but the Christian high command was far from relieved of pressure. They now had with them 30 000 troops of good quality, but they only held a thin strip of territory between Suleiman to the north, and Hussein to the south.
January
Gabriel immediately sent word to his other lieutenants, Kaplir and Thurn, who were both further north, bidding them to send south as many men as they could. Meanwhile, leaving Rakoczi in place with 10 000 men mostly hussars and croats he headed south with the rest of the army, in order to crush Hussein. He needed to achieve this in order to relieve the threat to his south, so that he could concentrate on Suleiman.
After the defeat at Szigetvar, Suleiman had moved south, presuming that the Christians would next move against Pozega, the next fortress along the Sava route. However, he was mistaken, and upon hearing of Gabriel's departure he resolved to seize Gradisca and settle his score with Rakoczi. The landscape was sliced horizontally by the Sava, flowing from west to east. Five miles of flat ground extended north from the river bank before reaching a hollow mountain range, centred around the hilltop fortress that was Pozega, and its wide, open valley. Reaching Pozega, Suleiman bolstered its garrison and also that of Brod na Savi, another nearby fort. On the 7th, he marched south towards the Sava valley, but found that Rakoczi had blockaded the entrance to the pass with his hussars. The pass itself was only two miles wide, a valley formed around a minor tributary of the Sava. The hussars, 5000 strong and led by Fekete, fell upon the Ottoman vanguard as it approached.
Hungarian attack roll: 3 Ottoman defence roll (-1 for demoralization +2 for greatly superior numbers): 2
However, they were too slow to prepare and seemingly the effect of Szigetvar upon their morale lingered, resulting in the immediate retreat of several Akinci ortas from the frontlines, creating disarray and panic in the rest of the army. However, the Timariots and other Ottoman cavalry acted more bravely, and managed to counter-attack, meeting the rather undisciplined Hungarian charges in a few skirmishes. Soon, the Ottoman infantry started to join in the engagement in increasingly large numbers, and Fekete pulled out. The action left just over 100 Hungarian dead to a slightly greater number of Turks. After regrouping, the next day Suleiman marched across the Sava plain to Gradisca, where he found Rakoczi entrenched and guarding the river crossing there with his full army. Suleiman therefore started to prepare outworks for his artillery, meanwhile sending a detachment east in order to build a pontoon bridge across the river.
Rakoczi intelligence roll: 3
Rakoczi saw the detachment go, but assumed it was just another exchange of men with Pozega considering that men had been coming and going fairly regularly from the Ottoman camp. The Ottoman army had with it at least forty guns, of heavy calibre, and when they started to bombard the Hungarian position on the southern bank their superiority to Rakoczi's 6 light pieces started to make themselves felt.
Ottoman pontoon (+1 due to engineering skills): 3
A few days later, Suleiman lost patience with his troops' bridge-building efforts and ordered around 8000 of them to cross at Brod na Savi. They duly departed on the 13th, taking a few light guns along with them.
Two days later, Thurn received his orders from Gabriel. Fortuitously, Vacs fell to Kaplir's army soon afterwards. Thurn gathered his own battered army, combining with that of Kaplir and starting the southwards march, heading through friendly territory and keeping a steady pace in order to not wear down his troops too much, some of whom were still sick. Around two and a half weeks into his march, as he passed Veszprem, he heard that the Turkish garrisons of Buda and Esterzgom had started to devastate the landscape around Vacs, ruining the supply situation of the Vacs garrison, comprised of 500 sick or wounded soldiers. This forced him to detach a flying column of 800 hussars to secure Vacs and defend it.
Meanwhile, Gabriel led his force into the Dinaric Alps towards Sarajevo. He set a fast pace, hoping that Rakoczi could hold out while he marched against Hussein.
Progress roll: 3
However, the march across narrow mountain roads was difficult rainfall turned many paths into mud, and had an adverse effect upon morale. The march slowed greatly, although fortunately the Hungarians encountered very little enemy resistance. No Ottoman outriders followed their progress, and a small detachment defending Travnik was taken by surprise when the Christians arrived. The town fell swiftly, and the frustrated hussars sacked the place, killing all of the defenders as well as a good number of civilians. It was not until the 19th that he reached Sarajevo.
Hussein leadership roll (-1 for personal traits): 1
As Gabriel and the ravenous Hungarians approached, Hussein lost his nerve. He abandoned the regional capital, taking his army south-east towards Serbia, where he hoped to gather more reinforcements. Gabriel pursued, but (1) it became apparent that he would not catch the Ottoman general. Frustrated by failure to bring the enemy to battle, worse news still came when Savelli's group received orders from the Spanish government to attack Ragusa, protected by the Ottomans. Still, he was in possession of Sarajevo, a major blow to Ottoman prestige which also granted him a precious supply-base as well as large amounts of treasure with which to continue funding the war. Remaining in place for another 2 days to loot the surrounding countryside and acquire provisions for the return march, he then headed back north, where at Gradisca Rakoczi had been enduring for a week.
Ottoman assaults: 5 Hungarian defence (+2 for superiority of position, -1 for demoralization/losses due to bombardment): 6
The Ottoman attacks across the bridge had been vicious and relentless. Several times they captured the Hungarian defence line or portions of it, before being pushed back only with the greatest difficulty.
On the 19th, as Gabriel was capturing Sarajevo, a company of hussars on a foraging mission encountered Ottoman troops on the south bank of the Sava, marching westwards.
Hungarian skirmishing: 2 Ottoman skirmishing: 3
After a chaotic skirmish in which the Hungarians were defeated, the survivors retreated back to Gradisca, immediately informing Rakoczi of the threat to his flank. Fortunately, their estimates of the Ottoman army size were correct, so their general knew what he was dealing with.
Rakoczi leadership roll: 2
However, he was at his wit's end with how to both contain Suleiman to his north and remove this new threat to his east. On the 20th, with the Ottoman river detachment only a few miles away, the Hungarian leadership decided to abandon Gradisca. A new line of defence would be prepared at Bosanska Dubica until reinforcements arrived. Around 1000 troops were left behind the walls with orders to hold for as long as possible, and word that they would be relieved within two weeks.
Ottoman pursuit (4+): 4
The Ottoman corps advancing from the east bypassed Gradisca and pursued the fleeing Rakoczi, while the main body of Suleiman's troops streamed across the river and surrounded the town. Within two days, they caught the Hungarian rearguard defending the extremely narrow Bistrica defilé, where the road passed between mountain and riverside. The Hungarians had one 3-lber gun, 500 hussars and 500 croats.
Hungarian defence: 3 Ottoman attack: 2
The first time the Ottomans attacked, their cavalry was surprised by the Hungarian gun and driven into disorder by an attack by the croats.
Hungarian defence: 3 Ottoman regrouped attack: 5
After a few hours and some more intermittent skirmishes, the Ottomans brought up their own guns and started pummeling the Hungarian troops, breaking up their formation and routing them. The gun was taken, but the pursuit did not last long the Ottomans had been delayed enough for further pursuit to be redundant.
Action of Bistrica, 22nd January Result: Ottoman victory Ottoman losses: 40 Hungarian losses: 70
Ottoman siege roll (+4 for abundance of siege equipment, expertise and enemy demoralization, -2 for short length of time): 6
Although the garrison held out for another week, it eventually capitulated after Suleiman blasted the gates apart and offered an ultimatum.
2nd Siege of Gradisca (10th - 27th January) Result: Ottoman victory Ottoman losses: 2300 killed, wounded or taken prisoner. Hungarian losses: 2000 killed, wounded or taken prisoner.
Fortunately for the King of Hungary, he found out that Gradisca had fallen before Suleiman found out that he was approaching the city. He emerged from the Dinaric Alps on the 30th , hoping to quickly reach Dubica before Suleiman could react. The Turkish general had wisely decided to not move against Dubica until he knew where Gabriel was, yet by the time he did the Hungarian was already hurrying towards the place, and Suleiman suddenly risked losing the initiative. A conveniently positioned group of mountains meant that he would not be able to intercept Gabriel en-route, so he planned to do the next best thing: He would surround the fortress and prevent the two armies from joining, before crushing Gabriel and bringing Rakoczi to a final, humiliating defeat.
The problem was once again the Bistrica defilé. Rakoczi made use of it again in a desperate attempt to hold back the Ottomans long enough for the king's army to arrive. To this end he sent Horvath the man who had risen to prominence during the Bohemian campaign of 1621 and 1000 cavalry there, with orders to ambush the head of the Turkish column as it arrived. In fact, Suleiman had cautiously sent a division of 5000 ahead to ensure that the pass was clear before he brought in the rest of the army.
Hungarian initial attack (+2 for position): 5 Hungarian danger roll (-1): 3 Ottoman danger roll (-2): 3
The Hungarian cavalry pounced upon the vulnerable Ottoman troop, composed of Wallachian irregulars with a cavalry escort. Horvath led his men from the mountainside against the flank of the enemy column, throwing those who did not break into the river and killing hundreds. The whole Ottoman force retreated in chaos, pouring back out of the pass, its morale and cohesion shattered. The pursuing Hungarians went no further, reminded of their situation by cannonfire and the swift appearance of native Turkish reinforcements. They withdrew in good order to their original position. Suleiman had to waste half a day getting his troops back in order, and by then it was nightfall. The next day he sent in three ortas of experienced Sipahi, with orders to move slowly and remain grouped. They found Horvath's corps further along the pass after several hours of marching, and formed up some distance from them. The Ottoman commander did not want to attack and risk a repeat of past events, so he waited for a while before sending out a single company to attack the Hungarian right.
Sure enough, the force was riddled with shot as it approached and finally cut to pieces when swarms of hussars attacked it from the flank.
Hungarian discipline roll (-1): 1 Ottoman discipline roll: 3
The Ottoman cavalry was dispirited by this sight, yet the Hungarians lost all order as they pursued the broken detachment they had just vanquished, placing them at serious risk when the Ottomans attacked again in full force.
The fight that followed was extremely fierce and bloody, the Ottomans not having enough momentum to use their lances to the fullest and the Hungarians being too strung out to mount an effective attack. Eventually the heavier Ottoman troops prevailed, sending the Hungarian horse into a stampede as each cavalryman raced to escape the pass. The Hungarians lost many during the retreat.
2nd Action of Bistrica, 2nd February: Result: Hungarian victory Hungarian losses: 20 killed or wounded. Ottoman losses: 450 killed, wounded and captured.
3rd Action of Bistrica, 3rd February: Result: Ottoman victory Hungarian losses: 300 killed, wounded or captured. Ottoman losses: 130 killed or wounded.
Battle of Dubica - 5th February 1623
Thurn march roll: 1 (does not arrive in proximity)
Hungarian-League Army of the Sava:
Gabriel I of Hungary 12 670 Hussars 3 180 Croats 3 100 Skirmishers 3 400 League Infantry 7 light guns 5 heavy guns
Total: 22 350 men, 12 guns.
Imperial Ottoman Army:
Suleiman Bargjini 2 000 Kapikulu 6 810 Sipahi 8 600 Akincis 15 590 Janissaries 15 750 Azaps, Gonulluyan and regional light infantry 44 assorted medium and heavy guns
Total: 48 750 men, 44 guns.
Preparation and deployment
Weather roll (1-2= Rainy, 3-6=Normal): 2
By the following afternoon, Suleiman was well clear of the pass with his whole army, yet disappointingly word soon reached him that the King of Hungary was two miles from Dubica. Realizing that he would be unable to prevent the Hungarian forces from concentrating, he prepared for a set battle on the plains south and east of Dubica. King Gabriel, however, would not fight him there, which would favour his far greater numbers. Instead, leaving 400 men in Dubica to act as a thorn in the Turkish flank, Rakoczi retreated two miles to the west, across broken, sloped ground, at the summit of which waited Gabriel's force. Across this the Ottomans would have to cross if they decided to attack - the real challenge would be bringing their cavalry and guns up the approaching broken ground without losing order. The battlefield was enclosed into a width of around two miles, between a hilly, scarcely passable forest on the Hungarian left and the mountain range to the southern end of the battlefield. The broken, upward slope extended for one mile to the northeast, leading eventually to open ground and Dubica. In the Hungarian centre and right, however, it extended before them for around two miles. It was not an optimal defensive position, particularly considering that it could be outflanked on the extreme left, past Dubica, but it was the best that the joint Christian command could settle on in a short time-frame.
There had been some strong discussion between Christian officers about whether it would be wise to give battle or retreat and wait for Thurn. However the latter was not such an alluring prospect they knew nothing of how far Thurn was, and retreating across such hazardous terrain could end in disaster, particularly considering the valuable baggage held by Gabriel's men. In any case the king silenced such talk, rejecting continued retreat against the heathen. Rakoczi's men were fresh, although recent events had fostered some defeatism in the ranks, particularly the skirmishers. Gabriel's men were tired as a result of several days of forced marching. Suleiman's troops were fresh, but many of them were somewhat fearful of the Hungarians, who had so far been a reckless, even savage enemy.
Around 1000 skirmishers, 4000 Hussars, 500 Croats and 2 guns were placed on the left, under Kollmann. The skirmishers were mostly placed in the forest, acting as a shield for the left wing. In the centre, all of the League troops, plus 1000 Croats, 3000 hussars, 800 more skirmishers and 6 guns were left under Anholt. To the right, Rakoczi was in command of the remainder mostly cavalry. The remaining 800 skirmishers he deployed with Gabriel's permission - in the baggage wagons, hastily forming an outward-facing wagonburg with the remaining 4 guns, behind which the cavalry was formed up in a deep formation.
Wagonburg formation roll: 4
It was not perfect due to the time constraints, but it would suffice. The cavalry were placed behind it.
Gabriel was in overall command, but he delegated to these three commanders, remaining in the centre with the 3000 hussars nominally under Anholt's command. These would be utilized as reserves.
The Ottoman force had been cautious in its approach, with Suleiman conscious of the threats of sudden ambushes and flank-attacks which had characterized the Hungarian activity until then. He dispatched a single orta of light troops to blockade Dubica, entrusting them with several of the largest guns that would be too difficult to bring to the field. Considering that the hill was least forgiving and bordered by forest on his right and the Hungarian left, he placed a good number of Akinci and irregulars here. His infantry was deployed in three ranks, Janissaries at the front and irregulars at the back, or on the flanks. Suleiman kept a strong reserve with him, comprising the elite Kapikulu guard and other detachments. Most of the Sipahi were on the left or in the rear also. When he saw the wagonburg, he stretched his infantry line so that some of the Janissaries could act as shock troops, replacing the gaps in the centre with irregulars. The guns were spread evenly along the line.
The Battle
Ottoman intelligence roll (5+): 5
Due to the lateness of the day (the Ottoman army arrived in position only around 5pm) and bad weather, Suleiman postponed his attack until the next morning (5th). It was then that some of his scouts reported that a valley opening up on the left side of the westward road from Dubica could lead them behind the Hungarian army. Suleiman therefore dispatched 4000 infantry and 2000 Akincis in this direction, feigning that he was sending them to Dubica. The distance was around 5 miles, so he could count on them showing up within a few hours. With this in mind, he brought his men steadily within gun range of the Hungarians, and the barrage between them started.
Ottoman positioning roll: 1 Hungarian barrage (+2 for positioning): 8 Ottoman barrage (+7 due to quantity, -2 for inaccuracy): 10
The small strip of flat ground the Ottomans could find to suitably deploy their heaviest guns was a mile from the Hungarian line, rendering the first duel at this range essentially pointless. By the timeSuleiman reached 600 yards of the Hungarian position to renew the artillery battle, he had taken some losses to the more accurate Hungarian guns, fired from their strong position up the hill. However, their thundering response soon started to decimate the Hungarian ranks, causing light damage to the wagonburg and heavier casualties upon the Bavarians in the centre and Kollmann's force on the left.
Kollmann maintained order in his ranks with professional cool, restraining the natural inclination for attack that his kinsmen harboured.
Suleiman's unwieldy force thereafter began its assault all along the line.
Hungarian left first defence (D12+4 for positioning and superior quality): 11 Danger roll: 5 Ottoman right first attack (D12-1 for commander loss): 7 Danger roll: 2 Survival roll: 2
Hungarian centre first defence (D12+4 for positioning and superior quality-1 for commander loss): 10 Danger roll: 1 Survival roll: 2 Ottoman centre first attack (D12): 9 Danger roll: 1 Survival roll: 6
Hungarian right first defence (D12+6 for positioning and greater experience): 8 Danger roll: 5 Ottoman left first attack (D12+1 for greater quality): 4 Danger roll: 1 Survival roll: 5
The first hour of fighting was brutal, casualties mounting quickly on both sides. On the Hungarian left the skirmishers in the wood pelted the approaching Akincis, sending them quickly back to their line in disgrace. When their commander, Mustafa, re-organized them and attacked again, he was killed and they were once-more repulsed. A line of Azaps then approached but Kollmann sent in the Croats, who scattered them before falling back to their own lines.
In the centre, the best infantry of both sides went up against each other. Here, an intense firefight erupted between German musketeers and Janissaries, in which one of the League Colonels, Herliberg, was killed. His men fell back and gave some ground to the Turks, until the latter's assault lost cohesion and they were forced to retreat.
On the right, an abortive attack by Sipahis upon the wagonburg was defeated. Hungarian discipline roll: 4 Rakoczi had strictly ordered that no counter-attacks would be made unless he commanded it (with the order Saint Stephen), so the Hungarians here also expressed remarkable sang-froid.
These attempts had succeeded in testing the strength of the Hungarian positions, but now Suleiman's vulnerability revealed itself, for he was now dependent upon the flanking manoeuvre. For the next hour, he withdrew from gun-range, resting, feeding and watering his men, replacing those on the frontline with fresher troops from the rear. The Hungarians could allow themselves no such luxury.
Hungarian intelligence roll: 2
When the Turks next marched up the slope, the cannon-exchange started once again. Soon after, the Hungarians were surprised by the sudden arrival of the Turkish flank detachment in their rear.
Hungarian reaction: 4
Some cavalry from Kollmann and Gabriel's hussar reserve were mustered in response, but the line they formed was uneven, and only suitable for defensive purposes.
Ottoman attack (+2 for surprise): 7 Hungarian defence (+1 for superior quality): 6 Hungarian danger roll: 1-6 Ottoman danger roll: 6
The ensuing fight was confused and messy. The Hungarians were outnumbered, and were gradually pushed back in a series of running skirmishes, that is until reinforcements under Horvath could arrive from Rakoczi's wing.
Ottomans: 1 Danger roll (-2): 3 Hungarians (+2 for superior quality and reinforcements): 4 Danger roll (-1): 3
The Turks were broken and sent into the valley behind them in disarray. Several hundred were killed or taken prisoner in the retreat.
Ottoman intelligence roll: 6
However, Suleiman had noticed the shift in force distribution along the Hungarian line, and to this end he renewed the attack, focusing this time on the centre and ignoring the wagonburg altogether, only surveying it with the Sipahis and Janissaries. He himself led the central attack with the Kapikulu, while opposite him Gabriel took to the field in order to bolster his left.
Hungarian left second defence (D12+4 for superior positioning, quality and leadership): 13 Danger roll: 3 Ottoman right second attack (D12+1 for greater intensity and numbers): 13 Danger roll: 4
Hungarian centre second defence (D12+4 for positioning and quality): 5 Danger roll: 4 Ottoman centre second attack (D12+2 for leadership and greater numbers): 13 Danger roll (-1): 5
Hungarian right discipline roll (-2): 1
Hungarian far left discipline roll: 1
On the Hungarian left, Turkish light infantry started to clear the woods of skirmishers. Gabriel's personal presence ensured that his soldiers kept their ground, and Turkish casualties started to mount rapidly, however so did those of the Christians, and they could afford far less. Horvath and those who had defeated the Turkish attack on their rear were no-where to be seen.
In the centre, a focused Ottoman bombardment followed by a spirited attack broke the Christian resolve. The Bavarians were thrown back with scarcely a fight, abandoning their position and their guns.
Seeing this, Rakoczi's hussars on the right surged from behind the wagonburg, attacking both the victorious Turkish centre and those opposing them, in a desperate attempt to re-establish the security of the line.
Hungarian centre counter-attack (D12+3 for impetus): 7 Danger roll (-1): 2-6 Ottoman centre defence (D12+2 for greater numbers and leadership): 5 Danger roll (-1): 5
Hungarian right attack (D12+3 for impetus and greater experience): 14 Danger roll: 3 Ottoman left defence (D12+5 for much greater numbers): 13 Danger roll: 6
On both fronts the Ottomans were initially thrown back by such a vigorous assault. However, the Ottomans still possessed reserves on all of their fronts, while the Hungarians had very few left, and the Bavarians were regrouping.
Bavarian regroup roll (+1 for training): 4
Hungarian left (D12+3 for superior position, leadership and quality): 4 Danger roll: 6 Ottoman right (D12+1 for greater numbers): 10 Danger roll: 6
Hungarian centre (D12): 10 Danger roll: 5 Ottoman centre (D12+4 for reinforcements and leadership): 13 Danger roll: 6
Hungarian right (D12+1 for greater experience-1 for command loss): 12 Danger roll: 1-2 Ottoman left (D12+5 for much greater numbers and quality): 15 Danger roll: 5
The Hungarian left was first to fold after the forest was finally cleared and Ottoman troops started to attack from it, throwing the engaged, tired hussars into flight, despite Gabriel's exhortations.
Gabriel escape roll (4+): 5
Eventually the king listened to the advice of his attendants and retired along with them.
Soon after, Rakoczi's attack on the centre lost momentum, and soon the heavier Kapikulu, Sipahi and Janissaries pushed them back, gaining in vigour as victory seemed in sight, while the Hungarians lost their own. Despite being heavily outnumbered, the Hungarian right fared best, fighting for vengeance after Colonel Fekete was killed. It was forced to retreat when Rakoczi's defeat saw its flank threatened.
Now the German infantry was all that remained, and it attempted to form a rearguard as the rest of the army streamed past it.
League defence (D12+2 for quality): 4 Danger roll: 5 Ottoman attacks (D12-1 for command loss): 1 Danger roll: 1-1
The jubilant Turkish victors threw themselves at the ranks of professionals facing them. Although the Germans wavered, they were saved when Suleiman was shot dead. The breathing space granted by this event allowed the Germans to now start their own retreat.
German retreat roll (+1 for training): 5
Anholt soon had his exhausted, dispirited men leave the battlefield altogether.
Result: Ottoman victory Ottoman losses: 2200 killed and wounded. Hungarian losses: 1620 killed, captured and wounded, all guns and majority of standards taken.
Ottoman officers killed were Suleiman Bargjini and Lefkeli Mustafa Pasha. Hungarian officers killed were Lt. Colonel Herliberg (League) and Colonel Fekete (Hungarian).
Aftermath
Dubica soon capitulated, adding 400 further prisoners to the Christian casualty list. The Ottoman pursuit was crippled by a command vacuum, resulting in a squabble among the Janissaries over who could assume command. The feral Akincis were unhindered by this, however, and entered with glee their favourite phase of any fighting: Leftovers. Christian wounded and stragglers were slaughtered, while isolated groups received the same fate.
Ottoman recovery: 5 Hungarian recovery: 4
The Turkish castle of Novi Grad proved an obstacle to groups of Christian soldiers fleeing westwardly, capturing scores of them. However, Gabriel did manage to restore some order after making efforts to dispel rumours that he was dead, and by the 9th he had bypassed the castle with a few thousand troops (mostly Germans). The Ottomans recovered soon from their confusion, and moved swiftly west.
Hrvatska Kostajnica was a minor town with a castle around 10 miles west of Dubica it had fallen to the Hungarians the previous summer and now appeared like a safe haven. Thousands of Hungarians pouring out of the mountain passes had entered, however upon the approach of the Ottoman army most of them deserted and flooded out of the north side. Those who remained put up as strong a resistance as they could.
Turkish siege roll (+2 for victory and preponderance of equipment): 3
The Ottomans were surprised at its tenacity, and failed to cajole the garrison into surrender.
Thurn arrived finally in Sissek on the 9th, prudently remaining in the fortress and allowing the half-starved, beaten survivors of the Army of the Sava to rally under him.
Gabriel continued fleeing through the mountains, failing (3) to induce the castle of Gvozdansko to surrender to him. Hundreds of troops deserted during the march due to lack of sustenance. He arrived in Sissek on the 14th , with less than 5000 men. Thousands had been captured by the Turks over the past week.
The Attack on Ragusa
As it turns out, the Spaniards who may have been able to change things at Dubica were busy making a move on the Republic of Ragusa. Although the republic had military and trade agreements with Madrid tolerated by the Sublime Porte it was in league with the Turks and in Count-Duke Olivares' eyes, this made it a suitable target which would draw Turkish forces away from the Hungarians. When the Ragusans refused to turn against their Turkish masters, Olivares dispatched the mediterranean fleet with orders to bombard the place in conjunction with Savelli's infantry. He attempted to hire Venetian help but the negotiations with them broke down.
The Spanish troops arrived outside the city on the 31st . A task force of galleys with 2 men-of-war arrived soon after.
Spanish siege (-2 due to lack of siege equipment): 4
The Ragusans were taken by surprise, but the Spaniards had underestimated their foe. With a mere 2 guns on land and a few dozen at sea, they could achieve little against the tough walls of the place. Instead, they settled on starving the place seeing as they surrounded it both by land and by sea.
International News
The King of France has proclaimed that Spain must evacuate the Valtelline and return it to its Grison proprietors, stating that unless this is done he must honour the defensive treaty of 1602 signed with them.
The Margrave of Baden-Durlach has joined the Saxon-Imperialist camp. According to the terms of his surrender, he has pledged loyalty to Saxony, the Lutheran Union and the Kaiser, and to prove this he has joined the war against the Turks.
The Bishop of Halberstadt and the Catholic League expeditionary force in the Rhineland have engaged in several winter actions, to the overall benefit of the Protestants.
Darmstadter troops have re-occupied the Landgraviate of Hesse-Marburg. Wallenstein's force has plundered Hesse-Kassel.
The Saxon-Imperialist army in the Palatinate has been reinforced by Imperial troops under the command of Charles Bonaventure de Longueval, Count of Bucquoy.
Duke John Christian of Silesia has re-converted to Lutheranism, and joined the Lutheran Union. Lutheran Union priors have been sent as missionaries to Silesia.
After a long period of diplomacy, a truce has been signed between Sweden and Poland.
The Calvinist Union has been created under the sponsorship of the King of Hungary.
The Ottoman army has re-conquered Gradisca and Dubica, also defeating the Hungarians in battle. The Hungarians have taken Vacs.
The Spanish have attacked the Republic of Ragusa and laid siege to the town.
Public Update May 1623
The War in Hungary
Reeling from the defeat at Dubica, Gabriel did his best to re-organize his troops in Sissek, where Thurn was waiting with his professionals. Although thousands more troops arrived over the next week or so, they were a ragged, desperate bunch, with many wounded and some unarmed or with no ammunition. The Christian army received another morale blow when news was received that the Turks had seized Hrvatska Kostajnica and executed all Christian prisoners within the walls. Thurn's scouts reported Akincis already pillaging north of the Sava, and Gabriel was not prepared to stand against the Ottomans yet. Leaving Rakoczi in place with almost all the battle-ready cavalry he had on hand (this amounted to only 5000) he placed almost 1000 infantry in Sisak under Kaplir, and continued his retreat towards Zagreb. This was on the 24th February.
Hungarian nobility on the march.
Immediately Rakoczi activated his mobile force and set about delaying the Turks as they marched west.
Leadership roll (+1 for close bond with troops): 4
He knew that his Hungarian troops were fragile, and despite his efforts he could not bolster their spirits. However, Gabriel had given him command over the Polish Lisowczycy. This was a mixed bag although they were excellent light cavalry, Rakoczi and the cossack commander Rusinowski despised each other, and considering that they had fought against each other only a few years ago, the hussars and cossacks were openly hostile. Both units fought separately, but Rakoczi did succeed in bringing the morale of his hussars and Croats up to speed by harnessing their rivalry with the cossacks none of them wanted to seem weak in front of the Poles.
Rakoczi skirmishing actions: 3 Akincis (+1 for morale): 7 Christian danger roll: 5 Ottoman danger roll: 2
Lisowczycy skirmishing actions (+2 for vastly superior quality): 8 Akincis (+1 for morale -1 for fear inspired by cossacks): 6 Christian danger roll: 2 Ottoman danger roll: 2
Although his troops performed well at first, upon the convergence of several thousand Ottoman horsemen on their position, they panicked and fled. Rakoczi could not halt them. The cossacks fared better, defeating two smaller forces of enemy skirmishers. However, the new Ottoman commander Iskender Pasha, the victor of Cecora knew his enemy well, and prevented further losses. The Christian cavalry therefore returned to Sisak soon after, leaving the route clear for the Turks to arrive. The cossacks ravaged the surrounding villages, slaughtering civilians wherever they found them.
Sisak garrison morale roll: 6
The Sisak garrison was at first concerned by the sight of their fleeing comrades and news that the enemy was approaching unhindered. Paul Kaplir, however, was a man of courage and conviction. Although not a particularly imaginative field commander, he roused his men to steel themselves for the coming siege, reassuring them that their king would return at the head of a mighty host, and reminding them what becomes of Turkish prisoners. The Ottoman army arrived on the 27th and moved to surround the town. Kaplir did not take the risk of opposing their crossing of the Sava.
Four days later, Gabriel and Thurn met with Margrave George-Frederick of Baden-Durlach near Laibach, Austria. Soon after, Gabriel was forced to send all of his remaining light cavalry to Duke Maximilian, who would have otherwise withdrawn Anholt's contingent from the Hungarian theatre. This brought the total Christian strength to just over 11 000 men with 9 guns still not enough to pose a serious threat to the Turk. For that, Gabriel would need the Spaniards, and they were embroiled in their own conflict against Ragusa.
Gabriel Bethlen of Hungary and George Frederick of Baden.
Rather than opt out in the face of Ragusan resistance, Olivares had instead decided to redouble his efforts to capture the republican city. To this end he negotiated with the French the evacuation of the Valtelline and the restitution of the Protestant Grisons to lordship of the valley. This provoked much unrest from the native Catholics and surprised many European courts, who were not familiar with such an amenable, pliant Spain. However this embarrassment came with the advantage that several regiments were now free for service in Hungary. These troops marched through Milan and the Papal domains, before boarding ship in Ferrara, however (1) heavy rains and wind delayed their departure. Savelli grew impatient at the wait, and the limited amount of cavalry at his disposition limited his knowledge of his surroundings.
Intelligence roll (-1): 5
Despite this, a local Christian informed him that 20 000 Turks were headed his way from the east. In fact, this was Hussein Pasha's army, although Hussein himself had been executed following the loss of Sarajevo and the retreat of his army. The new commander Damad Halil Pasha had bolstered his ranks with a good number of local garrisons left behind in Serbia by Suleiman Barjini, before marching west, arriving (1) on the 11th March to relieve the city. Savelli was unsure how to proceed the reinforcements under Marradas could arrive, or perhaps they would not. His own position around Ragusa was vulnerable to attack from behind, yet if he marched to meet the enemy he would be doing so with greatly inferior numbers, although the local terrain was highly mountainous and favored use of small armies.
Savelli leadership roll (-1 for traits): 3
Unsure of which option to take, he attempted both, ensuring that his main force was fully entrenched while he dispatched Caracciolo's cuirassiers and several forlorn hopes (musketeer companies) in an attempt to hold the hill passes above the coast and prevent the Ottomans from gaining the high ground.
Action of 11th March, Ragusan hills near Komolac:
Weather roll (1-3 rainy; 4-6=clear): 6
Ottoman outriders met the Spaniards in a few initial skirmishes:
Spain (+2 for superior quality): 5 Ottomans: 5
An inconclusive skirmish erupted between them and the Spanish musketeers, until hundreds more Turks started to arrive. The Spaniards attempted to prevent them from breaking through the mountain pass.
Spain (+2 for superior training, equipment and experience): 7 Ottomans (+1 for vastly superior numbers): 5
After a few bloody attacks with heavy loss on both sides, Damad Pasha brought up his guns in an attempt to blast the Christian forces away.
Spain: 4 Ottomans: 2 Spanish danger roll (-2): 1 Survival roll: 4 Ottoman danger roll (-1): 5
Seeing this and the carelessness with which the Turks were deploying, Caracciolo mounted a rapid assault with his cuirassiers, surprising the light troops before him who had not expected attack from such a small force. The Turks were sent back from their guns, but Caracciolo was forced to quickly retire seeing as the attack had led him astray from the safety of the pass. Still, the enemy was demoralized and could only attempt one further attack before nightfall. To this end the angered Pasha dispatched his small amount of Timariots with some Akinci support for another assault.
Spain (+4 for superior position, morale and quality): 6 Ottomans: 1
Caracciolo was resting his men in some nearby woods, so the burden of repulsing the attack was left to the musketeers, who succeeded largely due to the half-hearted nature of the attacks.
Following this, Caracciolo sent a messenger requesting reinforcements from Savelli, stating that he believed the pass could be defended with more men.
Savelli leadership roll: 4
Savelli accepted, but did not send more than 800 additional men. They arrived within a few hours with shovels and started preparing earthworks. Damad Pasha made no further moves for the rest of the day.
The next day, the Ottomans moved troops eastward in an attempt to find alternative routes to Ragusa, which would make Caracciolo's position untenable. The Italian sent a few companies of musketeers to ensure that his rear was secure, and requested for Savelli to send another few companies to support them.
Savelli leadership roll (-1): 1
This time the general refused, stating that Caracciolo had enough men to do his duty. (Weather roll: 1) Late in the afternoon, the companies of musketeers encountered enemy scouts in a small pass east of Caracciolo. The Christians were at a disadvantage due to a sudden downpour which made use of their muskets which relied upon a lighted fuse difficult, particularly in an ambush.
Spain (-1 due to incapacitation): 2 Ottomans (+1 due to troop type): 3
A confused skirmish erupted, in which the poor visibility prevented too many casualties on either side. The Spaniards soon disengaged, most of them fleeing back towards Ragusa.
Caracciolo intelligence roll (-1): 1
Spanish defence (-3 for position and surprise; +2 for superior quality): 2 Ottoman attack (+1 for superior numbers): 4
Caracciolo was caught unawares by the sudden attack to his rear. His musketeers scattered instantly and his own cavalry faltered.
Spanish escape roll (-2): 1 Caracciolo danger roll (-2): 1 Survival roll: 4
A Turkish force had been left at the mouth of the pass to watch the Christian position, and this soon attacked when it saw what was happening. The Christians were encircled and butchered. Caracciolo was captured along with the few survivors.
Result: Ottoman victory Spanish losses: 500 killed, wounded or captured. Ottoman losses: 70 killed and wounded.
Aftermath
Savelli leadership roll (-2): 1
Hearing news of this disaster, Savelli panicked and ordered his troops to board ship.
Ottoman initiative roll (-2 due to terrain and conditions): 2
Fortunately, the bad weather, mountainous terrain and chaos caused by the fighting meant that the Ottoman commander had difficulty establishing himself across the narrow hill passes. By nightfall, they had disengaged fully. The fleet waited at anchor for a few days off the coast, but there was no way the city would be taken now, so it eventually sailed for the Spanish domains in Southern Italy. A few ships were left behind to see if Marradas showed up he did, on the 18th, and promptly followed Savelli to Bari. Once there, many of the sick and disheartened Neapolitan troops deserted.
Result (Siege of Ragusa): Ottoman victory. Ragusa maintains its suzerainty to the Porte.
Siege of Sisak
Weather roll: 1 Rakoczi harassment (-1 for low morale): 5 Danger roll: 3 Rusinowski harassment (+2 for superior quality): 4 Danger roll: 1 Survival Roll: 1 Turkish siege roll (+2 due to preponderance of guns and equipment, -2 for harassment and bad weather): 5 D+D roll: 4
The Ottomans started to besiege Sisak with alarming efficiency. The Christian cavalry forces operating in the region did their utmost to disrupt Turkish supply-routes, and despite their inferior numbers they were rather successful in this. There were setbacks Rusinowski was killed and following this the Lisowczycy became less active in their raids against the Ottomans, instead turning to plundering the surrounding countryside and wiping out defenseless villages. Inexorably, the Turkish trenches drew closer to the walls, yet heavy rainfall and minor flooding forced them to abandon their gains temporarily and resort to a mere blockade of the castle. Although it allowed the garrison some respite, they still had to worry about supplies.
The War in Germany
For the remainder of February and most of March, negotiations occurred which precluded further warfare in the Rhineland. During this period, all Catholic League troops evacuated the region, returning to Bavaria. Some observers feel that neither side intended for peace, seeing as Christian of Brunswick used the time to continue recruiting, while the Saxons largely appear to have snubbed his overtures.
Therefore, in late March operations resumed. The Allies were somewhat crippled by the departure of the Leaguers, as well as a strong mutiny among Wallenstein's corps which essentially prevented him from contributing to the fighting. Klitzing, John-Christian and Bucquoy therefore continued the fighting themselves.
Klitzing and Bucquoy combined to begin the siege of Frankenthal, garrisoned by some 2000 Palatine-Halberstadter troops.
Initiative/attack siege roll (divided by two if unsuccessful): 1 D+D roll: 5 Klitzing danger roll: 4 Bucquoy danger roll: 1; Survival roll: 1
The enemy was well prepared, and it seemed that the siege of Frankenthal would be a long one. It was duly surrounded, trenches were dug and redoubts erected, however no dents were made in its walls. An attack led by Bucquoy himself was repulsed after he was shot dead. A few hundred Allied troops were killed or otherwise deserted over April.
Silesian attack (+1 for superior numbers): 5 Palatine defence: 4
John-Christian once again attacked Bad Durkheim. Palatine forces there were very well entrenched, and after several assaults they had not budged. John Christian eventually requested some guns from Klitzing, the latter obliged.
Halberstadter interception roll: 3
A company of Halberstadter arkebusiers watched the column's progression, but were not strong enough to take action against it. The guns arrived and John-Christian spent a full day battering Bad Durkheim into submission with alternating barrages and attacks. He took several hundred prisoners, and the town was nearly wholly destroyed by his troops.
Depiction of the Imperialists' victorious occupation of Bad Durkheim.
International News:
Hrvatska Kostajnica has fallen to the Turks. Sisak is now under siege. King Gabriel has retreated to Zagreb, where he has joined with Margrave George Frederick of Baden-Durlach.
The Turks have led an attack upon the Spanish around Ragusa, who quickly abandoned their siege and withdrew across the Adriatic.
Spain has evacuated the Valtelline and given control of it back to the Protestant Grisons. The French and several other states perceive this as a triumph over the Habsburgs.
In Flanders, Spinola's army has started siege preparations against Bruges.
Last edited by Inkie; November 21, 2012 at 02:00 PM.
Under the patronage of the formidable and lovely Narf.
Proud patron of Derpy Hooves, Audacia, Lordsith, Frodo45127 and Sir Adrian.
Timeline June 1619 - March 1621 Here all of the public updates and important events are recorded.
Spoiler Alert, click show to read:
[START]
Situation – June 1619
Spanish and Austrian troops are facing off against Czech forces in Austria and Bohemia. A Bohemian army is nearing Vienna. Spanish troops are marching from the Low Countries towards Austria.
- Imperial Election: Any Prince of the Empire may present themselves during the Election. If you wish to engage in diplomacy with the NPC Electors (Cologne, Mainz, Trier, Brandenburg) either post in the Protestant Union group if you belong to it, or PM the GM. You can vote publicly or privately, and you can wait up to 48 hours from now before voting, if you want to discuss things with the other electors first. - Poland and Russia are now at peace. - France is fighting a civil war.
- Oldenbarnevelt has been executed in the United Provinces, and his Arminian supporters in Holland have been defeated. The United Provinces are still Unstable.
Public Update – August 1619
Imperial Election! May the players possessing Electoral powers please place their votes. No princes have yet presented themselves for the Imperial Crown, save Ferdinand of Austria. Bavaria appears undecided. You may consult with other electors and possible claimants before voting – diplomatic response will be immediate.
The Protestant Estates of Lower Austria have joined the Confederation, and that territory has been occupied by a battalion of Confederate soldiers.
Assembly of the Protestant Union: 15 000 troops have been raised. Most of them are currently just north of the border with Bavaria and the Ecclesiastical states. Details will be posted in the Protestant Union group shortly.
The Catholic League has raised an army of over 20 000.
The Prince-Elector of the Palatine, Frederick V, has accepted the crown of Bohemia. He is currently the sole pretender with the support of the Bohemian, Silesian and Lusatian Estates.
The siege of Vienna has been broken off. Count von Thurn is currently moving north with his army.
Moravia has entered civil war.
The King of France, Louis XIII, has expressed great anger at the actions of the German Princes. He has sent a high-powered diplomatic mission, under the leadership of the Duke of Angoulême, to Germany.
Duke of Angoulême, to Catholic League and Protestant Union: “My king is most displeased with your infighting. War in the Empire would be a disaster, and we strongly urge you to not take any actions against one-another. Whichever side strikes first against the other will be met with the fury of the King of France. This concerns military actions between the Catholic League and Protestant Union alone – other theatres and conflicts are not of our concern."
More news may be forthcoming.
Current Map:
Battle of Hollabrunn - 6th August 1619
The Imperialist army under the Count of Dampierre has defeated the Count of Thurn at Hollabrunn. The Imperial camp claims its losses at 1000, and those of the Estates at 4000.
Public Update – November 1619
-Imperial Election: Mainz, Trier, Cologne, Saxony and Brandenburg voted for Ferdinand of Austria. The Elector Palatine abstained. - Ferdinand, of the House of Habsburg, is created Ferdinand II, Holy Roman Emperor. - The Austrian Habsburgs are now officially at war with the Palatinate, due to the latter's acceptance of the crown of Bohemia.
-Bavaria and the Catholic League are now at war with the Confederate Estates, the Palatinate, the Principality of Anhalt and the Landgraviate of Hesse-Kassel. - A Catholic League army of 10 000 has entered Austria. - Spain is now at war with the Protestant Union. - The Habsburgs have re-conquered Lower and Upper Austria. - The Confederate Army has retreated to Prague. - The Imperialist army is suffering from plague and desertion.
- The Polish-Lithuanian Commonwealth is now at war with the Ottoman Empire and the Principality of Transylvania.
An army of 15 000 troops from the Spanish Netherlands has marched into Germany, brushing aside initial resistance from Union troops on the border. The Lower Palatinate has been occupied and Imperialist troops are ravaging the countryside, also besieging the fortress of Heidelberg. The Union army managed to regroup, and counter-attacked with 10 000 men, commanded by Christian, Duke of Brunswick-Luneburg.
Battle of Wimpfen - 17th October, 1619.
Forces: Spain: 11 000 – Ambrosio Spinola.
Protestant Union: 10 000 – Christian of Brunswick Luneburg.
Rolls: Spain – 4+2 (Superior quality, superior command) Protestant Union – 3
Result: Spanish victory. Losses: Spain – 1550 Protestant Union – 2300 killed and wounded, 3000 captured.
Spanish army morale increased. Protestant Union army morale decreased. James I of England has dispatched an expeditionary force to Germany. Louis XIII of France and Navarre has spoken out against recent developments and established a war-footing, but his country is currently highly unstable. The Protestant Union is raising fresh armies in Germany.
A Confederate army under Count von Mansfeld has entered Bavaria and besieged Alt-Ötting.
Northern Moravia is now under Confederate control. Count von Schlick is emerging as a powerful warlord there.
A Confederate army under Field-Marshal Hohenlohe has marched into the Upper Palatinate.
An Imperialist army commanded by General Bucquoy is leading a campaign in Bohemia.
The Protestant Grey Leagues of the Valtelline have closed this north-Italian pass, sealing it off to the Habsburgs. The Spanish invaded from their base in Lombardy, but were forced to retire.
Protestant counter-attacks in the Lower Palatinate have forced Spinola to retire. The Habsburg army has been bolstered by more men from Flanders, while the Protestant Union army has received additional English, Dutch and German reinforcements. Both armies have been weakened by disease.
Bethlen Gabor has won several victories against the Poles.
Paladin Vargas is no more!
Public Update – May 1620
Spoiler Alert, click show to read:
Siege of Prague
Bucquoy's imperialist invasion force has been heavily defeated outside the walls of Prague by a combined Bohemian-Silesian army.
Bavarian Campaign and Battle of Crasburg
Mansfeld and his Confederate army finally assaulted Alt-Ötting in March,(5+2) - which he succeeded in capturing, destroying the 3000 man garrison within before marching westward, towards Münich. Tilly's orders were to attack Mansfeld with full-force, as his Lord Maximilian wished to put an end to the vicious plundering of the land for which Mansfeld had become known. They both knew that 10 000 men from Austria were en-route, but the duke was confident in the skill of his top-general to destroy the Protestant invasion force, while Mansfeld knew that he had to annihilate the force before him if he was to lay a successful siege to the Bavarian capital. Tilly assembled his force outside Münich and marched east, meeting Mansfeld's army at Crasburg, across the Inn river. The latter feinted to the south, but Tilly was not dislodged. Knowing that another army was approaching his rear, Mansfeld launched an assault with his whole army, hoping to break the League force with a decisive push on the northern flank(Catholic League: 12 200 vs Confederates: 11900; Catholics +1 due to superior command and greater discipline) Result: 4+1 vs 3
Tilly contained Mansfeld's assault, before launching his heavier tercios forward and utterly crushing the Confederate force. 8000 of them were killed, wounded and captured, with Bavarian losses at 2400. (Tilly danger roll: 6 Mansfeld danger roll: 6) Mansfeld managed to escape the battlefield with 2000 men, and fled to the Upper Palatinate. Very few of those who were captured joined the Catholic army, due to the oppressive standards set by Tilly and Maximilian. The second Catholic League army returned from Austria, but (1) failed to capture Alt-Ötting, the defenders of which put up a furious resistance. (D+D roll for Tilly: 4; D+D roll for Mansfeld: 4)
Maurice the Learned of Hesse-Kassel has died in Bavarian captivity. The Bavarians claim that he caught a fever and that his death was one of natural causes. He has been succeeded by his son, William V.
Christian I of Anhalt-Bernburg has been crowned as King of Bohemia by the Bohemian, Silesian, Lusatian and Moravian Estates.
The King of Spain broke his neck during a bedroom escapade, and was killed instantly. Philip IV is now King.
Following a final Transylvanian victory, the Principality of Transylvania and the Polish-Lithuanian Commonwealth are now at peace.
The Spanish army has captured the fortress of Mannheim, in the Lower Palatinate. The Protestant (German, English and Dutch) forces under Sir Horace Vere are now confined to Heidelburg.
The Confederates now control Moravia, ending the civil war there. Count von Schlick has been created Margrave of Moravia by King Christian. He has also executed those Catholics who refused to join the Protestant camp, including the Cardinal of Olomouc.
A large Confederate army is gathering in Prague.
A large Imperialist army is gathering in Budweis.
Skynet464 is no more!
Two new factions have emerged as playable.
Updated Map (Catholic League is dark grey.)
Public Update – August 1620
The Wittenberg Congress is currently in session.
The Duchy of Savoy has declared war upon the Spanish Habsburgs and the Republic of Genoa, invading both the latter's territory and the Spanish-occupied Duchy of Milan.
The Emperor has placed an Imperial Ban upon the Landgrave of Hesse-Kassel, William V, officially stripping him of the Marburgian inheritance he currently occupies, and offering it to Hesse-Darmstadt instead. Instability within the Empire has increased.
The Emperor has ceded all of Royal Hungary save the city of Pressburg to the Prince of Transylvania, a diplomatic humiliation for the Habsburgs.
A Catholic League army under Count von Tilly has invaded Bohemia.
A Catholic League army has occupied the Upper Palatinate without meeting any resistance.
The Margrave of Baden-Durlach is assembling an army.
Public Update – November 1620
The invasion of Bohemia and the Battle of Scherau:
The fertile lands of Bohemia, a ripe target for wanton depredation at the hands of an invader.
In August, a Catholic League army under Count von Tilly invaded Bohemia, capturing the cities of Klattau and Pilsen, before marching south, then north, in order to pillage as much of the Bohemian countryside as possible, yet avoiding Prague.
Due to an erroneously bloated intelligence report, the Confederates within Prague – under the joint command of King Christian and Count von Thurn did sally forth to confront the Catholic aggressor immediately. Instead, they awaited reinforcements sent by the Margrave of Moravia, before moving west, with a detachment under Mansfeld marching parallel to them in the south. Seeing their overwhelming strength converging on his position, Tilly decided to retreat towards his base at Pilsen, marching along the westward road towards Carlsbad. However, after reaching the Carlsbad junction and starting the south-eastern stretch to Pilsen, he discovered that his passage had been cut by two-thousand freshly arrived Transylvanian Hussars. Refusing direct engagement, this force considerably slowed the League army (2+2 due to faction advantages) through skilled harassment, before being broken by Tilly's force outside Poplewitz. These attacks allowed Thurn's combined army to catch up with Tilly, and force him into an engagement. Mansfeld's attack (1) failed to arrive from the north in time for the battle, but the Catholics were still horrendously outnumbered by their foe.
At Scherau the two armies met, on an open plain which favoured the Confederates' superior numbers. Tilly, however, still believed that he could achieve victory, so he launched a furious tercio assault into the face of the Protestant vanguard. His heavier cuirassiers broke the first groups of Confederate mounted arquebusiers without a mêlée, then performing a caracole on the advancing infantry groups before disengaging. Then followed the tercios, Tilly's core strength. He wished to achieve a central penetration of the Confederate army before it finished deploying, and rout it. However, Thurn was more prepared than he expected, and was already moving to outflank his deeper battle-lines. The mass of Tilly's pikes failed to compensate for the weaker firepower offered by his formation, due to the far greater depth of the Confederate lines. League casualties racked due to heavy fire from both arquebus groups lined up before the Confederate infantry and dragoons firing in the shifting “limacon” pattern on his flanks. Tilly threw in his cavalry once more but found that he could not dislodge the Protestant flanks under Hohenlohe and Pithan, and his men were battered by the ensuing skirmishing.
As Tilly's position weakened, Thurn's grew stronger. With his full might deployed and enveloping the Catholic lines, the Bohemian commander led a push of pike from the center, and had his two lieutenants make a general attack on both sides. The Catholics were crushed – the flanks were first to fold, and after a heated clash in which Thurn's charismatic presence proved decisive, the League tercios in the centre were thrown back.
(Confederates: 4+4 for overwhelming numerical superiority; Catholics: 5+1 for superior command -1 for demoralisation due to harassment and retreat. Thurn survival roll: 2; Tilly escape roll: 5).
King Christian I at the Battle of Scherau. Although he placed full de facto strategic authority in Thurn's hands, he played a major role in galvanizing his subjects during the battle.
Although he was wounded by a stray shot during the final confrontation, Thurn was victorious, his forces killing an estimated 1500 Leaguers and capturing a further 3000. Throwing 1000 men into Pilsen, Tilly retreated towards Klattau with the remnants of his army.
Bethlen Gabor has been crowned as King of Hungary. He also has a large army in Bohemia.
The Spaniards have marshalled an effective counter-attack in Northern Italy. Mantua fell to the Savoyards before being swiftly re-taken by a Spanish army under Marradas.
The Spanish occupation force under Spinola has evacuated the Palatinate after an abortive siege of Heidelberg. The Protestant Union has gained in prestige while the Kingdom of Spain has seen its own prestige decrease.
Wittenberg Congress: See above.
Public Update – January 1621
The Siege of Bautzen
Tension between Electoral Saxony and the Silesian-Lusatian Confederates had been on the increase for several months, before the capture of a spy in Dresden in late 1620, which was for John George, the “final straw” and proof that the Confederates intended to attack. Having already assembled a large force, the Elector launched a campaign into Lusatia, hoping to bring the Estates of that land to heel. The Saxon army moved east from Dresden, marching straight for the main Silesian-Lusatian force at Bautzen, arriving outside the city (march roll: 3) in just under two weeks. Knowing that the Bohemians would likely come to the aid of their allies, the Saxon commander decided to immediately press the attack.
However, the city was heavily defended, despite not being outfitted with the latest advancements in defensive technology. The Spree river functioned as a natural barrier on the western side, from whence the Saxons were approaching. Additionally, Silesian-Lusatian troops, under the command of John Christian, Duke of Brieg, had entrenched themselves in and around the city. Both of the main bridges leading to the eastern side of the Spree were barricaded and manned by strong infantry contingents and each of them by forts. The Saxon commander, Hans Kaspar von Klitzing, was a cautious man and decided to await his artillery train before assaulting either of the two bridges. He assumed position on the western ridge overlooking the Spree valley and directly facing the city, planning to use his high altitude to benefit his guns. His infantry deployed alongside him, from the northern bridge to the southern one, taking no fire from the Confederate cannon, as Brieg had already ordered his men to conserve ammunition.
Klitzing had several companies of arquebusiers reconnoitre the northern and southern flanks past the two bridges, and ordered his men to establish a main camp behind the ridge upon which he was established. His intelligence (6) gathered much information for him – that there were good ford points both north and south of the city, and that the Confederates could only be reinforced or re-supplied from two eastern roads. Furthermore, estimates of the enemy strength placed the northern bridge garrison at 400, the southern bridge garrison at 600, and the city's main defence force at several thousand, with another wooden fort watching the eastern roads to Weisenberg and Lobau, and two more guarding the southern wall, which appeared to be weakest. Together these three forts, along with the stone southern bridge fort, formed a defensive ring, which Klitzing sought to reduce in order to breach the medieval walls of Bauzten in the southern sector.
To this effect, the Saxon general sent two strong detachments both north and south – the stronger of the two headed south – in order to cross the Spree at advantageous positions and thus outmanoeuvre the Confederate bridge defences. Seeing this, Brieg immediately dispatched his cavalry forces, followed by groups of infantry, to stop the Saxon forces from crossing.
To the north, both groups – the Saxons with a slight numerical superiority but fatigued from a long march – engaged one another, but after some skirmishing between musketeers and a few cautious attempts to cross, the Saxons retired, and asked for reinforcements from the main force. Klitzing, frustrated with his subordinates, acquiesced, and reluctantly sent a further regiment of infantry north.
As for the south, here the Saxons found no opposition to their crossing, and their cavalry eagerly galloped up the eastern bank, cuirassiers at the fore. However, the Confederates had skilfully dissimulated themselves among some nearby woods and gulleys, and promptly attacked from both sides before the Saxons had finished crossing. The Saxons were thrown into complete disarray, and suffered casualties in the rout, some from enemy fire, others from drowning. In fact, despite being well-equipped, the Saxon army was disorganized, having been freshly raised from almost nothing – and most of its men and officers had precious little experience. At least half of the Silesian and Lusatian troops opposing them were veterans from the Moravian and Bohemian conflicts.
As the first day came to a close, both commanders reinforced their contingents at the fords, and Klitzing brought up his artillery in preparation of a lengthy barrage the next morning.
This occurred promptly (5) and produced immediate results. The Saxon army's light guns made short work of the southern bridge's barricades, causing light casualties to the men defending it. Brieg had them stand and take these, anticipating an infantry assault. To the north (4) the heavier guns in position were less accurate, and for fear of destroying the less sturdy northern bridge, Klitzing instead started bombarding the adjacent wooden fort, destroying part of its walls. Around noon, Klitzing ordered a general assault, at both ford-points and both bridges, ordering his colonels at the ford-points to conduct feints further away from the city and attempt to draw off the Confederate defenders.
(North ford: 2 South Ford: 6)
Unfortunately, the high spirits of the Confederates guarding the south made them more restless, and they eagerly followed the feint, hoping to score another victory. Using some foliage as a screen, the Saxons then wheeled back, and the signal was given for an assault. The northern ford-point's lure failed.
Northern ford attack: 4 Northern bridge attack: 4 Southern bridge attack: 3 Southern ford attack: 2+1
At the bridges, strong Saxon infantry forces marshalled into squares, with musketeers rushing ahead of them and starting a fire-fight against opposing Confederates. The packed Saxon ranks came under fire from a Confederate cannon located on the walls, which had a strong position from which it could view any positions between the Spree valley and the southern plains. Casualties suffered (1), however, were nil, seeing as the gun could not angle itself low enough to fire directly on the Saxon troops. Still, the assaults on the southern bridge and the southern ford were disappointments. The Saxons were thrown back from the former after a heated push of pike, and the attack on the southern ford was an undisciplined spectacle, petering out when the previously duped Confederate cavalry returned enraged to the crossing.
The northern assaults were more successful. At both crossings, despite heavy casualties, the Saxons forced the Confederate defenders to retreat. Klitzing immediately sent fresh reserves to the northern sector, and by nightfall he had 3000 men facing the northern walls of the city. Brieg knew that unless he threw this beach-head back across the river, his riverline defence as a whole would be compromised. To this effect he launched a night-time attack on the Saxon camp (1) but this failed miserably. In the dark, his men were unsure where exactly the Saxons were, and failed to coordinate their movements. While most were driven back in chaos, a company of Confederates actually ended up in the middle of the Saxon camp, and were hastily captured. The action had cost Brieg a good hundred and fifty men, and he decided against taking such risks, adopting a more conservative strategy. He sent out orders to his southern detachments that they should quietly retire and file into a deeper defensive position behind fortifications. Unfortunately for the Confederates (2), although their men at the bridge managed to disengage without a hindrance, the Saxons at the southern ford raised the alarm, and attacked, routing the cavalry on the other side without a melee, before converging on the disorganized infantry. Around three-hundred were killed or captured. The next morning, as the Saxon army flooded across the Spree and started moving to encircle the city, Brieg had his men at the damaged northern fort evacuate it and retreat behind the main walls.
The bloody first phase of the siege was over, with the Confederates losing one fort and all of their defensive positions along the river. The actions costed the Saxons 800 men and the Silesian Lusatians around the same number, over a third of which were captured.
After this, however, the Saxon advance slowed. They failed to reduce the stone fort guarding the southern bridge, and it created a gap in their encirclement, throwing them back every time they attempted to cross. This forced Klitzing to bring both of his heavy gun batteries south to bear on this nuisance of a fort, and start bombarding it. The barrage (6) was eventually successful, destroying much of the fort and allowing the Saxons to invest it. The two southern forts were next, and (3) out of range of the Saxon guns, they resisted all attempts to storm them by the Saxons, until Klitzing deployed his light guns across the bridge (enemy cannon fire: 2) without losing any pieces. These eventually battered both forts into submission, and the eastern fort (4) fell soon afterwards.
The siege was now in its second week, and despite having conquered the outer defences, Klitzing was facing problems – winter was setting in, and he knew that the Bohemians could arrive at any moment (march roll: 5). He had not made a dent in the Confederate main defences, either. He rushed his heavy guns to the southern wall area, and pounded it (2+1 for weaker walls), setting up redoubts there and entrenchments facing outwards against the east. Still, by early December he had (1) failed to make much headway, launching repeated assaults against any breaches he made, but his inexperienced troops, despite valiantly rising to the occasion, were thrown back each time. (D+D roll: 2) His luck worsened with snowfall and sickness among the men, considering their poor conditions. His foraging was becoming less successful and supplying the troops was becoming difficult: Desertion and incapacitation plagued the Saxon strength and morale. Brieg did not know any of this, however, and could only hope for the best, desperately ensuring the plug any breaches in the walls with hastily erected barricades, and moving reserves to repulse attacks made elsewhere.
Towards the middle of the month, Klitzing received word that the Bohemian army had passed Lobau and was half-a-dozen miles to his east, according to his scouts' estimates (4) around four or five-thousand strong, with cannon. He quickly moved most of his available reserves to the eastern sector, but this made Brieg aware that relief was forthcoming. Marshalling his remaining 4500 able men, he prepared sallies wherever he could, and redoubled his fire upon the Saxons - no longer concerned for the preservation of ammunition – in order to increase pressure upon them. In truth, the 4000 men sent by the Bohemians were fairly second-rate troops, no better than the Saxon regulars. They had been previously under the command of the opportunistic Mansfeld – half of them had experience but were disillusioned, while the other half were Germans who had not yet seen action, not having participated at Scherau. Leaving four-thousand and his heavy guns to continue the blockade of Bautzen, Klitzing placed his light pieces on his east-facing redoubts, deploying his remaining 7350 men before them.
Brieg's counter-attacks: 2+2 for greater experience, leadership and morale. Field action outside Bautzen: Saxons: 2+3 for vastly superior numbers, superior position and command. Bohemians: 5
The “battle” of December 13th resulted in an inconclusive engagement lasting a few hours. Cavalry and musketeers engaged throughout the afternoon, without being able to dislodge sizeable portions of the other force. Eventually, with a rather hesitant push of pike, the Saxons coerced the Bohemians to retire, without being able to capitalize on their success seeing as their rear was threatened by a Silesian breakthrough in several areas. Klitzing hurriedly marched most of his forces back to the walls, in order to succour his blockade, (5 = Successful) eventually pushing Brieg's troops back behind the walls, albeit being driven back by musketeers firing from the battlements. No guns were captured by either side.
For several more days, the same spectacle occurred: The Bohemians would threaten the eastern flank, an exchange of cannon-fire would occur, and both sides would then retire. Brieg continued his enthusiastic sallies at first, but soon his efforts receded. Neither side had sufficient strength or confidence to take major risks, yet the threat of winter, of lack of supplies and munitions, were pressing.
Initiative roll: Saxons: 5 Confederates: 4
Eventually, the inertia would have to give way to a decisive clash – both Brieg and Klitzing knew this, but it was the latter who felt the most pressure. Elector John George was urging him to bring a swift end to the siege. He was running out of ammunition, money and supplies, and the siege could collapse if he hesitated any longer. On the night of the 21st, he called a council of war and gave orders to his officers. The next morning, a skeletal force of 3000 made mock-assaults on all areas of the walls, while Klitzing took his main force to crush the Bohemians to his east. The Bohemians quickly rushed into a motley battle-line and hurried their guns to bear on the advancing Saxons. (Dissimulation roll: 2) The day was clear, and Brieg saw that the forces attacking him were inferior, gathering all his available reserves in the east and preparing to break through the Saxon blockade, before attacking their field army in the rear.
Brieg's attack: 6+2 for superior command and superior numbers. Saxon blockade defence: 3 Saxon attack: 3+3 for preparation, superior command and vastly superior numbers. Bohemian defence: 3
Klitzing's furious assault punished the Bohemians, and although his advancing pike suffered casualties, the Bohemian line gradually gave way, and its right wing collapsed.
However, meanwhile Brieg personally led his own attack (Danger roll: 4) against the Saxons before him, with 2500 men – over half of his strength – facing 700 Saxons. These were taken by surprise and failed to maintain order, being utterly routed and dispersed.
(Momentum roll: 6) Rather than pursue them, Brieg kept his eye on his target and maintained strict discipline over his troops, heading for Klitzing's field headquarters and his guns on the redoubts.
(Reaction roll: 4) Klitzing saw this, immediately ordering his guns to turn about and load canister shot, as well as urging that his reserves return to his position. His guns got off a few shots (Brieg danger roll: 4) (Silesian morale roll: 3+1 for elan) but failed to halt the incoming Confederate cavalry, which drove back Klitzing's cuirassier bodyguard (danger roll: 5) (morale roll: 6) which maintained superb order and fired on its pursuers as it retreated towards the main force.
Silesian momentum roll: 1 Saxon relief roll: 2
Here, Brieg's attack was stalled, as more and more Saxon forces from the victorious centre arrived, furious at this incursion to their rear. It was a disorganized counter-attack, but in its own movements the Confederate cavalry had also lost much of its cohesion, and soon became outnumbered. A great deal of skirmishing and a few brief melees (Brieg danger roll: 4; Klitzing Danger roll: 5) broke the spirit of Brieg's force. Both commanders fought with great courage and determination, but the Confederates were soon outnumbered, and forced to retreat all the way back to the gates of Bautzen, (morale roll: 5) which they achieved without loss of dignity or honour.
Although Brieg's heroic attack had created enough disarray in the Saxon army to save the Bohemian retreat, the initiative was now firmly in the hands of the Saxons. Klitzing dispatched 3500 men to continue hounding the Bohemians during their retreat, and immediately pressed his siege effort against Bautzen, now contributing to his effort with a battery, supplies and money captured from the Bohemian camp. The morale situation had reversed, with the fresh Saxon army's spirits uplifted at its first true victory, and the Confederate defenders dismayed by the defeat of the Bohemian relief force. Within another week, the walls were ruined beyond any hope of repair in the southern sector, and Brieg entered negotiations with the Saxon commander.
A man of honour, Klitzing had come to highly respect Brieg as a commander during the siege, particularly during the battle of the 22nd. Brieg was allowed to leave Bautzen with all of his soldiers, provided the Silesian and Lusatian treasury and guns go to the victors. With few choices between accepting this offer or orchestrating a bloody fight to the death and the destruction of his native capital, Brieg acquiesced.
Electoral Saxony: 3 200 killed and wounded. Silesian and Lusatian Confederates: 2 100 killed, wounded and captured. 2 guns lost. Bohemian Confederates: 1 800 killed, wounded, captured and missing. 2 guns lost.
Aftermath
Bohemian escape roll: 2
The Bohemian misfortune continued when they were cornered by the pursuing Saxons near Zittau, with their backs to the Neisse river.
Saxon roll: 4+2 for superior numbers and morale. Bohemian roll: 1
Those at the front, who desperately turned and attempted to offer a fight, were destroyed or forced to surrender. Those at the rear threw themselves into the river in panic, with many of them drowning. Following this, the remainder of the Bohemian army disintegrated.
The Bohemian Campaign, after Scherau
Tilly's defeat at Scherau handed the initiative to the Confederate camp. Hot on his heels, the Confederates surrounded Pilsen with a strong force and (6) taking advantage of low enemy morale and the city's weak defences, captured it after a brief but bloody siege, with numerous prisoners. Continuing along the Uhlava river, the Confederates re-occupied Klattau unhindered, its garrison already having been evacuated.
The successes of this royal advance slowed its progress, and only Bethlen's regiment of hussars managed to engage Tilly's force as it retreated into Bavaria. In its harassment efforts (5+1 for native skill) the hussars brought chaos and confusion to an already demoralised force, allowing it no respite as it retreated during the winter, and breaking its supply-lines. Over 1000 men were lost, primarily through desertion, and while mapping his path during a morning reconnaissance, Tilly (Danger roll: 1, survival roll: 2) was ambushed and killed by the Transylvanians before the assassins were finally driven off. However, drawing from his reserves present in Bavaria itself, Duke Maximilian drove off the Protestant raiders, but (1) failed to deal them any damage.
Sweden and the Polish-Lithuanian Commonwealth are now at war. Riga has fallen to the Swedish army under Gustavus Adolphus.
The Margrave of Baden-Durlach has invaded Franche-Comté, resulting in an indecisive campaign. The Margrave's forces have been pushed back to the border.
Spain has given Venice access to her Mediterranean ports of Bari and Otranto for commercial and military purposes. Venice is currently reducing its garrisons along the border with Mantua.
The main Confederate army is wintering along the Uhlava, mostly near Klattau.
The Catholic League is marshalling a second army in Bavaria, fifty miles north of Alt-Otting.
The Polish-Lithuanian Commonwealth has been defeated during mid-November in a campaign by the Ottomans. Both sides have temporarily withdrawn their forces.
A harsh, late winter period is expected to last until some time in February – a serious obstruction to any military campaign.
Troops are gathering on the borders between France and Spain. It is unsure whether or not a conflict will erupt from this, considering the difficult situation and Catholicism of both Kingdoms.
The Spanish War-Fleet anchored on the coast of Flanders has been reinforced by decree of the King of Spain.
Current Map:
King James VI and I, King of Scots, England and Ireland.
The King of England, James I, has sent delegations to various European courts, with the following proposals in order to “solidify peace among Christian monarchs and de-escalate the confessional conflicts ravaging Europe.”
These are his points:
I call for the Catholic League and the Protestant Union to demobilize for a minimum of four years.
I call for Bavaria to withdraw its forces from the Upper Palatinate and return it to its rightful owner, Henry Frederick.
I call for the Margrave of Baden-Durlach to immediately withdraw his forces from Spanish territories in the Franche-Comte, and take no further military action against Spain or the Spanish Road.
I call for the monster Mansfeld to be sacked and his army disbanded, as it is only causing damage to the German people as it ravages their lands.
I call for Spain to cease all involvement in German affairs, to not interfere with German politics and to keep its military strictly separate from German lands.
I will withdraw my expeditionary force from the Palatinate.
All of the states involved have been invited to Höchst in order to discuss the matters covered above.
Elizabeth Stuart, daughter of King James and current de-facto regent in the Palatinate, supports these proposals. Wurttemberg also supports, while currently Ansbach strongly opposes. Hesse-Kassel makes some gestures of opposition.
Margrave Joachim Ernst of Brandenburg-Ansbach.
Ansbach: "With the advent of the Lutheran Union and further growth of Saxony's power, the Protestant Union is all that can be relied upon to defend free, Protestant Germany from the depredations of the greedy Duke of Bavaria and his lackeys among the Catholic League. Dissolution of the Union will only leave us and our Protestant brethren more vulnerable to attack!"
Hochst conference.
Public Update - March 1621
Spain and the United Provinces are now at war.
Milan has been re-conquered by the Spanish. The Grey League-Savoyard force in Lombardy has splintered.
The King of Hungary has mobilized to full strength, with an army some say to be 40 000 strong.
Spring season has started.
The Hochst Conference has collapsed, following a conspicuous Spanish absence.
The city of Vesoul in Franche-Comté has been captured and sacked by the army of the Margrave of Baden-Durlach.
Last edited by Inkie; November 16, 2012 at 04:40 PM.
Under the patronage of the formidable and lovely Narf.
Proud patron of Derpy Hooves, Audacia, Lordsith, Frodo45127 and Sir Adrian.
After some abortive attempts to come to a diplomatic settlement, the Badener and Saxon-Bavarian forces resolved on force. Elector John George dispatched Klitzing and his field army to destroy the Badeners. The conservative Klitzing and the impetuous Pappenheim quickly came at odds, the former holding the superior rank but the latter having a different master, which in his view granted him strategic autonomy.
Word soon arrived that the Badeners were in Rudoltstadt. The smaller Bavarian army was faster moving, and Pappenheim quickly moved ahead into the Saale valley, his considerable cavalry detachment leading the way. Seeing this, Klitzing decided to take the northern route, following the Beutelsdorf valley towards Arnstadt, hoping that Pappenheim would force Baden northwest. The latter hastily retreated at Pappenheim’s approach, evacuating Rudoltstadt but marching south-west rather than north. Here he went along the Rinne River into the Thuringian Forest, a move which baffled the Saxon-Bavarian command. Pappenheim assumed that the enemy was confused, and entered the forest behind him.
Action of Rottenbach – 9th September 1622
Time roll (1-2 morning, 3-5 afternoon, 6 evening/night): 3 Weather roll (1-2 raining, 3-5 normal, 6 hot) 2
During a shower in the early afternoon which disrupted the westward march of both armies, the Bavarians passed through a fork in the Rinne River, near a small village named Rottenbach. Soon, however, to Pappenheim riding at the van with his own cavalry regiment, reports came that the enemy was attacking the baggage train. Judging that it must be a feint, Pappenheim took three companies of horse with him along the column, ordering all troops to halt and assume battle formations. He mustered with him much of the Cronberg cavalry regiment and arrived to succor the beleaguered Bavarian rear, which was standing in formation around the baggage and guns, its musketeers firing into the trees on each side of the valley, from whence shots were pouring into them.
Bavarian discipline/morale roll (+1 for training, -1 for inexperience): 3
The troops were losing spirit and their response was lacklustre. Although he recognized that there were large numbers of the enemy by judging the volume of muzzle flashes, smoke and sound, Pappenheim found the results satisfyingly desultory: The bad weather and high range at which they were firing made casualties very light. Nonetheless, his infantry was unresponsive and the hilly, wooded terrain made use of cavalry impractical. His scouts reported that the land was flatter and more open about a mile downriver, so Pappenheim ordered that the column continue its march, remaining at the rear in order to maintain the cohesion of his troop.
The march was slow, but his men endured the rippling volleys following them along the valley without responding, Pappenheim giving orders to his cavalry ahead and making a plan, also using his personal charisma to bolster the spirits of the soldiers.
Badener discipline roll: (-1 for lack of leadership and cohesion): 4
Once in the open, Pappenheim found that, disappointingly, the Badener musketeers did not become overconfident and venture from the confines of the woods, although their fire was becoming less frequent, presumably due to a lack of ammunition. Pappenheim ignored caution in the form of the warnings of his staff, and ordered his own musketeers to clear the woods on both sides.
Bavarian attack (+2 for superior numbers and ammunition, -1 for demoralization): 3 Badener resistance (-1 for lack of ammunition and cohesion): 5
The Badeners were strung out throughout the woods, rendering tactical manouevre difficult, but they still held a large advantage in terms of defensive cover. The musketeers of the Catholic League weren’t well-trained to act independently and fire in ranks, and therefore their superior numbers failed to compensate for their lack of cover. Although the continuous Protestant salvo was rather ineffective, as they approached the treeline the Catholic gunners lost heart and fell back to the column in disorder. Pappenheim, infuriated, had them attack again. They poured fire into the woods, but this seemed to have no effect and they were once again pushed back. Still, no sudden cavalry attack – what his staff had feared – came, so Pappenheim decided that these musketeers were acting independently. He deployed his guns and had them start indiscriminately blasting the forest away.
Badener morale roll: 5
The Badeners gradually melted away throughout the rest of the day, but the League army was forced to remain in position in the rain, and make a muddy camp in the same position come evening. Casualties were light but the spirits of Pappenheim’s army were low. Many were sick, hungry, and soaked to the bone, also demoralized by the stressful events of the afternoon.
Time: Evening Weather roll (1-2=Rain, 3-6 = Normal): 3 Pappenheim caution roll (3+): 2
The next morning, word came to the Bavarian camp that (intelligence roll: 6) the whole Badener army was around ten miles to the south-west, and that the Saxon army was around the same distance to the north-west. Refusing to allow the last day’s inglorious skirmish be his only legacy in the campaign, Pappenheim had his troops force-march into the wider, open valley at the end of which Baden waited. Pappenheim guessed that Baden hadn’t simply trapped himself, and yesterday’s events made it known to the Catholic League general that his foe was a crafty one. He had his troops rest for a couple of hours in Herschdorf – a few miles north of the alleged enemy position – sending out reconnaissance parties and bringing up his guns. Joining some of his scouts to see things for himself, he noticed that the terrain would be problematic for any attacking army: To the west, on his right, a solid line of forested mountains precluded any outflanking. To the east, on his left, there were two miles of open ground which soon degenerated into a maze of hills, woods and rivers. To the south, across which he would have to march in order to attack, the land was flat and unbroken on the right side, but almost impassable on the left, where the land dipped into the forked Junkerbach valley, stretching parabolically east to west, like a barrier against him.
However, to his bemusement, the enemy had not chosen to defend this pass, which would have been a nightmare to assault. Instead, the only sign of life was around 1000 Badener infantry standing in open sight before a low hill (named Edenhill). They were too far beyond the Junkerbach valley to effectively defend it or stop troops from passing, and the aforementioned flat ground to Pappenheim’s right was also unimpeded.
Pappenheim deemed that he had utilized enough tiresome caution, and settled for a direct assault. He brought up his whole army, and crossed the Junkerbach without bothering to disperse parties of musketeers into the surrounding woods. However, no efforts were made to slow his progress.
After deploying his infantry in three lines across the valley and his guns among them, he fired a brief cannonade at the enemy ranks.
Effect (-1 for duration): 4
Casualties were fairly impressive, and Pappenheim saw his chance for the decisive stroke. He marshaled his two cavalry regiments on the right – leaving his presumably demoralized foot soldiers in place, as their morale was an uncertain factor - and launched a furious attack on the Badener infantry, which were mostly pikemen with few musketeers.
Effect (+2 for preponderance of force and personal traits): 4 Protestant discipline roll: 5
Although his caracoles wrought heavy damage upon the massed Protestant ranks, they did not break, instead starting a gradual retreat up Edenhill, doing their best to keep rank.
Pappenheim was killed during this phase of the battle by gunfire, leaving his troops leaderless.
Catholic League morale roll (1-2 dismay, 3-4 loss of impetus, 5-6 vengeance): 5
Fortunately for the League, news of Pappenheim’s death did not reach the infantry. Cronberg took command of the force thereafter, and rallied the Catholic horse around him, calling for vengeance to not make the death of their heroic leader have been in vain. The Catholic cavalry charged again.
Catholic League assault (+1 for elan): 6 Cronberg danger roll: 6 Protestant retreat: 2
After two close-range caracoles the Protestant infantry on top of the hill started to falter, soon breaking and pouring back down the other side in disorder, making them easy prey for the merciless League troops.
The Catholic infantry, however, had only received a few orders since the start of the battle. Floreinville regiment had brought up the guns and deployed within and around the village of Friedersdorf – sandwiched as it was between Edenhill and the Junkerbach, preparing to act as a reserve. Blankhart and Schmidt-Rouville infantry regiments had deployed on each side of the hill, alongside the mass of cavalry now in the centre. Before them – as Pappenheim had deduced – lay what appeared to be the rest of the Badener army.
Protestant cannonfire: 1
They were greeted by half a dozen cannonballs sent their way, but the shots were fired too early and most of the Catholic troops were covered by the crest of the hill.
Protestant regroup roll: 4
Immediately after this, the Protestant infantry started to march against the Catholic line, both up Edenhill and on its sides. The regiment that had been broken flooded in around them, but the efforts of George Frederick and his officers got a good number of them to rally, and merge with the ranks of other battalions. Thus the bulk of the Protestant army was not dispirited by this apparent setback.
The two infantry lines clashed on the wings, while in the centre the Catholic cavalry renewed its attack, with small groups of Protestant horse among the ranks of the infantry doing their best to launch counter-caracoles and stem the tide.
Protestant left: 3 Catholic right (+1 for superior quality): 5
Protestant centre: 4 Catholic centre (+1 for advantage of terrain and added weight): 6
Protestant right (+1 for superior quality): 5 Catholic left: 6
Both forces had deployed their best troops on their respective right flanks – George Frederick his tested Badener regiments and Cronberg the Schmidt-Rouville Bavarians. Despite this, all along the line the Protestants were defeated, and although their right was only steadily giving way, calamity struck in the centre where the murderous Catholic horse punched a hole in their enemies’ line and started to engage other units.
A messenger arrived to the Margrave’s staff, announcing that all was lost unless he sent reserves to the centre, reserves which he did not possess. This was because he had one final ace to play: From the woods on his left and the Catholic right (where the aforementioned mountains receded into more gentle hills) the Sax-Weimar brothers emerged at the head of around 2000 Protestant cavalry and several companies of musketeers. They promptly formed up and led an attack on the Schmidt-Rouville regiment from its right:
The impetus of the Catholic victory on the west flank was stopped instantly as they attempted a defence against the Protestant assault, allowing the defeated Protestant infantry some respite. At the onset of the ensuing cavalry attack several League companies broke and routed, and the rest started a retreat towards Friedersdorf.
Marcossay (leader of the Floreinville troop) had the artillery fire a few half-hearted shots against these new aggressors, but they were largely unsuccessful. He then led his infantry in an attempt to stop the whole Catholic line from being rolled up, but overwhelming enemy pressure kept him locked in place. The Protestant left - saved from destruction and now free to do as it pleased – swung around and relieved the beleaguered Protestant centre from Cronberg’s cavalry, descending from both their right flank and their rear, Edenhill.
Cronberg danger roll: 3
The latter felt the risk of encirclement, and ordered an eastward retreat towards the left.
Catholic horse retreat/escape: 1
The extrication attempts were repulsed several times and ended in disaster: Hundreds were killed – blasted by musket-fire or pierced by pikes - and most of the rest were captured. Finally, the victorious Protestants pushed the now isolated Blankhart regiment back to Friedersdorf.
Catholic final defence: 5
With the Junkerbach valley behind them making prospects of retreat rather frightful, the remaining Catholic League infantry and guns put up a strong resistance, stopping the victorious Protestant cavalry in its tracks and rebuking attempts by infantry to storm the place.
Sax-Weimar danger roll: 1 Survival roll: 5
George Frederick soon realized that his victory was far from complete. Klitzing was arriving from the north - he had heard of the course of events and dispatched a strong cavalry contingent to “save what might be left of the Catholic army.” The Margrave of Baden could not establish a credible defence along the Junkerbach unless he crushed the Catholic remnant in Friedersdorf.
Baden leadership roll: 4
He called off all attacks and had his troops form a proper line, placing himself and his guard towards the front. He delivered a speech praising their valour and achievement, before ordering a final attack.
Protestant attack (+2 for higher morale and numbers):4 Catholic defence: 1
Finally, the League troops broke, streaming disastrously into the Junkerbach valley, which resulted in a massacre as the Protestant horse descended upon them, forcing many into the river and butchering scores of others.
1st engagement at Friedersdorf Result: Badener victory
Casualties Catholic League: 1680 killed, up to 5000 captured. Badener Protestants: 800 killed and wounded.
Arriving Saxon cavalry witnessed this destruction of Pappenheim Force, and reported it back to Klitzing, making no move against the Badeners. The latter was shocked that Pappenheim had been so rash, and that he had met such an utter defeat. George Frederick’s men were exhausted and bloodied, but he did his best to rest them for the next trial over the following few hours. By the time the Saxons arrived, nightfall was descending, making an attack impossible. The two sides prepared for the following day’s battle, although the Badeners were reinforced overnight by the arrival of the musketeer force that had engaged Pappenheim at Rottenbach.
Protestant entrenchment: 1
The Margrave ordered his men to dig sconces along the vulnerable flat ground between Friedersdorf and the mountain line, but they refused in exhaustion and complained that they lacked shovels, leaving George Frederick no choice but to hope for the best.
Saxon intelligence roll: 1
Klitzing was not aware that there were any available passes that would permit him to outflank the Badener army, so he resolved on a direct assault. The battlefield was too narrow for him to deploy all of his force, so his line was particularly deep. He was greatly superior in infantry, slightly greater in cavalry, but inferior in guns seeing as the Badeners had captured Pappenheim’s 10 pieces. The battle began anew the following dawn with an artillery duel.
Saxon roll: 6 Badener roll (+2 for greater numbers): 6
Although the Badeners had more guns, the apparently superior Saxon gunnery crews punched above their weight, inflicting similar levels of casualties. Klitzing prudently waited to see whether a weakness would develop in the Badener line. As this was not the case, he ordered the left wing to cross the Junkerbach, hoping to attract George Frederick’s attention there and make him think that this is where the main attack would come from:
Badener leadership roll: 3
George Frederick was at an impasse: He had hoped that the Saxons would not dare attempt an attack across the river, with its steep banks and untested ford points. Not knowing what type of leader Klitzing was, he could only assume the worst. Still, he could not march to stop the Saxons establishing a beach-head without breaking the integrity of his line and dividing the army into two forces. His junior staff were worried and urged him to respond with due force – he acquiesced reluctantly and sent a substantial troop under Duke Magnus of Wurttemburg to watch the Junkerbach valley and crossings.
Badener counter-attack: 6 Saxon defence (-1 due to position and lower numbers): 2
The Saxon troops sent across the river did not hold long enough to act as a sufficient distraction. Fearing meeting the same fate as the Catholics – the bodies of many of which still littered the area – they put up a token resistance before fleeing back to the safety of the north bank in much disorder and ignominy.
Nonetheless, Klitzing decided to make the decisive push across the Friedersdorf-mountainline plain lying before his right flank. Plauen infantry regiment led the way, with companies from Hoffkirch cavalry regiment interspersed among them.
Saxon attack: 2 Badener defence: 2
Neither side showed much spirit in this first clash – the Protestants had strict orders to not move beyond their position, and the Saxons were intimidated by the events of the day before. The Saxons fell back eventually, but it wasn’t all bad for them – in their view, the Badeners had just revealed themselves to be less ferocious than expected, a paper tiger of sorts. The attack was renewed, albeit with George Frederick rushing his reserves to his left. Realizing that he had to seize the initiative immediately if the Badeners were to be dislodged, Klitzing led the attack himself.
Klitzing rushed at the head of a cavalry column, several of his bodyguards falling around him in the ensuing firefight. The courageous Plauen, well respected by his men, followed behind. At first shaken by the intensity of the cavalry attack, the Badeners recoiled, until the superior depth of the Saxon lines allowed the push of pike to finally carry the wing. The Badener flank started to dissolve, and George Frederick was forced to thin-out the rest of his lines, hoping to save the imperiled left flank with a counter-attack led by the Sax-Weimars.
Having taken to the field personally, Klitzing could not coordinate the rest of his army, leaving Bindauf on his left facing the Junkerbach with no orders at all. The Saxon right lost failed to remain cohesive in its impetuousness, and was quickly forced to pull back in order to save itself from breaking apart, suffering heavy losses in the process.
Plauen danger roll: 2 Sax-Weimar danger roll: 2
Although he had saved his army for now, George Frederick had still lost the integrity of his line: To his right, the force defending the Junkerbach under Magnus was too far forward to act cooperatively with his own lines on the left, which had now been stretched in order to contain the Saxon attack. More Saxon infantry were flooding through the flat ground between Friedersdorf and the mountains to the west. Once more, the village became essential to both sides: If it fell into the hands of the Saxons, the Badeners would be lost, their line neatly sliced in two. George Frederick sent the Baden regiment to defend it with two light guns – it was the best he could do without reducing the depth of his left even further. Klitzing launched a two-pronged attack on the village from both his own position west of it, and through a noticeable gap in the Badener line between the Margrave’s position and Magnus’ detachment. The Saxon Field-Marshal also dispatched orders to Bindauf, saying that he should engage in a series of attacks to keep the Badeners on the southern bank fixed in place.
Saxon attack on Friedersdorf (+1 for numerical advantage): 5 Badener defence: 1
Somehow the village caught fire, and the wind blew the smoke back in George Frederick’s face, rendering coordination difficult and lessening the effectiveness of the Badener guns. The Saxon infantry marched up to the village with near impunity from both north and west, quickly reducing it and forcing Baden regiment back in disorder. Klitzing lost no time, rapidly massing his considerable reserves around the place and from it launching vigorous attacks against both George Frederick and Magnus.
Badener left (George Frederick) retreat: 3 Badener right (Magnus) retreat (-1 for precarity of position): 4
George Frederick and the regiments with him on the left retreated deeper into the valley, with all order in their ranks soon collapsing. The Catholic League prisoners were too numerous to be taken or watched, and many of them seized discarded weaponry as their guards fled in fright, joining the victorious Saxons under Plauen.
Despite now being almost surrounded, Duke Magnus put up a respectable defence both along the Junkerbach and against Friedersdorf. Many of the Saxons were joining in the pursuit of the Badener left, so their efforts to crush the right were handicapped. Still, for the Badeners there was nowhere to go and no longer any hope of victory. Most of them soon dissolved away into the eastern forest.
2nd engagement at Friedersdorf: Result: Saxon victory
Casualties: Electoral Saxony: 1320 killed and wounded. Badener Protestants: 2080 killed, up to 3000 captured over the following days.
Summary
George Frederick had come up with a good tactical plan, but on a strategic level he failed to compensate adequately for the vast superiority of the forces aligned against him. Pappenheim’s aggressiveness and the lack of binding cooperation between both him and Klitzing allowed the Margrave to gain initial success, but it was short-lived and did not save his army from destruction, with most of the Catholic prisoners escaping to the Saxon side. As for the aftermath itself, the Badeners were forced to disperse into the Thuringian wilderness, across untamed woodland and some old, narrow mountain pathways. Many groups were caught by Saxons pursuing them, and they quickly surrendered, while the rest of the force had dissolved beyond repair. George Frederick escaped, fleeing to Gotha with a dozen men, and then from there to Hesse-Kassel, where he was joined by Magnus. Klitzing was soon reinforced by an Imperialist contingent under Wallenstein, and a Silesian contingent under Brieg.
The War in Hungary
Gabriel’s directive for the Autumn was to maintain pressure on all of the resisting strongholds, and attempt to increase his control over the Ottoman provinces.
Bosanska Dubica siege roll: 4 Siege roll total: 5
His own army was met with progress in late September – namely his own trenches arriving close enough to the walls to blow a hole in them with the guns. He launched several assaults into the breach but all were repulsed with heavy losses, however his military advisors estimated that it would not be long before the fort was overrun.
Vacs siege roll: 2 Siege roll total: 3
Eger siege roll: 1 Siege roll total: 3
Lippa siege roll (-1): 1 Siege roll total: 3
Along the rest of the frontier, his lieutenants were obliged to make excuses and conjure up mediocre successes in their reports, seeing as the places they had encircled showed no signs of faltering.
Other news
- Revolts have risen against the Sublime Porte in parts of Anatolia, and there are rumours that they extend further east. - Spain is raising fresh armies throughout Europe, causing concern among some Protestant German states.
Public Update – December 1622
The War in Hungary, October-December 1622
Bosanska Dubica siege roll: 3 Siege roll total: 8 D+D roll: 4
The fortress of Bosanska Dubica was finally taken by storm on the 5th of October, thanks to the skill of the Catholic League troops and officers there, as well as the presence of Gabriel Bethlen himself. Nonetheless it had been a hard fought battle, with many casualties on the Christian side.
Christian losses: 900 Ottoman losses: 600 (of which around 300 captured)
From here, Gabriel continued eastward towards the nearby fort of Bosanska Gradisca, prudently leaving a small garrison behind him.
Siege roll (+1 for recent victory): 3
He was on the verge of reducing it when he received reports that to his south, a local Ottoman force from the Bosnian Elayets was approaching, under the command of Hussein Pasha (XX), ex-Grand Vizier of the High Porte.
Intelligence roll (+2): 6
Some of his Hungarian advisors recommended falling back to Dubica, others to head south and meet the enemy in battle. Anholt and some of the Germans thought it best to dig in and resist their assaults. Fortunately, his own scouts and local informants provided Gabor with some solid details regarding the Ottoman army’s force-composition, and he had time to prepare given that they were still several days away.
Therefore, he resolved to accommodate the plans of both sides: While the bulk of his infantry and guns would prepare earthworks around Grandisca, he would dispatch most of the Hussars, skirmishers and Croats to the south, under Kovacs. He left it to his lieutenants’ discretion whether he would delay, harass, assault or lure the enemy.
Kovacs had 8000 men, mostly horse, while the Ottoman force was estimated at between 13 000 and 15 000, with a good number of guns.
Keeping this in mind, Kovacs opted on a conservative approach, using traditional Hungarian methods of skirmishing and harassment.
Hussein Pasha preparation roll (-1 for traits): 1
While crossing the one of the branches of the Dinara Alps, the Ottoman force lost some of its integrity. Kovacs suddenly appeared and fell on several cavalry elements of the Turkish vanguard, massacring a great many and throwing the rest back in confusion. Had he been more ambitious, Kovacs might have destroyed the entire army, but as it was he contented himself with this action and subsequent attacks which substantially delayed Hussein Pasha and demoralized his troops.
Result: Hungarian victory
Hungarian losses: 80 Ottoman losses: estimated 400 killed, some desertion.
Siege of Grandisca, 1622
Just over a week later, the Ottoman army arrived to relieve the fortress. It was in the middle of a large plain with its back (north) to the Sava River. Gabriel and the Hungarians had deployed in several trenches around it, their cavalry on the wings. The four guns were positioned on two small redoubts, facing southward.
After the debacle of Travnic, Hussein Pasha had become slightly more sensible, ensuring that his troops were properly formed up during the approach, and waiting to deploy his greater array of guns before attacking. His staff had expressed doubts about attacking, due to the shaky morale of the men and the strength of the Christian position. Hussein, however, feared that he would lose reputation unless he attacked and made up for his poor record during the campaign thus far, also feeling that indirect warfare would work to the advantage of the mobile Hungarians.
Artillery duel: Hungarians: (-1 for inferiority of guns, +2 for superiority of position) 3 Ottomans: 6
Aiming at the vulnerable cavalry wings of the Hungarian line, the large-calibre Ottoman guns started to cause serious damage to the Hussars and Croats stationed there, while the response of the Hungarian gunners was a disappointment. Instead of retreating, however, both Kovacs on the right and Kollmann on the left lost patience and made a rash assault against the opposing Turks. The former was eager for more blood after Travnic, while the latter was anxious to achieve something himself.
Hungarian right attack (-1 for indiscipline): 2 Ottoman defence (-1 for demoralization): 2 Hungarian danger roll: 5 Ottoman danger roll: 3
Hungarian left attack (-1 for indiscipline): 2 Ottoman defence (-1 for demoralization): 1 Hungarian danger roll: 1; survival roll: 3 Ottoman danger roll: 6
The result was a brutal, messy affair without sufficient order on either side to achieve a decisive result. Kollmann succeeded in pushing the Ottoman cavalry back, but he was wounded and his men were forced back once more. The infantry of each side could only watch and cheer their own troops on – the Germans having been ordered to remain in defensive position by Anholt, and Hussein unwilling to risk his less disciplined infantry in flank attacks against cavalry.
Hungarian right attack: 3 Ottoman left: 5 Hungarian danger roll (-2): 1; survival roll: 4 Ottoman danger roll (-1): 2
Hungarian left attack: 4 Ottoman right: 3 Hungarian danger roll (-1): 2 Ottoman danger roll (-2):4
Eventually, Kovacs’ troops crumbled and retreated along the Sava and away from the battlefield. Some of the Turkish horse pursued them while the rest started to make attacks on the skirmishers holding the flank of the Hungarian defence network.
On the left side, however, the Christians were more fortunate. The Ottoman cavalry there was outnumbered, and soon collapsed, taking with it much of the Ottoman right, composed of dispirited and mediocre infantry which lacked means to defend itself from cavalry. However, Kollmann could not exploit this victory, for he was pushed back by concentrated fire from the Ottoman gun-crews.
Ottoman cavalry attacks against Hungarian right (+1 for morale-boost, -2 for indiscipline and troop type): 2 Hungarian defence (-1 for troop type, +2 for position): 6 Ottoman danger roll (-2): 2
The victorious Turkish cavalry on the left made several poorly-led attacks against the Hungarians defending, suffering heavy losses. When their commanders had them pull out in order to regroup, they simply fled.
Hussein was now in a risky position – he had little available cavalry to protect his flanks, rendering a major attack no longer possible, while Kollmann’s men were licking their wounds and preparing another assault on his right. He should have attempted to hold for a few more hours, but instead it appears that his courage left him, and he ordered an immediate retreat. His infantry started to abandon all order and leave the heavy, slow-moving guns vulnerable. Kollmann received an order from Gabriel to attack.
Hungarian attack (+1 for morale-boost): 6 Ottoman defence (-2 for demoralization and disorder, +2 for greatly superior numbers): 4
The Turks put up a solid fight, and Kollmann was forced to retreat several times, but eventually he broke the companies before him, taking one of the gun batteries (3 pieces) and capturing a good amount of prisoners.
Aftermath
Meanwhile, Kovacs found his retreat cut off by a segment of the Sava.
Discipline roll (-2 for troop type and demoralization): 1
His men threw themselves – or were pushed by those behind – into it. The river was ten metres wide, but (4) it could be forded in places. Still, it was a disastrous rout, and his men suffered many casualties, particularly seeing as the Turks who cornered those that attempted to provide a rearguard slaughtered them without mercy. The Turks did not pursue for much longer, however, having lost their own order and heard of events back at Grandisca.
The fort quickly surrendered after the battle – with a truce allowing the vanquished to march out with their arms and honour intact. Gabriel received sufficient evidence to conclude that Hussein Pasha’s army was no longer an immediate threat, so he threw several hundred men into Grandisca and continued with the plan, launching several attacks from there against Pozega, the next castle along the Sava line.
Gabriel now controlled a long stretch of the southern bank of the river, isolating Pozega and ensuring that his rear would be secure from Ottoman positions in Bosnia while he and his lieutenants continued their campaign.
Result: Hungarian victory.
Hungarian losses: Around 1000 killed and wounded, mostly cavalry. Ottoman losses: 1450 killed and wounded, half cavalry. 3 guns and 400 prisoners taken.
Still, Gabriel limited himself to placing pressure on Pozega by launching cavalry attacks against its environs – supply issues and the approach of winter stopped him from going any further.
The siege of Vacs continued at its dreary pace, although Field-Marshal Kaplir had ensured that his troops were adequately supplied, allowing him to maintain it during the early winter.
Eger D+D roll: 2 Eger siege roll (-1): 1
Eger, however, did not go so well. Lack of supplies and other factors led to an outbreak of disease, wiping out a full quarter of the besieging troops.
Thurn kept his decimated force in position for too long, reluctant as he was to abandon the project. However, after mutinies by the troops and the unyielding pressure of his officers, he broke the siege and retreated to Fillek, unable to do anything but remain there and re-organize his force.
Lippa siege roll (-1): 1 Siege roll total: 5 D+D roll: 3
At Lippa, Rakoczi’s fortunes were nearly as bad. He could make no progress with the small amount of equipment he possessed, and his frequent attempts to assault the walls were thrown back, gradually wearing down the morale of his troops.
Intelligence roll (+1): 6
News soon came to him that the Turkish general Suleiman Barjini (XXXX) had (5+2 for skill and superiority of force) entered Serbia and swiftly crushed the uprising there. He was apparently advancing towards Lippa with up to 50 000 troops, not only regional forces but including strong contingents of Janissaries, artillery and Sipahi heavy cavalry. As Suleiman ended the revolt in Serbia, Rakoczi retired with his force to Varad, in Transylvania, hurrying to recruit more men and calling for help from Gabriel and Thurn. He did not know that the morale and supply situation in Lippa had been desperate, and that the garrison there had been strongly considering surrender on the eve of his departure.
Rather than attempt a winter invasion, Suleiman contented himself with remaining in Serbia with the bulk of his men, dispatching strong groups to several remaining Ottoman strongpoints along the frontier.
The War in Germany, October-December 1622:
Following the crushing defeat of George Frederick of Baden, the Saxon-Imperialist army swept southwest, past Hesse-Kassel. Field-Marshal Klitzing's orders were to relieve Landgrave Louis of Hesse-Darmstadt, and destroy the Bishop of Halberstadt. However, the strategic directive of Klitzing's sovereign was clear: He was to ensure that he proceeded cautiously and attacked only when in possession of overwhelming force, using his superior numbers to the fullest. He also had to contend with his League allies – the more flexible Cronberg had been replaced as commander of the League by Blankhart, who had orders from the President of the League (Bavaria) to remain independent from Saxon command and not to share his military resources with them. Still, with the reinforcements from Silesia, Bavaria and Austria amounting to around 13 000 men, the total Allied force formed an estimated total of 30 000.
Next to this, Halberstadt's corps was minute. Wisely conceding that he would not be able to capture Darmstadt, he decided to avoid repeating the mistakes of Baden and retreating southwards, for the friendly Palatinate region. His force had a moderate amount of baggage for its size, considering it had spent a good deal of time looting, but the presence of the Odenwald mountains forming an impassable wall along the eastern side of the road south prevented the Allies from intercepting him. In any case Klitzing wasn't prepared to make drastic moves considering the circumstances, and the conservative Blankhart even less so. Halberstadt left rearguards in choice locations during the march, resulting in several inconclusive skirmishes which kept the Saxon vanguard on its toes.
Having forewarned the Elector Palatine of his retreat from Darmstadt, Halberstadt entered the city with his army on October 9th. He sent several detachments to reinforce Mannheim and Frankenthal, which were already defended by local detachments. Faced with this line of fortresses, Klitzing was at an impasse; however, after consulting with his allies in a Council of War, a plan emerged: Blankhart would watch Heidelberg with his League force, while the rest of the army would concentrate on gradually reducing Mannheim and Frankenthal, along with the other nearby strongpoints. Soon, however, two problems emerged: Firstly the approach of winter, and secondly word from the north that the Badener had regrouped, and was forming a second army.
The nearby fortified settlement of Oppenheim had fallen fairly easily, although Bad Durkheim had resisted capture and held out. The siege of Frankenthal had gone without a hitch thus far, but – although he possessed a good amount of guns – Klitzing blamed his failure to capture the first Palatine fortress on Blankhart's refusal to give him the 10 guns under his command. Wallenstein was sent north with 3 guns and several regiments in order to reinforce the Darmstadt garrison and watch Baden. Klitzing suspended operations and had his men winter in Worms and the western Palatinate, releasing all constraints on their treatment of Palatine civilians, with predictably brutal results. The siege of Frankenthal was an exception to the wintering – he maintained around 4000 men in a blockade of it, mainly to disrupt supplies and prevent potential reinforcements from reaching it.
International News
Instability in the east of the Ottoman Empire is reaching critical levels.
Dubica and Grandisca have fallen to Hungarian armies. The Hungarian sieges of Eger and Lippa have been broken.
The Concordia Lutherania has been signed, ensuring non-aggression between the Lutheran Union and the Habsburgs. Denmark and a good number of Lutheran Imperial states have joined.
The Pope has formed the Congregation for the propagation of the Faith, an institution aiming to spread Catholicism and protect Catholic churches and authorities in non-Catholic lands.
Following the Siege of Montpellier, a treaty has been signed there between the French Catholics and the Huguenots, guaranteeing the tolerance of the Edict of Nantes in return for the disarmament of several Huguenot fortresses.
Additionally, following Diamat's cool idea, here's a map of Germany, with 1648 borders but relevant information on locations and alignments in our game. I'll re-post it when something on it changes.
The dark blue states are those currently involved directly in the anti-imperialist camp. Areas they have troops in are represented by teal (crosses).
The pink states are Lutheran Union members. Areas they have troops in are represented by magenta (crosses).
The red states are Catholic League members. Areas they have troops in are represented by scarlet (crosses).
Last edited by Inkie; November 06, 2012 at 01:17 PM.
Under the patronage of the formidable and lovely Narf.
Proud patron of Derpy Hooves, Audacia, Lordsith, Frodo45127 and Sir Adrian.
With the negotiations going nowhere and falling into a stalemate, Brunswick resumed hostilities early in the month. He assembled several regiments from his numerous garrisons and sent them to recover Bad Durkheim from the Allies. His second-in-command Knyphausen was to lead the attack while an auxiliary corps under Dohna would block the road to Oppenheim and prevent any relief from the Allied garrison there.
Initiative roll (-1 for commander traits): 4
They arrived on the 19th, finding the town still defended by the Duke of Silesia with his own troops. However, the ruin of the place and the relaxation of fighting had led the Silesians to partially disperse to Grünstadt and other villages, leaving John Christian understrength.
Halberstadters:
General of Cavalry Baron Dodo zu Innhausen und Knyphausen Knyphausen Infantry Regiment Neu-Brunswick Infantry Regiment Anhalt Cavalry Regiment Sax-Weimar Cavalry Regiment Wildenstein Dragoons 2 Falcons
Silesians:
Duke John Christian of Silesia Brieg Infantry Regiment Wohlau Cavalry Regiment (understrength)
Halberstadter initial attacks (+2 for superior numbers and guns): 7 Silesian defence (+1 for superior quality): 3
Knyphausen's assault was furious. His infantry attacked from multiple directions after an artillery barrage, driving the Silesians back from their hastily-erected barricades. The experienced Wohlau cavalry which had made something of a name for itself at Bautzen managed to counter-attack, but it too was soon broken by repeated caracoles from the more numerous Halberstadters and enfilading fire from Wildenstein dragoons.
John Christian danger roll (-1): 2 Silesian recovery roll (+1 for personal presence of Duke): 4 Halberstadter momentum: 6
The brave duke scolded his men and bid them stand fast, but they could not push back the advancing enemy forces. They retreated from the town gradually, putting up fleeting rearguard efforts as they went, under the stern supervision of their officers.
The Halberstadters pursued them some way over several hours of intermittent skirmishes, but were delayed by the death of one of the commanding officers and a subsequent loss of order. Whilst retreating, the dispirited Silesians ran into Dohna's group on the road to Oppenheim, 2500 strong.
Silesian attack (+1 for superior quality, -1 for demoralization): 4 re-roll: 5 Halberstadters: 4 re-roll: 3 John Christian danger roll: 2 Knyphausen arrival: 1
Dohna was taken by surprise, expecting the enemy to come from Oppenheim, if at all. His men put up a strong fight at first, but John Christian saw a gap in their line and sent in the ten companies of Wohlau cavalry regiment, cuirassiers at the fore. The Halberstadter line was rapidly bisected and the Silesians poured through the gap, pressing onwards to the safety of Oppenheim. Knyphausen had inexplicably failed to follow up his initial pursuit, while the captured friendly prisoners the Halberstadters were expecting had in fact been sent to Grünstadt with the other Silesian troops. The Silesians, in their retreat, had not been able to capitalize on their victory over Dohna.
Result: Halberstadter victory. Halberstadter losses: 270 killed and wounded. Silesian losses: 300 killed and wounded.
Action of Oppenheim, 23rd May
Two days later, around a thousand Halberstadters showed up outside the walls of Oppenheim and started burning suburbs. Despite having vast numerical superiority, John Christian called for help from Klitzing.
Command roll: 5
Although the siege was not going exceptionally, Klitzing nonetheless sent his ally a cavalry regiment and two guns.
Halberstadter initiative roll: 3
This column entered Oppenheim the following evening without being inhibited. The Halberstadters were stubborn and disappeared each night, showing up again in the morning. John Christian's inaction led to rumours circulating within the city that he had lost his nerve following the loss of Bad Durkheim. As soon as he heard of these, he personally led the attack, leaving only 500 men from Loser infantry regiment inside Oppenheim.
Weather roll: 3 (clear) Halberstadter discipline roll (-1 for inexperience): 1
Having been accustomed to the usual routine of Imperialist inaction, the Halberstadters were caught unawares when John Christian suddenly appeared at the head of the Wohlau cavaliers, with the infantry fast coming up behind him. Men were drinking, dismounted and unprepared. Those that were not fast enough to realize what was going on were quickly captured or killed on the spot. The rest were sent fleeing south in disorder.
Imperialist discipline roll (-1 for elation): 1
Caught in the heat of the moment and emboldened by victory, the cavalry regiments Wohlau and Hoffkirch raced on in pursuit of the fleeing cavalry, while several companies dispersed to mop up the scattered enemy musketeers. However, their enemy was not undone: Knyphausen was lying in wait just over a mile to his south.
Halberstadter ambush execution(-1 due to lack of suitable terrain): 4 (slight advantage)
John Christian danger roll (-1): 2 Halberstadter counter-attack (+2 due to superior local numbers and guns): 3 Silesian response (+1 due to superior troop quality; -1 due to surprise): 2
What followed was a messy affair. The sight of his vanguard's genuine rout instead of planned retreat surprised Knyphausen and his officers, and their counter-attack was blunted by subsequent disruption. Still, John Christian was essentially alone with less than 1000 cavalry against five times that number. The Halberstadter guns opened fire, causing light damage while the Silesian duke paused to re-organize his ranks. A low ridge obscured his view of part of the Halberstadter force, so he was inclined to believe that with a direct attack he could simply seize the guns. Hoping to seize the initiative (and perhaps dispel rumours of his cowardice) he led his horse forwards, only to be met in a pincer attack in open ground once he was close to the guns. A few mediocre volleys of arkebus fire were exchanged between the two sides, before John Christian disengaged and returned to his main force. The two detachments faced each other off for an hour or so, exchanging cannonfire which worked to the advantage of the Halberstadters. A few cavalry probes to the Allied flanks were made unsuccessfully by Knyphausen's men, but eventually, in face of this mounting pressure John Christian was forced to return to Oppenheim, under enemy harassment.
Result: Inconclusive Halberstadter losses: 300 killed and wounded, 300 captured. Allied losses: 350 killed and wounded.
Siege of Heidelberg
A few days after this action, Christian (intelligence roll: 5) was notified by a rider that a sizeable Catholic League army had entered the Palatinate, headed straight for Heidelberg. Although he only had a few hundred men with him in the capital, he would not flee, despite pressure from his advisors.
Catholic League initiative: 2
The general commanding the League force, Lindelo, advanced slowly, gobbling up the Palatine outposts that resisted, although most of their garrisons fled for Heidelberg. A few minor forts, as well as Wiesloch, capitulated but managed to slow the Bavarian advance. Although a force of cavalry had arrived beforehand, the League army arrived in earnest on the 7th of June. The defenders were taken by surprise, but the city's defenses were nonetheless formidable. The main problem was that there were only some 1500 troops to man the outworks, and it could be attacked from various sides. Lindelo duly proceeded to do just this, having guns brought up on the flat western side and the hills overlooking the city and castle from the south. The Neckar was forded but he could not bring guns across it, so had to content himself with a blockade on the northern bank, although this only required a couple thousand men due to the narrowness of the field. He had his infantry start to entrench themselves.
Lindelo command roll: 3
The Leaguers' knowledge of the conflict's recent developments was limited, and he had a screen of Croats and hussars disperse to the west for foraging purposes.
Knyphausen had heard of this development on the 8th, and on the 10th he brought his force east to lead a relief of the city, leaving a small rearguard behind in Bad Durkheim. Fortunately for him, John Christian made little show of curiosity, and remained in Oppenheim.
Lindelo intelligence roll: 1
Knyphausen crossed the Rhine at Mannheim with over 5000 men, hoping to dislodge the League army from its position. Lindelo had over 11 000 infantry and almost 7000 cavalry, although half of these were Hungarian and Croatian irregulars. Still, he was completely taken by surprise when Knyphausen arrived on his western flank.
Knyphausen leadership roll: 3
Knyphausen did not take advantage of his enemies' disarray, focusing solely on his objective of forcing his way inside the city. He crossed the Neckar at Ladenburg – the fateful town where during the previous winter the Halberstadters had pushed back Blankhart's League troops – and headed for the infantry force blockading the portion of Heidelberg that lay on the northern bank.
Knyphausen attack (+3 for superiority of numbers, equipment and initiative): 9 Bavarians: 1
The Leaguers were annihilated. Hundreds threw themselves into the river, some of which drowned, while the rest were caught between the defenders of Heidelberg and Knyphausen's relief force. Those that weren't dead surrendered immediately, granting the Halberstadters over 1000 prisoners. The defenders were now increased up to 7000, the besiegers reduced to less than 17 000. Although this was still strongly in favour of the Imperialists, it was a huge blow to their morale and quashed their hopes for a quick victory.
Siege combat roll: 5
On the Palatine side, however, things were scarcely better. Although Knyphausen's success had raised spirits, in his rapid advance he had failed to leave an adequate rearguard at Ladenburg, and the Catholics seized the bridge on the 12th, soon re-establishing their blockade on the northern bank. The prisoners only being so many more mouths to feed, after some abortive negotiations Halberstadt was forced to send them back (without weapons or equipment however) to Lindelo in return for a paltry 200 of his own men taken by the Bavarians, with some cash. Over the following weeks, the Catholic batteries positioned on the southern hills started to do heavy damage to both the city and the castle.
Meanwhile, the Imperialist siege of Frankenthal resumed, albeit with little evident progress, save for Wallenstein finally reigning in his mutinous troops and re-joining Klitzing.
D+D roll: 5 Siege combat roll (+2 for superiority of force): 3
Overall, events were of mixed satisfaction for both sides. While Bad Durkheim had been re-taken for the Halberstadters, they had failed to defeat John Christian or threaten Oppenheim, and had to surrender their gains in order to defend Heidelberg. On the other side, the Leaguers had captured a good amount of the countryside and laid siege to the capital, but Knyphausen's relief was a major blow to them. The stalemate at Frankenthal was also disappointing. Still, overall the Palatine-Halberstadter forces were now trapped in their three major fortresses, two of which were under siege and with little hope of relief. The noose was tightening.
The War in Hungary
Throughout May, Rakoczi continued his raiding from within enemy territory, even as his own resources and men depleted and the enemy grew more determined in their attempts to bring him to battle.
Rakoczi harassment roll (+1 for quality): 5 Turkish response (+1 for quantity): 6
More skirmishes were lost than were won against the Akinci, while the Lisowczycy continued to operate independently and gradually fragment. During this low-intensity warfare a good amount of local bandits allegedly sympathizing with Gabriel were recruited, although they were undisciplined and many deserted over the following weeks. In mid-may, Rakoczi received word from local supporters that the Turks were moving a large convoy containing with it the Janissary salaries. The Hungarians had been until then focusing on disrupting the supply-line along the Sava. The Turks held all of the strongpoints along this line – Kostajnica, Dubica, Gradisca, Sabac, Belgrade – but the mobile hussars had managed to disrupt traffic between these areas, hampering Iskander Pasha's ongoing siege of Sisak.
However this gold convoy was much more important. The Turkish military elite was accustomed to good treatment, and without their pay Rakoczi knew that the Pasha's best troops would become unavailable to him. On the evening of the 3rd July,as the column passed between Sabac and Gradisca, Rakoczi pounced.
The defenders were numerous and prepared, mostly Janissaries or Timariots. Rakoczi had dispatched Fekete with a few hundred men to block the van of the column and serve as bait. The Turkish cavalry threw itself arrogantly upon these skirmishers and drove them back with losses. Rakoczi soon attacked himself from the nearby woods, eventually breaking the Janissaries (these were Anatolian Sekbans) and seizing the wagons. Fekete was left alone to deal with the Timariots while Rakoczi's men filled their pockets, but by virtue of his personal leadership the fight was eventually won.
Upon hearing of this, Iskander Pasha ensured that no word got out by having the survivor who had brought him the message strangled. He then mobilized almost the entirety of his cavalry and sent it to “bring [him] the soldiers' gold and god-willing the head of Georgy Rakoczy too.”
Rakoczi escape roll: 4 Turkish pursuit: 2
The plan came to little. The Hungarian Field Marshal employed a series of lures and feints, dividing his force into many smaller groups who fought several skirmishes with Turkish outriders and confused their cumbersome main body. Despite being burdened with the wagons, he got away with most of the gold – although his troops had helped themselves to a good proportion of it.
Siege of Sisak: D+D roll (-2 for supply problems and large size; +1 for faction advantage): 1 Siege attack roll (-1; +2 for superior equipment and faction advantage): 4
The loss of the troops' pay was the nail in the siege's coffin. The huge army fielded by the Ottomans was by definition strained in an already arid land which had been subjected to the necessities of the previous campaign. Troops were deserting or falling ill, and the assaults were faltering.
Sisak D+D roll: 1 Kaplir danger roll (-3): 1 Survival roll (-1): 2
Unfortunately, both combat losses and an outbreak of dysentery within the walls left the garrison seriously depleted by this time. The walls were finally overrun, and barely 200 soldiers, including Kaplir, were still alive of the initial 950. They were taken prisoner and sent to Istanbul in chains.
When the Janissaries heard of the loss of their pay, however, they mutinied. In the face of this and his logistical difficulties, the Pasha could not continue the campaign and decided to withdraw north-east to Szigetvar, also sending a part of his force to Mohacs. His cavalry in most part remained in the region to suppress local banditry and hunt down remaining cossacks.
The loss of Sisak, however, had serious consequences in Zagreb. Internal disorder had culminated with the appointment of foreign overseers to hussar units in order to instill discipline and prevent alleged corruption.
Hungarian discipline roll (-2 troop type, +1 similar territory): 1 Leaguer discipline roll: 1
Thurn, architect of this policy, had already received the blame for a good amount of the problems faced by the army. A mutiny broke out, and in the intense heat it quickly managed to proliferate. The League troops, who were being mobilized to march out of Zagreb as a result of an agreement between Field Marshal Anholt and King Gabriel, soon realized that they too had the opportunity to make up for their lack of funding, and they had no sympathy for the local inhabitants, who were to them little better than Turks. Hundreds of the populace were killed, women were raped, houses torched and everything valuable taken. By a stroke of the worst misfortune (1) the already undisciplined Badener troops in the outlying settlements decided they could get away with it too and mimicked the Christian troops in the capital. In all cases lower officers either turned a blind eye or participated in the lootings. By the time the Christian leadership had restored order, much of the country had been ruined beyond being able to serve as a supply-base, and the Ban was inconsolable.
Fortunately for the Christians, militarily the blowback from the defeat at Dubica was felt in both ways. A breakdown of order on the one hand, and an outburst of additional foreign support on the other. Although local recruitment had continued unabated thanks to Thurn's organizational skills, most importantly Marradas landed with a Spanish army in the south of the country. Shortly after several thousand fresh League troops arrived from Bavaria, as well as a small group of Hungarian Catholic troops who had been living in self-exile in Austria under Count Homonna. Finally, the Emperor issued a public statement requesting the support of the princes of the Reich to contribute to Gabriel's cause and that of Christendom. Although little support came from Germany that had not already been given, this elicited the interest of several Italian adventurers and prominent nobles, who started to raise their own private armies. The money received from Rakoczi had sufficed to stabilize the situation in Croatia, and by the end of June it seemed that Gabriel had a considerable host at his disposition...
International News:
The Shah of Persia has declared war upon the Ottoman Sultan and started to occupy Mesopotamia.
The Army of Flanders under Ambrosio Spinola has begun the siege of Bruges.
Public Update – October 1623
The War in Germany - July to October 1623
The month of July started well for the Imperialists: In a massed assault the walls of Frankenthal were taken and the city soon fell. John Christian remained largely holed up in Oppenheim – he had sent out a few raiding parties to gather supplies for the army but these were strongly checked by Halberstadter cavalry operating from Bad Durkheim. The Imperialist command now set its eyes on Mannheim, lying at the confluence between the Neckar and Rhine rivers. Still, there were issues with the re-structuring of command and a paucity of ideas regarding how to approach the formidable fortress. Thus the force remained inactive for over a week, yet when it set out again Klitzing was leading. Five regiments (three Saxon, one Imperial and one Silesian) were prudently left in Allied territory to act as garrisons. Seeing as Mannheim lies at the confluence of the Rhine and Neckar rivers, Klitzing recognized that it was essential to seize the city's bridges across these rivers, and for that, he would have to reduce the walled suburbs lying on the opposing bank of each river. He and John Christian headed straight for the city crossing over the Rhine, while Wallenstein and Pechmann moved to cross the river at occupied Worms in order to attack from the north-eastern Neckar River. The distance for the Protestants was shorter, and they arrived outside the city after less than a days march, on the evening of the 22nd. Scouts reported that the suburb facing them – on the western bank of the Rhine from whence they were approaching – was defended, and the Saxon brought up the guns.
After an hour of bombardment more for the encouragement of his own troops and discouragement of the enemy than anything else, Klitzing sent Plauen and Starschedel infantry regiments to the assault. Five infantry companies and about the same in cavalry defended, but after a bloody fight they abandoned the walls and retreated back across the Rhine. Their cavalry rearguard lost order, and many men died in the frantic scramble across the bridge, or were captured. The victorious Saxons were given free reign to plunder the captured portion of town, with a good amount of supplies and valuables having been left behind in the hurried evacuation of the citizens earlier during the day.
Having overseen the crossing of the Rhine with commendable organization, Wallenstein conducted a forced march to Mannheim, suddenly appearing outside of its north-eastern outskirts the next day. A desperate Palatine redeployment only barely managed to prevent the loss of the suburb and repulse two furious assaults as the day drew to a close. Wallenstein rested his troops during the night and regrouped with Pechmann in preparation for a third attempt the next day. On the morning of the 24th the Saxons made a leisurely stroll across the Rhine from the south, directly threatening the main walls. Critically understrength, the defenders were forced to abandon the Neckar suburb to the Catholics, who met no subsequent opposition.
The walls and location of the city rendered large attacks difficult to organize, and thus despite their predicament, the defenders heroically resisted for over a month, finally being overrun on September 4th following debilitating food shortages. Klitzing and Wallenstein had deliberately refused to discuss conditional surrender, knowing that the city's possessions would be needed, and the place was emptied of anything worth taking. None the less they recognized that the Palatine commander had led a most honourable defence of the city with the limited resources at his disposition, and some form of discipline was kept by the officers: Surrendering soldiers were mostly spared, as were civilians and infrastructure.
Siege of Mannheim:
Allied losses: 600 Saxons, 550 Wallensteiners. Palatine losses: Estimated 700 killed, 1200 taken prisoner.
During most of summer the siege of Heidelberg went nowhere. League Major General Lindelo opted for a cautious policy of minimizing attacks and starving the garrison, however discipline and morale gradually declined and in August the League command started to grow impatient. Lindelo resolved to organize an assault from three sides – on the northern bank of the Neckar, on the western face of the wall south of the river, and from the southern hills near Heidelberg castle. The assaults were repulsed with grievous losses, and when renewed several days later they met with no greater results. Although morale was very low among the men, they were prevented from deserting by the constant screen of hussars and cavalry patrolling the countryside, a wise precautionary measure of the League command. Following this setback, Lindelo intensified his artillery bombardment, and in mid-September a breach was made in the walls, with the morale gap between both sides becoming evident when the Imperialists arrived under Wallenstein and Pechmann, bearing news that Mannheim had been conquered. Several attacks were made through the breach with heavy loss of life on both sides. As Protestant reserves rushed from within the city to plug the gap, the Leaguers on the north bank overran the walls before them and were soon within the city. The Palatine troops led several forlorn hopes forward in chaotic door-to-door mêlées and street firefights but were overrun and forced over the bridge and into the southern town. With Catholic attacks intensifying on both sides, quickly all hope of maintaining a defence of the city was lost.
Lindelo sent in the hussars to complete the victory, and within a few days the town was under Catholic-Imperialist control. Colonel Kovacs kept a surprising amount of discipline in the ranks of his Hungarian mercenaries, although the wealthy city was nonetheless sacked. The castle, however, had rebuked assaults made against it and - perched atop its impressive hill - remained defiant. Over the next few days, victoriously undisciplined Catholic soldiers led repeatedly ill-fated assaults against its walls, each being driven back in disorder. On the 28th of September, however, Lindelo's troops finally entered the palace grounds and fought their way into the castle. Holed up in the court room with his own advisors and bodyguard along with the Palatine leadership, Christian soon decided to lay down his arms.
Conclusion
After a few hours of waiting the prisoners were given a chance to make their final vows and prayers. Shocked by the implications, there was an eruption of grief and shock among them. The Electress Regent, Elizabeth Stuart, is said to have fainted. She, Baron Knyphausen and Ludwig Camerarius along with most of the minor courtiers present asked for mercy again. One Achaz von Dohna questioned his captors about the legality of such an action, and demanded to speak with the League commander. Where was the writ of the Kaiser in this? None present would believe that even such a cruel man as Ferdinand II would back such a slaughter. The retort of the Catholic officer present is said to have been “Law be damned. Your heads will roll!” Word spread in the streets that the Catholic leadership was going to have all of the ruling family killed, and heated protests broke out, pleading clemency for the Wittelsbachs and ferociously condemning Christian of Brunswick. The troops struggled to keep order, or more aptly the officers attempted to maintain the discipline of their subordinates. Soon afterwards Lindelo was seen on horseback forcing his way through the throng with a burly mounted escort, and within the following hour 'clemency' was accorded to all save Christian. A company of Catholic cuirassiers emerged from the citadel gardens, bearing a dozen standards and with Lindelo at their head, still in full armour. Christian of Brunswick, stripped to a shirt and hands tied behind his back, walked in their midst. The people he had been defending only a week ago were now jeering him like a pack of rabid animals. Without so much as the dignity of a final speech, he was roughly shoved onto the scaffold, where a hastily recruited executioner awaited. A herald promptly declared that Christian was guilty of the irreparable crimes of rebellion, lèse-majesté and of breaking the imperial peace, for which the sole punishment was death. Following an ominous drum roll, the sword fell, and Christian was killed.
So ended September.
The War in Hungary - July to October 1623
The Christian army remained immobile for most of July. At first, they had to deal with the aftermath of the mutinies of the previous month. Following this there was the impeachment of Thurn – this affair dragged on due to Thurn being arrested for a second time along with his son and staff almost immediately after leaving Zagreb, as the King of Hungary wished to ensure that the Bohemian gave an oath to not take up arms against him. Thurn remained obstinate and would not sign any documents. He was still imprisoned as Gabriel called for a council of war with the other major commanders. Of them, Baden was alone in displaying enthusiasm for the Christian situation and planned campaign, the rest making only signs of consent or dissent in the ensuing discussion. Gabriel took the reins, and it was determined that an attack would be led to reclaim Sisak immediately, following which the Turkish threats to the north would be dealt with. The 'Thurn Affair' was shelved by his being sent to Vienna, allowing military action against the Turk to finally resume in earnest.
After a few days march, the combined army arrived outside Sisak. Preceding this, Baden purchased the service of a few hussars hoping to capture the place by ruse, however this came to nothing: The garrison refused them entrance and threatened to fire if they approached. Anholt left several of his regiments near Zagreb as a reserve in case of difficulties and to act as a check against any Turkish forays into Croatia, seen as wise orthodoxy by some and lack of faith in the plan by others. In any case the real logistical issues of the army certainly favoured decentralization of command, as was standard in Flanders and Germany: Most of the troops had received only very scarce and inconsistent wages for the past few months, while hunger swept the ranks due to the ravaging and poverty of the local terrain. Colonel Horvath took his hussar regiment northeast across the Sava, engaging with the Akinci raiders occupying the north bank. After several running fights in which losses were sustained and inflicted while valuable supplies were sent south from raided farmsteads, Horvath determined that these Ottoman cavalrymen and light infantry accompanying them were operating from Szigetvar, due to their increasing numbers. Following a successful lure, two companies of hussars were destroyed by the Akinci near Szentkereszt, and following this all Hungarian forays beyond Sisak were ended.
With the supply-situation deteriorating thus, Gabor resolved on an assault. The meek response of the other lords left him unfazed, however: He would lead the attack himself, using his own troops. Therefore, on the 9th August, the attack was made. The guns had blown asunder the wooden fortifications erected to plug the gaping breach in the walls made during the previous siege, and the weather was clear. Gabriel dispatched Rakoczi and a few thousand hussars to the surrounding plains as a screen, while several forlorn hopes of Hungarian skirmishers would advance steadily ahead of the main force. He himself was with the 1stand 2ndGerman infantry regiments, while the Bohemians – deemed untrustworthy – were kept in reserve. The skirmishers were met by a serious deluge of fire, and their response was met with little result against the cover of the fortifications, however they provided an admirable screen for the heavier German infantry as it approached from its trenches. From horseback, Gabriel urged them forward, marching with them into the daunting plain leading up the walls. As they approached, the king quickly became a target for Turkish sharpshooters on the walls and inside them, but their accuracy was hindered by the sheer volume of musket-fire being sent their way, and the king was not harmed. Hundreds were killed during the approach, but these were the most experienced infantry in Gabriel's composite army, despite having changed hands a fair amount since their formation in 1619. The attack was made with professional vigour, but the passing of the breach proved difficult, with the men stumbling over debris as they climbed and making easy targets for the enemy. They broke through, however, and were almost within the courtyard of the outer walls when a counter-attack led by enemy reserves drove them back in disorder across the breach. They rallied around Gabriel and formed up again, but a subordinate noted that they were battered and would do no good in a second assault, therefore with the king's consent a general withdrawal was signalled by one of Gabriel's staff, and the Hungarian forces retreated to the relative safety of the trench lines.
An hour later it was the Bohemians' turn. There were grumblings in the ranks but the officers silenced such dissent. The larger Bohemian regiments advanced slowly across the plain, shielded once again by the mobile bands of skirmishers as they went. Their tight formations were raked by jezzail and canister shot, but they were not routed, so great was the presence of the 'warrior king' in their midst. Once again the Christian troops clambered up into the breach, and met the enemy troops – a mixture of regional Sekbans and experienced Janissaries – head on, breaking them after a close-quarter engagement and slaughtering them in droves as they retreated down the opposing slope. They retreated inside the inner fortress and sealed the doors, and for a long time the Christian troops were at the mercy of enemy shooters whilst occupying the open outer courtyard. Eventually, however, more assault companies managed to scale the walls and force their way inside the interior corridors, clearing them out in violent hallway clashes. A single heavy gun was eventually brought into the courtyard, and three of its 24lb shots smashed the inner gates open. The enraged Christian troops thundered in, met immediately by the corpses of the dozens of Turkish defenders who had thronged to man the gate. Enemy wounded were mercilessly executed and those that continued to resist were given no better quarter. By the end of the day, the fortress was virtually in Christian possession.
First attempt to relieve Vacs
Familiar problems, however, soon reared their heads: The army was starting to go hungry. The main Turkish army still appeared to lurk not far to the north-east, towards Szigetvar, while their outriders and light troops controlled all of the territory between it and Sisak, occupying the countryside in the thousands.Also came a new issue: News arrived that the enemy was besieging Vacs, captured only the preceding winter by General Kaplir. It was left by sufficiently garrisoned by Thurn, considering its relatively small size, however the enemy was rumoured to be over 20 000 strong. The walls of Sisak were still terribly damaged, and repairing them would likely take several weeks at the least and be costly if services and materials were to be acquired conventionally.It was, however, decided that Vacs would be relieved at once. A small force of some 600 skirmishers was left in Sisak to defend the area and repair the walls. The rest of the army headed north, making a peaceful march without any interference by the enemy. Despite this, the commanders moved methodically in order to better forage the region. They arrived in Veszprem on the 30th of August, and received a report on the progress of the siege of Vacs:The garrison was holding out. It had few guns with it, however, and the Turks had entrenched themselves around it, with a presence among the northern hills facing out against Hungarian-held Neograd, and trenches running along the plains in a crescent reaching to the edge of the Danube. They also had a contingent on the western bank.
Approaches to the town were limited: Either the Christian command took the safer crossing in friendly territory at Komorn and attacked from the north, or took a risk and marched through enemy territory in order to attack the Turks from the south, which could catch them by surprise and cut their supply-line. At a council of war in Veszprem, Marradas and Baden favoured dividing the army into two corps and taking both routes. Gabriel adopted the radical stance of moving the whole army through enemy territory, an approach Anholt backed with uncharacteristic elan. Dampierre asked about considerations of garrisoning, yet it was decided that a minimalist reserve would be kept in Hungarian territory so as to avoid diluting the invading force: An all-or-nothing strategy in essence. After sending cavalry companies in all directions to requisition supplies from the populace, the army departed on 4th September. The nearby Ottoman fortress of Fehervar would have to be bypassed and the Danube crossed at Ercsi if over 30 000 men were to make it to Vacs.
Keeping tight control over their contingents, the Christian generals arrived at Ercsi on the 7th, and immediately attacked.Unfortunately for them, the Ottoman defenders had been forewarned, and had ensured that the fort would not be taken swiftly by gathering supplies and local reinforcements. The Christian assaults were frustrated over several days, before arelief force of some 6000 cavalry and 10 000 infantry arrived on the eastern bank. Without the ability to entrench themselves or fortify their position in hostile territory, the attackers were forced to withdraw to Czesnek, 20 miles north of Veszprem.
There had been a good amount of plunder on the march to Ercsi as a caravan containing the pay of the Fehervar garrison had been caught by the Croats, so discontent at this failure was fortunately minimized. The Ottoman army made no attempt to pursue, and was content to remain at Ercsi.
Second attempt
On the 16th, Gabriel put forward another daring plan to relieve Vacs. This time the whole army would be crossing the old bridge at Tolna. The troops grumbled as sure discomfort, hunger and insecurity were guaranteed, but Baden backed the plan and the rest of the commanders did not voice any objections. The movement of the army – divided into several corps and spread over a wide territory – was slow, punctuated by delays due to wagons being stuck in muddy terrain or lost in the numerous marches of the area.An abortive night attack was launched against the outlying castle of Simontornya, but it failed.
Tolna itself was an old town with a small population. It was found to be undefended and was subsequently invested on the 23rd. The population hailed the Christian troops as liberators, although everything that could be eaten or used as currency was swiftly taken from them. The bridge was five miles east, yet the approach was laced with riverways and swamps. Rakoczi sent forward some of his hussars on Gabriel's orders to reconnoiter the bridge. On the approach they ran into several hundred Akinci, who were as surprised as they were at the encounter.
After a confused skirmish, a Turkish raiding party that had been marching parallel to the one being engaged intervened in support of their confederates, and the Hungarians were dispersed.The Akinci followed as far as the outskirts of the town, but fortunately the Hussars rallied inside the place with the support of arkebusiers of the League. Sending out mixed detachments of musket-armed infantry and light cavalry the Christians led a rolling counter-attack.
After an hour or two of such fighting, the Turks retreated across the bridge, on the other side of which they had reinforcements already waiting. It would appear that there were several thousand troops in all, with a handful of guns. Pursuant to the strategic plan, the Christian commanders agreed to lead an attack. The Spanish army, which had taken a largely auxiliary role in the campaign thus far, would organize it. The result was an inconclusive artillery duel across the river – Ottoman entrenchment was minimal but their gunners outperformed the Italians opposing them and nearly compensated for the fact that they only possessed four guns. The Christians inflicted greater casualties but the enemy showed little sign of softening. Nightfall reduced the battle gradually until it fizzled out completely. The next morning, Marradas tried again, having loaned additional guns from his allies.Having dug-in during the previous day's engagement, the Spanish results were greatly superior on the 24th. One enemy gun was neutralized by a stray shot, and Marradas marshalled the Galasso Infantry Tercio for an attack across the bridge.The attack faltered at first, suffering heavy losses to enemy guns and accurate small-arm fire as it crossed, but Lt. Colonel Galasso managed to galvanize his soldiers and seize the enemy trench on the other side.
The Janissaries launched an immediate counter-attack from their reserve position. Over a thousand fearsome Anatolian soldiers, the plumes on their long white bonnets giving them the appearance of a moving forest, charged the captured trench-line before them, but intense musket-fire from both within and above the trench caused them great loss and disrupted their ranks. They could not break the Spanish pike-screen and were routed. Seeing their elite fail crushed the spirits of the rest of the Turkish host and they retreated towards the north-east. As Galasso secured the bank and the abandoned enemy guns, Serbelloni's arkebusiers were sent forward to complete the rout.
Hundreds more enemies were captured during the retreat. The enemy base, Kalocsa, was left open to the approaching armies and the locals opened the gates. The Turks had seized what they could but much powder and provision was left behind, and as the Christian cavalry – arkebusiers, Croats and hussars – continued northwards, they captured more abandoned wagons in ditches or on the roadside. The material gain was minimal considering the small size of the enemy force in the field, but the morale boost would be valuable for the long march north to Vacs. The three enemy guns still intact were added to the Spanish battery.
Action of Tolna bridge: Christian losses: 300 infantry (Galasso regiment), negligible cavalry. Additional losses in the hundreds to enemy artillery. Ottoman losses: 4 guns, 200 Janissaries killed, negligible light cavalry and light infantry dead, 600 overall captured. Additional losses in the hundreds to enemy artillery.
While at first Christian spirits were high following the Turkish defeat, they withered during the northward march, across arid, unpopulated and boggy terrain in which such a host had difficulty sustaining itself. Several hundred Hungarian skirmishers deserted as well as many groups of other Christian soldiers from all contingents, and discipline declined sharply as the army became a hungry (and still unpaid) rabble. On the 1st October the Hungarian and Badener vanguard troops encountered enemy resistance whilst foraging a few miles south of Pest.
The Badener-Ottoman encounter was messy: In the morning fog, both sides believed that they were fighting vastly superior forces and promptly disengaged. The Croats and skirmishers of the Hungarian van were successful in driving back the heavier but mêlée-bound Timariots opposing them, and after further probing it became clear that the enemy was strongly positioned in two key forts on the eastern bank of the Danube – Pest and Rakos. While besieging either of them was out of the question given the situation in the Christian army, bypassing them would pose a serious risk, leaving potentially thousands of enemy troops able to strike at the rear of the force. Several Christian officers backed a retreat across the river at Ercsi, although this fort was still in enemy hands. Others also in favour of retreat would have preferred Tolna, although only a few hundred skirmishers and hussars had been left to garrison it and its situation was uncertain.September was over, and sustained operations in the impending winter were at the very least ill-advised. Thus the Christian command faced a dilemma as the campaigning season drew to a close, with Vacs still under siege and their own position vulnerable.
International News
Following the successful election of Leopold V, Archduke of Austria as King of the Romans, Ferdinand II has abdicated as Holy Roman Emperor, under pressure from his own Estates. The former was crowned as Leopold I, Holy Roman Emperor, a few days ago, although he had been managing a large share of policy beforehand.
Pope Gregory XV has died of natural causes. Maffeo Barbarini has been elected pope, as Urban VIII.
Henry Frederick of the Palatinate has recognized the Palatine annexation of the Upper Palatinate and the transferral of his Electoral status to Bavaria. The event, however, remains informal and unconstitutional until ratified by the Diet.
Following the death of Christian of Brunswick, the Cathedral Chapter of Halberstadt will now elect a new bishop.
Baghdad has been placed under siege by the Safavids. An Ottoman relief army has been crushed outside of the city.
The Ottoman Sultan Mustafa I has been deposed. A regency is now in place, with Murad IV as sultan under the guidance of Kösem, Queen Mother.
Gandalf. is no more!
Last edited by Inkie; January 29, 2013 at 11:26 AM.
Under the patronage of the formidable and lovely Narf.
Proud patron of Derpy Hooves, Audacia, Lordsith, Frodo45127 and Sir Adrian.
The factions are up, so go ahead and choose which one you want
My third post will be edited once the game starts.
Also, if you have any questions, don't hesitate to ask them here.
Edit: Only the factions that I have presented here are currently playable. Depending on what happens during the game, certain others will become playable later on.
Last edited by Inkie; June 14, 2012 at 01:44 PM.
Under the patronage of the formidable and lovely Narf.
Proud patron of Derpy Hooves, Audacia, Lordsith, Frodo45127 and Sir Adrian.
There are still 5 factions to be chosen, so go ahead!
Also, I just noticed I forgot a rule on inactivity. If a player hasn't responded beyond 48 hours of one of the GM's updates, the GM can boot them and their faction will become available to a new player.
Added that to OP.
Under the patronage of the formidable and lovely Narf.
Proud patron of Derpy Hooves, Audacia, Lordsith, Frodo45127 and Sir Adrian.


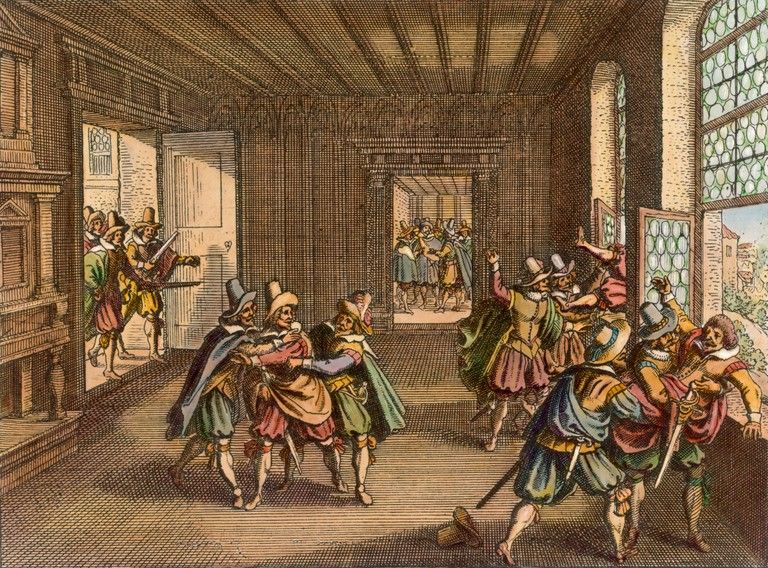
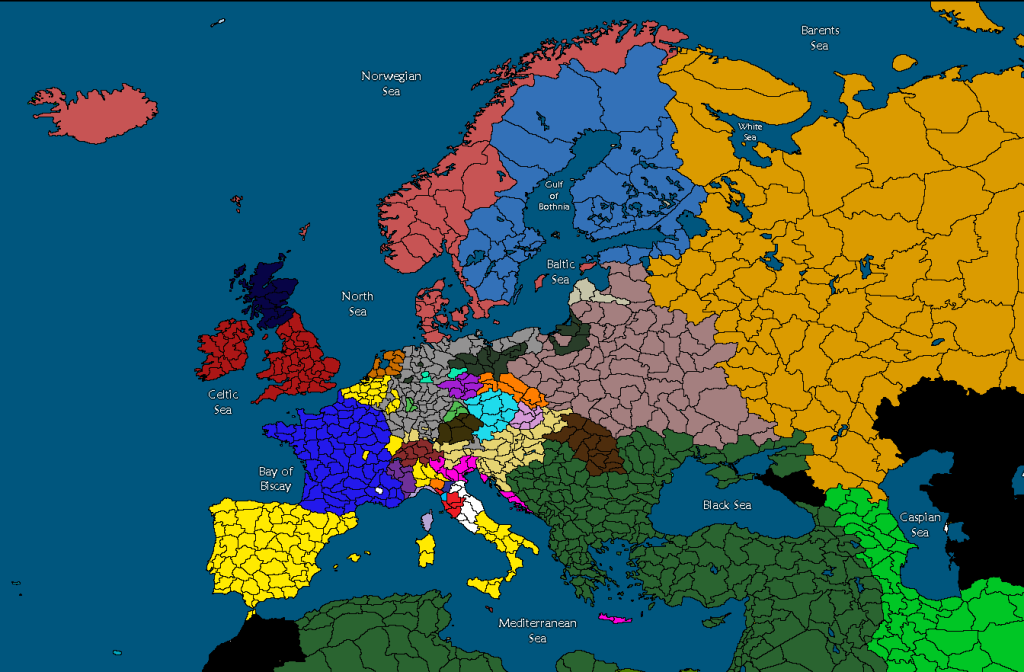


 Reply With Quote
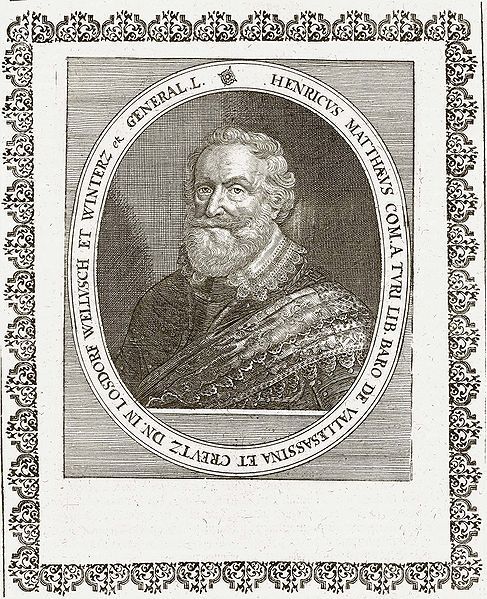


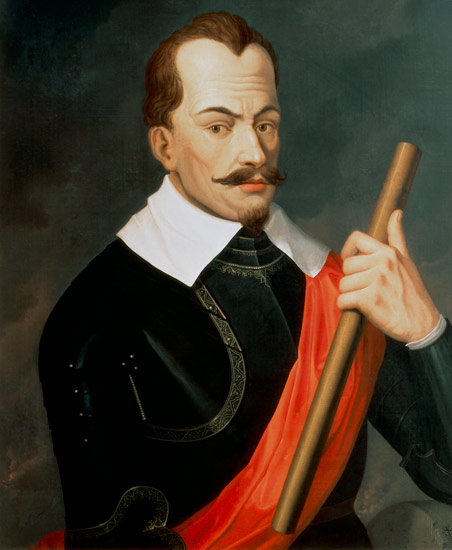
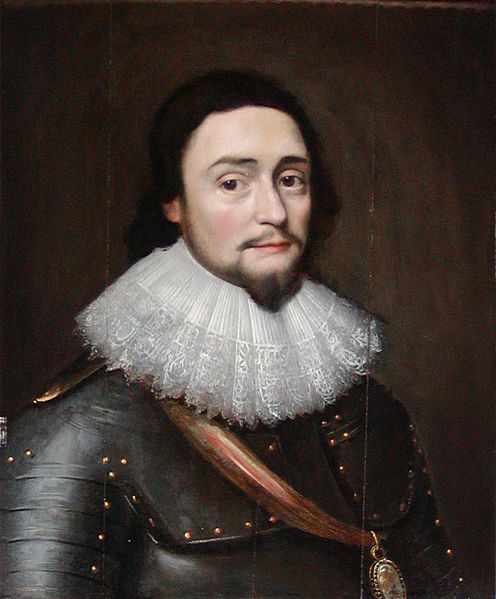
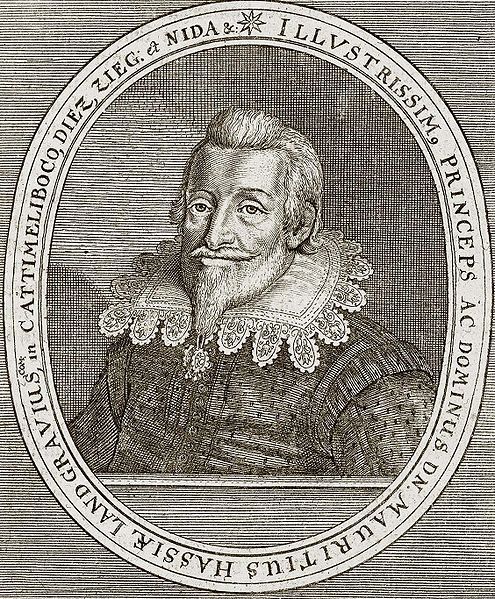
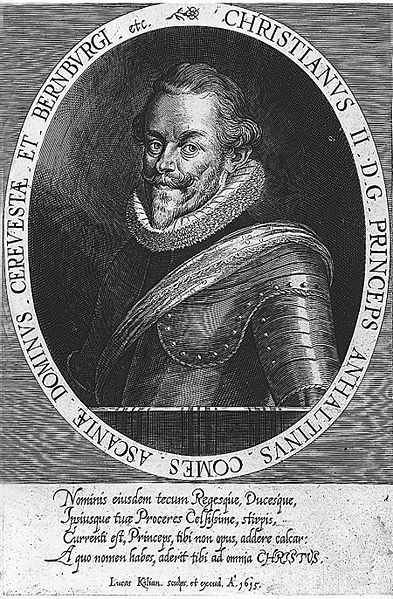
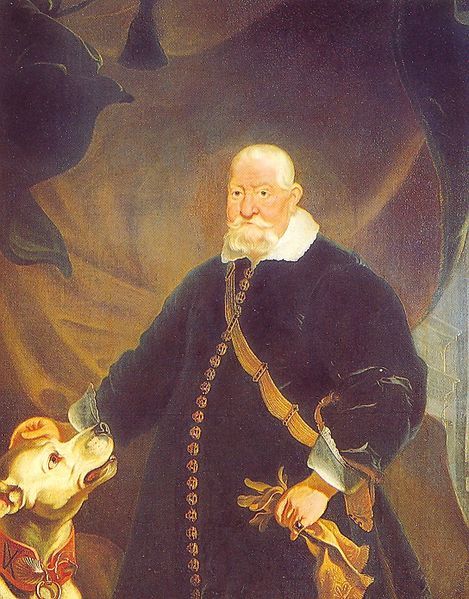


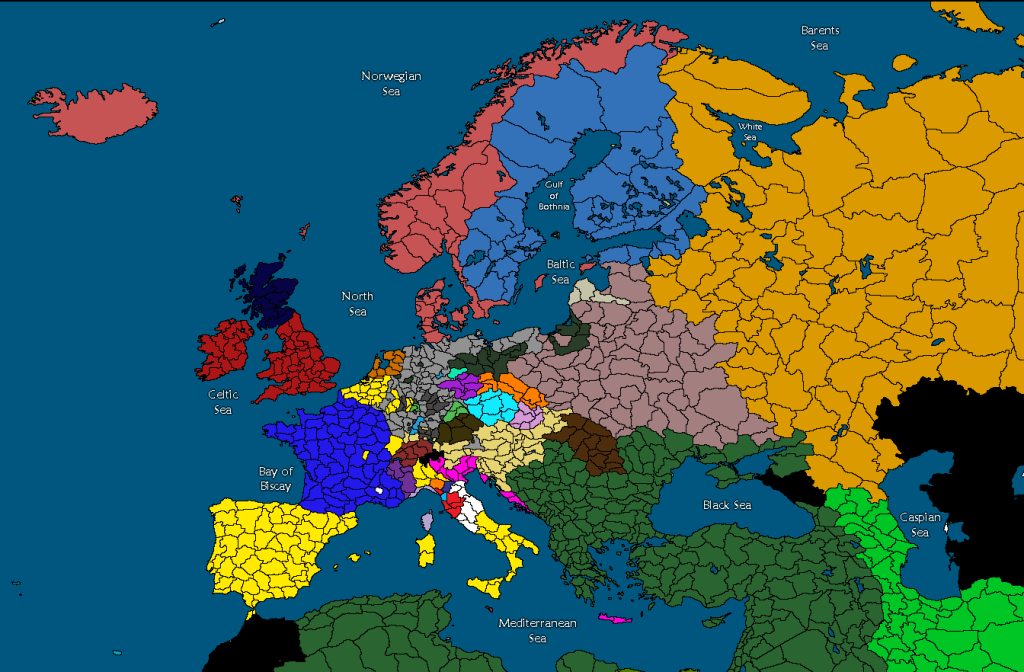
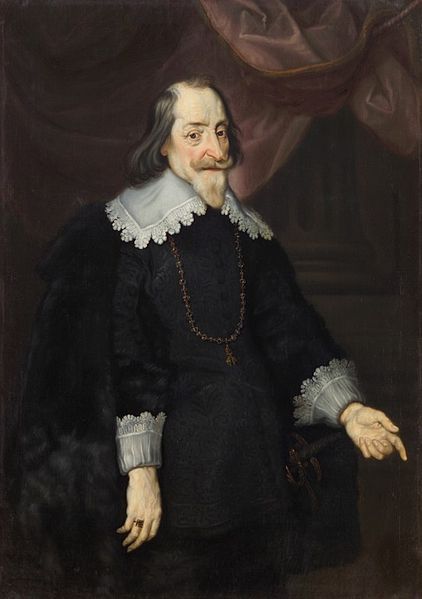
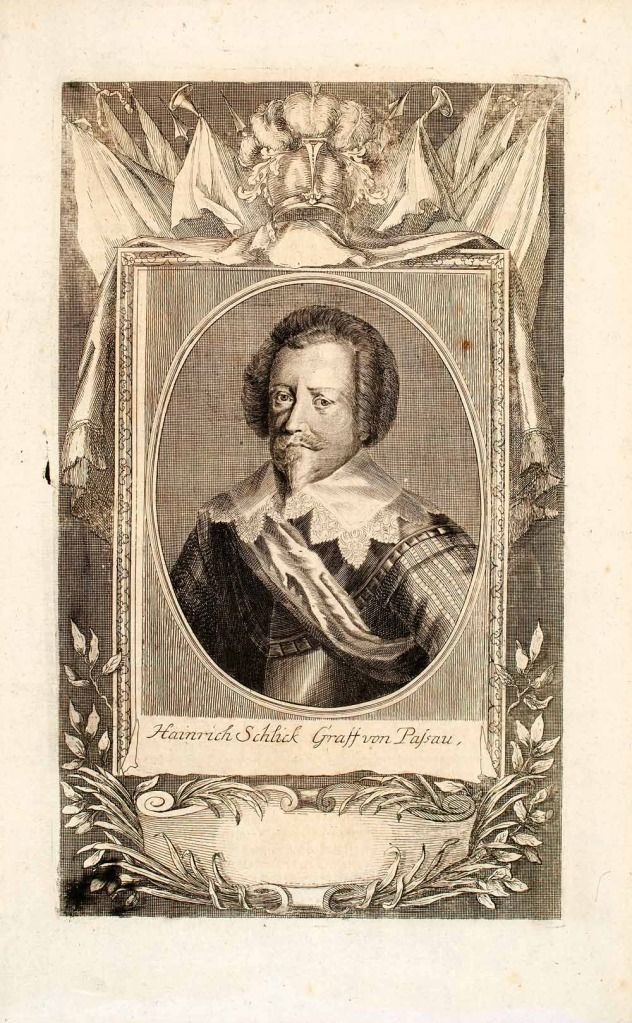
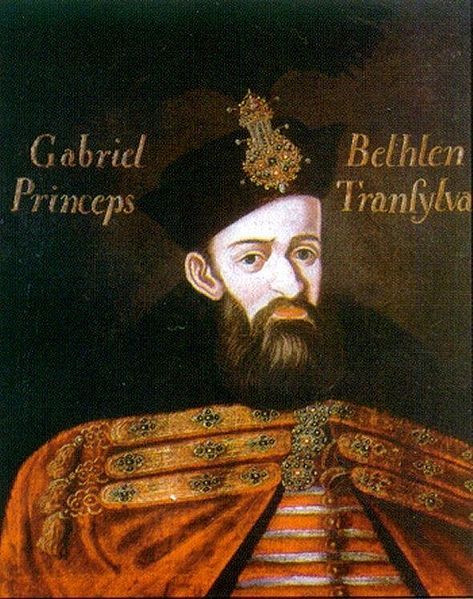


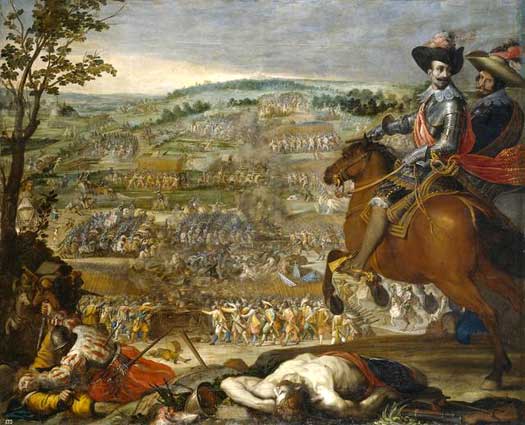


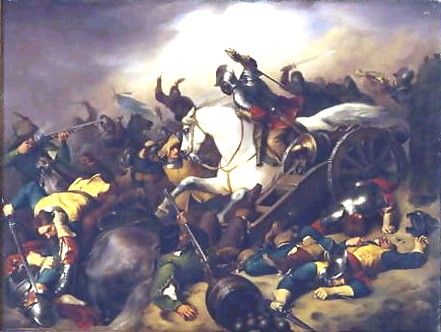


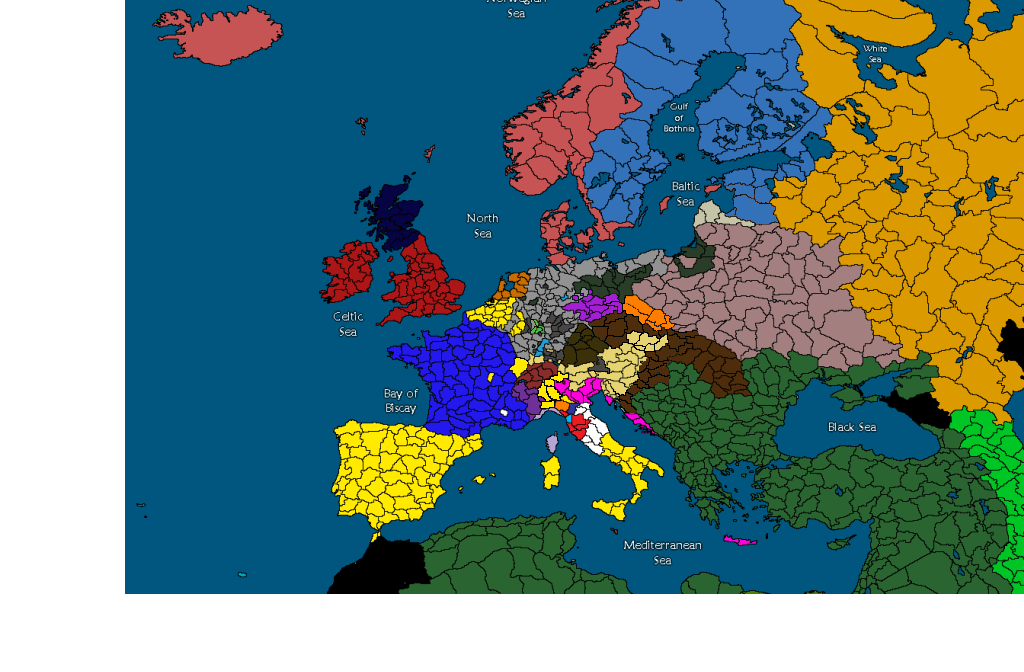


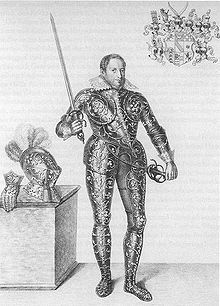


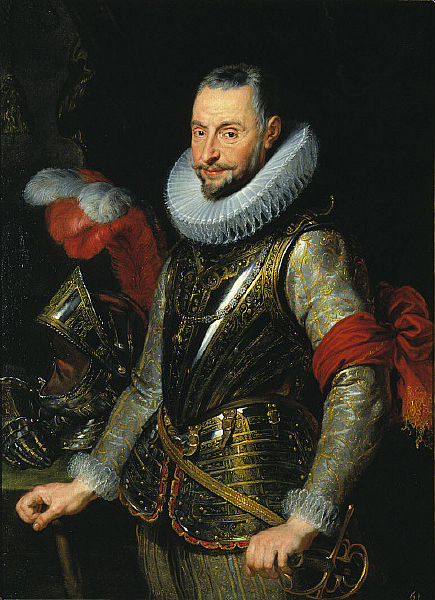


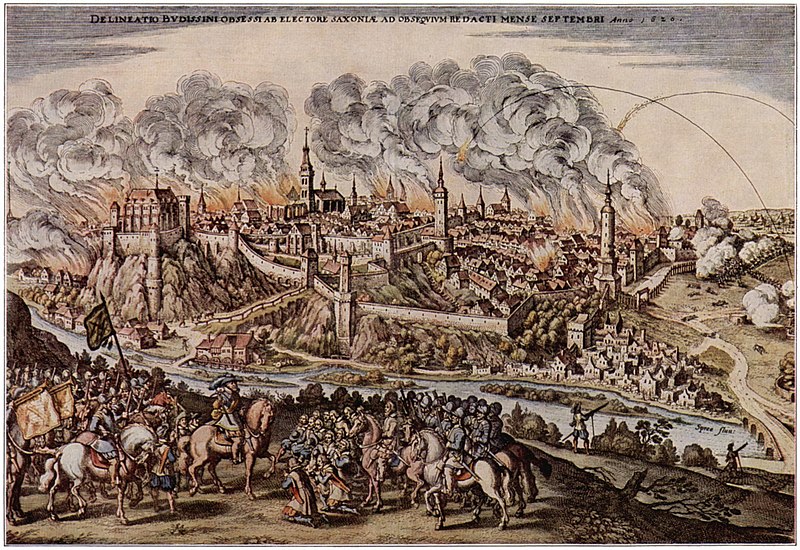
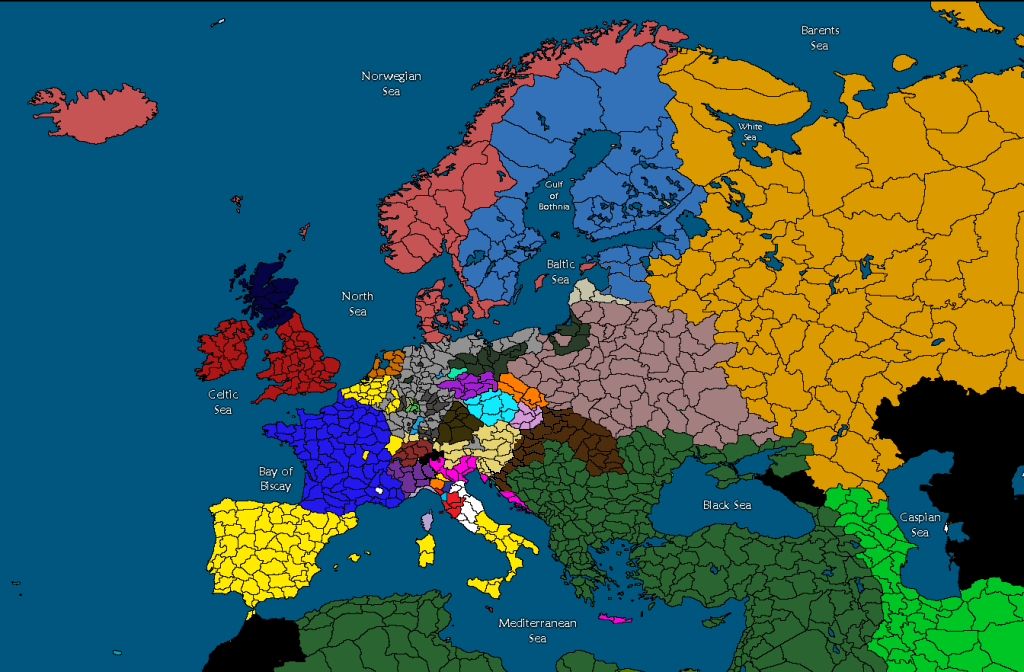


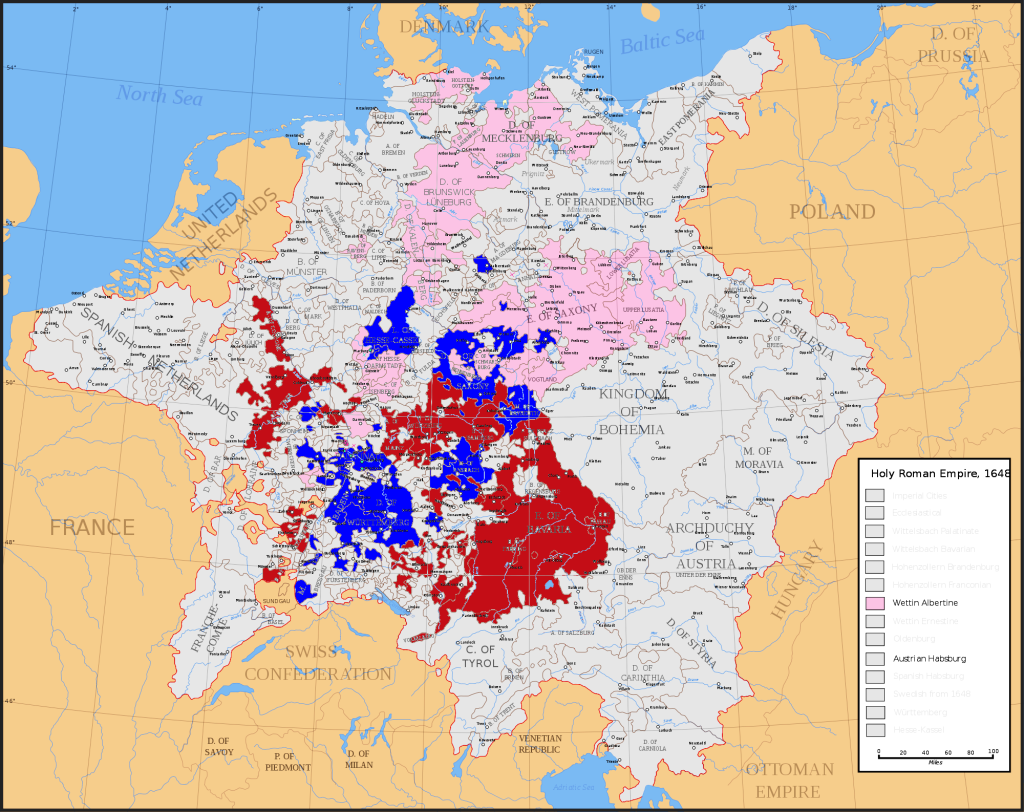
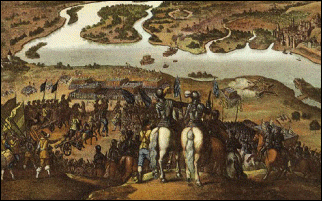


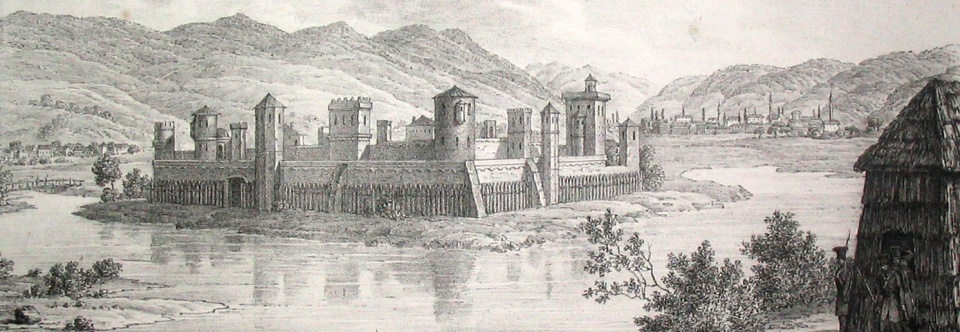
")
")


")
")


")
 )
)
")


