Last edited by Goofy; July 09, 2012 at 10:20 AM.


")


HiI was kinda bored so I decided to try some more than two
Original:
Spoiler Alert, click show to read:
Edited:
Spoiler Alert, click show to read:
Original:
Spoiler Alert, click show to read:
Edited:
Spoiler Alert, click show to read:
Original:
Spoiler Alert, click show to read:
Edited:
Spoiler Alert, click show to read:
Original:
Spoiler Alert, click show to read:
Edited:
Spoiler Alert, click show to read:
Original:
Spoiler Alert, click show to read:
Edited:
Spoiler Alert, click show to read:
Last edited by ForteS; May 08, 2012 at 01:36 PM.
UNDER THE MOST HONORABLE PATRONAGE OF: Legio!
PATRON OF: Wangrin, ♔Sir Digby Chicken Caesar♔, Geronimo2006 and Narf!
Hey Teach,
Number 1.)
Spoiler Alert, click show to read:
Number 2.)
Spoiler Alert, click show to read:
I know there not avatar size, but they can be resizedAlso about them being the same image - I wanted the same, but in different 'poses'
How I did well, I tried the alpha for the first one. However, for the second one I tried the selection method - it worked up until a point, when I tried erasing the 'not-needed' bits (after creating the transparent layer) it just erased to white, not transparent. So I simply used the alpha technique when the background was right. Any ideas?
Last edited by Shankbot de Bodemloze; May 10, 2012 at 12:44 PM.
THE WRITERS' STUDY | THE TRIBUNAL | THE CURIA | GUIDE FOR NEW MEMBERS
PROUD PATRON OF JUNAIDI83, VETERAAN & CAILLAGH
UNDER THE PATRONAGE OF MEGA TORTAS DE BODEMLOZE


")
")
")

")
")
I'll do this once I get back to my room. I can't do this in class without a mouse
Things I trust more than American conservatives:
Drinks from Bill Cosby, Flint Michigan tap water, Plane rides from Al Qaeda, Anything on the menu at Chipotle, Medical procedures from Mengele
Accidentally, (in the free select tool) I pressed enter instead of backspace, and the last circle I had made was connected with the 1st one. Is there any way to undo this? I don't want to go through this pain all over again...

")
Same thing here! Did exactly what he did, but when I erase I get a white background! Once I tried the Alpha technique it worked so its not a problem.How I did well, I tried the alpha for the first one. However, for the second one I tried the selection method - it worked up until a point, when I tried erasing the 'not-needed' bits (after creating the transparent layer) it just erased to white, not transparent. So I simply used the alpha technique when the background was right. Any ideas?
Not to state the obvious or anything, but couldn't you just click 'undo?Originally Posted by Beorn

Glad it's not just me!
THE WRITERS' STUDY | THE TRIBUNAL | THE CURIA | GUIDE FOR NEW MEMBERS
PROUD PATRON OF JUNAIDI83, VETERAAN & CAILLAGH
UNDER THE PATRONAGE OF MEGA TORTAS DE BODEMLOZE
when I click undo it erases the whole free select thing. when I hit backspace it does nothing. Anyway, I'll do the whole process again.
Original:
Spoiler Alert, click show to read:
With GIMP:
Spoiler Alert, click show to read:
About the second method, do you know why it happened to me and Shankbot? The background turning white instead of that background you got?
EDIT: Figured it out!
Original:
Spoiler Alert, click show to read:
With GIMP:
Spoiler Alert, click show to read:
Last edited by The Norseman; May 08, 2012 at 03:23 PM.
If you accidentally press Enter and the selection gets confirmed, you can set the Free Select Tool to the "Add to the current selection" mode and then continue your work (this time starting where the selection ends).
This tool can really be a pain at first, I know, but it'll become your friend when you start getting the hang of how to use it properly and get some experience.
@ForteS: Top-notch work! And nice to see that you tried out them all!
@Shankbot12: Good work. For avatars, however, you should choose a render which is complete - your first one is unfortunately cut on the right. And in your second image you might want to remove those leftovers of the background.
@The Norseman: Great, now just do the second one as well!
Did you make sure that the transparent layer is under the non-trasnparent one?
Another way to avoid this is to create a new image with a transparent background (you'll have such an option when you're creating an image) and then paste your desired picture to it. After that you can crop what is spare.
Ah, I just read The Norseman's first post and got the point - you must first set your GIMP preferences so that GIMP creates all images with a transparent background by default! You can do that by opening GIMP and then selecting Edit > Preferences > Default Image and then Advanced options > Fill with > Transparency. My apologies for this, I'll update the OP so that others won't face the same problem you did.
Last edited by Goofy; May 08, 2012 at 02:50 PM.
Ill try it out! Lol its hard for me sometimes because my GIMP is in my language
Still the same for me, it erases to the current background colour. Even when I crop it does this.
here's the 1st one:
Spoiler Alert, click show to read:
edit: here's the original
Spoiler Alert, click show to read:
Uhm ok I checked again and did what you said but somehow the background still goes white when I erase it...
Me too
Things I trust more than American conservatives:
Drinks from Bill Cosby, Flint Michigan tap water, Plane rides from Al Qaeda, Anything on the menu at Chipotle, Medical procedures from Mengele
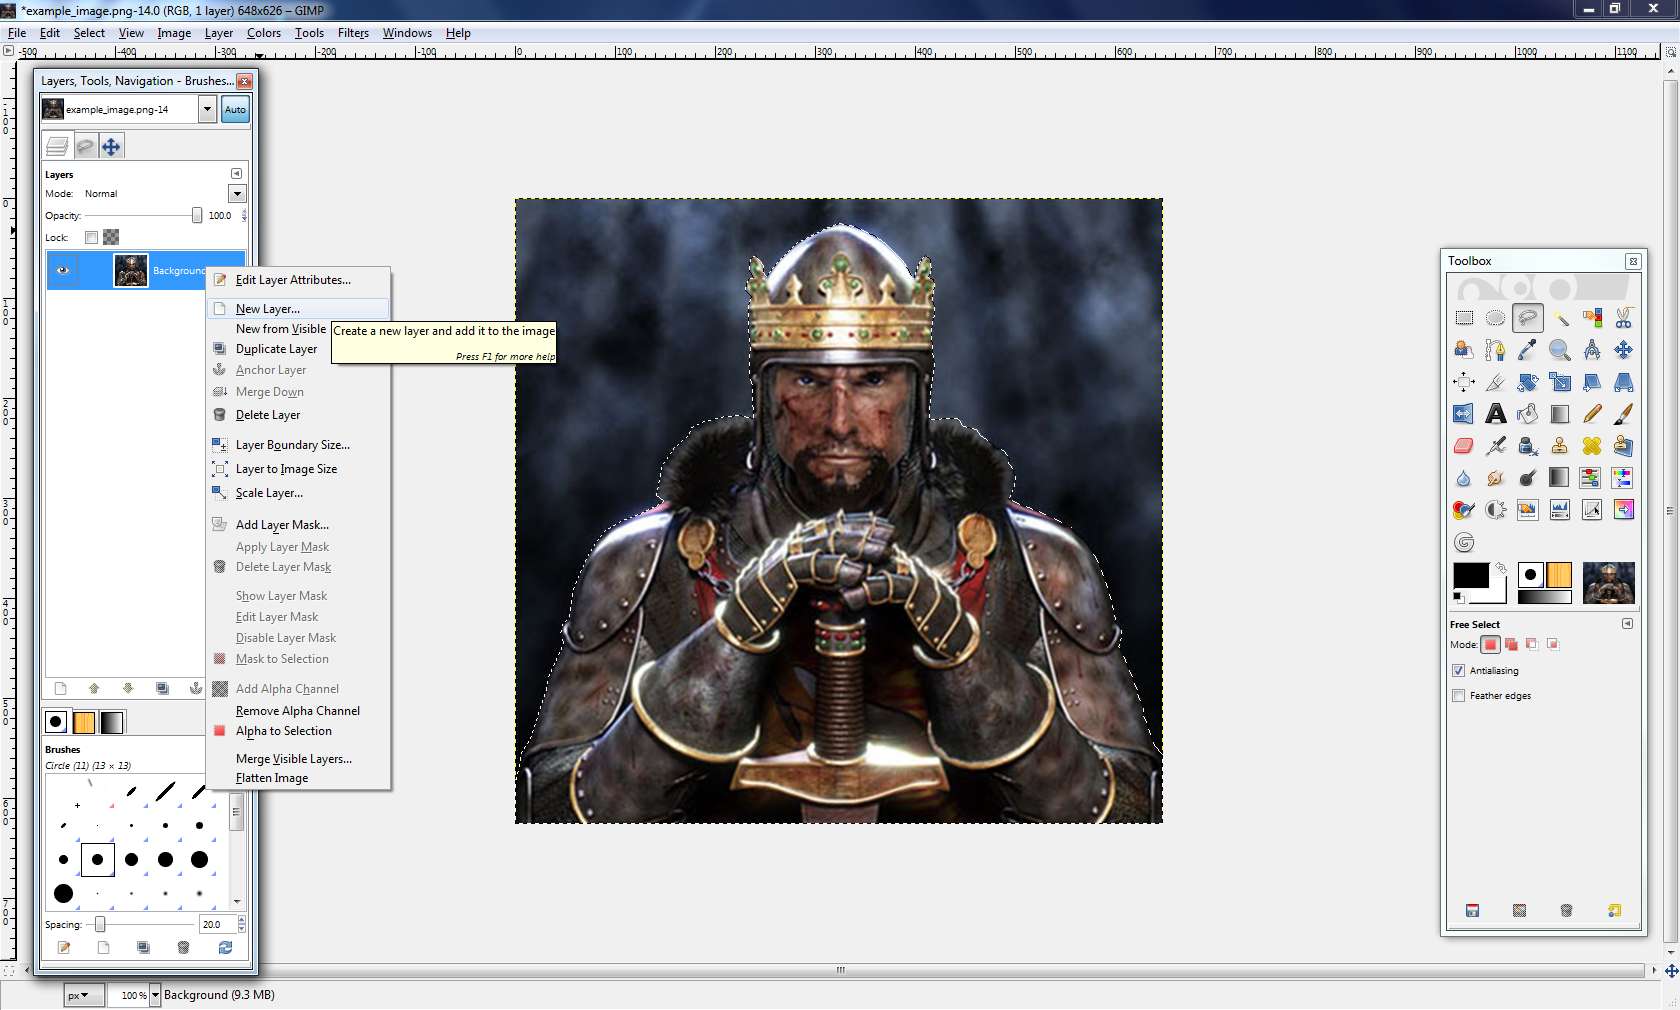
Ok, for those of you who have problems with having a white background when erasing, the solution is quite simple. Once you have marked the picture like here:
Spoiler Alert, click show to read:
Press Ctrl + X, then make a new layer as shown on the picture above and paste the picture you have
now cut, into the new layer. Then you will have the right background and the picture is finished when saving it.
Last edited by The Norseman; May 10, 2012 at 08:23 AM.
")
")

Originals
Spoiler Alert, click show to read:
My
Spoiler Alert, click show to read:
The borders are not very accurate, thats because i am tired
{I cook weird stuff}-{Patronised by the fearsome Chloe}
[...] því að með lögum skal land vort byggja en eigi með ólögum eyða.
(The Frosta-thing law, 1260)
Is acher in gaíth innocht,
fu-fuasna fairggae findfolt:
ní ágor réimm mora minn
dond láechraid lainn ua Lothlind.
Thanks. This is a huge help
I hold the blitz record for Medieval II (106 region in 7 turns) set in January 2024.
Check out my Youtube Channel: CosmicConqueror
Proud Member of TWC since 2011!
")


Oh I love this lesson
This one for the fabulousity
original
edited
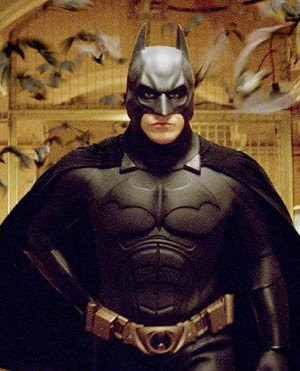
This one because I like Bean.
original
edited
Edit: Forgot the first technique:
original
edited
Edit 2: I feel so confused right now
Last edited by Raritу; May 08, 2012 at 10:12 PM.
Here is my work:
Penalty
1st image
2nd image
EDIT: I have no idea why there is that red line around the penalty
I think it is a imageshack problem because this screenshot proves that it looks fine in GIMP.
Spoiler Alert, click show to read:
I also have no idea why the Color to Alpha does this....
Spoiler Alert, click show to read:
please help!
Last edited by King William the Conqueror; May 09, 2012 at 08:16 AM.
I hold the blitz record for Medieval II (106 region in 7 turns) set in January 2024.
Check out my Youtube Channel: CosmicConqueror
Proud Member of TWC since 2011!
 Posting Permissions

 Reply With Quote


")
")

")