Page 1 of 14 1234567891011 ... LastLast
Results 1 to 20 of 272

Thread: LME Pictures - With Campaign Context

  1. #1

    Icon7 Règle France, France Règles les Vagues - LME Naval AAR [Screenshot Heavy, 56kers beware]

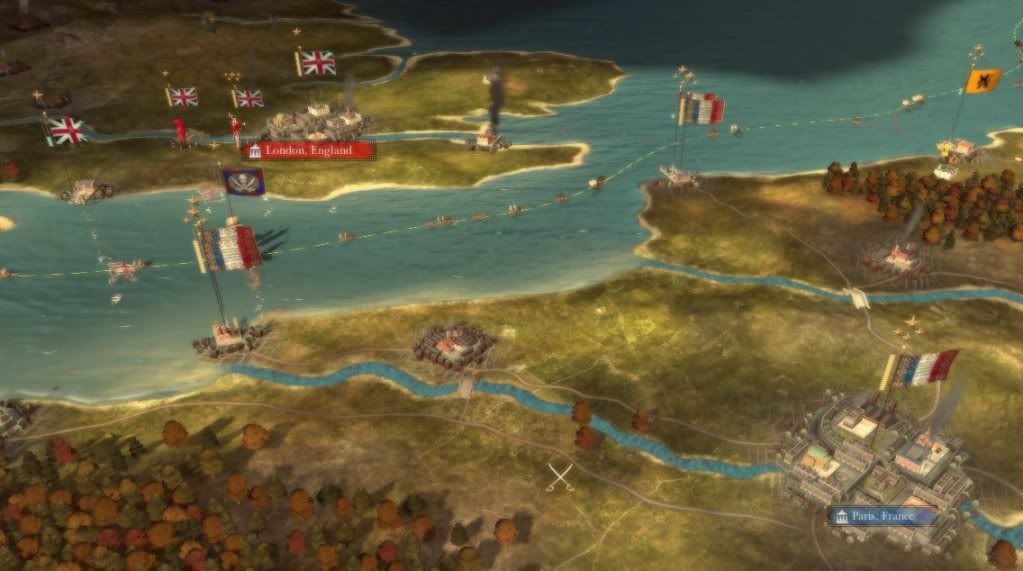
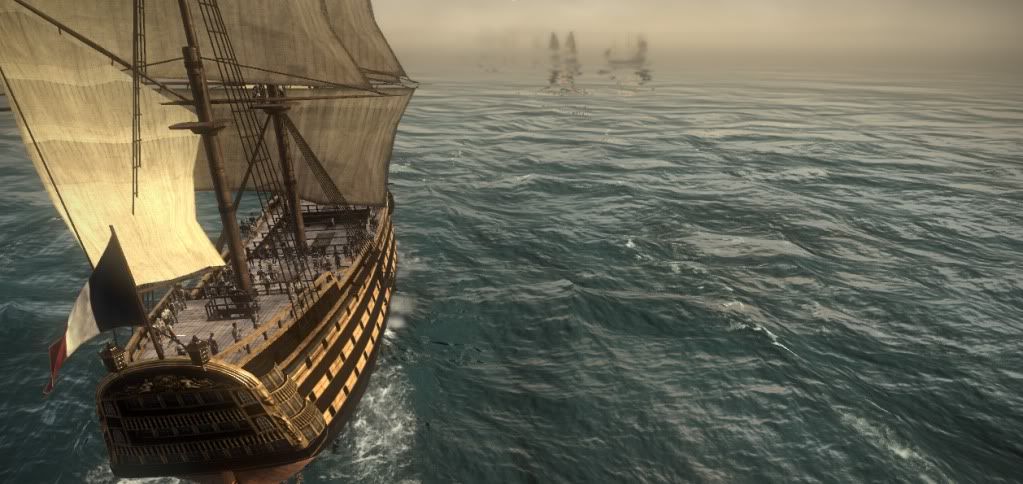
    The Date; April 15th, 1808

    The Place: The western coast of England

    The Situation; Lord Admiral Horatio Nelson is caught off guard by the Imperial Navy under Admiral Julien Marie Cosmao-Kerjulien and Rear Admiral Pierre Villeneuve.

    While the French have a superiority in heavy ships, Nelson is a commander without peer and his fleet's superior maneuverability may provide decisive.

    Order of Battle:
    Imperial Navy: Seven 122 Gun Ships of the Line, One 106 Gun Ship of the Line, Four 80 Gun Ships of the Line, Four 74 Gun Ships of the Line. Flagship; Imperial (122)
    Spoiler Alert, click show to read: 


    Royal Navy: Four 106 Gun Ships of the Line, Two 98 Gun Ships of the Line, Five 74 Gun Ships of the Line, 3 50 Gun Ships of the Line, 5 38 Gun Frigates, 7 Indiamen (12). Flagship; HMS Victory (106)
    Spoiler Alert, click show to read: 


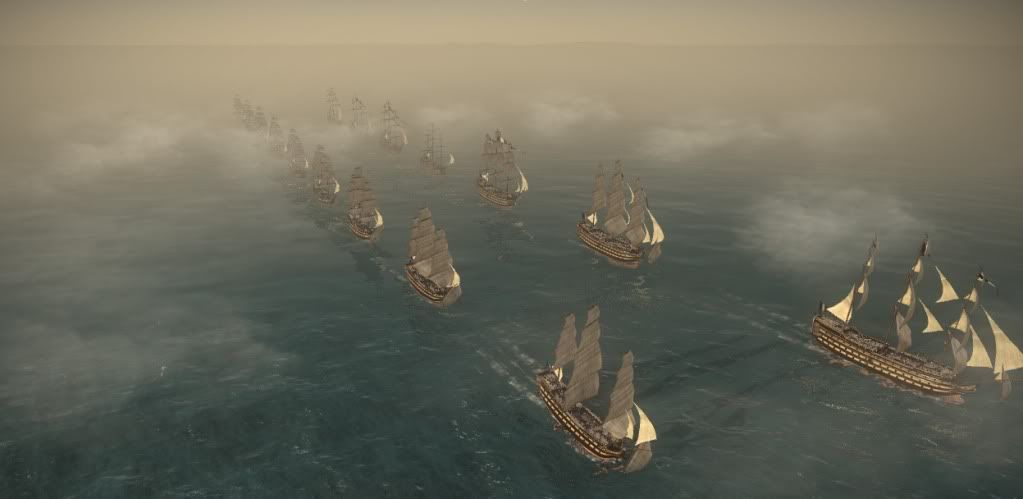
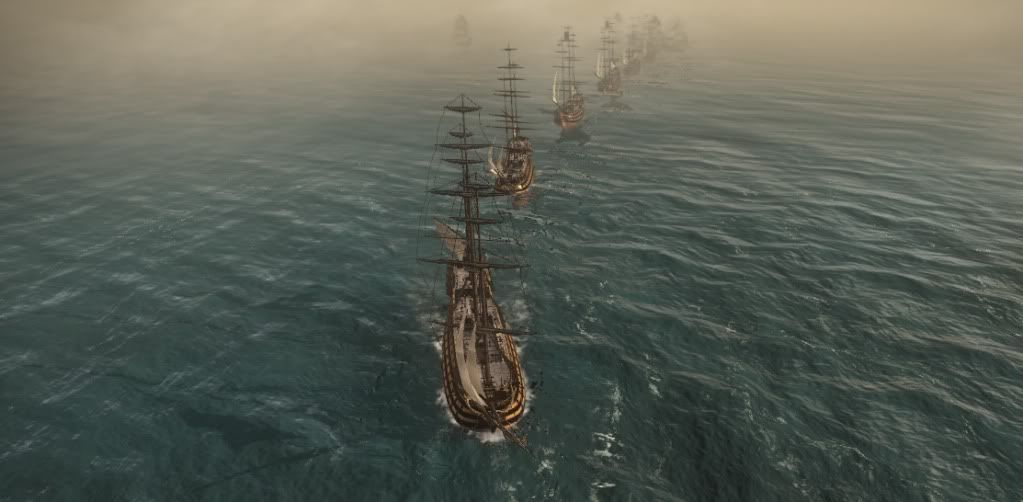
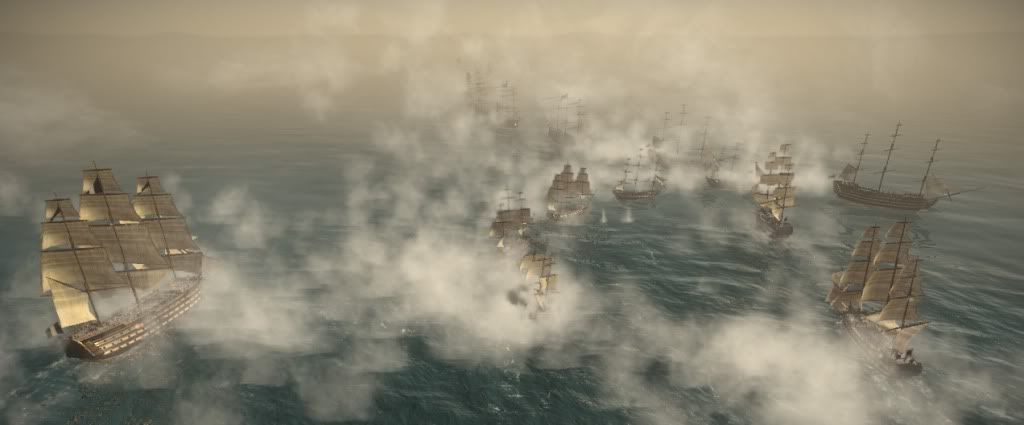
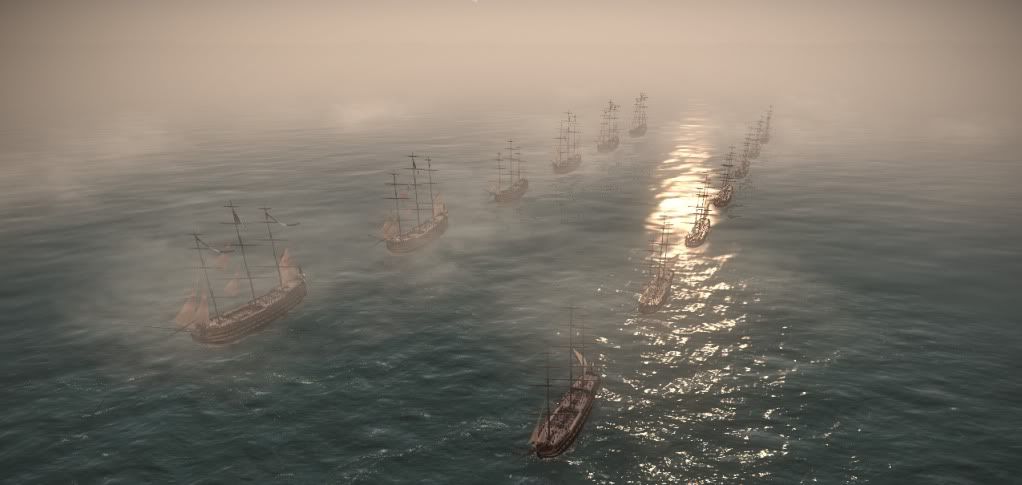
    The Imperial fleet deployed into two lines, heavy ships to one, the mediums to another. The Royal Navy deployed in a single, long line abreast, headed by the heavy ships, and getting progressively lighter down the chain.
    Spoiler Alert, click show to read: 


    Both fleets believing they had the advantage, they advanced at top speed towards each other. A strong easterly wind meant neither side had an overt advantage in speed.
    Spoiler Alert, click show to read: 


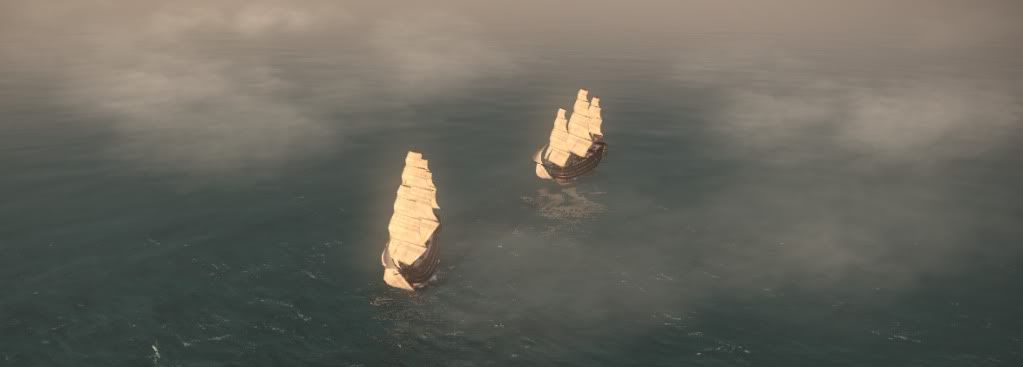
    Battle was joined when a small line of British frigates detached from the primary fleet and raced ahead to attack the French head on. Despite being much weaker vessels, their combined fire weakened the lead 74, the Achille, substantially. By the time the lead British 1st rates had finished their opening salvo, the two lead French 74s had lost almost 50% of their guns.
    Spoiler Alert, click show to read: 


    When the French heavy line entered the fray, the British frigates were quickly destroyer outright, the HMS Enterprize detonating after a round hit her magazine. However, the main British column continued to the west, with the lead heavy ships out of range of the French heavies.
    Spoiler Alert, click show to read: 


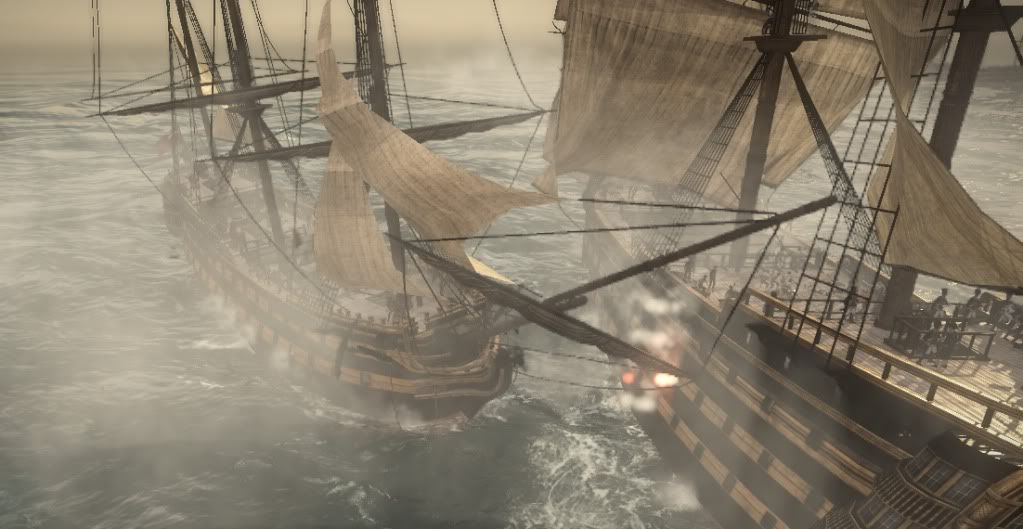
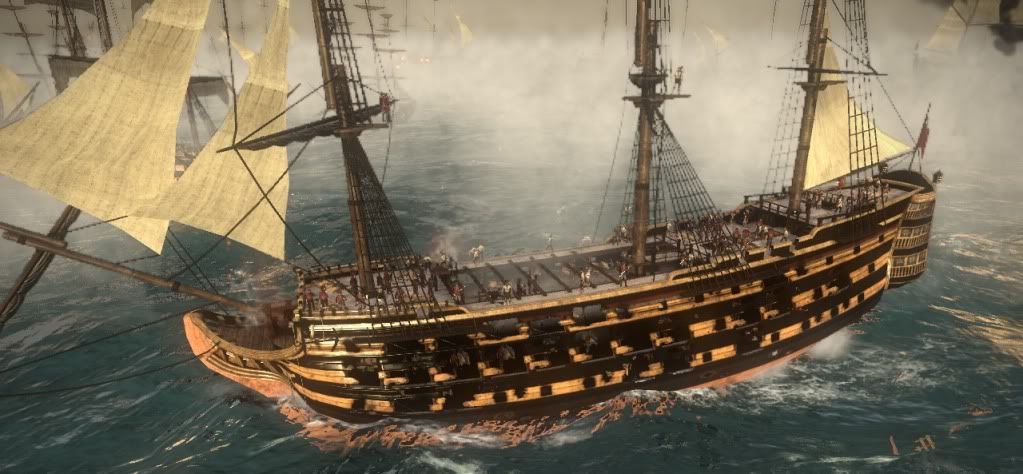
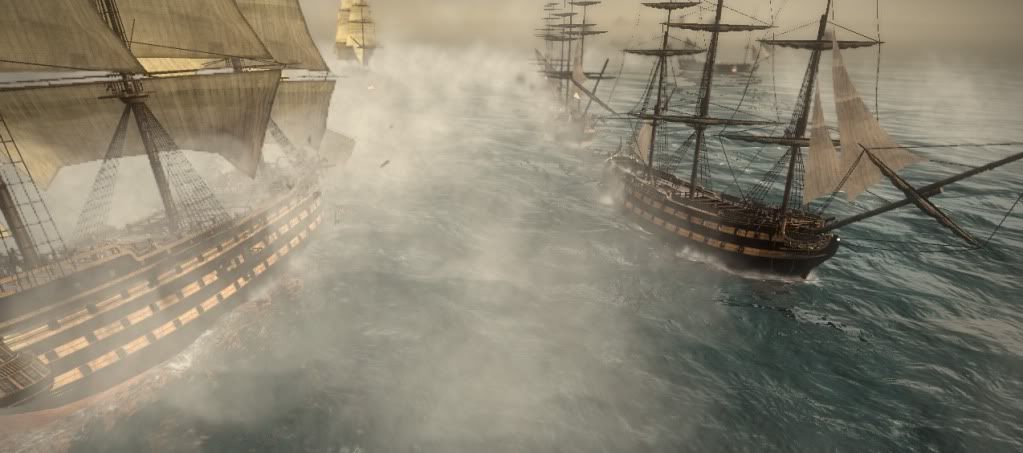
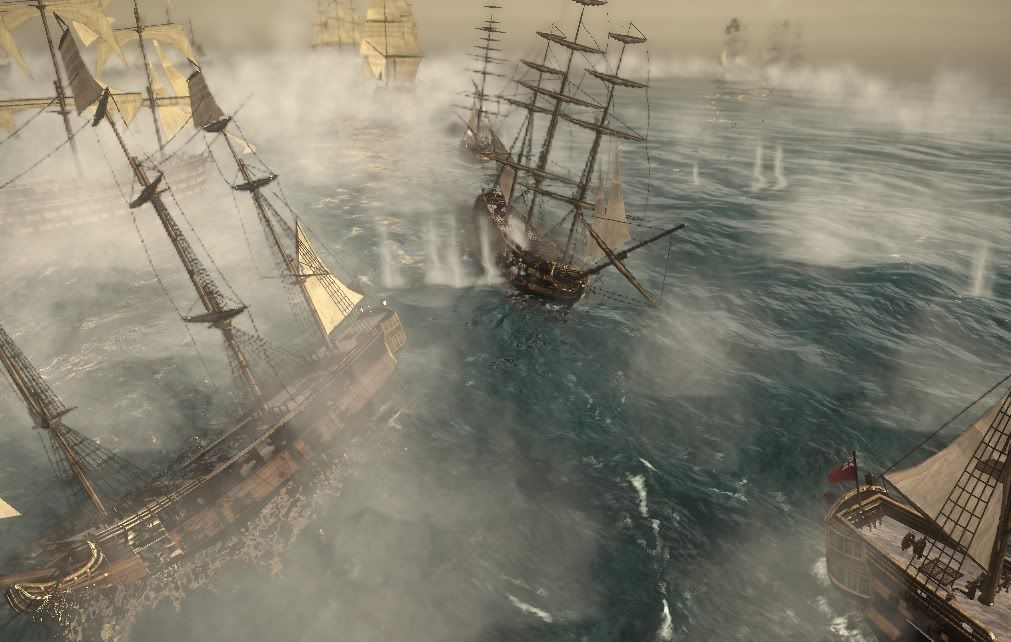
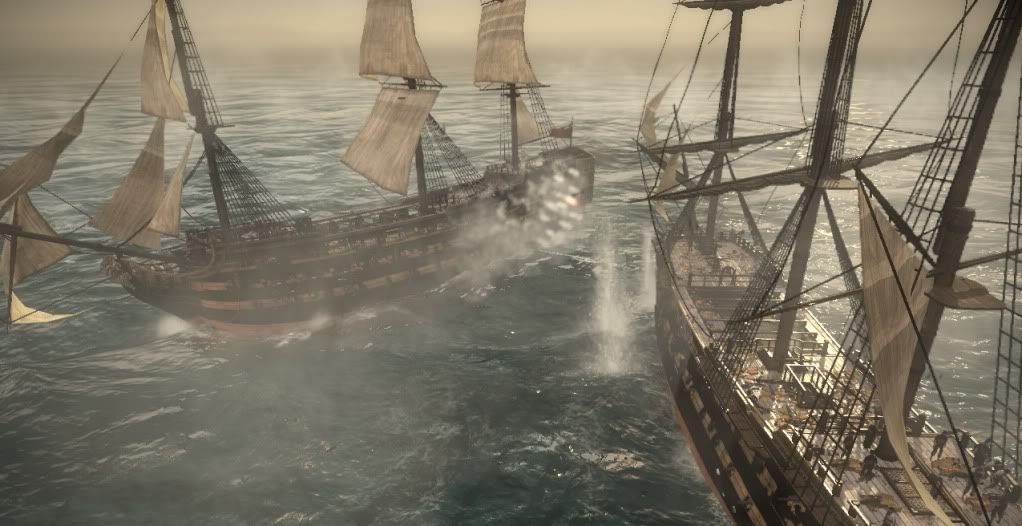
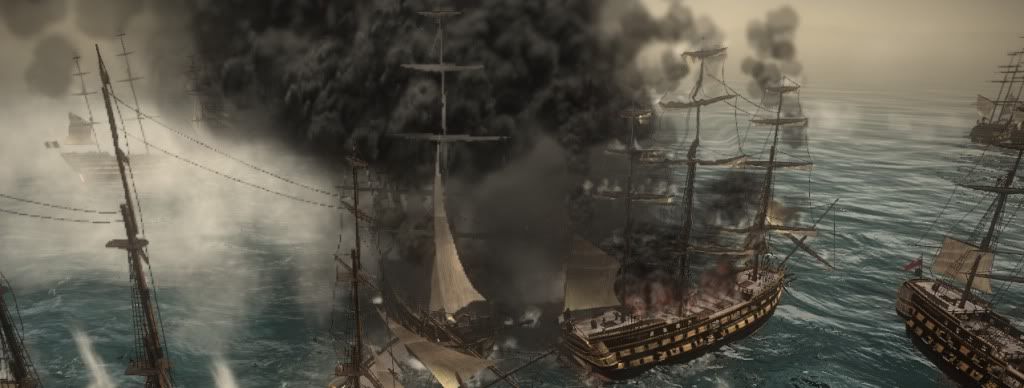
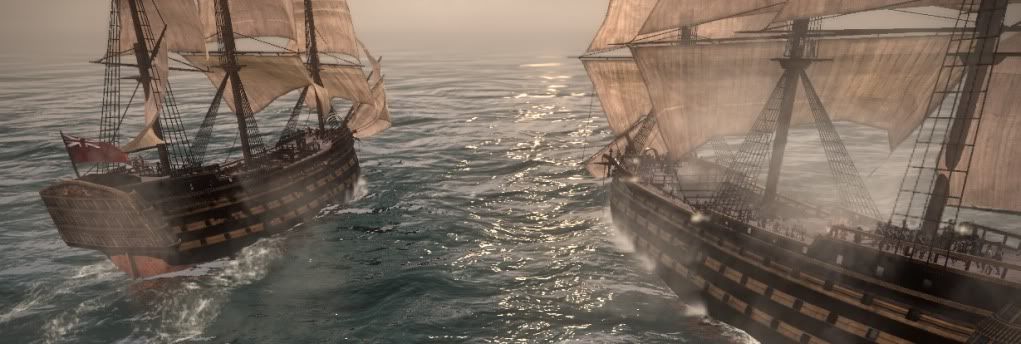
    In a move to break the highly disciplined British line, the Imperial Flagship, Imperial and Villeneuve's flagship, Ocean, made a break to punch through the British column between two 74s. Seen here is the HMS Bellepheron taking withering fire from the Imperial. She would not survive the engagement.
    Spoiler Alert, click show to read: 


    The Imperial circled the British line, before crossing it once more in front of the HMS Centurion (50), seen in the background. In the foreground, the Ocean begins to advance through the British 74s.
    Spoiler Alert, click show to read: 


    The HMS Victory (106), HMS Royal Sovereign (106), HMS Dreadnought (98) and HMS Hibernia (106) continued to duel the long line of slowly turning French 74s and 80s. While individually more powerful, the larger number of French ships began to do grievous damage to the British 1st and 2nd rates.
    Spoiler Alert, click show to read: 


    In an effort to reduce further damage, the Lord Admiral pulled the four heaviest ships he could away from the French line. With the number of accurate shots reduced, the crew could manage a number of makeshift repairs on the wounded vessels.
    Spoiler Alert, click show to read: 


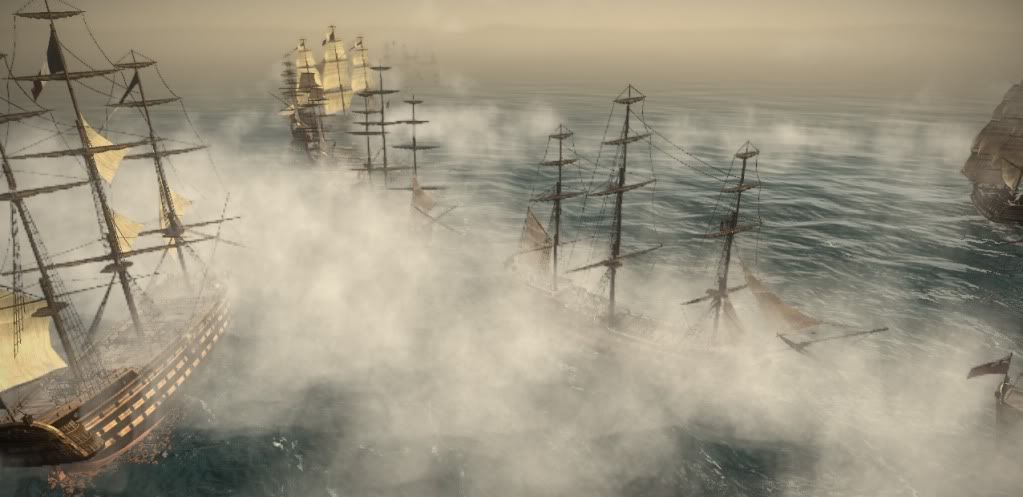
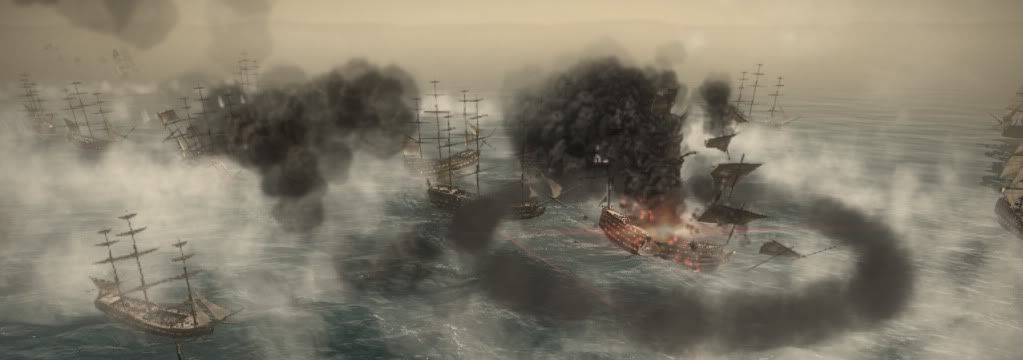
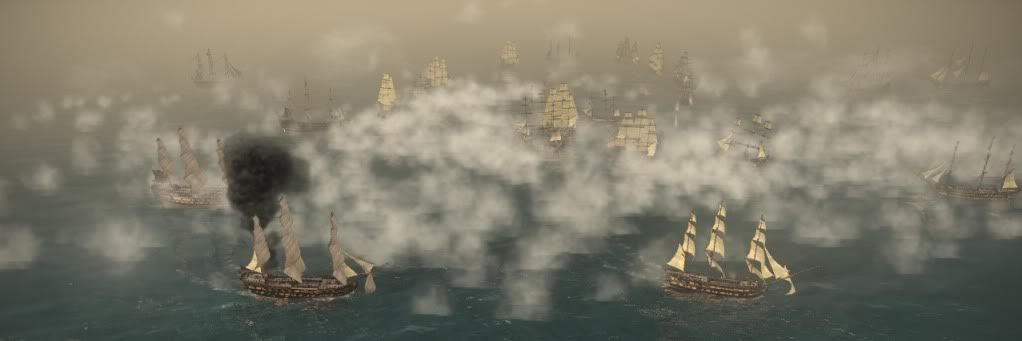
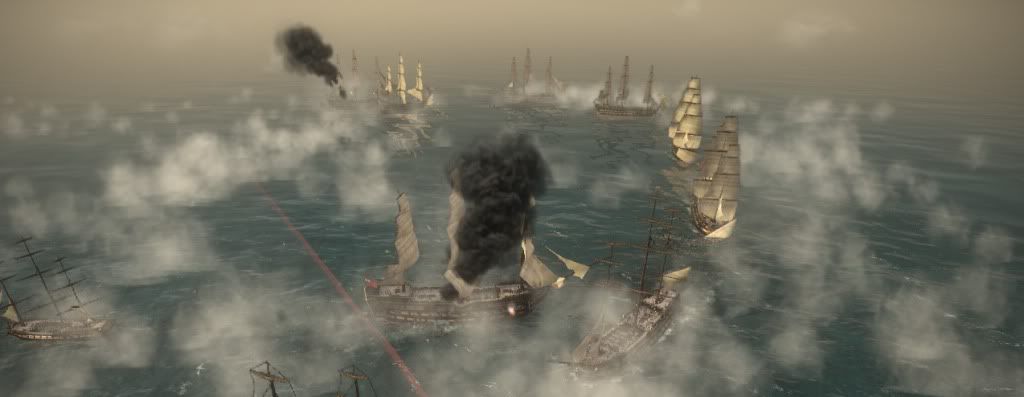
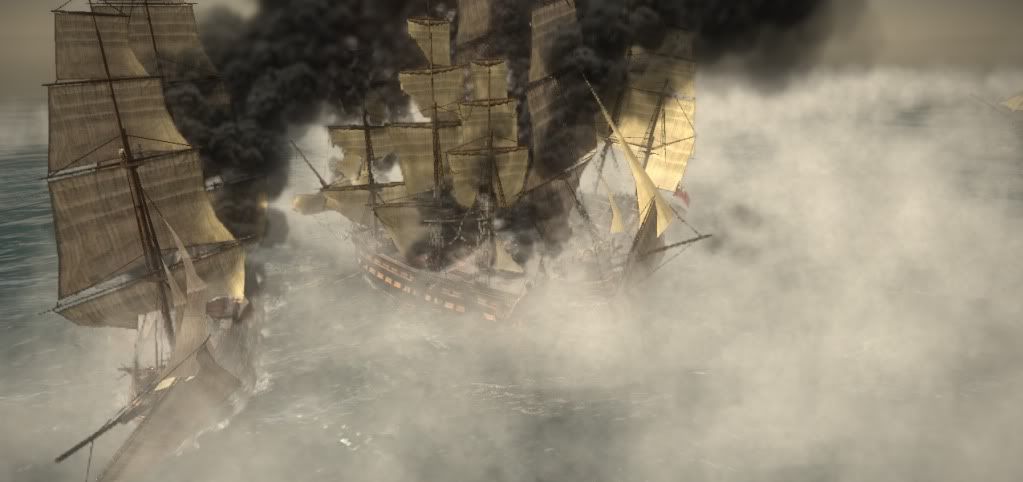
    Meanwhile, the French heavy line, and the straggling French mediums begin to engage the British line in full force, while the cut off British heavies attempt to circle around to gain a favorable wind. The Enterprize can be seen slightly through the gunsmoke burning ferociously.
    Spoiler Alert, click show to read: 


    British ships falling under the heaviest fire soon begin to sink, or in the case of the HMS Africa, explode outright.
    Spoiler Alert, click show to read: 


    Still attempting to gain purchase on the French medium line, the Lord Admiral watched hopelessly as the French 122s wrecked havoc on his lighter vessels.
    Spoiler Alert, click show to read: 


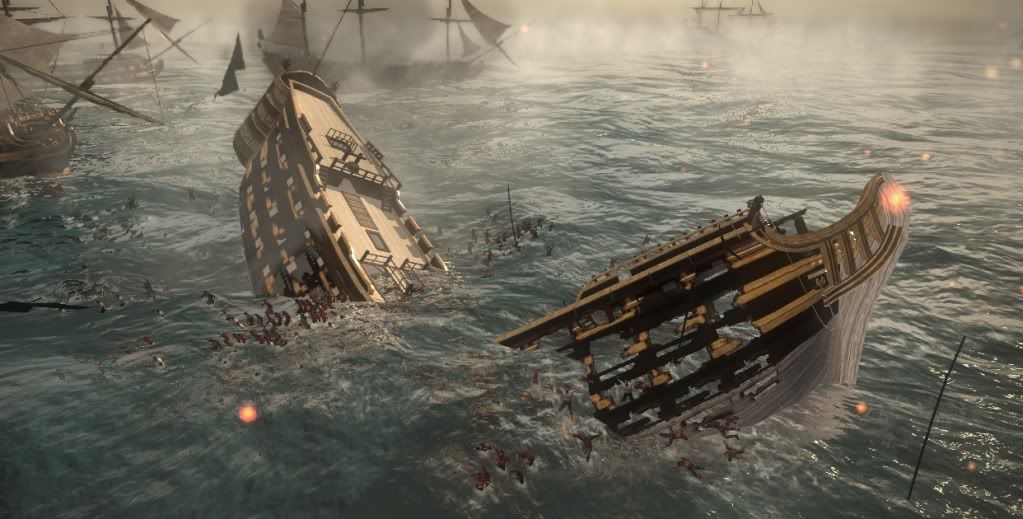
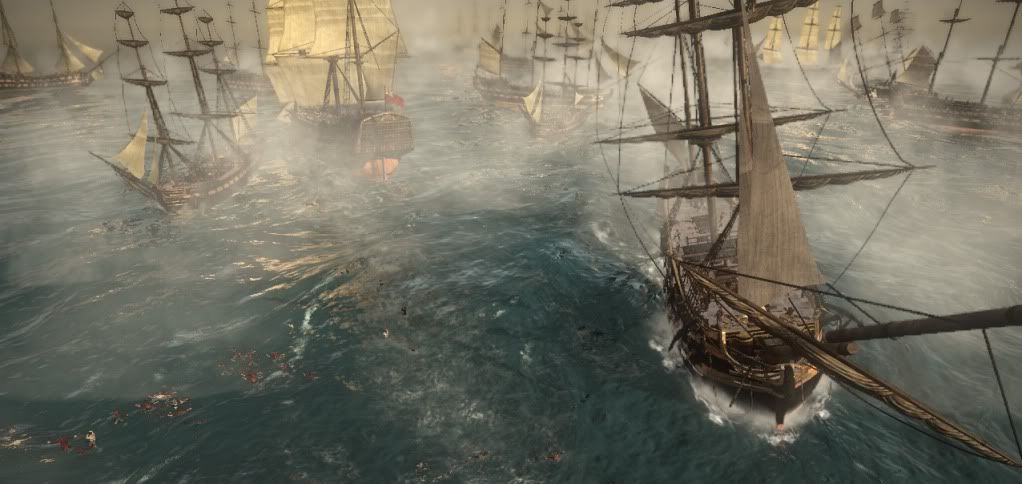
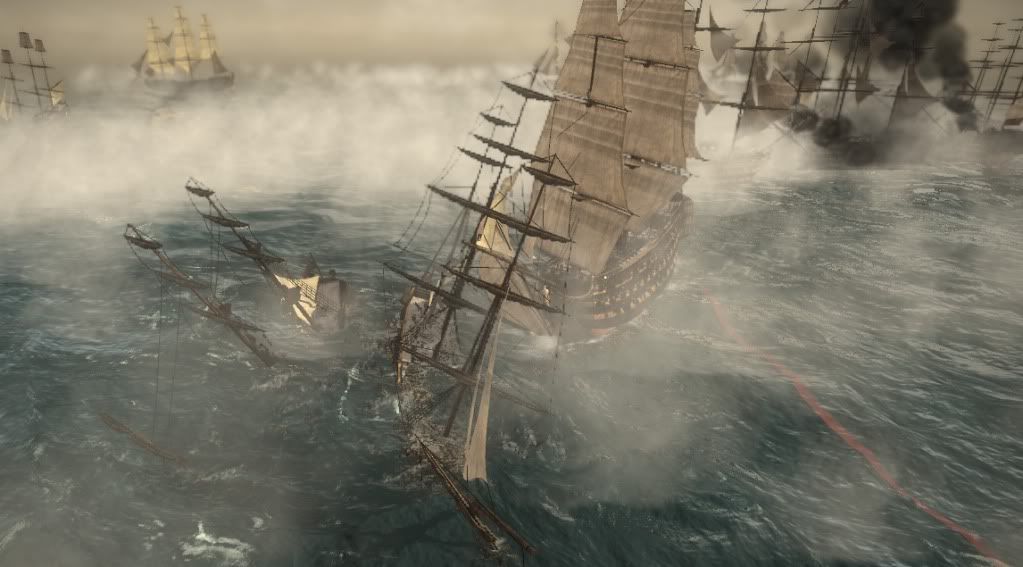
    Caught between Imperial 122s and 80s, the HMS Redoubtable (98) proves to be less than her name would suggest, exploding magnificently.
    Spoiler Alert, click show to read: 


    Her crew not killed outright would flounder in the water for some time, desperately holding on to whatever wreckage they could, and hoping stray cannonballs would not find them.
    Spoiler Alert, click show to read: 


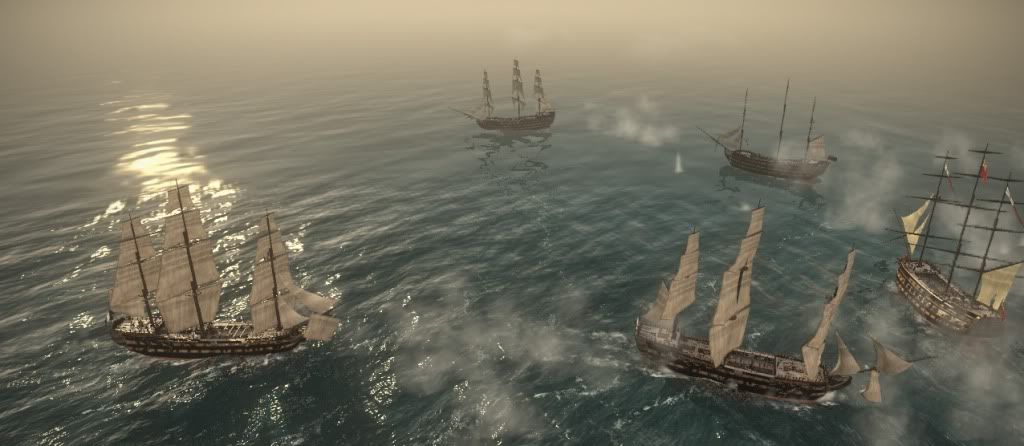
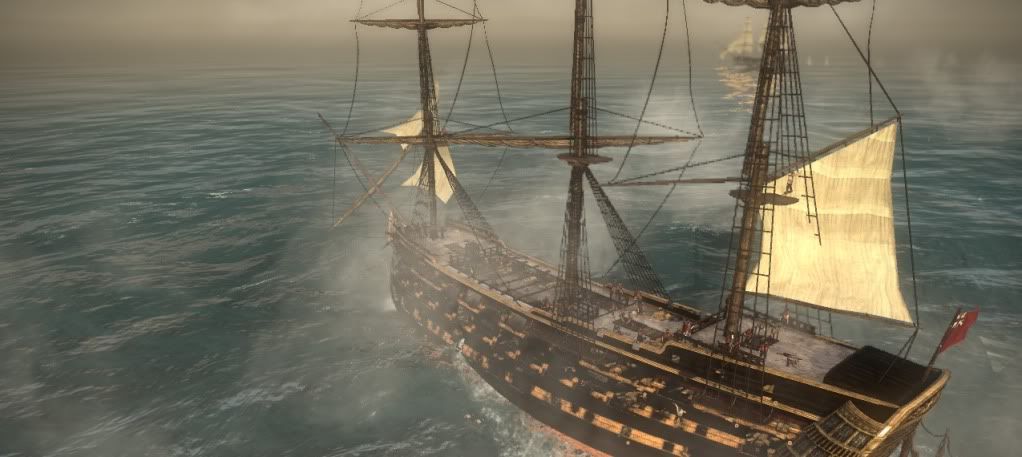
    Finally turned around and slightly repaired, the Lord Admiral leads the HMS Victory, Royal Sovereign, Hibernia and Dreadnought back into the fray.
    Spoiler Alert, click show to read: 


    By this time, the Imperial fleet is just about finished with the lighter Royal Navy vessels, and slowly begins turning around to face the 74s and 106s clustered around the returning HMS Victory.
    Spoiler Alert, click show to read: 


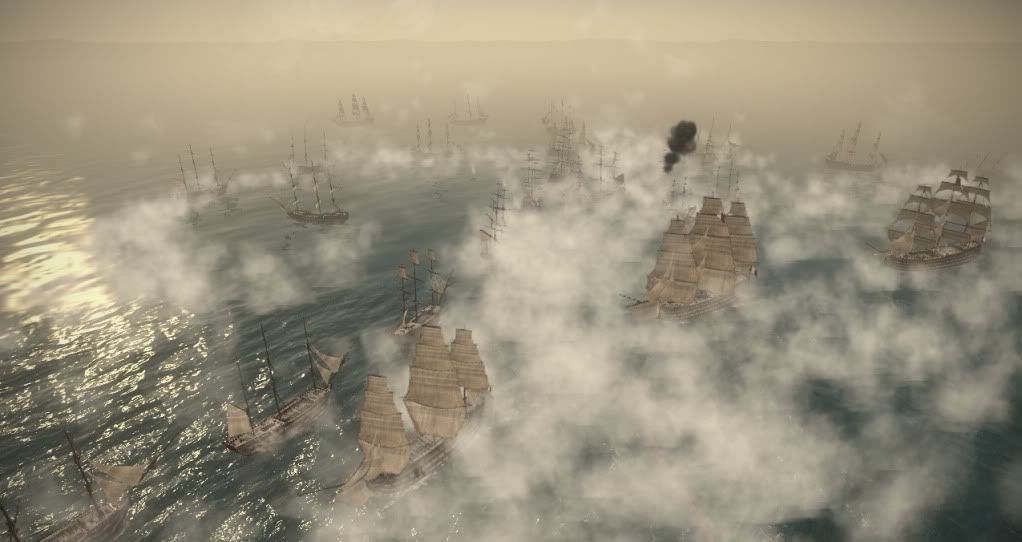
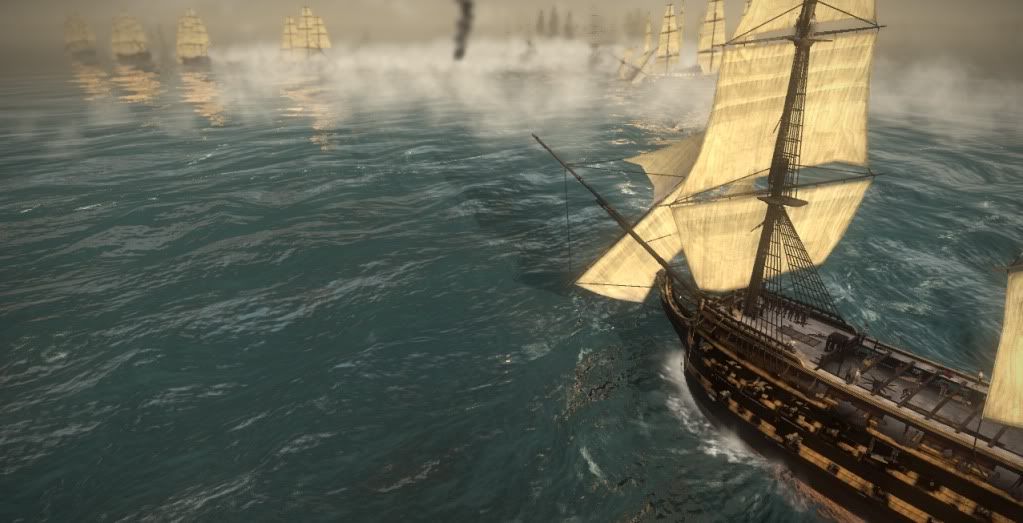
    The fight has become largely anarchistic. Captains content to follow the nearest ship flying their colours, and firing at anything which bearing their opposite. One can clearly see the returning British warships to the west, however.
    Spoiler Alert, click show to read: 


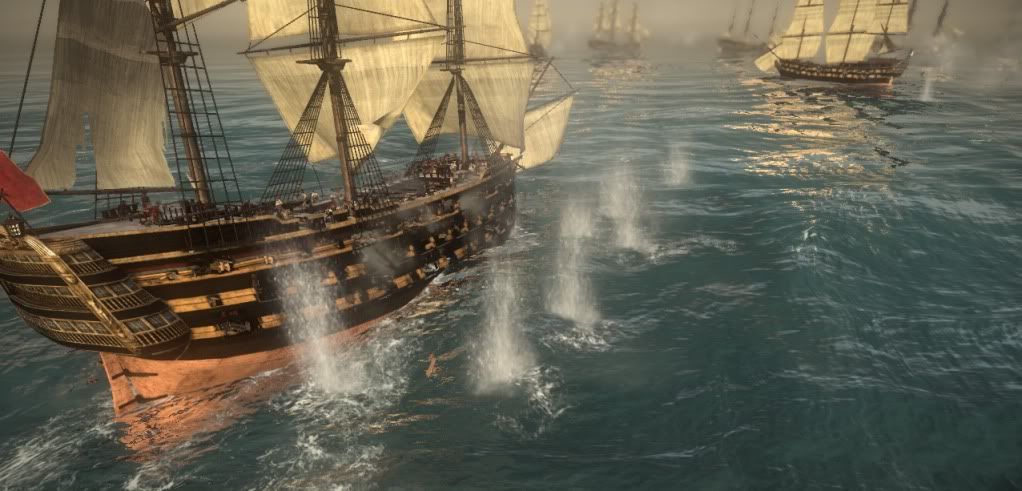
    The French were not found idly waiting, and quickly opened fire. Here you can see a number of narrow misses upon the HMS Royal Sovereign, by far the most wounded of the British heavies, having lost half her crew and 2/3 of her guns. The French mediums, however, are little better off.
    Spoiler Alert, click show to read: 


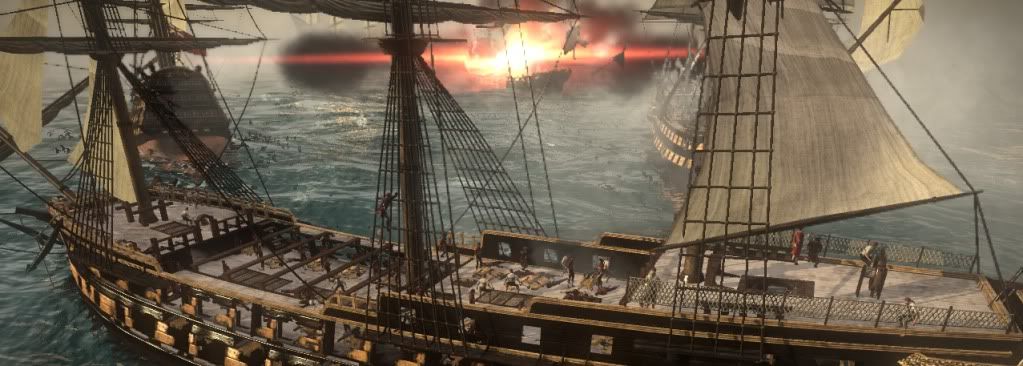
    Chaos ensues as the Victory and her sisters turn to the fray. Imperial and British ships ply whatever open sea there is between wrecks, surrendered and burning vessels.
    Spoiler Alert, click show to read: 


    The Victory opens fire on the wounded Tricolore (74). While suffering from substantial hull damage, most the Victory's guns remain in service.
    Spoiler Alert, click show to read: 


    The Royal Sovereign and Hibernia fail to make headway against the French. While the Royal Sovereign would live to see another day, the Hibernia would burn and explode minutes later.
    Spoiler Alert, click show to read: 


    Back the melee, the Ocean, under Pierre-Charles Villeneuve exchanged numerous broadsides with the HMS Victory. While more powerful, the superior crews of the Victory proved to be a tough match for the French 122.
    Spoiler Alert, click show to read: 


    Unfortunately for the Lord Admiral, the Imperial had maneuvered past, and proceeded to fire numerous broadsides into the unprotected stern of the British flagship.
    Spoiler Alert, click show to read: 


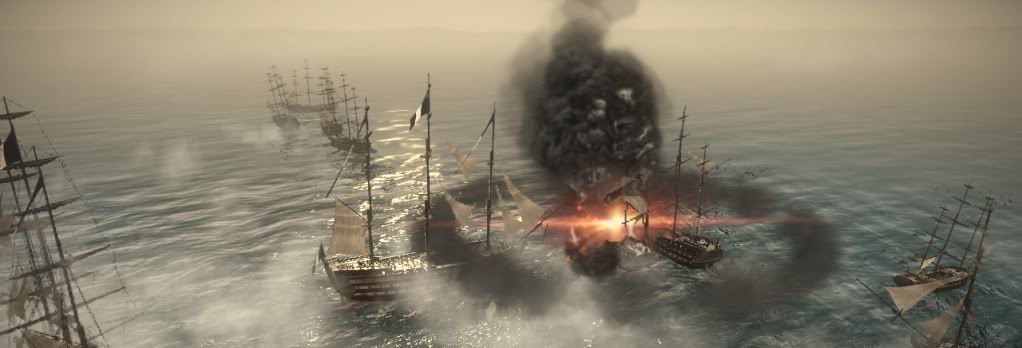
    Meanwhile, with the British fleet crumbling, the HMS Dreadnought explodes, taking the Imperial Tremaire with it.
    Spoiler Alert, click show to read: 


    As the Tremaire burns, the Imperial sails onwards, hoping to circle the HMS Victory once more, and finally crush the British flagship.
    Spoiler Alert, click show to read: 


    The few surviving British ships struggle to put out flames while the Majesteux (122) begins to pummel the beleaguered HMS Victory.
    Spoiler Alert, click show to read: 


    Attempting to withdraw, the Victory crashes into the sinking wrecks of two British 50s, taking ever more damage while using her superior size to batter through.
    Spoiler Alert, click show to read: 


    Severely damaged and having taken a crushing defeat, the HMS Victory and HMS Royal Sovereign withdraw to the Chatham docks.

    --------------------------------

    The Date: April 16th 1808

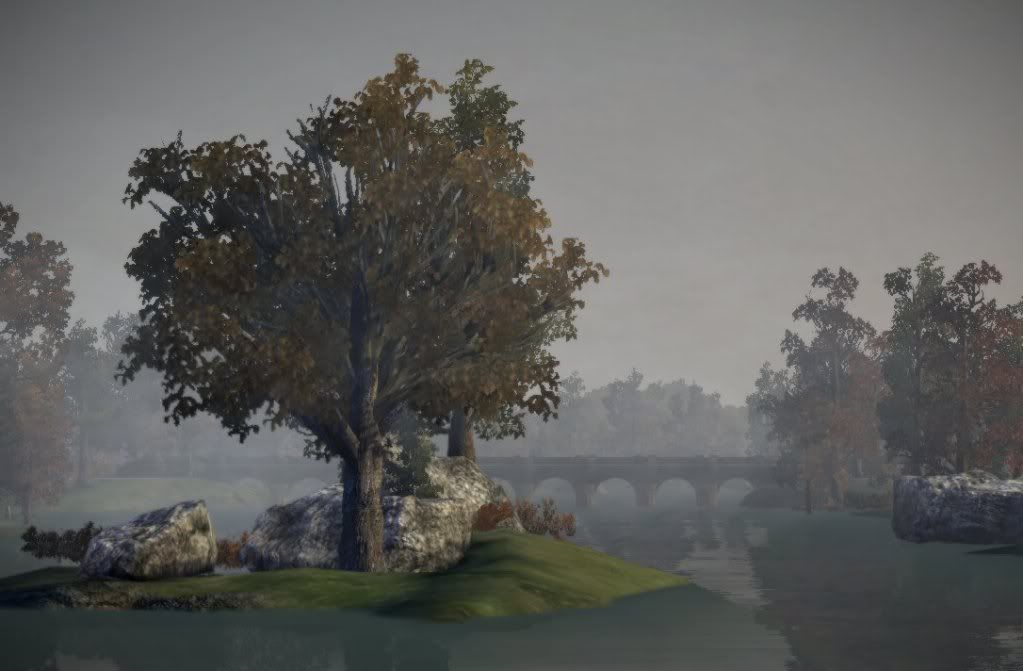
    The Place: Upper Thames, near Chatham

    The Situation, the retreating remnants of Lord Admiral Horatio Nelson's fleet are caught by the less damaged Imperial Fleet under Admiral Julien Marie Cosmao-Kerjulien.

    The Order of the Battle:

    Imperial Fleet: Six 122s, One 106, Three 74s and Four 80s. Flagship: Imperial (122)
    Spoiler Alert, click show to read: 


    Royal Navy: Two 106s. Flagship: HMS Victory (106)
    Spoiler Alert, click show to read: 


    With the Royal Navy all but destroyed at the Battle of the Blight, the two wounded 1st rates under Nelson's command represent all that realistically stands between Napoleon and an invasion of mainland Britain. Not wishing to allow the notorious Nelson to escape and recuperate his losses if given time, Kerjulien intends to show no quarter on the already defeated Admiral.
    Spoiler Alert, click show to read: 


    The Imperial Fleet has suffered relatively light losses. While a large number of their medium vessels are essentially crippled, the 122s have lost no more than 15% of their guns and crew. The HMS Victory, on the other hand, has 32 remaining crewmen, and 12 operational guns. The HMS Royal Sovereign is only slightly better, with 61 crewmen and 22 guns.
    Spoiler Alert, click show to read: 


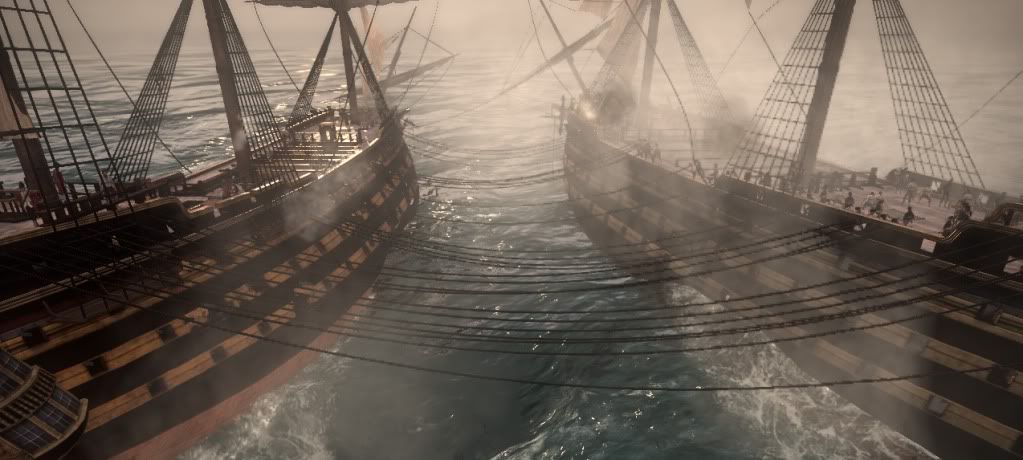
    The outcome far from in doubt, the Imperial pulls alongside the HMS Victory in an attempt to board and seize the famous vessel.
    Spoiler Alert, click show to read: 


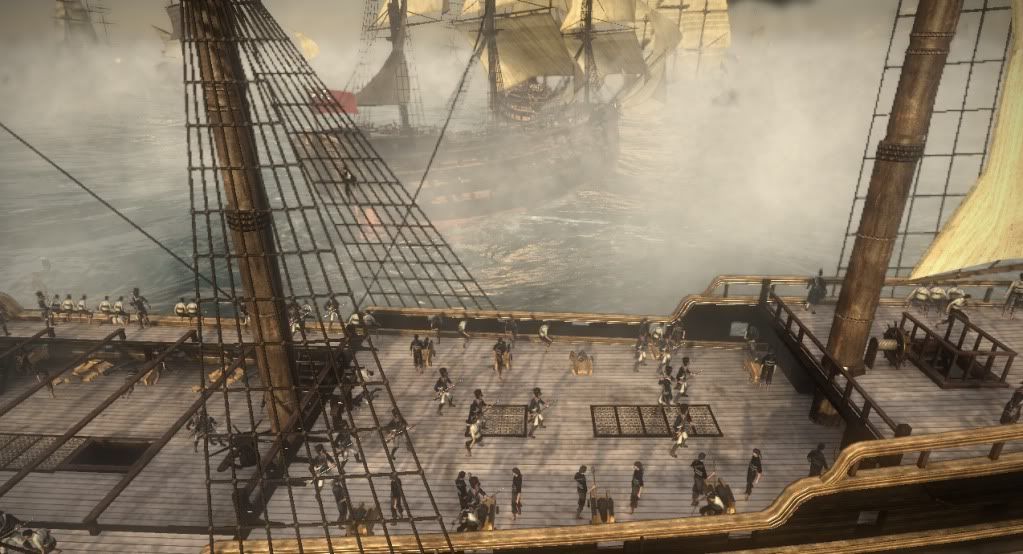
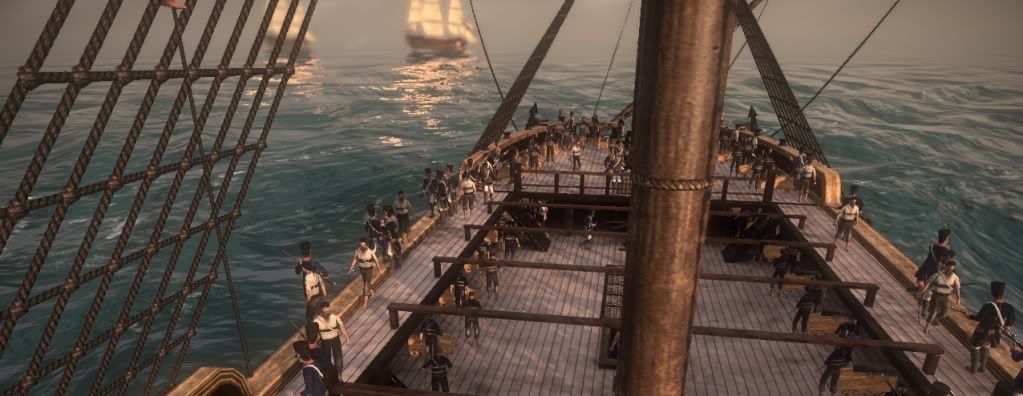
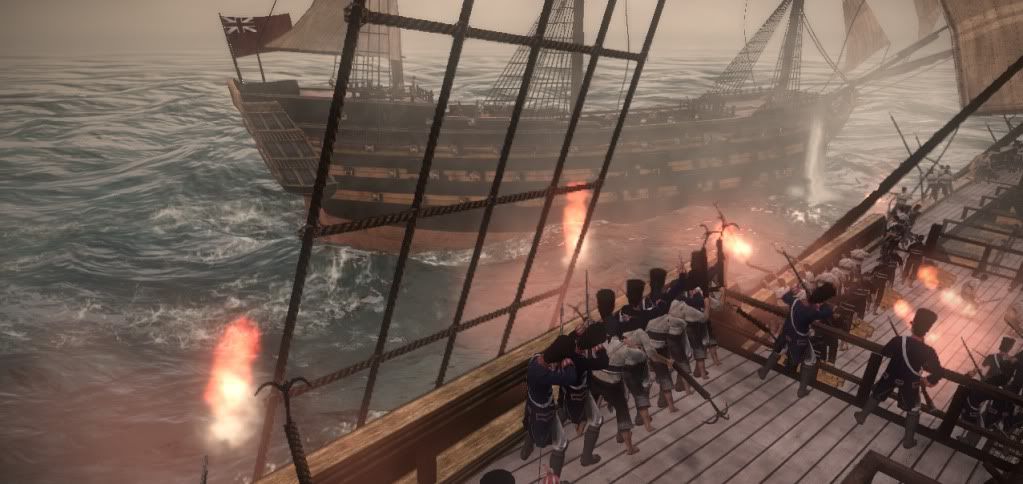
    Eager French Marines open fire on the Victory's quarterdeck, hoping to thin the already skeleton crew before boarding.
    Spoiler Alert, click show to read: 


    Within moment, boarding hooks have been thrown, and the French sailors slowly haul the Victory in for attack while no less than 50 cannons pound the already weakened hull. The handful of British defenders fight on valiantly.
    Spoiler Alert, click show to read: 


    The Lord Admiral, however, refuses to acknowledge the situation.
    Spoiler Alert, click show to read: 


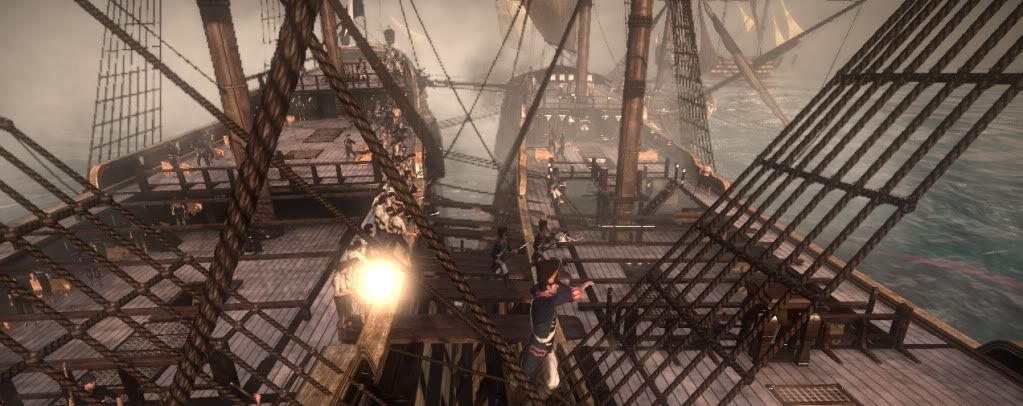
    Boarding ramps across, no less than 200 crewmen and Marines bound onto the Victory's deck.
    Spoiler Alert, click show to read: 


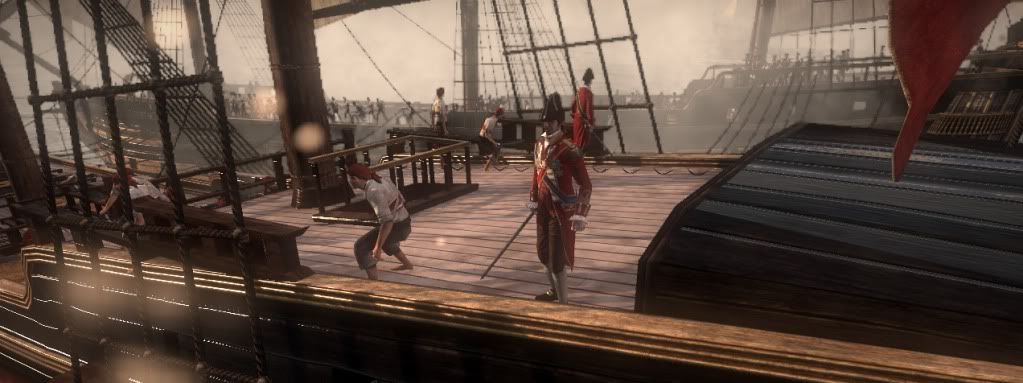
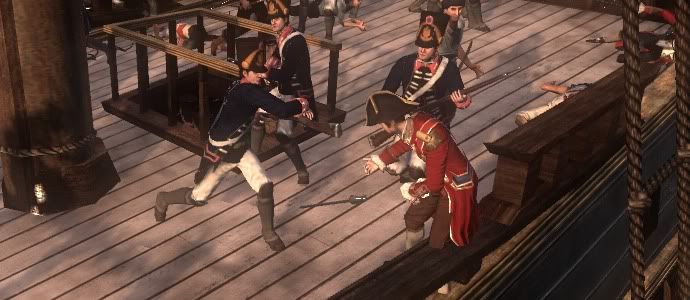
    The Imperial Marines assault the quarterdeck, and slay the Lord Admiral with an unceremonious musket butt to the head.

    The Royal Navy broken, her seniormost commander slain, with the nearest replacements in the Americas and Africa, and Britain's coalition allies thoroughly crushed by the Grande Armée, Napoleon is poised to strike across the Channel with an army of immense size.

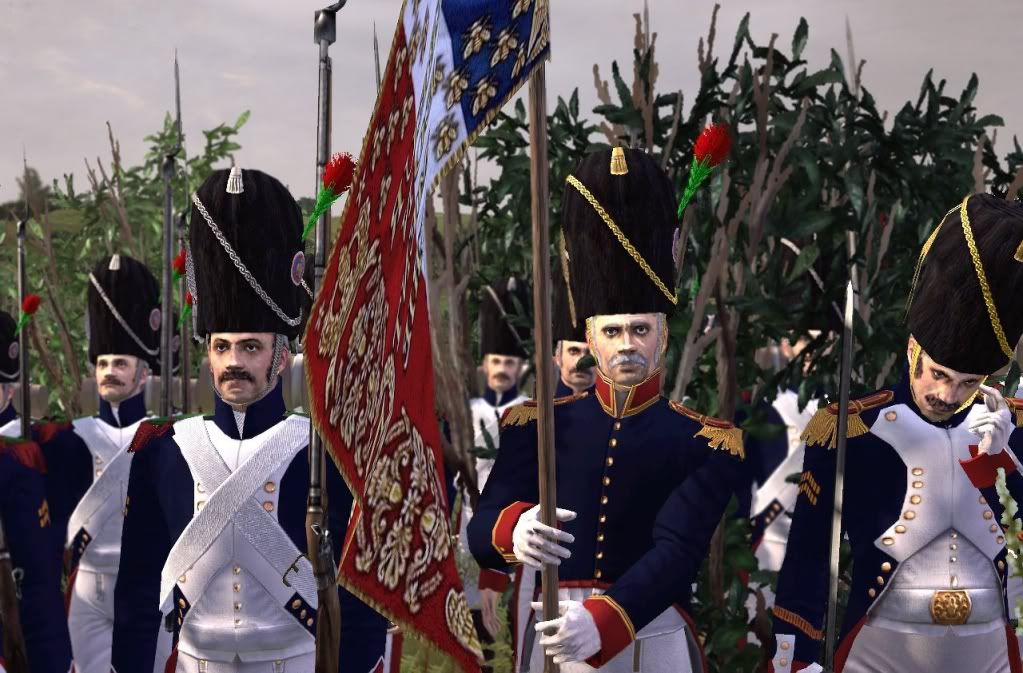
    But before any of that can happen, he is given a very personal triumph; the captured HMS Victory is renamed in his honour;


    ---------------------------

    Thought I'd just post this for one; My entire navy (France, Hard 1805 Campaign) against the entire Royal Navy. First time I've seen Napoleon: Total War actually slow to a crawl on my computer. Was also a very satisfying naval battle, if chaotic at times, moreso than any Naval battle I've had in Empire or Napoleon since a big UP/Austria/Venice/Ottoman battle I had in Darthmod way back when in the Adriatic.
    Last edited by Iutland; April 19, 2012 at 05:04 AM.
    Therefore, I conclude, that Valve should announce Half Life 2 Episode 3.

  2. #2
    KDK's Avatar Pro Rege Et Grege
    Join Date
    Feb 2009
    Location
    Denmark
    Posts
    1,368

    Default Re: Règle France, France Règles les Vagues - LME Naval AAR [Screenshot Heavy, 56kers beware]

    Nice!
    +rep

  3. #3
    ReignTerror's Avatar Master of Hyperbole
    Join Date
    Oct 2007
    Location
    Japan but now back in USA
    Posts
    799

    Default Re: Règle France, France Règles les Vagues - LME Naval AAR [Screenshot Heavy, 56kers beware]

    oh snaps... Le Napoleon... Epic!

  4. #4

    Default Re: Règle France, France Règles les Vagues - LME Naval AAR [Screenshot Heavy, 56kers beware]

    Really good and spectacular screen shots +Rep. Nice catch at the end btw.

    Cheers
    iutland

    For information: next LME update will include ship hull textures that reduces the "Swiss cheese" damage effect. The new textures are supplied by Bethencourt as a friendly gesture

  5. #5

    Default Re: Règle France, France Règles les Vagues - LME Naval AAR [Screenshot Heavy, 56kers beware]

    Ah, always good to see new ship textures. It was rather odd seeing ships with negligible hull damage having nothing but holes in them.

    My original rational for doing this was on another forum I'm somewhat an adversary of a very nationalistic Brit, so what better way to bug them than having the HMS Victory captured, and Lord Admiral Nelson defeated by those pansie Frenchmen.
    Therefore, I conclude, that Valve should announce Half Life 2 Episode 3.

  6. #6

    Default Re: Règle France, France Règles les Vagues - LME Naval AAR [Screenshot Heavy, 56kers beware]

    Quote Originally Posted by MajorStoffer View Post
    Ah, always good to see new ship textures. It was rather odd seeing ships with negligible hull damage having nothing but holes in them.

    My original rational for doing this was on another forum I'm somewhat an adversary of a very nationalistic Brit, so what better way to bug them than having the HMS Victory captured, and Lord Admiral Nelson defeated by those pansie Frenchmen.
    agree!

    Remember the old qoute:

    "History is written by the victors" Winston Churchill

  7. #7
    ♔Icebear77♔'s Avatar Biarchus
    Join Date
    Jan 2009
    Location
    Switzerland and Germany
    Posts
    673

    Default Re: Règle France, France Règles les Vagues - LME Naval AAR [Screenshot Heavy, 56kers beware]

    Realy cool screen shots +REP Thanks!!

  8. #8

    Default Re: Règle France, France Règles les Vagues - LME Naval AAR [Screenshot Heavy, 56kers beware]

    Hi!

    Very nice screenshots and a lot of work on them, + rep

  9. #9
    Tired of TWC Arrogance
    Join Date
    Apr 2006
    Posts
    3,246

    Default LME Pictures - With Campaign Context

    Deleted
    Last edited by Pdguru; November 29, 2010 at 01:05 PM.

  10. #10
    Tired of TWC Arrogance
    Join Date
    Apr 2006
    Posts
    3,246

    Default Re: LME Pictures - With Campaign Context

    1813 End-Game Campaign (added skins are L'aigles)

    Cavalry battle - the defeat of the Prussians and the long-awaited arrival of three new regiments of Curassiers from Reims enabled Napoleon to launch a drive on Vienna...
    Spoiler Alert, click show to read: 


    French forces marched on Vienna, fighting across fields and waterways to reach the city. Austrians fought for every inch of every bridge and acre...
    Spoiler Alert, click show to read: 


    After taking Vienna in early March 1814, at last Napoleon celebrated - but it had been a tough challenge and victory came at a high cost of men and equipment. So, when two Austrian relief columns arrived and assaulted Napoleon's severely depleted army, the capture of Vienna lookd like it would be shortlived. But cleverly utilizing villages and fields on the outskirts of the city, the French shot from buildings and formed squares between the houses to avoid cannon fire and fight off the cavalry...
    Spoiler Alert, click show to read: 


    After a heroic effort rebuffs the relief columns, what remained of Napoleon's infantry marched back to the city
    Spoiler Alert, click show to read: 


    As the same time, many miles away, Marshall Soult was overwhelming the extremely stubborn Portuguese and avenging the death of Davout.
    [spoiler]
    Spoiler Alert, click show to read: 

    Last edited by ReignTerror; December 16, 2010 at 08:44 PM.

  11. #11
    ReignTerror's Avatar Master of Hyperbole
    Join Date
    Oct 2007
    Location
    Japan but now back in USA
    Posts
    799

    Default Re: LME Pictures - With Campaign Context

    Reserved for my pics whooooooooa nice pics... great effects

  12. #12
    ♔Icebear77♔'s Avatar Biarchus
    Join Date
    Jan 2009
    Location
    Switzerland and Germany
    Posts
    673

    Default Re: LME Pictures - With Campaign Context

    Yes, great pics!! Love the effects +REP

  13. #13
    THEMIK DK's Avatar Senator
    Join Date
    Nov 2009
    Location
    Denmark
    Posts
    1,094

    Default Re: LME Pictures - With Campaign Context

    I am glad for this thread

    A 1500-1680 Total War FTW!!!

  14. #14
    KDK's Avatar Pro Rege Et Grege
    Join Date
    Feb 2009
    Location
    Denmark
    Posts
    1,368

    Default Re: LME Pictures - With Campaign Context

    Nice screens mate!

  15. #15
    Tired of TWC Arrogance
    Join Date
    Apr 2006
    Posts
    3,246

    Default Re: LME Pictures - With Campaign Context

    Second half of 1814. With the Prussian threat becoming a distant memory, Napoleon consolidated his forces around Vienna and Olmutz, bringing troops from Paris led by Rainier to clear out the Austrians from the Tyrol and Bavaria, and recalling Colbert-Chabernet from the eastern front (now stretching as far as Poland) to help push them south and east. Ney lounged in Vienna and consolidated his Corps ready for a push southward.

    Apparently seeing the coalition about to collapse, the British sent two invasion forces into France, forcing a hurried assembly of troops under recalled General Mortier, and a forced march by Soult out of Prague to avoid disaster at home. For some reason (and luckily) the British forces paused at Caen and delayed an immediate march on Paris... giving Mortier the chance to keep the British columns separated, and beat the first one. Seeing he would be too late if he marched with his men, Soult rode ahead of his Corps to lead a makeshift Corps of militia and raw Fusiliers out of Paris, but they were enough with Mortier's remaining units to defeat the second British force. Had the British not delayed, and/or sent Wellington, it could have ended differently - the casualties were high - but those British pests were beaten off, leaving Mortier and Soult to maintain costly armies to defend Paris and the coastline of Normandy from another attack. Reliable information on British activity was cut short with the loss of the spy, Raoul Legrange in a foolish duel, so, based on the old addage of attack being the best defense, Napoleon sent Rainier and his Corps back to Paris... to begin preparations for an invasion of England.

    Spoiler Alert, click show to read: 


    Picture 1: French Forces gathering in preparation for the invasion of England. The Dutch navy privateer the Channel, while London docks burn from repeated raids to break down British trade - and resolve...


    With Rainier's departure for Paris, Napoleon marched to Poland where he spent the summer in indecisive battles with the Russians who probed annoyingly into the new French Territories around Warsaw. A makeshift Corps made up largely of local militia and Landwehr with no artillery was holding Konigsberg, and was under severe pressure by the autumn, and under siege by October, so St Cyr was sent to relieve the city and push the Russians back. Outgunned and outnumbered, St Cyr called on Napoleon himself to help complete the job.

    All seemed to be going well, so late in the Autumn Ney's Corps marched on the Balkans, backed up by Colbert-Chabernet with a Corps made up of little more than the Garrison built in Vienna in the spring. Ottoman resistance we weak - They fled Belgrade at the first sight of the Ney's forces, so naturally Ney followed them, leaving Colbert-Chabernet's Corps to secure the city. Hunting the Ottomans down, Ney's troops made short work of them...

    Spoiler Alert, click show to read: 


    Picture 2: Little more than butchery work involved for the French veteran cavalry...


    ...but in a fit of excitement and visions of wintering in Athens, Ney got his head blown off by his own artillery.

    Spoiler Alert, click show to read: 

    Picture 3: French Old Guard Chassuers a Pied moments after the death of Marshall Ney to "friendly fire" - Captain Legrande scratches his head in disbelief. Note: Skins are those of L'aigle and I have added a standard bearer.


    This obviously put a bit of a damper on the Campaign... So, with winter coming, Napoleon called off the push south to Greece and instead sent Colbert-Chabernet northeast with Ney's far superior Corps, where he liberated Romania, one of Austria's last strongholds, with a plan to create a buffer between the new territories and Russians. Colbert-Chabernet then marched back to Belgrade to sit out the winter. On his march back in late November, news came that Napoleon had secured peace with the Russians - the question now was, did the Emperor think it would last long enough for him to return to Paris to personally lead the invasion of England?
    Last edited by Pdguru; December 16, 2010 at 09:24 PM.

  16. #16
    THEMIK DK's Avatar Senator
    Join Date
    Nov 2009
    Location
    Denmark
    Posts
    1,094

    Default Re: LME Pictures - With Campaign Context

    how can the officer have grey hair?

    A 1500-1680 Total War FTW!!!

  17. #17
    Tired of TWC Arrogance
    Join Date
    Apr 2006
    Posts
    3,246

    Default Re: LME Pictures - With Campaign Context

    Quote Originally Posted by THEMIK DK View Post
    how can the officer have grey hair?
    Just part of the great skinning work by L'aigle! Makes a difference, eh? When I said above I added the standard bearer, I mean I just added one to the relevant db file (LME classifies OG Chassuers as Light Infantry so they don't have one) and L'aigles skin is then used.
    Last edited by Pdguru; December 01, 2010 at 08:21 AM.

  18. #18
    Tired of TWC Arrogance
    Join Date
    Apr 2006
    Posts
    3,246

    Default Re: LME Pictures - With Campaign Context

    End Game French Campaign 1813-18 Continued...

    The Western Front

    The French invasion of Britain began in March 1815 with the landing of a Corps consisting primarily of veterans of Rainier's Portuguese campaign, now under the command of General Lefebvre, at Waterford Harbour, Ireland. Securing the docks, he marched swiftly inland, with the goal to draw troops from Scotland to defend Dublin. With the ruse achieved and Wellington crossing the Irish Sea to support General John Sherbrooke's forces around Dublin, Lefebvre veered Northwest towards Galway and crossed the River Shannon. Sherbrooke marched on them without hesitation. Lefebvre turned around and the forces met at the pictureque village of Shannonbridge, County Offaly, (pictured below). Meanwhile, Wellington secured Dublin and detached units to relieve Waterford.

    Spoiler Alert, click show to read: 


    Picture 1: The bridge at Shannonbridge.


    The battle was a brutal defeat for the British. Seeking to avoid the veterans of the French Spanish Campaign (the French 44th, 52nd and 62nd Regiments) who guarded the bridge, Sherbrooke, presumably rusty after his recent tour as Governor of Nova Scotia, underestimated the French artillery and infantry defending the deep ford south of the Bridge... The mistake proved deadly for most of the British soldiers, and Sherbrooke himself.

    Spoiler Alert, click show to read: 


    Picture 2: The fields of Shannonbridge littered with dead.


    Picture 3 (RL photo): The bridge at Shannonbridge, completed in 1757 was, interestingly, heavily fortified by the British in the Napoleonic era. Some of the fortifications, including a fort that now houses a restaurant are still visible today on the west bank of the river. Here's how it looks today - remarkably similar to the in-game bridge, as it happens:


    With only a few casualties to his Corps, Lefebvre was ready to take on the second British force led by Wellington. If he could move swiftly, Lefebvre could catch Wellington in Dublin before the troops he had sent to Waterford could return.

    The news of Wellington's departure from Edinburgh triggered the second step of the invasion. Soult and Mortier sailed from Le Havre and Calais, and landed on the east coast of Scotland. Undefended, Edinburgh surrendered. The flawless execution of the plan ended there however, when the flotilla that had transported Soult and Mortier was taken by surprise by a Russian fleet skulking in the North Sea and was duly destroyed. There would be no escape route if things went wrong...

    The Eastern Front

    The Russians had broken the peace treaty within a few months and invaded Hungary, but with little more than an expeditionary force. Even so, an unprotected Budapest could offer up only token resistance.

    Spoiler Alert, click show to read: 


    Picture 4: Local milita and citizens defend the the house of a local dignitory - the Russians were subsequently without mercy.


    On hearing the news, General Colbert-Chabernet (who on discovering Athens was largely undefended, had forgone a winter of rest and taken Greece from the Ottomans) marched north again to rebuff the invaders, and ensure Vienna remained safe.
    Last edited by Pdguru; December 16, 2010 at 09:25 PM.

  19. #19

    Default Re: LME Pictures - With Campaign Context

    hi!

    You are master in screens.

  20. #20

    Default Re: LME Pictures - With Campaign Context

    Ah, good to see others have followed my idea.

    I've currently been bitten by the EVE Online bug, but in due time I'll have my own invasion of Britain to go over, perhaps then cover a Peninsular Campaign.
    Therefore, I conclude, that Valve should announce Half Life 2 Episode 3.

Page 1 of 14 1234567891011 ... LastLast

Posting Permissions

  • You may not post new threads
  • You may not post replies
  • You may not post attachments
  • You may not edit your posts
  •