Page 1 of 4 1234 LastLast
Results 1 to 20 of 61

Thread: 2nd Lesson

  1. #1
    Subuatai de Bodemloze's Avatar No rest for the wicked
    Join Date
    Mar 2008
    Location
    50 degrees, 26.2 minutes North, 119 degrees, 12.4 minutes West
    Posts
    2,436

    Default 2nd Lesson

    Lesson 2
    Ok, guys welcome to the 2nd lesson! This one should be easier (I hope) and funnier then the previous lesson. If there is a part you don't understand or somewhere where I'm unclear, don't hesitate to notify me.


    1.The Render What you first need is a render. I suggest you use the one you rendered in the previous lesson.
    Altough some of you might have rendered pieces that wouldn't fit so good in a sig, so then I suggest you to look for renders on Planetrenders.net (you need to be registered).


    Now we can start with the actual signature.
    2. The Size The right image size is very important. Noobs tend to make their sig as big as possible, but smaller sigs can achieve a far better effect for the most time. I usually use a size around 430x140, with a transparent background.
    Spoiler Alert, click show to read: 


    3. Positioning your Render Now put your render into it. It is probably too big, so press ctl+t to resize it. When you resize it keep the "shift" key pressed down, the render will keep it's proportions. How big you want it and where to put it depends on the render itself and your intentions, but generally it's best to put it close to the middle of your sig.


    You better duplicate your render layer , just to be sure. Right click on the layer and choose duplicate layer. Set one of them to be invisible.

    4. Background Basics

    Now a background comes in. Make sure that it's big enough and matches the render's style. Resize it (don't forget to press "shift"!) and position it to your liking.
    Put the background layer above the render, so you can concentrate on it.


    From now on there are thousands of things you can do, but we are going through some very basic, more advanced will come later in the course.
    I want to make it look like my rendersoldier is moving, so I select the background layer (which ironically is in the foreground atm ) and click "filter->blur->motion blur". Play around with the settings a bit. Now put one of your render-layers on top of it. (We don't need the invisible one, we just kept it to have backup)


    5. Improvements
    We're now going to blend the Render with the background. Select the eraser tool from your toolbar and select a soft brush with ~50 pixels. Use something close to these settings:


    Now just go around your the edges of your render and slightly erase some parts of it. If you have done something wrong, press ctrl+alt+z to undo your last step.


    Now we go on and improve it. Create a new layer on top of all others, select "image->apply image" and duplicate the layer(copy) (by selecting the layer and pressing CTRL+J). We duplicate it just to have backup.
    Select the top layer and set the layer mode to soft light and lower the opacity until you like it.

    Layermodes:
    Spoiler Alert, click show to read: 


    Now Create a new layer. and with the marker tool select 2 main colours of your sig. (you can of course also choose other colours if you want to)


    Go ahead and choose the "Gradient tool"


    Drag your mouse over your empty layer while holding down "shift" and you'll get this


    Set the layer mode to "overlay" and lower the opacity until you like it.


    As you can see, my render is a bit dark. Create a new layer and brush with a white 50 px soft brush on the render.


    Now put the brushed layer on soft light


    After that create a new layer and choose "image->apply image" again.

    To get some focus to the render select your blur tool and blur around the render.


    Find some splatter brushes, if you don't know how to implent them in Photoshop, check this guide. Create a new layer and brush in some different splatter brushes with fitting colours.


    Then set the layer to soft light.


    Take forth your Text tool(the icon shaped like a 'T'). Press somewhere on your screen where you want text, and write your username. Use a text size of 20pt - 36pt. Font choice is up to you, I chosed "Trajan Pro".


    I'm not happy with the placement of the text, so I decided to rotate the text a bit. I did this by pressing CTRL+T and then rotating the text by placing the mouse outside a corner of the selection and then rotated it.


    I'm still not happy with the focus on the sig, so we will be adding a sharpen filter.
    Create a new layer, go "image->apply image". Now go "filter->sharpen->sharpen".


    Now our picture became sharp, but I only want the render to be sharp, since that is our focus.

    So now take forth your eraser, make sure the opacity and flow settings are on max. Choose a 75px big soft round brush.


    To create a nice focus, I will erase these parts of the layer we applied the sharpen filter to.


    Now erase the parts where you don't want focus.


    Now we gonna add a border. Create a new layer, go "image->apply image". Double click on your layer, a window with blending settings should pop up.

    Use these settings;

    Spoiler Alert, click show to read: 


    Now you're done with the editing, now the most boring parts await, the saving

    Go "File->Save" and save it as a .PSD first.

    After you have saved it as a .PSD, save it as a .PNG by going "File->Save as".


    Homework:
    Follow the lesson above and post your signature in .PNG and .PSD format. I also want you to post the image you used as background and also the render you used. If you have a doubt how to proceed somewhere, download my PSD file. If you still have doubts after you have checked my PSD, make a post in the Lesson Help Thread.
    Last edited by abbews; March 07, 2010 at 01:16 PM.

  2. #2
    Hesus de bodemloze's Avatar The Gaul
    Civitate Patrician Content Emeritus

    Join Date
    Aug 2006
    Location
    Belgium
    Posts
    12,313

    Default Re: 2nd Lesson

    Last edited by Hesus de bodemloze; March 02, 2010 at 01:12 PM.
    Horum omnium fortissimi sunt Belgae :
    Hesus 's Photo Gallery
    The Writers Study|Ex-Global Moderator|Moderation Mentor| Ex - Librarian of the Scriptorium|PoTW|MAARC|ToTW
    SPQR Forum Moderator

  3. #3

    Default Re: 2nd Lesson

    Help - You're going way too fast ! The GIMP lessons were 1 per 2 weeks or so

  4. #4
    Hesus de bodemloze's Avatar The Gaul
    Civitate Patrician Content Emeritus

    Join Date
    Aug 2006
    Location
    Belgium
    Posts
    12,313

    Default Re: 2nd Lesson

    I am ready for lesson 3.
    Horum omnium fortissimi sunt Belgae :
    Hesus 's Photo Gallery
    The Writers Study|Ex-Global Moderator|Moderation Mentor| Ex - Librarian of the Scriptorium|PoTW|MAARC|ToTW
    SPQR Forum Moderator

  5. #5
    abbews's Avatar The Screen Door Slams
    Join Date
    Apr 2009
    Location
    Stockholm, Sweden
    Posts
    8,193

    Default Re: 2nd Lesson

    Wait a bit!? This should be posted on saturday/sunday? Wow, sorry if I wasn't clear subby.

    This one isn't finished yet, will leave the thread as it is but lock it and open it when the lesson is ready.

  6. #6
    Subuatai de Bodemloze's Avatar No rest for the wicked
    Join Date
    Mar 2008
    Location
    50 degrees, 26.2 minutes North, 119 degrees, 12.4 minutes West
    Posts
    2,436

    Default Re: 2nd Lesson

    my bad

  7. #7
    abbews's Avatar The Screen Door Slams
    Join Date
    Apr 2009
    Location
    Stockholm, Sweden
    Posts
    8,193

    Default Re: 2nd Lesson

    Ok guys, the lesson is up!

  8. #8

    Default Re: 2nd Lesson

    Ite, am currently on the non-GIMP pc, so can't post my sig, but it's the one I made for the GC, and I did pretty much everything that's explained in this tuto, except the text and the splatters (but will add them jsut for lesson purpose)

    And no offence, but this lesson looks just a tad like the one Fev made

  9. #9
    abbews's Avatar The Screen Door Slams
    Join Date
    Apr 2009
    Location
    Stockholm, Sweden
    Posts
    8,193

    Default Re: 2nd Lesson

    It's the one Fev made, almost. As some of you know, he should have been my assistant (after Ratbag's outrage) but he got IRL problems and left the site. He gave me permission to use his tutorial, since he couldn't make a lesson.

  10. #10
    Leonidas The Lion's Avatar Until we win! Or die.
    Content Emeritus

    Join Date
    Apr 2006
    Location
    UK/Der Freistaat Griechenland
    Posts
    10,406

    Default Re: 2nd Lesson

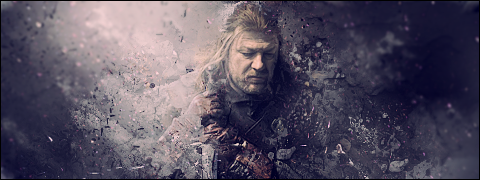
    gave it a try:
    Quote Originally Posted by Jom View Post
    When using the stick and carrot approach, remember that what you have to do is shove the carrot up their arse and then beat them with the stick.
    Check out my YouTube Channel here
    Under The Patronage Of jimkatalanos
    Patron Of
    Murfios,
    Bolkonsky and DekuTrash


  11. #11

    Default Re: 2nd Lesson

    Here is mine

    Son of Major Darling | House of Caesars | Content Writer | My Workshop | Moderator

  12. #12
    abbews's Avatar The Screen Door Slams
    Join Date
    Apr 2009
    Location
    Stockholm, Sweden
    Posts
    8,193

    Default Re: 2nd Lesson

    Quote Originally Posted by Capt. Fozdike View Post
    Here is mine

    Quote Originally Posted by Leonidas The Lion View Post
    gave it a try:
    Good good, need to see the PSD and the source for your render and background too.

  13. #13

    Default Re: 2nd Lesson

    Quote Originally Posted by abbews View Post
    Good good, need to see the PSD and the source for your render and background too.
    Okay. here you are
    Son of Major Darling | House of Caesars | Content Writer | My Workshop | Moderator

  14. #14
    Finch's Avatar is Deadpool
    Join Date
    Feb 2009
    Location
    X-Mansion
    Posts
    1,678
    Tournaments Joined
    1
    Tournaments Won
    0

    Default Re: 2nd Lesson


  15. #15
    Leonidas The Lion's Avatar Until we win! Or die.
    Content Emeritus

    Join Date
    Apr 2006
    Location
    UK/Der Freistaat Griechenland
    Posts
    10,406

    Default Re: 2nd Lesson

    here are the extra stuff
    Quote Originally Posted by Jom View Post
    When using the stick and carrot approach, remember that what you have to do is shove the carrot up their arse and then beat them with the stick.
    Check out my YouTube Channel here
    Under The Patronage Of jimkatalanos
    Patron Of
    Murfios,
    Bolkonsky and DekuTrash


  16. #16
    Prince of Yunderup's Avatar Tiro
    Join Date
    Sep 2009
    Location
    Fremantle Western Australia
    Posts
    230

    Default Re: 2nd Lesson

    Here's mine:

    My extras

  17. #17
    Hesus de bodemloze's Avatar The Gaul
    Civitate Patrician Content Emeritus

    Join Date
    Aug 2006
    Location
    Belgium
    Posts
    12,313

    Default Re: 2nd Lesson

    For some reason my splatters didn't get true entirely.

    Do you need the PSD from every one?


    Background
    Spoiler Alert, click show to read: 
    Last edited by Hesus de bodemloze; March 08, 2010 at 11:59 AM.
    Horum omnium fortissimi sunt Belgae :
    Hesus 's Photo Gallery
    The Writers Study|Ex-Global Moderator|Moderation Mentor| Ex - Librarian of the Scriptorium|PoTW|MAARC|ToTW
    SPQR Forum Moderator

  18. #18

    Default Re: 2nd Lesson

    Here's mine :


    Background (also took the render from this one )

    http://nl.playstation.com/media/1134...rwars_hero.jpg

    Used a zoom motion blur instead of a linear one, but did all the rest like the lesson

  19. #19
    abbews's Avatar The Screen Door Slams
    Join Date
    Apr 2009
    Location
    Stockholm, Sweden
    Posts
    8,193

    Default

    Quote Originally Posted by Divus View Post
    Great. Passed.

    Quote Originally Posted by Capt. Fozdike View Post
    Great. Passed.


    Quote Originally Posted by Leonidas The Lion View Post
    here are the extra stuff
    Great. Passed.


    Quote Originally Posted by Hesus de bodemloze View Post
    For some reason my splatters didn't get true entirely.

    Do you need the PSD from every one?


    Background
    Spoiler Alert, click show to read: 
    Yes I need it from everyone to make sure you have understood the lesson.

    Quote Originally Posted by Mr.Blackadder View Post
    Here's mine :


    Background (also took the render from this one )

    http://nl.playstation.com/media/1134...rwars_hero.jpg

    Used a zoom motion blur instead of a linear one, but did all the rest like the lesson
    Looks good so far, need the psd though.

    Quote Originally Posted by Prince of Yunderup View Post
    Here's mine:

    My extras
    Great. Passed.
    Last edited by abbews; March 08, 2010 at 03:02 PM. Reason: woops double post

  20. #20
    Hesus de bodemloze's Avatar The Gaul
    Civitate Patrician Content Emeritus

    Join Date
    Aug 2006
    Location
    Belgium
    Posts
    12,313

    Default Re: 2nd Lesson

    PSD File


    For some reason it doesn't save the border in the image.
    Last edited by Hesus de bodemloze; March 08, 2010 at 04:09 PM.
    Horum omnium fortissimi sunt Belgae :
    Hesus 's Photo Gallery
    The Writers Study|Ex-Global Moderator|Moderation Mentor| Ex - Librarian of the Scriptorium|PoTW|MAARC|ToTW
    SPQR Forum Moderator

Page 1 of 4 1234 LastLast

Posting Permissions

  • You may not post new threads
  • You may not post replies
  • You may not post attachments
  • You may not edit your posts
  •