Page 1 of 6 123456 LastLast
Results 1 to 20 of 116

Thread: 1st Lesson

  1. #1
    abbews's Avatar The Screen Door Slams
    Join Date
    Apr 2009
    Location
    Stockholm, Sweden
    Posts
    8,193

    Default 1st Lesson

    Hi all and welcome to my first lesson with you! I hope we will all learn alot and grow artisticly during this course. We are starting this off slow, since I know how lazy students can be
    I will be gone on a skiing holiday 27th February to the 6th March. During that time I will have NO computer access, though I will have internet access so I will keep a watch on you with my phone. Subby (please introduce yourself here! ) will keep an eye of you during that time, and help you when you get stuck.

    The second lesson will be posted on the 7th March.

    General Notes:
    • All students should be aware that when using images other than ones provided by Subuatai de Bodemloze or myself MUST be included (or linked provided) in your completed lesson post.
    • Lessons will be one week in duration (Exeption for the first lesson). We have taken our own time in setting this up and running this course, se we ask the same of you. All assignments will be due no later than 10 days after we post the lessons. Any late submittals will be treated on a individual basis provided you have justifiable circumstances. We are not Ogres but we would also like to avoid having students one or two lessons behind the bulk of the class.
    • We will do our best to post the lessons promptly, but if there is a delay be patient.
    • I am at GMT+1 and Subuatai de Bodemloze is GMT-8, please keep that in mind when you pm me 4 times in an hour asking for help... If I don't respond to you, chances are I am sleeping or something.


    1.Introduction
    Hi all and welcome!

    Here comes some short basic descriptions of the most used and most basic tools in Photoshop.


    Healing Brush
    The Healing Brush tool lets you correct imperfections, causing them to disappear into the surrounding image. The Healing Brush tool matches from sampled pixels to the pixels being healed. As a result, the repaired pixels blend seamlessly into the rest of the image.
    Spot Healing Brush
    The Spot Healing Brush tool quickly removes imperfections in your photos. The Spot Healing Brush works similarly to the Healing Brush: it paints with sampled pixels from the image. Unlike the Healing Brush, the Spot Healing Brush doesn’t require you to specify a sample spot. The Spot Healing Brush automatically samples from around the retouched area.

    Clone Stamp
    The Clone Stamp tool paints one part of an image over another part of the same image. You can also paint part of one layer over another layer. The Clone Stamp tool is useful for duplicating objects or removing a defect in an image.

    Blur tool

    With this tool, when you have a image selected in the layer palette,
    just click or drag on the image and it gets blurry, therefore called blur tool.

    Sharpen Tool

    This tool works the same way as the blur tool, but it doesn't make the pic blurry, but it sharpens it.

    Smudge tool

    With this tool, you can smudge the pic to create a really cool effect. Works the same way as blur and sharpen tool.


    Eraser Tool
    The eraser tool is used to erase. Click on the eraser icon and then click on an area you wish to erase.

    Dodge tool

    With this tool you can lighten up pictures, it works on everything except absolute black. Absolute black wont lighten.

    Burn Tool

    With this tool you can darken pictures, it works on everything execept absolute white. Absolute white wont darken.

    Sponge Tool

    With this tool you can absorb the colors of a picture, making the picture more colorless.
    If you use it hardly the picture will become black and white.


    Brush Tool

    With this tool you can brush a shape of your choice, in different sizes and colors. The first and most basic tool in PS.


    Gradient Tool
    You can use this to make a blending of your foreground color and background color when you click and drag it.
    Paint Bucket
    The Paint Bucket is the simplest of painting tools. It is used to fill areas with solid colors or patterns.

    Crop tool

    With this tool, you can select a box shaped part of the image, and the crop it leaving only the area you had selected left.
    The unselected part of the image will dissapear.

    Text Tool
    The Text Tool is used for typing… You can either just click and type or you can drag a box were the text should be.

    Pen tool

    Pen tool is for creating paths.
    Paths can be used in a few different ways, mostly to create clipping paths, or to create selections.
    You use the tool by clicking to add a point. If you click and drag, it will change the shape of your path,
    allowing you to bend and shape the path for accurate selections and such.


    This lesson is going to be about how to remove the background from a object in a nice and clean way. This is called a render ( an object that has been cut out from its background ). A render is often used in signatures, avatars and the likes, and you probably seen a lot of render signatures here on TWC.

    Let’s start shall we.
    Lesson 1 - Rendering
    2.1. Choosing The Right Picture
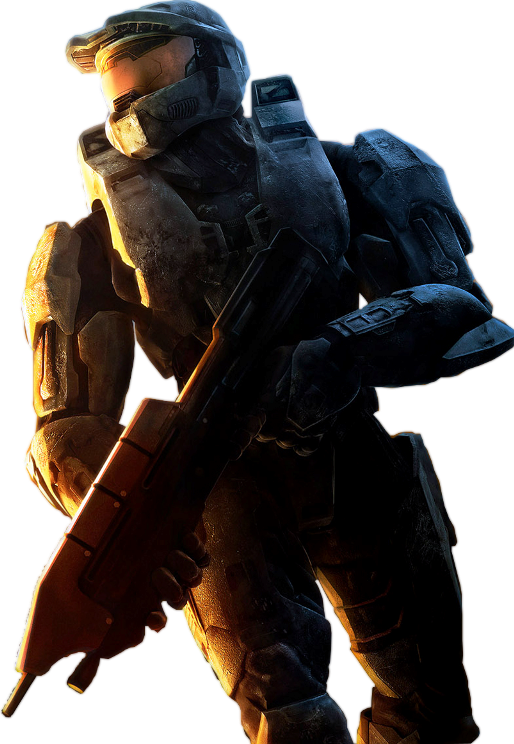
    All good renders started with an quite big and high quality picture. I recommend the picture to be no smaller than 800x800 because pictures below that size are usually low quality, and rendering a small picture is really hard, almost impossible. And a tip, rendering hair can be very hard.

    We also want the picture to have some natural flow in it. The picture should also not be in a lot of different colors, this will help in further classes.

    For example, this picture would be excellent for a render purpose;
    Spoiler Alert, click show to read: 


    This on the other hand, would not be good;
    Spoiler Alert, click show to read: 


    So make sure to choose a picture that includes this above, otherwise you will find it a hard time rendering it.


    2.2 Pen Tool Rendering
    Open your picture in photoshop, your picture is probably locked;
    Spoiler Alert, click show to read: 

    If we work on a locked layer, we will not be able to have a transparent end result.
    So double click on the layer, and then this should pop up:
    Spoiler Alert, click show to read: 

    Click Ok, and then your layer will no longer be locked!:
    Spoiler Alert, click show to read: 


    Now take forth your pentool.

    You should have these settings.
    Spoiler Alert, click show to read: 


    Open up your chosen picture. Zoom in on the location where you which to start your rendering, a foot or a like is a good choice.
    Now you start clicking with the pentool around the object which you want render.
    A tip is when you comes to a pretty round part of the picture, hold down your the left click mouse and drag it to create a bend, this can be useful for round areas.

    Spoiler Alert, click show to read: 


    By clicking like this, you are making a path that will go around the render.

    Continue to do this until you reach the end of the pic or the beginning of the path.

    Spoiler Alert, click show to read: 


    If you haven’t reached the beginning of the path, you can reach it by continuing the path outside the pic, like this.
    Spoiler Alert, click show to read: 


    Now you right click with your pen tool, choose ”make selection”. Now you will have a line around your render that looks like ants. Right now if we would erase, we would erase the render.
    So now press CTRL+SHIFT+I, this will revert our selection. Now erase all with a huge hard brush.
    Spoiler Alert, click show to read: 


    A beauty isn’t it? But still not done.

    If you have any parts left like I do

    Spoiler Alert, click show to read: 


    Just do as above again until the cut is done, but do not invert the selection.


    Now the cut is done.

    Spoiler Alert, click show to read: 


    If some edges are rough, erase very soft with a small soft brush.

    Now copy your layer (have the layer selected, press CTRL+J).
    Take the original layer, press filter-blur-gaussian blur.
    Settings should be on about 1,5 pixels.

    Now the render is done!

    Spoiler Alert, click show to read: 


    Now go to file-save as. Save your render as .png.
    Have these settings when the options pop up (after you have clicked save)

    Spoiler Alert, click show to read: 


    2.3 Quick Mask Tool
    Now were going to have a look at a different way of rendering.
    The actual process is relatively easy and this particular conversion took 5 minutes to perform. Of course, digital images will differ and some will be more difficult than others to render the unnecessary image sections. Patience is key.

    Let's begin shall we.

    · Open the your image in Photoshop. Once the image has been opened, press Q to initiate Quick-Mask mode.

    · From the tool bar, select the paint brush icon. Select a starting brush size to use for the mask effect. During the course of the mask selection process, you will probably need different sizes of brushes in order to highlight all aspects of the photo.

    · Start using the paintbrush to select the portions of the image that you do not wish to utilize. The selections will turn red as you go over them with the paintbrush


    · Continue utilizing the paintbrush, with varying sizes, until the sections you wish to exclude from the image are completely covered.


    · When complete, press Q again to exit Quick-Mask mode. At this point, the non- selected portions of the photo will be selected and outlined by a dotted line.


    · At this point, select Edit/Copy from the top bar or press Ctrl+C to copy the selected image section into memory. Open new layer and select Edit/Paste from the top bar or press Ctrl+V. This will paste the image selection into the new layer.

    . Now go to file -> save as. Save your render as .png.
    Have these settings when the options pop up (after you have clicked save)

    Spoiler Alert, click show to read: 


    And now you have used the Quick Mask tool to make a selection, congratulations.


    Homework :
    Create a render by the pen tool method. Post it here as a. PNG. You must post the original image aswell. You do not need to render with quick mask, but if you have time I recommend it since it's good practice I want the homework at my desk no later then the 10th March.
    Last edited by abbews; February 26, 2010 at 08:24 AM.

  2. #2

    Default Re: 1st Lesson

    Looks fair enough. Not sure if the second thing you did exists in GIMP. Though I did find something that looked like it, but it really was crap

    Will update tomorrow

  3. #3
    Beorn's Avatar Praepositus
    Join Date
    Jan 2009
    Location
    Athens
    Posts
    5,327

    Default Re: 1st Lesson

    will try this one in the weekend

  4. #4
    Aikanár's Avatar no vaseline
    Join Date
    Mar 2009
    Location
    Sanctuary
    Posts
    12,516
    Blog Entries
    3

    Default Re: 1st Lesson

    Ah Abbews, mate, you're early! I'm stuck in the middle of nowhere scripting


    Son of Louis Lux, brother of MaxMazi, father of Squeaks, Makrell, Kaiser Leonidas, Iskar, Neadal, Sheridan, Bercor and HigoChumbo, house of Siblesz

    Not everything that counts can be counted, and not everything that can be counted counts.

  5. #5
    abbews's Avatar The Screen Door Slams
    Join Date
    Apr 2009
    Location
    Stockholm, Sweden
    Posts
    8,193

    Default Re: 1st Lesson

    Updated it a bit.

  6. #6
    Hesus de bodemloze's Avatar The Gaul
    Civitate Patrician Content Emeritus

    Join Date
    Aug 2006
    Location
    Belgium
    Posts
    12,313

    Default Re: 1st Lesson


    Last edited by Hesus de bodemloze; February 24, 2010 at 03:49 PM.
    Horum omnium fortissimi sunt Belgae :
    Hesus 's Photo Gallery
    The Writers Study|Ex-Global Moderator|Moderation Mentor| Ex - Librarian of the Scriptorium|PoTW|MAARC|ToTW
    SPQR Forum Moderator

  7. #7
    Aikanár's Avatar no vaseline
    Join Date
    Mar 2009
    Location
    Sanctuary
    Posts
    12,516
    Blog Entries
    3

    Default Re: 1st Lesson

    Ok:
    Original pic

    Pen method render


    Edit: lol same here, updated with gaussian blur
    Last edited by Aikanár; February 24, 2010 at 03:57 PM.


    Son of Louis Lux, brother of MaxMazi, father of Squeaks, Makrell, Kaiser Leonidas, Iskar, Neadal, Sheridan, Bercor and HigoChumbo, house of Siblesz

    Not everything that counts can be counted, and not everything that can be counted counts.

  8. #8
    Leonidas The Lion's Avatar Until we win! Or die.
    Content Emeritus

    Join Date
    Apr 2006
    Location
    UK/Der Freistaat Griechenland
    Posts
    10,406

    Default Re: 1st Lesson

    took a stab at it:

    EDIT:forgot Gaussian blur, there now
    Render:
    Spoiler Alert, click show to read: 


    Original:
    Spoiler Alert, click show to read: 

    Last edited by Leonidas The Lion; February 25, 2010 at 12:14 AM.
    Quote Originally Posted by Jom View Post
    When using the stick and carrot approach, remember that what you have to do is shove the carrot up their arse and then beat them with the stick.
    Check out my YouTube Channel here
    Under The Patronage Of jimkatalanos
    Patron Of
    Murfios,
    Bolkonsky and DekuTrash


  9. #9
    Legio's Avatar EMPRESS OF ALL THINGS
    Content Emeritus

    Join Date
    Mar 2008
    Location
    Chlοëtopia
    Posts
    43,774

    Default Re: 1st Lesson

    I don't know how to make an alpha channel on PS so I gave him a groovy background.


  10. #10

    Default Re: 1st Lesson

    Render

    Original


    hmm, maybe I should have resized them. I think I will do that and crop or try to fix the line of text another day.


  11. #11

    Default Re: 1st Lesson

    Here's mine. I have used the picture abbews put up because I couldn't be bothered finding another one.

    Original
    Spoiler Alert, click show to read: 


    Render
    Spoiler Alert, click show to read: 
    Son of Major Darling | House of Caesars | Content Writer | My Workshop | Moderator

  12. #12

    Default Re: 1st Lesson

    Here is my try old boy!

    Original!
    Spoiler Alert, click show to read: 


    My result!
    Spoiler Alert, click show to read: 

  13. #13
    karamazovmm's Avatar スマトラ警備隊
    Join Date
    Aug 2009
    Location
    Brazil, Săo Paulo
    Posts
    9,639

    Default Re: 1st Lesson

    My try

    rendered:
    Spoiler Alert, click show to read: 


    original:
    Spoiler Alert, click show to read: 


    going all the way down to pixels is misleading, as you can see
    Last edited by karamazovmm; February 24, 2010 at 08:12 PM.

    The very ugly forgive, but beauty is essential - Vinicius de Moraes

  14. #14
    abbews's Avatar The Screen Door Slams
    Join Date
    Apr 2009
    Location
    Stockholm, Sweden
    Posts
    8,193

    Default Re: 1st Lesson

    Quote Originally Posted by Hesus de bodemloze View Post
    Spoiler Alert, click show to read: 


    Spoiler Alert, click show to read: 
    You have passed, altough in the future I recommend you to use bigger and higher quality pics.

    Quote Originally Posted by Aikanár View Post
    Ok:
    Original pic

    Pen method render


    Edit: lol same here, updated with gaussian blur
    Passed. In the future I advice you to use bigger and HQ pics.

    Quote Originally Posted by Leonidas The Lion View Post
    took a stab at it:

    EDIT:forgot Gaussian blur, there now
    Render:
    Spoiler Alert, click show to read: 


    Original:
    Spoiler Alert, click show to read: 

    That is really great! Bravo! Passed.

    Quote Originally Posted by Legio View Post
    I don't know how to make an alpha channel on PS so I gave him a groovy background.

    First of all my friend, choose a bigger and higher quality picture.
    Then it seems like you've tried to erase on a "locked" layer, instead copy the locked layer (CTRL+J) and hide the background layer and do the pentool method on layer 1.
    Example

    Quote Originally Posted by Lazy Knight View Post
    Render

    Original


    hmm, maybe I should have resized them. I think I will do that and crop or try to fix the line of text another day.
    Looking good, as you said you could crop it since there is alot of empty space. Passed.

    Quote Originally Posted by Capt. Fozdike View Post
    Here's mine. I have used the picture abbews put up because I couldn't be bothered finding another one.

    Original
    Spoiler Alert, click show to read: 


    Render
    Spoiler Alert, click show to read: 
    Passed, altough in the future I advice you to find a picture on your own if not stated something else
    Quote Originally Posted by ♔Mr.♔L.E.E.♔ View Post
    Here is my try old boy!

    Original!
    Spoiler Alert, click show to read: 


    My result!
    Spoiler Alert, click show to read: 
    It can be my eyes, but has the render changed colour from the original pic?

    Quote Originally Posted by Mr MM View Post
    My try

    rendered:
    Spoiler Alert, click show to read: 


    original:
    Spoiler Alert, click show to read: 


    going all the way down to pixels is misleading, as you can see
    That picture is hard to render, I suggest picking an other pic. And as I said to Legio, you seem to have worked on the background layer.

    Then it seems like you've tried to erase on a "locked" layer, instead copy the locked layer (CTRL+J) and hide the background layer and do the pentool method on layer 1.
    Example

  15. #15
    Aikanár's Avatar no vaseline
    Join Date
    Mar 2009
    Location
    Sanctuary
    Posts
    12,516
    Blog Entries
    3

    Default Re: 1st Lesson

    Quote Originally Posted by abbews View Post
    Passed. In the future I advice you to use bigger and HQ pics.
    I'll keep that in mind and thanks for the advice


    Son of Louis Lux, brother of MaxMazi, father of Squeaks, Makrell, Kaiser Leonidas, Iskar, Neadal, Sheridan, Bercor and HigoChumbo, house of Siblesz

    Not everything that counts can be counted, and not everything that can be counted counts.

  16. #16
    Katsumoto's Avatar Quae est infernum es
    took an arrow to the knee

    Join Date
    Feb 2009
    Posts
    11,783

    Default Re: 1st Lesson

    Here's mine:

    Spoiler Alert, click show to read: 


    Original:


    Render:


    "I pray Heaven to bestow the best of blessings on this house and all that shall hereafter inhabit it. May none but honest and wise men ever rule under this roof."
    - John Adams, on the White House, in a letter to Abigail Adams (2 November 1800)

  17. #17
    Subuatai de Bodemloze's Avatar No rest for the wicked
    Join Date
    Mar 2008
    Location
    50 degrees, 26.2 minutes North, 119 degrees, 12.4 minutes West
    Posts
    2,436

    Default Re: 1st Lesson

    Good job Katsu. Looks like a pass to me.

    TO everyone: While some of you have done a great job with your renders there have also been a few that were sloppy. I have seen a couple where clearly you have not followed the outline of the render but rather cut in straight lines point to point. Rendering is the worst part of digital design and the single most time consuming part. But if you spend the time the render will look 50 times better.

  18. #18

    Default Re: 1st Lesson

    It can be my eyes, but has the render changed colour from the original pic?
    I think he put on layers on overlay or so ?

    Anyway :

    Spoiler Alert, click show to read: 


    original :

    http://www.wallpaperez.net/wallpaper...nce-2-1620.jpg
    Last edited by Killerbee; February 25, 2010 at 11:30 AM.

  19. #19
    Finch's Avatar is Deadpool
    Join Date
    Feb 2009
    Location
    X-Mansion
    Posts
    1,678
    Tournaments Joined
    1
    Tournaments Won
    0

    Default Re: 1st Lesson

    Original Image
    Spoiler Alert, click show to read: 


    Render After using Pen tool
    Spoiler Alert, click show to read: 


  20. #20
    Hesus de bodemloze's Avatar The Gaul
    Civitate Patrician Content Emeritus

    Join Date
    Aug 2006
    Location
    Belgium
    Posts
    12,313

    Default Re: 1st Lesson

    Quote Originally Posted by abbews View Post
    You have passed, altough in the future I recommend you to use bigger and higher quality pics.
    I noticed when i finished the rendering.
    Horum omnium fortissimi sunt Belgae :
    Hesus 's Photo Gallery
    The Writers Study|Ex-Global Moderator|Moderation Mentor| Ex - Librarian of the Scriptorium|PoTW|MAARC|ToTW
    SPQR Forum Moderator

Page 1 of 6 123456 LastLast

Posting Permissions

  • You may not post new threads
  • You may not post replies
  • You may not post attachments
  • You may not edit your posts
  •