Page 1 of 3 123 LastLast
Results 1 to 20 of 46

Thread: [Broken] Basic Render Signature in Photoshop

  1. #1
    Citizen
    Join Date
    Sep 2008
    Location
    Germany
    Posts
    2,300

    Default [Broken] Basic Render Signature in Photoshop

    We have some new guys in the workshop that don't really know how to work with renders, so I decided to make a tutorial. It will cover everything you need to know for making a render sig. I've kept the sigmaking basic however, because documenting all steps I usually do would just be too much.

    Let's start.

    1.The Render What you first need is a render. A render is a cropped image, mostly showing persons or other living beings
    The best source for them is Planetrenders. You have to register there, but it's quick and free.
    Of course you can make renders yourself, I suggest using the pen-tool for it.

    Finding the right render depends on what you want to do. Some things you should know:

    1. Only use high-qualtiy renders. If you do them yourself, take your time and be accurate, the render is very very important.

    2. You can change colours of your render. For example, if you want to use this one you'd have to make the signature blue. You can however change the colour by clicking ctrl+u (or image-adjustmens-hue/saturation) Now you choose the colour you want to change, in our example we want to change the blue glasses and shine to a green colour. Just push "Hue" to the left a little, and you have this outcome.
    Now you can go ahead and make a green signature.


    Now we can start with the actual signature.
    2. The Size The right image size is very important. Noobs tend to make their sig as big as possible, but smaller sigs can achieve a far better effect for the most time. I usually use a size around 430x140, with a transparent background.


    3. Positioning your Render Now put your render into it. It is probably too big, so press ctl+t to resize it. When you resize it keep the "shift" key pressed down, the render will keep it's proportions. How big you want it and where to put it depends on the render itself and your intentions, but generally it's best to put it close to the middle of your sig.


    You better duplicate your render layer , just to be sure. Right click on the layer and choose duplicate layer. Set one of them to be invisible.
    4. Background Basics

    Now a background comes in. Make sure that it's big enough and matches the render's style. Resize it (don't forget to press "shift"!) and position it to your liking.
    Put the background layer above the render, so you can concentrate on it.

    From now on there are thousands of things you can do.
    I want to make it look like my rendersoldier is moving, so I select the background layer (which ironically is in the foreground atm ) and click "filter->blur->motion blur". Play around with the settings a bit. Now put one of your render-layers on top of it. (We don't need the invisible one, we just kept it to have backup)


    5. Improvements
    We're now going to blend the Render with the background. Select the eraser tool from your toolbar and select a soft brush with ~50 pixels. Use something close to these settings:


    Now just go around your the edges of your render and slightly erase some parts of it. If you have done something wrong, press ctrl+alt+z to undo your last step.


    Now we go on and improve it. Create a new layer on top of all others, select "image->apply image" and duplicate it. This time we're gonna need the duplicated layer, so don't forget this step!
    Select the top layer and set it to soft light. After that change it to "soft light" and lower the opacity until you like it.

    Now Create a new layer. and with the marker tool select 2 main colours of your sig. (you can of course also choose other colours if you want to)
    Go ahead and choose the Gradient tool:


    Drag your mouse over your empty layer and you'll get this


    Set it to "overlay" and lower the opacity until you like it. After that create a new layer and choose "image->apply image" again.

    To get some focus to the render select your "blur" tool and blur around the render. Find some splatter brushes, create a new layer and brush in some different, but fitting, colours. Then set the layer to soft light. Add a text and you're done!


    Those were just the basic techniques, of course you can go ahead and improve it a lot more, but I wanted to give you an overview. And remember, following a tutorial is not that hard, so after some practice you shoudl come along with your own ideas and don't just copy what I did.
    Last edited by Maяcel; March 03, 2010 at 11:00 AM.

  2. #2

    Default Re: [Tutorial] Basic Render Signature in Photoshop

    WOW thank you guy
    -
    "None are more hopelessly enslaved than those who falsely believe they are free."
    Johann Wolfgang von Goethe
    -
    -
    -


    Golden Conquistador

  3. #3
    abbews's Avatar The Screen Door Slams
    Join Date
    Apr 2009
    Location
    Stockholm, Sweden
    Posts
    8,193

    Default Re: [Tutorial] Basic Render Signature in Photoshop

    Very good tutorial and I love the layout, may I use for my future tutorial?

    And who will propose this for the Scriptorium? Raglan or Ratbag or someone else?

    Great tut, + rep! (need to spread)

    Will come with outcome very soon.

  4. #4
    Louis Lux's Avatar Into the Light
    Patrician

    Join Date
    Aug 2008
    Location
    London
    Posts
    4,708

    Default Re: [Tutorial] Basic Render Signature in Photoshop

    Really simple to follow and usually render sigs have a good result.
    Not really a big fan of render sigs because I think they sometimes lack personality and the many tutorials around make the sig scene appear homogeneous and monotonous, but i liked that you kept it simple and gave room for the person following the tut to make his own sig and inject his own personality.

    I wouldn't however have chosen comic sans to write it...

  5. #5
    abbews's Avatar The Screen Door Slams
    Join Date
    Apr 2009
    Location
    Stockholm, Sweden
    Posts
    8,193

    Default Re: [Tutorial] Basic Render Signature in Photoshop

    My outcome:

  6. #6

    Default Re: [Tutorial] Basic Render Signature in Photoshop

    Great tut

    TWC Son of the One and Only Abbews

  7. #7
    Wildrek's Avatar Senator
    Join Date
    Jun 2009
    Location
    Greece
    Posts
    1,071

    Default Re: [Tutorial] Basic Render Signature in Photoshop

    Very nice man!

  8. #8
    Citizen
    Join Date
    Sep 2008
    Location
    Germany
    Posts
    2,300

    Default Re: [Tutorial] Basic Render Signature in Photoshop

    Quote Originally Posted by abbews View Post
    Very good tutorial and I love the layout, may I use for my future tutorial?
    Of course.

    Quote Originally Posted by Louis Lux View Post
    Really simple to follow and usually render sigs have a good result.
    Not really a big fan of render sigs because I think they sometimes lack personality and the many tutorials around make the sig scene appear homogeneous and monotonous, but i liked that you kept it simple and gave room for the person following the tut to make his own sig and inject his own personality.

    I wouldn't however have chosen comic sans to write it...
    Fixed the writing

    And the goal of this tut was to give the very basics, because I think there are lots of people here that would like to do some simple render sigs. A noob at PS will follow this tutorial strictly and probably have a good outcome, and an experienced guy can make his own adjustments and make it look more unique, like abbews proved. So no matter whether you like render sigs or not, it's good to know at least their basics

  9. #9
    abbews's Avatar The Screen Door Slams
    Join Date
    Apr 2009
    Location
    Stockholm, Sweden
    Posts
    8,193

    Default Re: [Tutorial] Basic Render Signature in Photoshop

    I just figured, this will be similar to one of the classes if Photoshop Basic Course launch

  10. #10
    Citizen
    Join Date
    Sep 2008
    Location
    Germany
    Posts
    2,300

    Default Re: [Tutorial] Basic Render Signature in Photoshop

    Why don't you just copy it, it should be good enough, or isn't it?

  11. #11
    Product Designer
    Join Date
    Jan 2008
    Location
    the Netherlands
    Posts
    3,005

    Default Re: [Tutorial] Basic Render Signature in Photoshop

    great tutorial!
    DESARC92 / Product Design
    Once known as MarcelP | Product Designer | Under the Patronage of Legio
    Marcel's Modder's Resources | Tutorials | The Graphics Workshop

  12. #12

    Default Re: [Tutorial] Basic Render Signature in Photoshop

    Awesome work my friend simple but great tut+rep

  13. #13

    Default Re: [Tutorial] Basic Render Signature in Photoshop

    Very well done Fereveldir

    See, I said your name

  14. #14
    Blackomur89's Avatar Campidoctor
    Join Date
    May 2009
    Location
    Serbia
    Posts
    1,904

    Default Re: [Tutorial] Basic Render Signature in Photoshop

    Thank you this is very useful. +rep
    2D artist for Call of Warhammer TW; 2D artist for Westeros TW; 2D artist and researcher for The Ruins of Arnor TATW sub-mod; 2D artist for Warcraft TW.

  15. #15
    Katsumoto's Avatar Quae est infernum es
    took an arrow to the knee

    Join Date
    Feb 2009
    Posts
    11,783

    Default Re: [Tutorial] Basic Render Signature in Photoshop

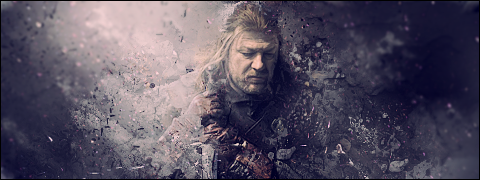
    Great tutorial, very easy to follow. Here's my noobish attempt

    "I pray Heaven to bestow the best of blessings on this house and all that shall hereafter inhabit it. May none but honest and wise men ever rule under this roof."
    - John Adams, on the White House, in a letter to Abigail Adams (2 November 1800)

  16. #16
    Blackomur89's Avatar Campidoctor
    Join Date
    May 2009
    Location
    Serbia
    Posts
    1,904

    Default Re: [Tutorial] Basic Render Signature in Photoshop

    And here is my result:


    So what does everyone think?
    2D artist for Call of Warhammer TW; 2D artist for Westeros TW; 2D artist and researcher for The Ruins of Arnor TATW sub-mod; 2D artist for Warcraft TW.

  17. #17
    Citizen
    Join Date
    Sep 2008
    Location
    Germany
    Posts
    2,300

    Default Re: [Tutorial] Basic Render Signature in Photoshop

    Quote Originally Posted by Katsumoto View Post
    Great tutorial, very easy to follow. Here's my noobish attempt

    It's quite nice considering you didn't make any sigs before, but 2 things you should change
    1. the render isn't very well blended it, don't use that much erasing, make it more subtle
    2. Make the text smaller and place it on the pictures left side, a little below the guy's head

    Quote Originally Posted by Blackomur89 View Post
    And here is my result:


    So what does everyone think?
    The background is barely visivle, and the render doesn't have any presence at all. Make it bigger and add some brushes.

  18. #18
    Raglan's Avatar ~~~
    Join Date
    Jan 2009
    Location
    earth, solar system, the universe.
    Posts
    17,377

    Default Re: [Tutorial] Basic Render Signature in Photoshop

    you know what fev, this has been a really useful tutorial, while i know how to do all this stuff, the concept about planing the signature and background has been really useful

    thanks

  19. #19
    Katsumoto's Avatar Quae est infernum es
    took an arrow to the knee

    Join Date
    Feb 2009
    Posts
    11,783

    Default Re: [Tutorial] Basic Render Signature in Photoshop

    I had another go, how's this:

    Last edited by Katsumoto; November 10, 2009 at 10:58 AM.
    "I pray Heaven to bestow the best of blessings on this house and all that shall hereafter inhabit it. May none but honest and wise men ever rule under this roof."
    - John Adams, on the White House, in a letter to Abigail Adams (2 November 1800)

  20. #20
    Citizen
    Join Date
    Sep 2008
    Location
    Germany
    Posts
    2,300

    Default Re: [Tutorial] Basic Render Signature in Photoshop

    That one's really nice, maybe try to blend the render a little more, otherwise good.

Page 1 of 3 123 LastLast

Posting Permissions

  • You may not post new threads
  • You may not post replies
  • You may not post attachments
  • You may not edit your posts
  •