Page 1 of 36 123456789101126 ... LastLast
Results 1 to 20 of 711

Thread: The Great M2TW Informative Thread

  1. #1

    Default The Great M2TW Informative Thread

    Hi Members,

    Here is the updated Great Thread, as the former one was buggy
    So I have made this one with only 4 guides per posts as the bugs where caused by having too much information in one post.

    I would like to thank Viking Prince, France, Exarch, Zyxos, ForlornHope. Landtuber, Conquistatore, Spartan90, Axnsan, Nazgul Killer, Kallum, Claudius2007, PO14K and Basileios Zacharias for their contribution to help me make this thread the Greatest of this part of the forum.

    Anyone who would like to add their own good guides let me know via PM and please don't copy someone else's work.

    Just for Information the first Great Thread had received 16 589 visits / vues and 376 replies. it was a busy thread

    Regards
    Rebel6666


    Info on Vassals By Rebel6666

    Spoiler Alert, click show to read: 
    The whole point of having vassals is to show you military might and that you completely pawned another faction. The major benefit of having a vassal isthat they automatically become you allies, will give you the rest of their money after done building and recruiting and will help in battles.

    I struggled with making other factions my vassals until recently and once you get the hang of it its easy, cause I played as England and now have France, Spain, Denmark, Portugal, HRE, Milan, and Hungary as vassals and am working on the Mongols and the Byzantine Empire. For anyone that wants to know how I'll explain (results may vary). As stated up top you need to reduce them to one territory but you done need 5 armies, one will do. Capture their territory in such a way as to either completely enclose in territories owned by you or down one coastal region, I've found coastal regions to be easier but its up to you.

    The point is that they can’t be just militarily weak but economically as well so if their enclosed they have no one to trade to and if their coastal region all you have to do is blockade their port and cutting off their trade. Ok after that send in a diplomat (this should take multiple turns) and tell them that you want to be their new master. The first proposal will be rejected outright no matter what you offer, try it again, you probably won't get them to except but rather a not interested message and negotiations will stop.

    Continue to ask them to be your vassal and DO NOT stop blockading their port and DON'T let the war end but every now and again siege the city and then lift the siege it and have you diplomat come in and ask again. Usually this method takes about 3 of 4 turns but Hungary held out on me for 9 turns until they gave into my demands. Ok, now to keep those as your vassal just give them gifts. Money or even giving them back one of their old territories does wonders and solidifies your relationship and your control over them, also create a fort in each of their territories and keep it garrisoned at all times just to remind them that your always watching and ready to attack when ever you please. And that is how you create and keep vassals.

    Now go and make the other factions your vassals


    Added May 8th, 2009 Here is a good example of what a vassal looks like lol....

    Spoiler Alert, click show to read: 


    Tips on reputation by Rebel6666

    Spoiler Alert, click show to read: 
    Having alliances and maintaining them increases your reputation.
    Having good relations with a faction increases your reputation.
    Having bad relations decreases it.

    Having a high chivalry faction leader increases your reputation.
    Having a high dread faction leader decreases it (So best to keep your main bloodline as high chivalry generals, and let some other line of the family be the bastard enforcers).

    The best thing to do is to make alliances with specific factions in the game ( the one that you know you don't want to go at war with) at the start, so that you have allies far off who you don't share a border with and who won't be tempted to attack you. Give gifts to any ally who your relations decline with IMMEDIATELY in order to keep your relations at so-so or better (Preferably better, because that increases your reputation faster). Pick a couple of factions to be super allies with, and push your relations with them to perfect, and KEEP them there.

    Don't attack an ally ever (Ever). Don't attack a non-ally unless they attack you first. In fact, don't retaliate even, only break their forces in your territory (This is good strategy anyway, fighting them on your home territory gives you the advantage because you should be able to choose your battlefields). If you let them keep entering your territory a few times before retaliating and taking one of their territories, you are much less likely to take a reputation hit. See, if another faction has a BAD reputation, you can attack them freely without losing reputation (In fact you seem to gain reputation for attacking them, as long as you're at war with them and THEY started it). So let them attack you a few times before you retaliate, let their reputation fall and fall and then retaliate.

    Additionally, the higher your reputation goes, the bigger hit the enemy will take if they attack you. I've seen factions go from mixed to despicable after attacking me just one time, when I had very high reputations.

    High reputation does SO many good things for you in this game, it's worth doing the work to maintain it

    Here are the Reputation names that your factions can have from the bad to the good

    - Despicable

    - Deceitful

    - Very Untrustworthy

    - Untrustworthy

    - Dubious

    - Mixed

    - Reliable

    - Very Reliable

    - Trustworthy

    - Very trustworthy

    - Immaculate


    Info on guilds by Rebel6666

    Spoiler Alert, click show to read: 
    LONG POST BUT WITH GREAT Info’s ON GUILDS!!!!

    From perusing the contents of export_descr_guilds.txt i have determined the following:

    Each guild type has 3 levels, to get a guild at each level the player has to score a certain number of points for either their faction overall, or for that particular settlement.

    Guild: 100 points
    Masters Guild: 250 points
    Guild HQ: 500 points

    The player gains (and loses) points for each guild for each settlement, and for their entire faction, by performing certain deeds. In general, settlements will gain more per deed (typically 10, 15, 20, 25, 30 points) than the overall faction score (typically 2, 3, 4, 5 points per deed).

    Not sure how the overall faction score works, presumably if your overall faction score exceeds the required amount you will get offered a guild even if none of your individual settlements qualify - thus you can still get guilds by, say, training lots of priests all over the place - but it will still be far quicker if you train them all in the same settlement.

    Agents can also gain points. Assume that this is once per agent, and that these points add to the overall faction score.

    General
    Upgrade a guild (+20 settlement bonus for that guild type, +10 faction)
    Destroy a guild building (huge penalty for that guild type, -100 settlement, -20 faction)
    Upgrade a settlement (+10 settlement bonus for all guild types)
    Every 25 turns every settlement loses 1 point for all guilds

    Missions
    Bonuses are also given for successfully completing a guild mission, but failing to complete the guild mission will incur a penalty for that guild type.

    The following guilds offer missions:
    Assassin's Guild
    Merchant's Guild
    Explorer's Guild
    Theologian's Guild
    Thieves Guild

    Assassin's Guild
    Train assassins: +10 settlement
    Successful Assassinations: +20 agent bonus
    Governor with dread >4: +4 settlement bonus (per turn?)
    Build brothel series buildings: +10/15/20/25/30 settlement, +0/0/0/2/5 faction
    Succeed/Fail Assassin guild mission: +/-10 agent

    Alchemist's Guild
    Train Cannons etc: +10/15/20 settlement
    Train hand gunners etc: +15 settlement
    Build cannon maker series: +10/15/20/25/30 settlement, +1/2/3/4/5 faction

    Explorer's Guild
    Train merchants: +10 settlement
    Build shipbuilding buildings: +15/20/25/30 settlement, +0/0/2/5 faction
    Build merchants wharf series: +20/25/30 settlement, +0/2/5 faction
    Fleet distance from capital 50-99: +3 agent
    Fleet distance from capital >100 : +5 agent
    Succeed/Fail Explorer guild mission: +/-30 agent

    Horse Breeder's Guild
    Train cavalry: +10 settlement, +1 faction
    Build stables series: +10/15/20/25/30 settlement, +1/2/3/4/5 faction
    Build racetrack/sultan's racetrack +50/75 settlement, +5 faction
    Governor throws races: +5 settlement

    Mason's Guild
    Build Stone wall series: +10/15/20 settlement, +2/2/3 faction
    Build mustering halls series: +10/15/20/25/30 settlement, +2/2/2/2/3 faction
    Build town watch series: +10/15/20/25/30 settlement +2/2/2/2/3 faction
    Build armourer series: +10/15/15/20/25/30 settlement +2/2/2/2/2/3 faction
    Build bowyer series: +10/15/20/30 settlement +2/2/2/3 faction

    Merchant's Guild
    Train merchants: +10 settlement
    Build merchants wharf series: +20/25/30 settlement, +0/2/5 faction
    Build market series: +10/15/20/25 settlement, +0/0/2/5 faction
    Make trade agreement: +10 agent
    Successful acquisition: +10 agent
    Income > 1000/2000/5000/10000: +1/2/3/4 agent (per turn?)
    Succeed/Fail merchant's guild mission: +/- 10/20 agent (depending on difficulty?)

    Sword smiths Guild
    Build armourer series: +10/15/15/20/25/30 settlement, +0/0/0/1/2/5 faction
    Train sword unit: +15 settlement
    Units: Sword and Buckler Men, Sudanese Tribesmen, Swordsmen Militia, Armored Swordsmen, Highland Nobles, Zweihander, Noble Swordsmen, Forlorn Hope, Byzantine Infantry, Battlefield Assassins, Norse Swordsmen, Dismounted Feudal Knights, Dismounted Chivalric Knights, Dismounted Gothic Knights, Dismounted Conquistadores, Dismounted Italian MAA, Dismounted Broken Lances, Dismounted Norman Knights, Dismounted Polish Knights, Dismounted E Chivalric Knights, Dismounted Byzantine Lancers, Dismounted Latinkon, Hashishim, Urban Militia, Dismounted Christian Guard

    Theologian's Guild
    Train Priests: +10 settlement
    Build church/masjid series: +10/15/20/25/30 settlement, +0/0/1/2/5 faction
    Get your cardinal elected pope: +30 agent
    Governor's piety >5: +5 settlement (per turn?)
    Succeed/Fail theologian's guild mission: +/-10 agent
    Priest becomes a heretic: -5 agent

    Thieves Guild
    Train spies: +10 settlement
    Build brothel series: +10/15/20/25/30 settlement
    Governor with dread >4: +2 settlement (per turn?)
    Spy in a settlement: +2 agent (per turn?)
    Succeed/Fail thieves’ guild mission: +/-10 agent

    Woodsman's Guild
    Recruit archers (England only!): +10/15/20 settlement (depending on unit)
    Build brother Seri >4: +5 settlement (per turn?)

    Various Knight's Chapter Houses
    General joins crusade: +25 agent
    General abandons crusade: -25 agent
    Recruit Specialist Knight: +10 settlement, +1 faction (knight type tied to guild type)
    Governor Chivalry >4: +5 settlement

    St. John's guild get a +10 settlement, +1 faction bonus when the settlement has Muslim neighbours
    St. John's guild get a +10 agent bonus when you declare war on a muslim faction.
    Teutonic guild gets a +10 settlement, +1 faction bonus when the settlement has Muslim neighbours


    Updated on Jan 8th What does each Guild Improves by Rebel6666

    Spoiler Alert, click show to read: 
    Alchemist's Guild Improves gunpowder recruitment

    Assassin's Guild Improves assassin recruitment and public order

    Hash shin’s Guild Improves assassin recruitment and public order

    Masons' Guild Reduces construction costs and improves public order

    Merchant's Guild Improves merchant recruitment and trade income

    Theologian's Guild Improves priest recruitment

    Thieves' Guild Improves spy recruitment

    Explorers' Guild Improves trade and movement

    Sword smith's Guild Upgrades melee weapons

    Horse Breeder's Guild Improves cavalry unit recruitment

    Knights Templar Recruits Templar Knight units

    Hospitaller Knights Recruits Hospitaller Knight units

    Teutonic Knights Recruits Teutonic Knight units

    Knights of Santiago Recruits Knights of Santiago units

    Woodmen's Guild Improves missile unit recruitment


    Updated on May 7th, 2009 Campaign Map for M2TW by Rebel6666


    Spoiler Alert, click show to read: 


    If you want to have a better look click on this link and save it on your desktop, you will be able to zoom in and out.

    http://img237.imageshack.us/my.php?image=mtw2map2qh7.jpg

    Last edited by Silent Assassin; September 02, 2009 at 01:10 PM. Reason: Updating done
    TIME TO DIE!!!! Proud Son of Viking Prince

  2. #2

    Default Re: Please members don't post here as I'm updating th Great Thread for it to work better

    How to manage your settlements by Rebel6666

    Spoiler Alert, click show to read: 
    some of my advice:

    - Don't build everything you can, not all buildings are necessary in every settlement; Having a blacksmith in a rear area city is pointless.

    - Aim for a ratio of 4:1 cities to castles (depending on whether you use Vanilla or a mod map, this could change)

    - Disband military units you will not use within the next 5 turns (except militia garrisoned for free). A 600FL DFK unit costs 250FL/turn to maintain. Unless they're veteran or at the front, disband them. Especially artillery at 350FL/turn. I only keep really high valour units, and tend to send them to the front.

    - Build land improvements because they are the quickest way to getting big cities, which produce higher level buildings and more tax revenues from a larger population; squalor isn't as big an issue as it was in RTW

    - AFAIK farming is taxed; mouse over all the elements on the Settlement screen and the Trade Summary

    - DON'T sack a Christian settlement unless that faction is excommunated and you really need the cash immediately; otherwise the settlement takes a long time to recover and you lose standing with other factions. NEVER exterminate Christian settlements if you are a Christian faction, and if you are an Islamic faction, that's a great way to get a Crusade called against you.

    - Always upgrade settlements ASAP (otherwise you'll have an irreversible squalor problem which affects future growth)

    - Watch your governors' traits. Some of them can get cumulative tax, squalor and unrest penalties that can practically destroy your economy in a big city

    - Always have the tax rate set to at least "high" (where possible) otherwise your governors get tax penalty traits; you don't need 100% public order in all cities.

    - Only build brothels/taverns/inns in cities with older governors who already have fathered children, or else you may get the "Adulteress" retinue character which can devastate a family line if a young governor gets it

    - Only build militia buildings in cities where you have an unrest issue, unless those cities may be open to attack

    - Kill off Rebels/Brigands/Pirates ASAP as they affect happiness. Rebels/Brigands also cause Devastation which is an issue

    - In the Trade Summary screen, flashing income items mean you are not getting the most out of your trade potential. Improving roads and ports is vital.

    - Turn down the Thieves Guild for high income settlements and work towards the Merchants or Explorers Guild; only build Thieves Guilds in lower income cities where you'll train most of your spies. Most of the AI settlements you capture will have Thieves Guilds anyway.

    - Don't ever destroy a Guild building, even in a captured settlement, as that destroys your ratings with all Guilds.

    - On VH, make sure your good generals are pious or they'll get killed by Inquisitors. Building Churches early on makes it easier to get 100% Catholic regions that don't fall to Heresy, which is a mid game problem.

    - Merchants can be powerful so use them wisely and move them off a resource if you spot a high valour AI merchant closing in. The AI doesn't buy out merchants who are not trading. Build up a merchant's experience close to home and only move them away when they have 3 coins rating. They'll usually die just when they're getting good; nothing you can do about that.

    - Only execute captured troops when you are absolutely certain they would defeat you in an ensuing battle. Otherwise your reputation suffers and a chivalrous general loses points. Likewise, if you want a dreaded general, execute when you have a small number of troops. It also seems like the AI doesn't pay the smaller ransoms, only for larger numbers of troops.


    Updated on Jan 22nd How to Unlock factions by Rebel6666

    Spoiler Alert, click show to read: 
    How To Unlock All Factions

    To unlock all factions for M2TW is really simple.
    There are two ways.

    (Please note that you must have started the game at least once in order for the preferences file to have information in it.)

    The first is:
    1. Go to your "Medieval II Total War" folder.
    2. Right click on the preferences.cfg file, select the properties tab and uncheck the read only box, then open it with notepad.
    3. Scroll all the way down to the bottom of the file.
    4. Add the following lines:
    [misc]

    unlock_campaign = true

    5. Save and exit the file.

    The Second way is:
    1. Go to the "Medieval II Total War/data/world/maps/campaign/imperial_campaign" folder.
    2. Right click on the file "desc_strat.txt", select properties and uncheck the read-only box.
    3. Open the desc_strat.txt file in notepad.
    4. Move all the factions from the unlockable section into the playable section. Make sure no faction is mentioned twice.
    The file should look like this:


    Code:
    playable England, France, HRE, Spain, Venice, Sicily, Milan, Scotland, Byzantium, Russia, moors, Turks, Egypt, Denmark, Portugal, Poland, Hungary, end unlockable end non-playable Papal_states Aztecs, Mongols, Timurids slave end
    All the factions that were meant to be playable are now unlocked.

    What about the Papel States?

    If you wish to play as the papacy you can also simply move it from the non-playable section to the playable section but there are no guarantees on how the game will play, crusades will be disabled if you do this.

    And the Mongols? Timurids? Aztecs?

    This is not recommended as they have special conditions, such as reaching a ceratin date etc. Doing this may result in an error.

    As requested by my good friend Viking Prince Here is the" OLD FASHION WAY to unlock factions. You need to either play a short or long campaign you need to destroy factions, to enable them as playable afterwards.

    Example of the file


    Updated on Jan 23rd M2TW Modifications Links by Rebel6666

    Spoiler Alert, click show to read: 

    So as requested by some members here I have now added a couple of links and description of Mods:

    Mods only for Medieval 2:

    CLOUDS ACROSS EUROPE V1.4
    Creator Zephrelial

    Mod Information: LINK

    Note that the basic aim of the mod is to enhancemtw2 by adding new factions,units,textures,guids,missions etc.And also realism and historical accuracy are the other most important goals of the mod.

    Download Link

    Bug – Fixer Download: LINK
    _____________________________________

    BROKEN CRESCENT
    Creator Ahiga and Miray

    Mod Information: LINK

    Broken Crescent is the premier total conversion for Medieval 2: Total War that centers upon the epic wars and empires of the medieval middle east. It is a tour de force in sight, sounds, colors and pure gaming that gives a new lease on life for your copy of M2TW. Featuring over 16 new factions, 300 beautifully crafted units, a gorgeous new campaign map, innovative battle and campaign dynamics, brand new music and much much more.
    __________________________________________

    THE DARTH MOD V 1.4
    Creator Darth Vader

    Mod Information: LINK

    The first wave of attack was successful (with 1.4C). Now it is time to start the final Invasion.
    DarthMod series has been known for the focusing in Gameplay and AI and with this version you will get hopefully the best of this game under patch 1.2/1.3

    There will be a new evolving team which is assimilated to the dark ways and wishes to continue the DarthMod name trademark. A new hope? I will be around for a while to consult them from time to time in order to be able to preserve the usual DarthMod quality or even better it.
    __________________________________

    HERE is the link for other M2TW only Mods


    Updated Jan 23rd Kindoms only Mods by Rebel6666


    Mods only for Kingdoms:

    Thera a new beginning:
    Creator TheFirstOneill

    Mod Information: LINK


    Thera, A New Beginning


    Based on Gundugs excellent otherworld map. This fantasy/non-historical mod is based around factions from different era's and technology levels. Each faction will have a very different feel, and will play quite differently.


    Historical Background


    Thera is a world much like ours, but she has been punished by the gods. For two centuries she has been ravaged by plague and natural disasters.

    At the start of 'Great Torment' as it was known Volcanos erupted, the land was shaken by earth quakes, black rain fell, and the sun was blotted from the sky. After this the the winters lasted longer and longer, the snows in the north refused to melt. In the normally fertile central lands, the crops withered and died. With the crops gone, there was no feed for livestock, and so they perished. Soon it was the people who withered, as the weakenedpopulations scumbed to disease and plague. The entire world population was decimated and many great nations fell.


    ______________________________

    The Retrofit Mod v1.0:
    Creator UnspokenKnight

    Mod Information: LINK

    Retrofits various Medieval II Total War (M2TW): Kingdoms features, improvements and bug fixes to vanilla M2TW. This mod can be used as it is, or as a base to create additional M2TW: Kingdoms mods

    Grand Unit Addon Mod for Retrofit Mod 1.0 : LINK

    This mod adds many of the new units from the Medieval II Total War - Kingdoms expansion pack to the Retrofit Mod 1.0 for Medieval II Total War, enabling you to recruit the new Kingdoms units in the Medieval 2 Grand Campaign. In addition, the Grand Unit Addon Mod includes many Kingdoms features, several minor bug fixes, and makes available many other unit additions from the original game that were previously not enabled.


    Custom Campaign v2.0 : LINK

    ______________________________

    Lands to Conquer Gold
    Creator Lusted

    Mod Information : LINK

    Overview

    Lands to Conquer is a mod that is aimed at improving the gameplay of Medieval II: Total War.

    For those of you who have played the mod before, Gold is basically a refined version of 4.1, featuring fixes for the few bugs in 4.1, and a redone Campaign AI that the creator made from scratch. He also improved the Battle AI.

    The Gold version of the mod uses the Kingdoms expansion to add in new features and other things to improve the mod. Boiling oil, controllable reinforcements, unit balance, new rams and many other things from the expansion are added into LTC. LTC Gold also takes advantage of new modding possibilities available in the expansion to enhance the mods gameplay.

    It also features improved Battle and greatly improved Campaign AI that has been redone from sratch to provide better battles and an enhanced campaign experience. The AI is also used in Stainless Steel 5.1.

    And also whilst it uses the Kingdoms.exe, it does not modify the Kingdoms campaigns, the mod just uses the .exes to bring over more features to the mod as it has it's own campaigns.


    _____________________________

    Stainless Steel 6.1
    Creator KingKong

    Mod Information: LINK

    Acombination of bug fixes, many small mods, better AI and AI armies, more provinces, graphical improvements and many other campaign and battle map changes. The whole game offers now a much greater challenge!

    And HERE is the Link for other Kindoms only Mods


    Updated Jan 28th How to start an After Action Report (AAR) by Rebel6666


    OK so here is 2 links of AAR's that I have helped with. Have a look at them it will be easier for you to see what to do then me explainning as I did with the two members.

    This first one is with Poland:

    This second one is with Russia:

    The third is:Here is a winner of the AAR's competitons

    Here is the Link for the rules:

    Hall of fame:

    Plus where you need to post your AAR, You will also be able to see other AAR's.

    BTW remember that this takes time to do an AAR, it's like if you were reading a story to someone. It needs pictures and alot of details, it's important. Some would consider this a bit of a Role Playing story.

    Another thing you can win awards for this a little badge that will be under your name as a Bronze, Silver or Gold winner. You need to update your AAR, Refer to the AFQ and rules link above that I have provided.

    So my best tip here would be add screens to explain, you will need in- battle pictures, some of your generals this with a nice detailed story to your campaign.

    You also need to decide the objectif of your AAR's faction before you start, make a good introduction of your faction, their generals, their starting empire plus explain each steps of your actions on each turn, battles, diplomatic agreements etc....

    Hope this helps but also keep in mind that is a good amount of work but it's fun to do. So if you have the time and the patience I encourage you. Any questions you can PM me.

    Little tips: Have a look and read a couple of them before starting this will definatly help you out.

    Regards Rebel6666


    Updated February 5th, 2009 The M2TW Agents Guide by Rebel6666

    Spoiler Alert, click show to read: 

    The Agents Guide

    So as everyone already knows, there are a couple of agents in M2TW. For those who don’t know them here they are:

    - Merchants
    - Priests/Imams (The Muslim Priests), Heretic/Witches
    And the Bishops from the Orthodox religion
    - Princesses/diplomats
    - Spies
    - and Assassins

    In this guide I will explain a bit what all of theses Agents bring/do in the M2TW game. But first I want to add that each Agent if used and recruited often can give bonuses (Guilds); please refer my Guild Guide in this Great Thread it will explain you what they do and how you can trigger them.

    A short story; Guilds gives you’re Agents more experience from the moment you recruit them; for example: Recruiting an Agent with your first Guild will give you 1 more experience point, the Master Guild 3-4 more points and the Head Quarters Guild 5-6 points, your agent won’t always start with the same experience sometimes more points and other times less.

    Merchants:

    The first thing that merchants do is to bring you money, recruiting a Merchant costs you 550 florins and doesn’t cost you 0 of upkeep afterwards.

    Purpose:

    Merchants gather more money for your faction to enable you to build your empire, the tech. level of your cities and to help paying your army upkeep.

    Training a Merchant: A new Merchant will have basics skills; you will need to train them to make them better and make them earn more money for your faction.

    Here is how you train your Merchant:

    - By placing him on a resource and letting him gather experience.(this is the slowest process)

    - By making him acquire other Merchants trades. I call that Merchant wars (BTW if you attack another faction merchants this will not affect your relations with them)

    - With Guilds like explained above.

    Hint: Some Resources are better than others and the further you are from your capital the more money your merchant makes.

    Priests/Imams/Orthodox Bishops and Heretics/Witches;

    So here I will only call them Priest if you don’t mind unless I have to write something specific to one of them. The Priest are IMO more important for the catholic factions in this game because of the implication of the Pope.

    Priest are recruited from churches, they cost 200 florins to recruit and another 100 florins of upkeep.

    Purpose:

    This is why you need to recruit Priests:

    - For a catholic faction this will help to keep a good relationship with the Papal State.

    - For any religion this is good to help religious unrest on your lands, this is even more important when your faction is bordering another faction whom their religious beliefs are different than yours.

    - Priest are also good to keep out Heretic Priests or Witches out of your lands.

    Princesses/diplomats:

    Now this Agent is probably the most important one. Lol… No I’m joking here.

    Ok so theses two agents are probably the ones you will play with the more regular diplomat.

    Diplomat costs 250 florins to recruit and 50 florins of upkeep. Princesses on the other hand don’t cost anything.

    Purpose:

    Princesses:

    - You can marry them to one of your generals; this will give them loyalty and also be incorporated in your family bloodline.

    - You can use them as diplomat to conclude agreements with other factions.

    - You can also make marriages Alliances to make your alliance with another faction stronger so they will less betray you (unless it’s Milan lol)

    - You can steal other faction’s generals with them but be aware that you could also lose you Princess in the same process, have a look at her % rate of success before trying.

    Diplomats:

    - You most likely use them to conclude agreements with other factions, like ceasefire, alliances, etc… Bride rebels armies or other faction generals.

    To have better traits with Diplomats and Princesses, the only thing you need to do is to make them conclude good agreements; bad agreements will take away any good traits that you had before this encounter. For Princesses its called charm displayed as hearts and diplomats are little management icons similar to what governors have when they manage a settlement.

    Spies:

    Spies cost 350 florins to recruit and 100 of upkeep. Spies have different uses.

    Purpose:

    - They can be use to enter other faction cities or armies, this gives you a better look at what they have in garrison plus when in a city a Spy can open the gates for you.

    - They can also be used to foresee coming attacks from your enemies as they have good sight range.

    - They also can be used as a weapon, yes they can…. For example: You have a city with the plague in it, here I’m not talking a bout the big one but from time to time there will be little plagues in your cities, the thing is bring your Spy in it be sure that he catches the plague and then bring him in your enemies settlements. By doing this you will infect them.

    - They also so have a defensive role in the game. Having one in your moving army can help you see ambushers so you won’t get caught in one.

    Assassins:

    Assassins recruit cost is 500 florins and 200 florins of upkeep. Assassins have two primary usages.

    Purpose:

    - As they name states it they kill people, most likely anything on the Map even the actual Pope.

    - They can also be used to sabotage buildings in your enemy’s cities. This can be a way to destroy your enemy’s economy.

    - They also can be used as scout like a Spy.

    Assassins need to be trained the same way as any other Agent by using them if you want them to have better traits that will give them a better rate % to succeed in their missions:

    Hints:

    Diplomat: Need to talk and conclude deals with other factions

    Assassins: Need to kill and/or sabotage

    Spies: Need to infiltrate cities and or armies

    Any kind of Priests: Need to convert population to their religion and to kill Heretics or/and Witches that are on their lands.

    So here is a global guide on how to use each Agents in this game, if you have any questions ask here in the Great Thread, if I don’t answer others will.

    Regards
    Rebel6666


    Last edited by Silent Assassin; August 06, 2009 at 01:53 PM.
    TIME TO DIE!!!! Proud Son of Viking Prince

  3. #3

    Default Re: Please members don't post here as I'm updating th Great Thread for it to work better

    Update Dec.31, 2008 with Economic Guide for M2TW made by Forlornhope.

    Spoiler Alert, click show to read: 

    Getting an economy is the stepping stone to everything in m2tw. Without money you can’t create buildings, train troops or even defend yourself. Without money in M2TW you are nothing but fodder to be chopped up and ground into a red paste. This guide will give you a quick rundown on generating a huge pile of cash to fund your expansion.

    The first key to untold riches is roads. Without roads your economy is utterly stalled and will never be anything. Roads increase trade by quite a bit and they enable your armies to move much further than they could otherwise. Always construct roads everywhere you possibly can when you have the funds.

    Next you want mines. Mines are expensive at first, but they provide a substantial reliable income that never changes like farm income does. Mines cannot be destroyed, so if you take over a settlement that has a mine you will get their mine too and they can get yours.

    Trade rights are also very important for your financial health, as they bring in a lot more money from trade with other factions. Send a diplomat to every faction you can and ask for trade rights and offer map information or a few florins and usually they will accept. Quite often factions will ask you first.

    Next you want farms everywhere. Farms increase population growth and money from farming income. Open the settlement scroll then click the show settlement details button at the bottom of the scroll and then click the scales icon on the bottom left of that scroll to find the economic status of the settlement. At the bottom you will see the farm income and what sort of harvest it was. The type of harvest you get is random and better harvests bring in more income. If the settlement has a good farm income, say 250+ florins you should build farm improvements to improve it further, building farms in poor areas will encourage more population growth, as you are providing a food surplus. Building farms everywhere when you have money to burn is a good idea, as it brings in even more money and grows your city faster. The whole point of growing your cities, besides to access more advanced tech is to tax them.

    Next you have to organise what settlements are cities and which aren’t. Cities will provide much, much more income than castles will, but they are a lot harder to keep loyal, as castles have much higher public order and you can get away with just 2 or 3 units garrisoning or maybe even none. Towns are unruly and need a much larger garrison, even with public order buildings. Towns are harder to defend as they have lousy walls compared to castles. Towns also grow faster and can build much larger religious buildings. They also are the only places where you can train gunpowder troops, as you can only train gunpowder artillery in castles, not infantry or cavalry.

    It’s best to have castles on your borders with people you are at war at or will be at war with soon, which is basically everyone because of the shoddy diplomacy. Castles are far better at resisting sieges and are much harder to assault than towns. You should have all settlements in your heartlands, places you’ve conquered that are within your empire, away from the borders as cities, as they will hopefully not be assaulted and will make the most money this way. If you want to make copious use of gunpowder troops you should have a huge city close to the borders stay a city, so it can pump out gunpowder troops.

    Alos don't build every building in a settlement as its a waste of money. You don't need elite level barracks costing 9400 florins in a heartland settlement thats never going to be attacked.


    Settlements in m2tw can support a certain number of units for free. These units will have a blue background on the control panel when you click a settlement’s army tab. The larger the settlement the more free troops it can support. Usually you need more garrison to keep a city loyal than the free ones but it can be handy.


    The free troops with the blue background are easily visible.


    Next you need to get your garrisons sorted out. Army upkeep can be very expensive in m2tw and it’s a complete waste if you have elite knights costing 225 florins a turn garrisoning a settlement deep in your empire that will never be attacked. Always move elite troops towards the front, i.e. where you’re fighting to make use of them or disband no longer needed troops. Make sure you don’t leave mercenaries around in settlements. They are more expensive than normal troops and will drain your treasury fast if you leave a lot of them in your settlements. Just use the settlement flags to see how many men at a glance is in the settlements and disband and replace them with spear militia, peasant archers, crossbows or even just plain peasants.


    Tax will form a lot of your income and needs to be balanced. More tax will give you greater income, but will make the settlement unhappy. You can pick from low tax, normal tax, high tax or very high tax. Usually unless you desperately need money have the tax on normal or low as the hit to public order can be too great at higher tax rates. This is especially true if the city is huge. When a city has 30k or so people it will be so big it will bring in stacks of money even with a low tax rate. If you have a building in the settlement to allow you to hold races or jousts, such as a jousting field or a Plaza Del Toro there will be another option for daily, monthly or yearly races. Having more races will raise public order, but will cost more money.

    Trade is probably the most important part of your income and will form the largest part, along with taxes. It is not that important to know what a settlement has access to before setting up trade routes, just build the biggest market you can there and a port and merchant wharf line. If built you’ll bring in plenty of money, though of course huge central cities tend to make much more than out of the way places. Make sure you keep building roads when you have trade buildings up, as this provides even more trade. The merchants wharf adds more trade ship fleets to the settlement which increases trade ever further.

    big image to show detail (614k)


    This picture shows the various ways to see income and gauge trade.

    Central settlements like central Europe and Italy are very rich and there is a lot of trade if you build up your settlements. The number of carts or ships shows the amount of land and sea trade taking place. the ones with the most carts are the most profitable so keep them safe and enemies out so the trade flow isn't interrupted.

    Certain governors have traits than can affect certain income, like more or less tax income or trade. Having high or low taxes can also increase dread or chivalry. You should check your governor isn’t too incompetent before leaving him there. The management stat from RTW doesn’t exist now so it’s down to traits and retinue.

    Merchants aren’t really all that useful, tho they can sometimes make a tidy sum. When you make a merchant he will have a finance rating. This governs how good he is at making money and the higher it is the more he will make from trade resources. Trade resources are shown as things like small piles of gold or logs or goblets of wine. You then move the merchant over the resource and he will begin to trade. If you look at his scroll you can see what he’s trading and for how much. Mostly this trade will be a really small amount except for things like gold and wine. The absolute
    est trade opportunities come in the new world as you’ll get insane profits from tobacco, chocolate and coffee. Make sure you take some merchants with you on the boats to the new world and some priests to convert the heathens.

    As you probably already know it’s possible for your merchants to buy out other merchants which will put them out of business, which can be handy if they are sitting on a juicy resource you want. If the merchant fails to buy out the other merchant he might be forced to quit instead and you’ll lose the merchant. Only target merchants with less or equal finance than your merchant has.

    Also check what governors you have, particularly for your huge money making cities. Though acumen doesn’t exist anymore, a governor can have traits pertaining to governing a settlement. If he has traits like corrupt or the extravagant line you’ll make less money from the settlement as to governor takes it for himself. Governors with bad negative trade traits are crippling as well. Don’t put these guys in charge of large settlements. Also high dread or high chivalry helps keep the population in line, so for cities it’s good to have a governor that’s high in one of these status if he’s equally good as a general with a lower stat.


    Finally protect your lands. Enemy armies in your provinces block trade routes and if left there cause devastation which loses you money, a black burnt area around an army shows it is causing devastation. Rebel armies often do this, so send out troops to crush people that hang around in your land. Neutral and allied armies don’t do this.


    The black area shows where my armies have been devastating the Hungarian's territory

    his is Budapest's status after i took it. Notice the devastation. This goes away over time.

    Naval trade can be blocked by enemy ships blockading your ports, stopping trade. Have a navy ready to fight off the attackers and keep your lucrative sea trade open.


    Make sure you keep you sea trade open!

    You should also try to keep peace with factions for as long as possible if you are trying to make money, so you keep you trade rights with them. However taking new settlements is the way to make even more money, as that provides more trade and more tax.

    I hope this guide has been useful! Now get out there and rake in the cash!

    V1.0


    Updated Jan 10th, 2009 M2TW Guide using Gunpowder Units by Forlornhope.


    Spoiler Alert, click show to read: 

    Gunpowder is a hard unit to use in m2tw for some people. When used properly gunpowder can be a truly deadly force, able to crush the most heavily armoured troops easily and cause mass routs, but when it’s used poorly gunpowder can be very useless, especially with the bugs.


    Gunpowder Infantry and general notes


    In the right situation musketeers can decide a battle.

    The first thing to remember with gunpowder infantry is they aren’t meant to run around and skirmish like archers. Gunpowder is a slow unwieldy weapon and units that use it fire slowly and take time to get into formation. When using gunpowder you want to let the units get set up, leave skirmish off and not move them until you absolutely have to, so they can volley fire uninterrupted and as quickly as possible. It doesn’t matter how close the enemy gets, the closer they are the more devastating their vollies will become.

    The second thing to remember about gunpowder is that it scares the crap out of the enemy. Any enemy that take casualties from gunpowder units suffers a large morale penalty and they will rout quite easily,. Gunfire also inflicts great damage on armoured and unarmoured units alike as it goes stight though armor. Muskets are deadliest at this as they can pierce any armor in m2tw. Aquebusiers are less powerful against armor than musketeers but still far better than most things, and handgunner bullets are the weakest armor piercers. Massed heavy infantry are exactly the sort of target gunners should be used against as they are slow to reach the musketeers and heavily armoured.


    When using gunpowder you can and will hit your own troops. They can’t arc their fire like archers and if you fire into a melee with your gunners behind your own troops you’ll hit your own and because of gunpowder’s morale penalty you could easily rout your own men. That said you usually have to accept a certain amount of friendly causalities when using guns as their tactics usually have them behind something else.


    Gunpowder infantry should be deployed in two ranks. This way they can bring the maximum amount of guns to bear on the enemy and they reload very quickly. In three rows the front gunners wait until the previous front rank has moved to the rear and started to reload before they fire. In two ranks the front rank simply steps to the side moving directly to the back and reloads while the front fires. Then that row moves and so on. The guns will stay far more organised and will fire much more quickly in two ranks. In more than three rows less men are firing at once and the third rank and ones further back will not shoot, making their volume of fire less than it could be and wasting their potential. You should only deploy gunpowder infantry this way when they are firing into a narrow frontage.

    Gunpowder infantry use a revolving fire style where the front rank shoots and then reloads. They then run to the back and the front rank fire and the cycle repeats. The front rank usually will not shoot until the previous front rank is in position at the back and facing the front, which is why two ranks are best. This takes a few seconds, which is why gunpowder must be kept still.

    Gunpowder, because of its slowness and setup time must be used with another unit to protect them, unless you have so many gun units you can shoot the enemy to pieces before they even get close. Pikemen are the classic choice for this, together musketeers and pikemen for the infamous pike and shot formation. I m2tw however it’s better to have your pikemen behind your musketeers if your facing slow infantry this gives the gunners a unobstructed view if the enemy and removes the possibly of friendly fire. If you are facing fast cavalry have the pikemen in front of the musketeers. Or just to the side to intercept their charge. If you are facing a lot of archers, you shouldn’t be even bother with gunpowder as their slowness and lack or armor and bugs make them almost useless and they will take too many causalities. Musketeers are exempt from this rule as they have such a huge range and kill morale so they can rout archers before they can do much damage. Any infantry that can hold a line, like heavy swordsmen, spearmen or even knights can be used instead of pikes. Having cavalry on the flanks to intercept them is a good idea too.


    (Thanks to cottontail for this idea, said in his words) For the Turks, Janissary musketeers and archers are a deadly combination. First, you let the Janissary archers deploy stakes, and retreat them behind your main battleline. Then, you move your musketeers up to the stakes, where they can fire upon the enemy without any fear from any cavalry. This makes up for the fact that the Turks do not have any pikemen. The combination of deadly arrowfire and demoralising musketfire should rout the enemy even before they reach your battleline. Same with the English, only with longbows and Arquebusiers instead.

    It is important to keep Aquebusiers and musketeers out of counter fire. There is a bug in m2tw that causes Aquebusiers and musketeers that get hit with missiles to get stuck in reforming or just keep shifting men around uselessly instead of just shooting. This is lessened if they are in two ranks but it still sometimes happens. Hand gunners do not have the fire_by_rank attribute that the other gun units have and doesn’t suffer from this problem. Try to use some other unit to draw fire. This against isn’t much of a problem for musketeers because of their huge range. A hilltop is perfect for musketeers because they get an even longer range and it’s harder for archers to shoot back at them. Always deploy your gunners on a hill if you can.


    M2: TW Kingdoms notes


    No bugs mean gunpowder infantry are deadly in kingdoms.


    The new gunpowder infantry is much better in kingdoms as the rank fire system works properly. The front rank will fire and then reload and stay kneeled until the second rank has finished firing. The first rank will then stand up and fire while the second rank reloads and kneels and so on. Ranks further back will not shoot, so again deploy them in two ranks. Because of the unbugged animations gun units work fine under fire and will keep shooting. It’s still not a great idea to keep them under fire as gun units have weak defense and little armor.


    Even while taking losses gun infantry work fine in kingdoms, if they are new.


    Note that only the NEW gunpowder infantry works properly Kingdoms Aquebusiers are exactly like the ones in the original m2tw.


    Handgunners

    Hand gunners are not meant to be used to stay back and shoot like the others. Handguns have a short range and they have a much better attack and defence than Attack: 11 Defense: 13 Armor: 7 compared to Attack: 6 Defence: 3 Armor: 0 for both Musketeers and Aquebusiers and they are best used to fire a volley or two into the flanks or rear of an engaged unit to wreck their morale form the gunpowder attack, then charge into melee, where their good stats and the enemies lowered morale from their gun attack will help them triumph. Against already engaged units this will almost certainly make them rout.


    Notice that the knights even though they are elites and aren't losing have wavering morale because of the gunfire the hand gunners are hitting them with. With another unit of gunners these knights would probably rout. This is how hand gunners should be used.


    Don’t try and use Hand gunners like normal gun units, as they have too short a range and their accuracy is too low.

    M2: TW Kingdoms notes


    Magnelwyr are quite versatile.

    Handgunners are the same in kingdoms, except there are more of them, particularly in the Crusades where everyone has a unit of them with slightly differing stats. The Magnelwyr are an exception however. They are the only gun units to have a shield and axe and thus can survive in melee better than the other handgunners, even tho their attack is still low. Their missile attack is also slightly lower than other hand gunners.


    Gunpowder Cavalry


    Nothing shuts up knights better than mounted gunpowder.


    Gunpowder cavalry is completely different to infantry. It is unbelievably deadly to just about anything, with a great combination of speed, armor piecing ability and raw distance firepower. The best tactic with them is to either simply stand off and shoot the enemy, the AP and sheer power of the units guns will shred them quite quickly, or run to the back of the unit and shoot them from behind to prevent shots being blocked by their shields. The two units in the game are very different and tactics will be advised separately here

    Reiters are a Holy Roman Empire high tech unit. Only at the very end of their cavalry tech tree does the HRE get Reiters. They are medium cavalry with a good melee attack and a huge missile attack as well as good armor and defense. They wield a pistol and a spear. The pistol pierces armor and has about the same range as Aquebusiers. They can circle and shoot and skirmish. Reiters are best used to shoot the foe in the back as their short range can make them somewhat vulnerable to archers. The Circle and shoot formation helps immensely with this however. Reiters are best used against any slow unit like infantry. They perform equally well against heavy and light infantry. When facing many archers, the Reiters have good enough stats to fight in melee and kill them that way.


    Camel gunners are very different to Reiters. They are a Moorish unique unit and like the Reiter they are high up on the tech tree. Unsurprisingly they ride camels and are armed with a long range musket, a sword and are unarmoured. Their defense is very poor. Camel gunners have a HUGE range as soon as the battle starts they will be able to hit the enemy with their muskets they are also quite fast and can skirmish.


    Camel gunners don’t require much in the way of tactics: they are incredibly devastating, shredding just about anything that moves. With heavy slow infantry just blast them from the front, and send some gunners round their rear and fill them full of lead from both sides. Anything but knights will rout very quickly and everything including knights will be ripped to pieces by the massed ap attacks. Against cavalry they are almost just as effective. Missiles are more effective against cavalry in M2tw, because the horse is a larger target for them. Thus camel gunners are great against horses as well, as their musket fire will kill the horses very easily. They can skirmish away from heavy cavalry quickly enough, but because skirmish mode sometimes fails to work they can be caught. Camel gunners have an advantage against cavalry in melee as well because of their camel class bonuses, so even if they are completely outmatched, like fighting heavy knights they will take more than a few down. They have good morale as well enabling them to take losses and keep going for quite a long time.


    Archers seem like the biggest problem for camel gunners, but these units, like all missile cavalry can fire on the move so the best way to deal with archers is to take the gunners off skirmish mode and run them past the enemy at close range but far enough to avoid melee. This way their movement will help them avoid arrows while they will still shoot at the enemy archers. Their closeness and damaging missiles will often cause the archers to rout.


    Archers/Crossbows are pretty much useless against the huge range of gunners as well.

    About the only weakness camel gunners have is massed archers and the fact they are very expensive indeed, one of the most expensive units making it hard to replace losses unless you’re rolling in money. If you use gunners properly however you shouldn’t suffer many losses.

    In the end, gunpowder cavalry is very, very effective, much more so than gunpowder infantry, as there’s no need to worry about cavalry or annoying bugs and you can just watch your enemy fall in droves.

    M2: TW Kingdoms notes


    Gunpowder cavalry is still deadly.


    There is a wider range of gun cavalry in Kingdoms’ various campaigns and it should be used just like the m2tw version. Take them off skirmish and run them close to the enemy, keeping them moving so they avoid the enemy missiles and shred them with their own and get behind the enemy to bypass their shields. Gunpowder cavalry is just as deadly, if not more so in kingdoms than it is in M2tw.

    Gunpowder Artillery


    Blowing up enemies with artillery is always fun, if you can hit them.

    Gunpowder artillery is used much like normal artillery. It is best used to fire into dense concentrations of enemy units. It causes a big morale penalty like all gunpowder but it is really inaccurate. The first cannons are apparently less accurate than the later ones but artillery as a whole is unreliable and you have to be lucky to get a hit. They are much better used against walls.

    Gunpowder artillery destroy stone walls very easily as their shots have a lot of power. The ultimate example of this is the Turkish Monster Bombard that can destroy even the biggest of walls in one shot. Gunpowder Artillery is very useful for destroying towers to make the assault less costly for your troops.

    Monster Bombards laugh at walls.


    The exceptions to this rule are Ribaults and Monster Ribaults These guns are a collection of small; tubes that fire together and pump out a hail of lead. They have a short range and only require one man to man them. They are quite accurate and cause a huge morale penalty. Monster Ribaults are much larger version of normal Ribaults. In normal firing mode they act like smaller Ribaults so they aren’t really much more useful than the standard Ribault. They have a barrage ability that causes all the barrels to be loaded but it takes almost minute to reload and it noticeably less accurate, tho the repeated gunpowder hits will have a huge effect on morale, probably routing the unit it’s aimed at. The barrage ability looks cool too.


    The Rocket Launcher, an amusing artillery weapon used by the Mongols fires a huge barrage of 36 rockets which are very inaccurate and land over a large area and are flame weapons. They are excellent for weakening masses of troops and for firing at enemy artillery since the many fiery projective gives them a good chance of hitting an enemy artillery piece directly and destroying it outright or setting it on fire making it useless.
    An annoyance of artillery is the fact is has a minimum range. If you tell a unit to fire and it’s in range but the unit wont shoot, that means the enemy is too close to target. Only large cannon type artillery have minimum ranges, Ribaults do not. Use fodder and other troops to keep enemies far enough away from the artillery so it can fire or target more distant enemy troops.

    Kingdoms have the same artillery as M2tw so there’s really nothing to say about it.


    Updated Jan 14th France Guide by France


    Spoiler Alert, click show to read: 

    Early France


    First off, the French in the early period are very vulnerable to being destroyed to say the least. They are surrounded on all sides and have horrible early period soldiers. They do make up for these cons, however, as they dominate the late game. You'd have to build up France early on by taking the rebel settlements around your starting position before others get to it. To prevent them from doing so, I'd suggest taking the farthest but reasonable settlement from you (for example, to prevent HRE from taking Bern, or Spain/Portugal from taking Zaragoza). Of couse it would make the surrounding factions angry, but that's what alliances are for! If they do happen to break the alliance, however, the Pope will soon break up the fight, or excommunicate someone in the process. You should then progress to the surrounding rebel settlements which you haven't taken yet, but keep in mind that Brudges and Antwerp are a pain to take, so try getting to them first. Now it's time to switch around some of your castles to cities. I always try to make Angers a city, and I usually change Caen and Bordeaux into cities as well. I like Toulouse a castle, as it will definately keep the Spainish out. If you really hate the Milanese that much, you could even change Marseille into a castle. Once you've established a basic empire, the English will still pose a threat to your inner states. Try luring them to attack one of your cities by leaving it with a low garrison. If they're too stupid to attack an easy target, go wipe before the Pope has time to think what just happened. A good strategy to doing this is by setting large armies near each other their cities before you launch your attack and try to take all of their cities at once. After that, I'd suggest having an alliance with the Scots, but conquest is all the more glorious. You should then focus on the Germans to the east. If you managed to take Metz/Bern, conquering the HRE will be that much easier. They are a very large faction and aren't gonna be beaten quickly, so be prepared to avoid getting the pope pissed off. By this time, you should already have a diplomat at the pope's office, so offer him an alliance, map information, cash and a tribute if you please. Don't offer trade rights, as he's to far for it to be of any use. Try taking HRE's castles first, and don't be shy to introduce your army to their capital. That should leave them weakened, but not out. If the pope at any time wishes you to stop, it would be best you do, you can't afford defending from crusades this early on in the game. If the HRE is small enough to not be a threat, try pulling back your forces for this time of pacifism and money making. If you are not aware, the Pope doesn't get pissed at you for defending from an attack or breaking up enemy forces in your lands. You should focus on taking some of Spain through pacifism. Send loads of spies to small cities and wait for them to revolt or bribe them into your country. Each city you take helps. The HRE should soon be finished off and you should now be looking at the already weakened Spain. They aren't much of a problem while you already got some of their land.

    Late France

    The late period for France should be a breeze for all players. The extensive ability of their units would prove lethal to all who oppose them. Start setting up empires all over the known world, but the most important place would be near Jerusalem. Those nasty Mongols are going to be tearing at those poor factions, and you're the only one who could stop them. More about the Mongol invasion below. Anyway, when you have good relations with His Holiness, call a crusade near your Palestinian empire and send a good force to rid the place of the nasty Egyptians or whoever. When you're about to take a targeted area, join the crusade with all your soldiers around the world to gain some experience after the successful crusade. That should make it much easier to conquer the known world.

    The Mongols Invade

    The Mongols are coming! Hold all conquests and make peace with other factions and prepare to fight the second hardest war you'll be fighting in the game. They usually appear from the Middle East and go for Antioch first in my experiences. They have really annoying Cavalry, and the more annoying Harchers. Be sure to have tons of spearmen and Lavalry to beat back their Harchers. They have really good generals so it's a good opportunity for your assassins. After you beat back the first wave, their will always be another. This one is a lot harder, as their already tough full stacks now have more experience and a lot stronger general. The Mongols are so numerous, that even if you win a battle, they can send another army to mop up right after. Once you finish off the Mongols, be prepared for the biggest war you've fought yet. The Timurid War.


    The World is Round

    This may be an exciting event for Europe, but for the average gamer, it's kind of a pain. First of all, not many of those savage native Americans in an army would prove to be a complete steamroll. On the contrary, an army swarming with Indians would prove fatal. They could swarm over any and all of your footmen, so watch their back. Be sure to pack Merchants in your French Mayflower, as the riches there sell for a lot, and it's a long way from home, and be sure to bring priests as well, because every region there is Pagan. What really makes the Americas really dull for me is the separation of each city. Walking back and forth could really be a pain for me, especially since I'm pretty lazy.

    Units

    Infantry- The French field OK infantry, but I happened to drop Heavy Pike Mlitia into the mix an found it helped a lot. Later in the game, you could have some French Dismounted Knights as your army's backbone, with some Sergeants on the flanks to protect from cavalry charges.

    Cavalry- Fielding the best cavalry in the west is a quite fitting title for the French. Able to send the fearless Lancers in the heat of battle is quite a privilege. As soon as they or any other of French's great cavalry units are in position, their devastating charge will rip through any unit.

    Missile- French's missile units aren't bad at all, as their Scot's Guard isn't bad at all. Having excellent range and damage, this unit is notoriously able to compete with England's mighty archers.

    Gunpowder- France would probably be the late game king if it wasn't for their lack of sufficient gunpowder troops. Only accessed to the Arquebus, France's gunpowder troops are quite "limited". Their Artillery is bad at all though, as their Serpentine could really rip through compacted ground of soldiers. Other than that, their gunpowder artillery is kinda the same as everyone else's.


    Updated Jan 21st Strategic Guide for Newbies by Viking Prince

    Spoiler Alert, click show to read: 

    Version 1.0

    Date 1.16.2009

    By Viking Prince

    With emotional prodding by Rebel6666

    Contribute to the next version and your name can be here!


    Introduction

    First, I am still amazed at how many new players are registering to the TWC site. There are probably several that do not register for every one that does register though. There are some very good reasons to register. First of all, TWC has a huge amount of traffic so your questions have a good chance at a knowledgeable answer and not just a guess. You can be a bit more interactive with the questions and answers; there is private mail; there is profile messaging; modification coding; etc. All very good resources to help you learn how to play the game and when you have a bit of experience under your belt, you will be able to contribute some great stuff to the site.

    Before reading this guide or any guide, please read and be prepared for a quiz on the printed manual. Just kidding on the quiz, but the manual is important. If you prefer an online version, Google is your friend. Hints for searching: the game is part of the Total War series, is published by Sega, and is created by Creative Assembly. Enough with the advertising – let’s get started on general strategy!

    This is more of a broad strategic guide rather than a guide to the perfect plan to plan a particular faction. There is plenty of each to look at though. Search and ye shall find. I will be mostly referencing to France as a starting faction. Odd that it is France? Not because I prefer playing them, but because they fit best with most of the points that I am going to make. For those who care, my favorites are Spain (Jinettes), England (Longbows), and Russia (Cavalry and wide open steppes). If people are interested, some specifics on these may follow this guide. Yes, another reason to register – encourage those who are providing good stuff to continue and offer suggested improvements to those of us who are trying but not quite up to your standards.

    I will try and avoid discussing what is in the manual. If you can read it here, you can read the manual before reading here. I expect that repeating information will bore you and my typing is not necessarily more entertaining than the manual.

    Study the Units and What They Can Do

    Most faction guides start out with a brief run down of the units available and their pluses and minuses. This is an important piece of information. For example – with France – history shows that they relied much more on mounted knights than England. The English longbows were the famous difference in many key battles, but the French held their own for a long time with nobility on horseback. You can choose to play the French differently, but for me historic paths are the most useful to follow the first time through a game.

    I like to create balanced armies. This means (if you have read the manual, you already know this) a mix of infantry, cavalry, spear, and missiles. In the beginning your general is your cavalry and your starting units need to be your armies. Recruit a unit or two as needed, but accept that life is not a perfect plan. If the French were to create an unbalanced army, they would load up on cavalry for frontal assaults. Later in the game, this will be a strategic option for any player choosing the French Faction.


    In the beginning your resources are tight (do not be fooled by the cash you start with – look to what your net spending is each turn. If it is negative – divide it into the balance and you will know when you will be bankrupt. Bankruptcy is not good in Medieval Total War since there is no government deficit spending like in modern times.

    A Typical Siege

    Before we decide what units should go where, it is important to know how capable the units are. This is not meant to be a tactical battle guide. It is important to know what you can do though, so that you can allocate the correct composition to an army and to know how many effective armies you can field. Where and when to attack are strategic concerns that can only be answered if you know how you will win the battles.

    Try out some of the typical units in practice siege battles – attacking settlements is the most common battles in the game. Let’s try a campaign siege against Bordeaux with the French early in the game. Before you attack, determine what you are up against. First the good news – You can reach the settlement immediately with a field army. Five units (1 mailed knights, two peasant archers, and two spear militia) can quickly engage the castle. Further a field in Toulouse, you have Prince Louis with two sergeant spearmen and a peasant archer. The bad news – it is an upgraded castle. I am playing with the Retrofit Mod and patched to 1.05. For me, this means boiling oil! At least it is not a better castle with two sets of walls to breach.

    If you inspected the units in the castle before attacking – always a good idea – you will discover four units: 2 spear militia and two crossbows. Also not that one of the militia has an experience stripe and thus attacks with one more point. It looks like a good fight with your field force. You possess five units against four units. The rebel crossbows are quite a bit better than the peasant archers and the spears are almost equal, but you have a cavalry unit to throw into the mix. Now you need to make a decision – to assault the castle of wait out a siege and have the rebels sally out to meet your forces in the open. Your units will have a tougher time of it to take the castle with siege equipment, but the cost of upkeep of your units for 8 turns.


    If you are going to breach the castle, you will need siege equipment. Your force gets to expend 75 build points per turn on siege building. This is not florins out of your treasury, but the productive capacity of the units to construct equipment. Rams cost 50, ladders cost 15, and towers cost 65. If you are in a hurry build the ram and one ladder or build 4 ladders. Rams and towers are easier to burn by defenders flaming arrows. The ram in my case can also flame up with the boiling oil. Ladders will not get flamed, but the unit carrying a ladder is more open and will take more hits putting the ladder in place.

    On the next turn fight the battle. Ok. You have fought the battle. If you are like me, the results were not very good. So fighting as soon as possible was not a good idea.

    What other options do you have?

    You can wait more turns and build better siege equipment suited to the available forces. For 150 point you can put two towers (and a ladder). By using two towers on one side of the gate you will find better results. First goes the militia spears to take the wall. You follow up with the peasant archers. Once firmly at the top, you will need to move the spears to the gate to open it for the cavalry unit. With luck and good timing, your cavalry will be able to run down a broken spear and a crossbow before they can reform in the flagged central square. You might find the win is acceptable. You might also decide that the chance of your militia spears taking loses and breaking and thus losing the battle is too great. I know that I enjoy close battles when I win, but always wish that I had put in more resources when I lose. You may also decide that you need better skills to win the battle.

    You may also want to auto resolve your battles. This is all up to you. I prefer to fight all the battles out on the battle map. This is a fun part of the game for me. Others find it boring and trivial. They are happy to auto resolve. Try playing both ways and select the style that is best for your own enjoyment.

    You can also bring up more units – remember Prince Louis is at Toulouse with some units. With the Prince present, you will also be able to hire some mercenaries to make the job easier. Mercenaries are not cheap to buy nor cheap to maintain, but neither is your army sitting and not fighting.

    Another option is to wait out the enemy with either the original force or with some reinforcements. If you use Louis, this should be an easy battle to win when the rebels sally out of the gates. If you use Louis to only recruit a mercenary spear to add to the siege, it still should be an easy battle. Try several options and you will get a much better feel for the simple beginning battles of the game. Save the game before the units sally out so that you can practice the open field battles also. Remember that the open field battles favor your cavalry and the settlement street fighting favors infantry and missiles. Your spears are best in defense of cavalry charges, but are ok on the offensive in the earliest battles in place of infantry.

    My preference is to wait out my opponents. For a 3 or 4 turn siege, this seems ok to me. For a wait of 8 turns, I would tend to use more units and simply take the place. This is not always true though. If you siege for 8 turns, other AI factions will not judge that this is controlled by your faction and yet they cannot enter the siege. Well, they can if allied to you to “help” an ally. Remember that the faction initiating the combat wins the settlement and not the faction that first besieged the settlement. Be careful. Or take advantage of an ally that can use your “help”.

    Where Should I Expand Initially?

    This is somewhat of a trick question. New players want to attack immediately and everywhere. This is total war, isn’t it? There are rewards to patience and also to decisive thrusts against an enemy before he has time to organize. The new player has the instinct to thrust. I would suggest learning when to wait.

    Let’s take a quick look at France. In the beginning the French control Paris, Rheims, Angers, Toulouse, and Marseilles -- five settlements. You are already one of the “big” boys.

    What are the adjacent rebel settlements? Going clockwise around France we have: Bruges, Metz, Dijon, Zaragoza, Bordeaux, and Rennes. Add in some easy to invade Mediterranean islands: Ajaccio and Cagliari. Before you start on your global conquest, it might be best to see what options nearby factions also have to expand. Remember it is easier to keep a peaceful existence with a neighbor that is busy with conquests of his own. If your neighbors have no place to expand without attacking another faction, they will attack another faction – even if this means breaking trade agreements and even alliances. You might complain when Milan “stabs” you, but if you are the only means for Milan to expand, you would do the same when playing as Milan. I mention Milan, because they are the most closed in of all your neighbors. Milan has the following rebel provinces adjacent at the beginning of the game: Florence, Dijon, and Bern. They also have the option for the same Mediterranean islands: Ajaccio and Cagliari. Yep. That is all that is available. Check out the rebel units in Bern. You can scratch them off of the quick list. So you can see why Milan will look at Dijon and Marseilles as good options even if they are French and not rebel held as well as the Mediterranean islands.

    Unless the French are willing to make an attack as difficult as the rebels holding Bern, be prepared for the Milanese to invade and possess your territory. Of course, if you want an initial campaign against Milan, grab as many of the rebel provinces as possible to force Milan to go on the offensive with a smaller resource base. Just do not do it and complain about a backstabbing Milan that has an alliance with France. If you leave the islands and Dijon to the Milanese – this buys time. The time is precious. Before Milan runs out of rebel provinces to attack, she will most likely be embroiled with her own wars with other neighbors and an alliance will last a bit longer. This gives the French time to build up the economy and to take on other opponents.

    Corners of the Map Are Easier Positions than the Center

    Take a look at France again. You have England, Holy Roman Empire (HRE), Milan, and Portugal as very close neighbors. Add in Spain, Sicily, the Papal States, and the Moors and you have quite a few potential wars to fight without even leaving the immediate part of Europe that you start in. Now take a look at England: France and Scotland. A bit further are Denmark, Spain, and Portugal. Also all but Scotland need a seaborne invasion to take out all of England. There is a similar situation with Iberia: Spain, Portugal, and the Moors are a triangle – any one can conquer Iberia and be playing a corner position.


    Back to our favorite example, France: One option for new players is to play France and make a corner position. The obvious choices are Iberia and the Isles. This type of a plan would then direct which rebel settlements to take and which to leave for neighbors to expand into without getting into a war with them. If France wants to establish a corner position with the Iberian region, then Bordeaux, Zaragoza, and Valencia are the most tempting rebel settlements. Also a Crusade against Cordoba will free up some upkeep of units. Remember the discussion on whether to wait out a siege or attack the city walls? Cordoba under a Crusade siege will buy you time to convert the population and build up your economy.

    Water Makes a Better Common Border than Land

    The computer program does not do as well in computing where to attack if a seaborne invasion is one of the choices. Call it a flaw in the artificial intelligence (AI) or just the way the game is coded. Maybe it is that the human player has too easy of a time when launching invasions. However, the game begins immediately after a famous invasion in 1066.

    With the knowledge of computer preferences and water borders, you can see how England may well be one of the easier factions to build up into an established economy. If you are playing the French – the only continental English settlement is Caen. If you seize Caen and then get a ceasefire, you are much safer from attack by the English. This is also a reason why the French like to grab Rennes, since this also reduces English expansion on the continent.

    Water does indeed make a better border than land. This does not mean that seaborne invasions will not happen. Good examples are the islands in the Mediterranean. Seize Ajaccio and leave a minimal garrison. The only question if you are playing as the French will be which faction will be the first to invade. You have Milan, the Papal States, Sicily, Spain, Portugal, and the Moors. If you are already at war with a faction, seaborne invasion chances rise. The richer the island is for trade, the more likely it becomes an attractive target also.


    Another example of likely seaborne invasions occurs in the Iberian Peninsula. There is a strait between Marrakesh and Cordoba. A naval unit will keep land units from moving between the two regions. If you are at war with the Moors, you can block this land movement. You will discover that the Moors may then look to a seaborne invasion. This means you have more settlements now at risk. Naval supremacy is expensive (check the upkeep costs). Garrisons that are not free are also expensive. You can get a ceasefire to reduce the risk or accept the risk. Just do not be surprised when an invasion does occur.

    Hamlet never said, “To Occupy, Sack or Exterminate – that is the Question”.

    I tend to role play the game a bit. For me, that means to occupy nearly all the time. As a new player it is tempting to sack and sack and sack. Turn all of Europe to a cinder and be wealthier than Midas. This is not an historic approach to the game, but it is only a game. Do what makes it fun for you. What I do is not even remotely right. It is only an opinion and a remark on my philosophy on what is fun for me.

    In game terms the three choices really mean money, control, and chivalry/dread. If you occupy, you will gain chivalry. Sacking means the loss of lives and thus a decrease in chivalry (or an increase in dread) as well as more income. Extermination means a much greater loss of lives. If you are a Catholic faction and the lives lost are Catholic – your pope rating will drop. The Pope does not like it when you kill fellow Catholics.

    For me, the sacking seems a bit extreme in historic terms and extermination is simply not an option. Also, I like to have chivalrous generals in my settlements to improve population growth and income. I also like the chivalrous generals in battle since they improve the chances of my own units to not break from losses and other factors that reduce moral. Other players like the high dread generals – they are really effective in the field to help break the enemy. As for extermination, many players like the option when the city has a large population and nearly all of the population is not of their faction’s religion.

    Hamlet also never said, “To Release, Ransom or Execute – that is the Question.”

    The chivalry/dread question also comes up when a battle is won and prisoners must be ransomed, executed or release. Release will increase chivalry if there are sufficient numbers. Execution will increase dread. Ransom is a neutral choice even if it is not paid and the prisoners are subsequently put to the sword.

    Once again, as a role playing human – I tend to release more than many other players. There are also some practical reasons for the release. If I am confident that the faction in question is no longer a threat, this guarantees some beat up units that will require some up keep. It is a bit different of a question when a noble has been captured though. The ransom is greater – thus the expression “a king’s ransom” comes into play. The possibility also exists that this can end the faction’s existence if there are no family members remaining to take the crown.

    This brings up another strategy that is useful for the new players to be aware of. Earlier I had mentioned looking at the enemy strength before entering battle. This is also a good time to assess whether the faction has too many family members concentrated in a single army. This is a very good reason for battle and capture. Capturing is best with an open field battle where your cavalry can run down broken units and capture the men involved as they flee in a completely vulnerable formation. Since cavalry is best for this purpose, this is a reason for a balanced army to contain some light cavalry in addition to the general. Light cavalry are good at only a few tasks, but running down a routed unit is one of there best abilities.

    You can also seek to kill the nobles during battle by concentrating your missile fire and trying to hit the heavy cavalry with a flanking unit once engaged. All good stuff to execute or ransom the enemy family members.


    Since Pockets Have Not Been Invented, Why Are the Florins Burning a Hole in My Pocket?

    There is a great deal to find on building an economy elsewhere and even in the manual. A few brief comments are needed here.

    First, build the cheap before the expensive. This is not just an admonition within a single settlement, but also a reason to allocate resources between the settlements. The first level farm may bring in perhaps 50 florins a turn. The second level costs more, but will still only contribute another 50 florins a turn. Farms can also improve population growth though. Population contributes to income as well as squalor. In the beginning you want the population to grow quickly, but later in the game it will be hard to keep up with the building improvements to serve the population and this squalor becomes an issue. You will note that various buildings increase population growth. This varies to a degree with the mod you are playing and also with the factions being played. Do not forget that castles behave differently than towns.

    Build to both increase revenue and to minimize upkeep. If a militia unit that can be built in a town is garrisoned in that town – there is free upkeep up to the rated capacity of free up keep units for the existing walls. Since a militia unit can cost 100 or more florins per turn in upkeep, a town that can house three units for free is a better deal than other structures that generate trade. I will nearly always opt for the 300 – 400 florins a turn that supports a garrison. First, the barracks improve the security of the settlement. This means higher taxes which can also lower population increases. Second, the garrison can be used as a part of an anti-rebel force so that a smaller professional force is needed in interior areas, if the professions are then even needed at all.

    Towns will produce more income than castles and can have the reduced costs of garrison upkeep. This will also mean the wise player will try to hold towns on the water for trade links and castles on the interior where trade options are reduced. Castles, for most factions, produce the better military units for a good professional army in the field. A growing economy needs the towns. The military usually needs the castles. Some will argue for a ratio of 3 to 4 towns per castle. Others look at the region and wish to maintain one good castle within each region. Others want the castles to make good borders with enemy factions since they are harder to capture and allow you to produce troops closer to the action.

    The important point is that the new player should have a plan and watch to ensure the plan is maintained or changes. Do not just do with the flow. Have a reason for what the structure of your economy is and how it develops.

    Another key to build an economy is to not spend resources that have no return to you economically or militarily. Not every town needs armor upgrades. Not every castle needs to be able to produce every unit. Specialize on where to recruit spy, archers, knights, high level naval units, etc.

    A Promise or a Threat: Final Words Until Next Time

    This completes this draft of the guide. This was a compilation of random notes that I had made when learning the game. I thought to never put this down in an organized fashion, but Rebel6666 has pestered me to contribute a bit to the discussion. So he gets credit for this as much as I.

    Remember this is a newbies guide. It is also a strategic and not a tactical guide. I have used the French in many examples, but this is clearly not meant to be a complete guide on to how to play the French. The fact that other factions were omitted should not deter the student from applying these ideas to many factions and the many situations that are not listed in the guide. There is a great deal that you will do when more proficient. There is also a great deal within this guide that you may disagree with.

    Comments and suggestions are always welcome. If I include your ideas in a revision, I will give you a credit for doing so. Help me make this better for all to use.


    Last edited by Silent Assassin; May 28, 2009 at 11:27 AM.
    TIME TO DIE!!!! Proud Son of Viking Prince

  4. #4

    Default Re: Please members don't post here as I'm updating th Great Thread for it to work better

    Updated Jan 21 England Guide for Newbies by Viking Prince


    Spoiler Alert, click show to read: 

    Viking Prince’s Faction Strategy Guide for Newbies to Medieval II Total War: England

    Version 1.0

    Date 1.20.2009

    By Viking Prince

    With emotional prodding by Rebel6666, additional ideas contributed by Sher Khan

    Contribute to the next version and your name can be here!

    Introduction

    First, I am still amazed at how many new players are registering to the Total War Community (TWC) site. There are probably several that do not register for every one that does register though. There are some very good reasons to register. First of all, TWC has a huge amount of traffic so your questions have a good chance at a knowledgeable answer and not just a guess. You can be a bit more interactive with the questions and answers; there is private mail; there is profile messaging; modification coding; etc. All very good resources to help you learn how to play the game and when you have a bit of experience under your belt, you will be able to contribute some great stuff to the site.

    Before reading this guide or any guide, please read and be prepared for a quiz on the printed manual. Just kidding on the quiz, but the manual is important. If you prefer an online version, Google is your friend. Hints for searching: the game is part of the Total War series, is published by Sega, and is created by Creative Assembly. Enough with the advertising – let’s get started on faction strategy!

    This is more of a broad faction specific strategy guide rather than a guide to the perfect plan. There is plenty of each to look at though. Search and ye shall find. For those who care, my favorites are Spain (Jinettes), England (Longbows), and Russia (Cavalry and wide open steppes). If people are interested, some additional faction specific guides may follow this guide, but they will be oriented for more experienced players. Yes, another reason to register – encourage those who are providing good stuff to continue and offer suggested improvements to those of us who are trying but not quite up to your standards.

    I will try and avoid discussing what is in the manual. If you can read it here, you can read the manual before reading here. I expect that repeating information will bore you and my typing is not necessarily more entertaining than the manual. I would also encourage a quick read of my Viking Prince’s Strategic Guide for Newbies to Medieval II Total War.

    I play my basic “vanilla” games fully patched and with the Retrofit Mod. My playing decisions should not change much between this and a strait out of the box play. I do highly encourage patching the game to 1.02 or downloading the Retrofit mod and patching to 1.05 before beginning play. This is up to you though. When you have digested a great deal of the game, you may also be interested in checking some of the fine mods (modifications) that have be created by enthusiasts of the game and its fairly open coded system.


    Why a Guide on England?

    A short answer is that all factions need a guide. The reason why this is my first faction guide is a better question. England is a great faction for a first try at this very fine game. Newbies need to learn. This is also one of the factions with which you can start play right out of the box. No need to modify code or file folders to play. I enjoy reading the guides and posts on TWC. Just as I did with my Viking Prince’s Strategic Guide for Newbies to Medieval II Total War, this is mostly a compilation from notes that I made when learning how to play the game.

    Joe Friday’s Just the Facts Ma’am

    England is a faction on the northwest corner of the map. England shares the Isles with Scotland. The faction consists of three settlements: Caen (on continental Europe), London, and Nottingham. Adjacent/nearby rebel settlements consist of Caernarvon, Dublin, York, and Inverness in the Isles. Continental settlements are Rennes, Bruges, Antwerp, and Hamburg. I have already mention Scotland (Edinburgh) but the big faction is France on the continent with Angers and Paris adjacent to Caen. You will also note that the North Sea separates England from Denmark and the rebel held Oslo.

    A brief bio of the settlements (I am not giving enemy unit information or settlement populations. There needs to be some exploration):

    Caen – England, castle, pop. 1500
    London – England, large town, pop. 3800
    Nottingham – England, castle, pop. 3000
    Rennes – rebel, town
    Bruges – rebel, large town
    Antwerp – rebel, large town

    Hamburg – rebel, castle
    Oslo – rebel, wooden castle
    Caernarvon – rebel, wooden castle
    Dublin, rebel, village
    York – rebel, village

    Inverness – rebel, wooden castle
    Angers – France, wooden castle
    Paris – France, large town
    Arhus – Denmark, large town
    Edinburgh – Scotland, large town


    A brief bio of the units:
    Caen – Robert, peasant archer, 2 spear militia
    Caen region – peasant, peasant archer, 3 spear militia, merchant, diplomat

    London – King William, peasant, town militia, 2 spear militia

    Nottingham – peasant archer, 2 spear militia
    Nottingham region – Prince Rufus, 2 peasant archer, 2 spear militia, Princess, Cardinal
    York region – spy

    At sea – cog fleet near London, cog fleet in channel near Caen’s port

    What will it take to win the game?


    The first thing to do is count. Count the settlements that can form the final empire upon a successful long campaign or short campaign. For England, the long campaign requires control over 45 settlements including Jerusalem. The short campaign requires the elimination of Scotland and France and control over 15 settlements. For the purposes of the guide, let’s assume you are going to take out Scotland and France and the perhaps do the same process for a first stage of a long campaign. With more experience, your long campaigns will start differently and we will cover some of the possibilities at the end of this guide for those who want to look at other approaches.

    How to Eliminate the Enemy Factions or Does AI Really Mean “All Incinerated”?

    Artificial Intelligence (AI) Factions are eliminated in Medieval II Total War (M2TW) by eliminating the King and the valid heirs or by taking the last settlement controlled by the faction. With Scotland, for example, you will probably capture Edinburgh and thus destroy the faction. The remaining military units will then become rebel forces that will still need to be hunted down to prevent detestation, trade route disruption, etc.

    Play Locally and Plan Globally -- Where Should I Expand Initially?

    This is somewhat of a trick question. New players want to attack immediately and everywhere. This is total war, isn’t it? There are rewards to patience and also to decisive thrusts against an enemy before he has time to organize. The new player has the instinct to thrust. I would suggest learning when to wait.

    A key to expansion is to minimize the number of opponents that you are at war with at any point in time. You will also need to consolidate the gains, invest in economic and military development, engage in diplomatic activities, serve the interests of the church, and plan for what you empire should look like at various stages of the campaign.

    For planning purposes, let’s suppose both Scotland and France will be eliminated by conquest of the last settlement controlled by the faction and that you will get no help from other factions to speed you towards your goal. This will mean controlling the initial positions of France and Scotland as well as settlements captured by the factions during the course of the game. This would mean 3 English + 1 Scottish + 5 French = 9 settlements.


    You might also want to broaden your economic base by taking some of the rebel settlements in the region which will also prevent the Scots and the French from expansion to a degree. This might mean Rennes and York on the Isles, at a minimum for the short campaign. If you are planning to play out through the long campaign you might want to also take the rest of the Isles and establish a solid corner position on the made from which you can safely advance on your future conquests. For the short campaign that we are playing in our first run thru this will mean York, Caernarvon, Dublin, Inverness, Rennes, and Bordeaux in addition to the previous 9 for a total of 15 settlements. This is close to the number needed for the short campaign game win. So our global plan will be to focus on the elimination of the factions initially. When the faction elimination is closer, we can revise the plan if we are far off the settlement count needed.

    Whether to be a Tortoise or the Hare: Choosing a Style of Play

    Before we actually begin play, it is useful to decide a style of play to approach the current game. I tend to be a somewhat historic oriented player and my role playing days prior to the Total War series does indeed color my play. Some like to play the role of the good Catholic sovereign and play a Knights of the Round Table chivalric game. They occupy settlements, quickly suppress bandits and rebels form the realm, send priests on missions to convert the world, and never break alliances with a combat action. Well that is really my style so I should not really be saying some people.

    Others like to see how quickly they can conquer the world and are simply not concerned with whether they exterminate a settlement of their own religion or not. The world can become a cinder. Their generals will max out the dread rating so that the enemy will begin breaking and running at the mere sight of the heavy cavalry preparing to crush their enemy in one ferocious charge that is known to never take prisoners. Piety is not a consideration since assassins can be used to eliminate the pesky inquisitors and any Pope who dares challenge the sovereign.

    You will need to find your own style. The style may change from game to game or even from one session to the next depending on your mood. It may even change within the game depending on a change of events when a king dies and the prince now becomes king. The phrase “The King is dead. Long live the King!” will ring throughout the game. This is to have fun.

    The Beginning – Turn One – 1080 in the Year of the Lord – Moving the Armies and Some Diplomacy

    I tend to play the game a bit methodically to avoid missing opportunities. I really dislike not moving a forgotten agent or recruiting a key Longbow archer needed for the army that is to set sail from England the next turn. Others play quicker and with more emotion. I will teach you the way of the Viking Prince. You will need to develop your own good or bad habits though. I will not be watching (maybe).


    First look at initial expansion possibilities – York and Rennes are always high on my list of first conquests. Scotland can get to York quickly so you cannot dally. The same is true of the French located at Angers which can move onto Rennes.

    I usually move the Prince Rufus’s led field force in the Nottingham region directly to besiege the village of York. There is no need for a large army since it is only a rebel village with five units. I did get close enough to look at the force in York before committing the army to a siege operation. This is a good habit for all players to look before biting down hard. The rebel forces can only last two turns, so I will just wait out the siege and win an open field battle.


    The captain led field force in Caen can also reach Rennes on turn one. The enemy forces in this rebel town are tougher than those Rufus is facing at York. Rennes is a town that lasts for 4 turns and holds 5 units including a mailed knight. No rebel general is the only real good news. The field force from the Caen region is weaker than the rebel army and is lacking in cavalry. We have options – go with what we have and hope for the best or wait for Robert and perhaps additional military to be moved up from Caen itself.


    There is also King William in London. What use is a powerful king sitting in a great city? I usually move him and the military in London up toward Wales and within walking distance of Nottingham. The forces in Nottingham can then join up for a planned future attack and conquest of the rebel held wooden castle at Caernarvon. There will be more on planning the assault of Caernarvon when we move the agents later in the turn.

    An Agent of Change or the Fine Art of Diplomacy

    This is almost a cheat, but it is a legitimate option for those who wish to use it. Angers is a potential French threat against a slower conquest of Rennes and we have a diplomat in range. The diplomat can move to Angers (Paris is within range, but since we cannot see it due to the fog of war feature in the game we will not head to Paris) and initiate some agreements.

    What agreements might you consider with the French? It will depend on your chosen style of play discussed above. The aggressive and non-chivalric style is not worried that the King has set a goal on the destruction of the French dynasty so you may be tempted to get an alliance and trade agreement. This will not prevent a French move onto Rennes if you dally in the Caen region gathering up your forces.

    Another option is to offer to buy the Angers castle. You can do this by offering perhaps 1,000 florins a turn for four turns in exchange for the castle. The French agree and you now have another castle as a buffer against French expansion. Sher Khan had mentioned this idea and he went with buying both Angers and Toulouse for more florins so that the French will the have no castles until they take a rebel held or another AI faction castle. The computer factions do not seem to convert towns to castles or castles to towns. This is why I think this is a bit of a cheat. It is also a bit unhistorical to be playing Monty Hall and Let’s Make a Deal with the royal lands. It is still your choice and your campaign.


    Back to the Captain Led Force

    This will be a good time to test your skills and learn to beat a superior force. Move the captain led force to siege Rennes and do not bring up reinforcements. If you are not ready for the test, also bring Robert and the army in Caen as far as they can go the first turn to reinforce the siege (turn two will reveal a secret). Depending on whether you will be assaulting the town or waiting to defeat a sallying force, you should be considering construction of siege equipment. I will usually want a couple of towers and a ram to both spread out the enemy flaming arrows and so that if the ram flames up, I have not lost the siege. This will cost 180 build points and your brave captain has a smaller budget. This means waiting at least two turns before the attack or waiting 4 turns for the enemy to sally out. This is really your choice.

    In my play, I leave the captain led force to take Rennes, purchase Angers, and move Robert to Angers to prepare for a march onto Bordeaux. Or use Robert to build some watchtowers to keep an eye on the French.

    Use the Diplomat to Use the Pope

    We have already moved the diplomat to Angers and acquired a great inland castle. The diplomat cannot perform and more operations on turn one, but he should be headed to the next great diplomatic mission. I would want to get an alliance with the Pope and also to improve the English rating with the Pope. A high papal rating means an ability to call Crusades that will be in the English interests rather than wait for the expected calls to Crusade in the Middle East (usually Cairo). Also, when in conflict with another Catholic faction, a high rating improves your chances of continuing an assault on an enemy settlement with only a loss of reputation and not excommunication. It is also important to keep you reputation higher than potential enemies for similar reasons and to discourage actual open conflict.

    Moving the Rest of the English Agents on Turn One

    You have some more agents to move. Now is a good time to learn how to ensure that you deal with all of your agents. On the control panel right click on the agents tab. You will now have a complete list of your agents. Click on each agent and ensure that you have ordered all that need directions. I would rather click on an agent such as our brave diplomat and ensure that all has been done than to forget to take an action and waste a turn. In this case you still have a spy, a merchant, a cardinal, and a princess to still move.

    Take the cardinal and the princess via a cog to the continent. Demobilize the cog when complete. The game is early and you do not need to spend upkeep on a navy unless you are going to use it in the next few turns. Every florin counts. The princess can be used as a diplomat, a marriage prospect to attempt to acquire a foreign general, or you can just wait for the Council to suggest a suitable marriage and add a family member and a general to your units. I usually accept the Council marriage suggestions as long as the prospect is not too old, low loyalty or lacking in piety. Chivalry/dread and command can be easily groomed, but old and disloyal are to be avoided at all costs. Send the princess to find the Danes and see what happens. Taking action is better than sitting still. The cardinal should be used to improve the religious rating in your continental possessions. If you spot a witch or heretic, this is just a bonus.

    The merchant is another issue. I have never had great luck using merchants profitably. This is a great game within the game. Build up the capability of a merchant and then you can make real money by putting other merchants out of business. Find some great trade resources and you can also make some good money with high level merchants. I usually move the merchant via the remaining cog to the Dublin area and plant the hapless merchant on the silver resource. He will stay there until old age. I know that many of you will do better with the merchants.

    The spy is up in the York area. I tend to use spies as moving watch towers. You have a couple of options with this one. You can move him into Wales to spot Caernarvon, the rebel held wooden castle. You will then be able to determine the necessary military resources that you will need to capture the settlement. Another use is to keep an eye on the Scots. Since you are learning and do not know the strength of Caernarvon rebel garrison, I would move the spy to spot the wooden castle. There is no reason to actually use the agent on a mission, just use him as a watchtower. Spies are expensive to recruit if you throw them away on needless risks. Even if the chances of success are 95% this still means failure 5% of the time.

    A Time for Fiscal Stimulus

    You have now moved your military and agents. It is now time to put some florins to work building your economy and building capacity for better military units. On of the great advantages of the English are their archers. The problem is where to produce them. I would convert Caen to a town if Angers was purchased. Angers needs to be built up along archery, barracks, and armor. If you want to first put in a small chapel and a farm, it is your decision. The farm will help improve growth towards the fortress walls needed for even better units. For thus example I would go for military in Angers and Nottingham. London should get a port improvement as soon as possible so that the warehouse line will become available as the city grows. First right clock the mine. You will discover that spending 2000fl will get you 240fl per turn. The port and the trade routes can wait. To help make such decisions go to the settlement scroll and then at the bottom click on settlement details to see the income and population effects of various economic build choices

    General development is usually to buy the cheapest choices available since it gives the best bang for the florin. Mines are the exception. I like any investment that returns 10% or better as a quick improvement to the economy. Many people will do land, small church, and a brothel to give small settlements a boost for population growth. This will then be followed by the second level and improvement and the town hall when available. Roads are good for communication and also improve trade. The merchants are limited to markets within the empire so players interested in playing the merchant game need markets. Markets are also essential to improve your trade.

    When building in town settlement, do not neglect the barracks line. Free upkeep is an important feature that can save more florins than a first level market will ever return. The barracks line is also a key to happy settlements.

    Recruit New Units

    What units to recruit?

    We may need a diplomat within England until the conquest of Scotland. If England wishes to have some trade with Scotland while consolidating England there should be a diplomat present to cancel the trade agreement diplomatically a turn prior to beginning the war. This helps keep your global reputation up.

    We need to replace the garrison units that left London with King William. Do not bother build town militia if you have spear militia. This is not a hard and fast rule, but you should build the best available garrison units that have free upkeep in a large town.

    If you have purchased Angers from the French with your grand diplomatic initiative and left the garrison units in Caen, there is no need to recruit more units at the moment.

    This leaves Nottingham. This is a where you will eventually be able to recruit your first longbow men. At the moment you need to replace the units that joined King William. The castle has a high level of loyalty, but you never know who may be lurking in the woods ready to walk into a settlement that is lacking any garrison. For this reason I always keep at least one unit at all times. Just like in London, you want to recruit the best available. Do not get carried away though – this is a very safe settlement and all units will cost you upkeep. Mailed Knights are great but have a high upkeep. Mailed Knights are never a good idea for garrison units unless there is a plan to use the units in the next turn or two. A peasant or two will do just fine for the moment. If you have a retinue that includes a pointy penciled accountant (I do) you might just recruit one peasant unit.


    Pushing the End of Turn Button - The Hourglass


    I do not like to reset the game to a prior saved or a quick saved position. This means that I am a bit cautious when it comes to ending a turn. Go back and ensure that all builds, moves, etc. have been performed to your satisfaction. Oh wait, check the tax levels and the public order in your settlements. London will become a very large city before any other English settlement, so why not take advantage of the income potential today and raise the tax level. I try to keep most town settlements on high unless this puts the public order into the blue range (less than 85%). Rebellions are not worth it to grab a few extra florins. London is empty of garrison units at the moment, but the units being recruited will appear before the rebellion/unrest is determined. Put London on high for the moment and then reset next to very high if you really want to squeeze the florins out of the general population. Caen and Nottingham are castles which have a fixed tax level. Still make certain that your public order is ok. Now you are ready to end the turn (hit the hour glass to end the turn).

    A Final Brief Note Before Ending Turn One

    This is really the end to the Newbie portion of this faction guide, but there is one item that you should be aware of. The force led by the Captain to besiege Rennes after the end turn button is pushed will not be fighting a defensive action as the rebel garrison sallies forth. The AI has determined that this is a favorable action to take at this time. You should win this battle. Before ending the turn, save the game (quick save). This will give more than one chance to learn how to succeed in this situation. This is always a great method to quickly resolve rebel settlements sieges at the beginning of the game if you can calculate how weak you can make your force and still win.


    Turn Two and Beyond

    A good general short campaign strategy with England for a newbie is to grab rebel-held York and Rennes right out of the box, acquire Anger diplomatically from the French, and convert Caen to a town for future income.

    The next stages are a thrust to rebel-held Caernarvon and then to Dublin with the cog that brought the merchant to the region. The continental forces should be consolidated after Rennes and with Robert’s leadership take on the castle at Bordeaux.

    You now will need to wait a bit (turtle) or launch an invasion by sea onto rebel-held Inverness.

    At this point you should have developed catapult technology in London, Longbows in Nottingham to create a professional army to march on Edinburgh. Be certain to cancel any trade agreements a turn prior to war. With the artillery, you should take out the Scots on the same turn the war begins. The only remaining issues will be the rebel debris that was the remains of the Scottish military.

    The final stage is to take out the French. Launch the campaign from Bordeaux into Toulouse or from Angers against Paris. Paris will be the harder nut to crack, but the capital is also a huge florin loss to your enemy. Toulouse is the most developed caste the French hold or perhaps their only castle if Metz or some other castle has not been captured. If you are feeling really ambitious, build up two siege forces including catapults and launch your offensive against both simultaneously for a real knockout punch. Then it will be a simple matter of picking up the stray settlements still controlled by the French for a short campaign victory.

    Other Campaign Ideas Useful for a Long Campaign

    If you have approached the long campaign as a continuation of the short campaign, you now have options:

    1) Iberian Peninsula, or
    2) Scandinavia and then Novgorod, or
    3) Holy Roman Empire, or

    4) Italy, or
    5) Hold the borders and reach beyond the immediate neighbors.

    The best newbie approach would be Iberia since you already hold the French regions and this would consolidate and continue the corner position strategy. Iberia can thus be followed by the Moors and now you will control the entire western portion of the map. At this point it should be a mechanical process of accumulating the 45 settlement count and a quick Crusade or conventional voyage to Jerusalem.

    Once you have progressed beyond the newbie stage with the English, try some strategic variations. My favorite is to consolidate the Isles except Edinburgh and Inverness. Let the Scots do their thing for a while and have a more interesting challenge when they are ready to invade Dublin or York or …. Get your diplomat to the Pope and get your Pope-o-Meter up. Request a Crusade on Cordoba. Take King William’s force and head to Toledo’s port area. Take Robert’s force from Bordeaux and march them by land. You should now be able to build another force at Nottingham with a great deal of Longbows for a third force and pick up some spear militia in London on your way to Toledo’s port area. This gives you three forces to bulk up with some Crusade mercenaries. Since the Crusade means free upkeep on these forces, do not be in a hurry to resolve the Crusade until all forces are besieging Cordoba. Swing your naval units around to blockade Moorish ports such as Marrakesh and Grenada. Do not forget to bring some priests also. If you are playing a chivalrous campaign like I prefer, you will be occupying Cordoba despite the huge payoff. If you cannot resist, sack the city. Now you will need to use your forces to take the rest of the peninsula. Start with the Moorish castle and El Cid in Valencia if not already held by an AI faction. Watch for more opportunities for a second crusade and keep your troops busy in the Western Mediterranean.

    Another interesting twist with England is a reverse Viking expansion by taking on the Danes after Edinburgh. This campaign will anchor the empire at Novgorod. You will now control the northern map edge and then pick apart Europe as factions lose favor with the Pope.

    There you go. A completed Viking Prince’s Faction Strategy Guide for Newbies to Medieval II Total War: England.

    Comments and suggests are always appreciated. If I use your ideas in a revision, you will get the eternal fame and glory of a credit at the top of the revised guide. Thank you and make Europe an English speaking Catholic empire. Until next time ---


    Updated on Jan 27th How to Raid by Exarch


    Spoiler Alert, click show to read: 

    Let me make one thing perfectly clear: a raid is not about taking and holding a region.

    a raid is

    Quote:
    1. A sudden assault or attack, as upon something to be seized or suppressed: a police raid on a gambling ring. 2.Military. a sudden attack on the enemy, as by air or by a small land force.3.a vigorous, large-scale effort to lure away a competitor's employees, members, etc

    source: http://dictionary.reference.com/browse/raid

    1) Make sure your borders are secure-you don’t want to be caught with your pants down with your armies half the world away. so you'll want to be conducting your raids in the middle game when you can train decent militia for the free upkeep and settlements and sackings will give decent $$$-like 20-30k from a good sacking.

    2) Picking the right man for the job: you want someone with movement bonuses in their stats, definitely not 'Lazy' or 'too comfortable'.

    Good stats include 'overseer' and 'fast horse' and 'sacker of cities'etc preferably with command stars and is reasonably young-16-30 should do it and preferably unmarried.

    You don’t want to leave any widows behind

    3) Select troops: armoured cavalry is best supplemented by heavy infantry or spearmen. The whole point of raiding is $$$ and loot so make sure the expenses of maintaining your raiding forces don’t engulf your sacking intakes.

    Mounted archers are also good for hunting down lone generals whilst on raids-you know those 'armies' the AI has around with only one general and a unit of catapults....

    4) Select agents: you'll be journeying deep into enemy territory so it's good to have some spies and merchants along for the ride.

    Spies to open city gates (remember fast as lightning like the lightning lord beric dondarrion) and merchants to exploit the highly profitable goods.

    eg raiding Alexandria and Cairo (both of which tend to be lightly garrisoned) from Italy or England France which brings us to...

    5) Select targets:

    The whole point of raiding is to deny the enemy the resources and the means by which to conduct warfare against you.

    In other words, economic warfare, so dont go trying to 'raid' a full stack citadel-too time consuming and too costly.

    You want to un-chivalrously target weakly defended cities and economic hubs.


    Updated Feb.19th The Great Faction BreakDown by Conquistatore

    Spoiler Alert, click show to read: 


    The Great Faction Breakdown

    This is a general breakdown to each specific playable faction in the vanilla grand campaign. The guide will list the strengths and weaknesses of each faction and will conclude with some general challenges this faction may face and ways to succeed and win.

    These are my personal observations only, each player must find their own path to victory!

    I hope this guide is useful for newbies and veterans alike.
    Enjoy.


    France


    Strengths: Fantastic unit roster, especially cavalry. Good late technology. Strong starting armed forces.

    Weaknesses: Insecure starting position, potential enemies from everywhere except the west. Will most likely be involved in an extended war with England or Milan. Quite prone to Spanish and Portugese expansion/aggression. Large empire to defend and protect.

    Conclusion: A challenging faction to play. If you are able to live through the dark ages and advance your technology and cities somewhat you will be a great western power in Europe and the world. France will have to content with tough rivals, Milan and The Holy Roman Empire. England will have to be dealt with aswell, by either forging a strong alliance or pushing them off mainland Europe and back to the Isles.


    England


    Strengths: Very secure starting position and some very good ranged units. Ability to deploy stakes, only faction with access to woodsmans guild and sherwood archers. Tough and varied medium and heavy infantry.

    Weaknesses: Has to contend with France and Scotland and possibly Denmark to secure the empire. Lacks pikes and easy access to the holy lands.

    Conclusion: A strong starting empire and a relatively easy faction to play, arguably the easiest. If you can secure the Isles then you will have an easy time gaining victory. Your only trouble will be keeping the French in mainland Europe and fending off sea-borne invaders. Scotland can also be a thorn in your side if they are not dealt with early. The successful leader will establish a strong and secure empire on the Isles with which to raid and invade mainland Europe, while maintaining the protection of isolation from most of the world.


    The Holy Roman Empire


    Strengths: Massive standing armies at the beginning and sizeable town garrisons, ability to field quite tough units, especially 2handers and tough cavalry. A well established foothold in Italy with easy access to the Pope to either support or destroy him. Has access to the Teutonic Knights with the construction of their chapter house.

    Weaknesses: Surrounded on all sides by potential enemies. Very prone to multi front wars. Good tech in the late period but not as good as their serious rivals, Milan and France. Mostly landlocked provinces, means less trading income until you can secure some coastal cities.

    Conclusion: The HRE will have a hard time trying to keep it's empire in one piece. The many enemies that surround you will most likely hit you when you least expect and hard. If the HRE can consolidate it's forces and protect it's borders from foreign expansion then the Emperor will have a mighty empire, equalled by none, with the ability to crush and absorb the smaller empires quickly. The Emperor will need to make use of the devastating gothic and zweihander units to ensure the empire's sovreignty and security.


    Spain


    Strengths: Very good pike and gunpowder units, good light and harassing cavalry. Powerful javelin throwers. Fairly secure starting position with only the Moors as possible enemies. Clear avenue of expansion and easily conquerable Portugal. Access to the Knights of Santiago with a guild. Easy access to America when it appears.

    Weaknesses: Only spear militia available in the early period. Tough factions to the north and across the sea to the east. Somewhat isolated from the holy-land. Boxed in somewhat by Portugal and the Moors. Can't afford to sit idly by while the other Iberian factions expand.

    Conclusion: The Spanish position is a good one and the empire is ready for expansion. The Moors pose the only significant threat and can be dealt with quickly and easily. The Spanish may struggle in the early period due to the lack of heavy infantry and spear units, but if the Spanish can survive this tough time they will have access to some of the best units in Iberia in the high and late periods. If Spain can unite Iberia under one flag, the empire will prosper and be a force to be reckoned with. The smart Spanish leader will decide to either destroy the Portugese or the Moors first, to take on both at once would not be advisable.


    Venice


    Strengths: Godly italian militia and crossbowmen. Very rich cities and trade. Unique Venetian heavy infantry. Quick access to the holy lands. Can expand easily in any direction.

    Weaknesses: Spread out starting position makes the outlying regions harder to defend. Will most likely have to contend with the other Italian powers and the mighty Byzantines. May also have problems in dealing with The Holy Roman Empire. Depending on direction of expansion, empire may come into direct contact with the Mongols and Timurids early on.

    Conclusion: The Venetian empire is a rich and fertile one that is in a good position to expand aggressively. Care will need to be taken to ensure that the rich core cities of the empire are not left defenceless against possible aggressors. Powerful enemies are near and will need to be weakened or destroyed. If Venice can maintain it's rich cities and develop strong trade, it will be well poised to deal with the impending threats from the East and other major empires who challenge the King's rule.


    Milan


    Strengths: Very rich starting cities with an excellent starting navy. Shares the same powerful militia as the other Italian powers. Central position, option to expand anywhere. Very good late technology and access to the
    Carroccio Standard.

    Weaknesses: Arguably the most hated faction in the game, other factions will try to destroy you early, especially the other Italians. Does not start with a castle region. Has to deal with tough rivals, France and The Holy Roman Empire. Mediocre cavalry at best.

    Conclusion: Milan is a tough faction to play, to be successful, a leader will need to be ruthless and unforgiving in conquest and expansion. No ground can be given and no prisoners taken. The world is against you and you must stand strong. If Milan can manage to fend off the early assaults from other factions while developing a lucrative trading empire, she will prosper and continue to decimate her enemies with wealth and power.


    Sicily


    Strengths: Strong and unique early period units. Secure and easily defendable starting position. Can form quite a wealthy trade empire by connecting the 3 regions of Palermo, Naples and Cagliari. Palermo is the most developed castle at the beginning of the game, meaning stronger more advanced units earlier on. Advantage of the cheap and strong Italian Militia.

    Weaknesses: Lacks strong late period cavalry. Is very likely to be hassled by the Moors and the other Italian factions for dominance of the Mediterranean Sea. Close proximity to the powerful and vast Byzantine Empire which will Sicily will come into contention with as Sicily expands eastward.

    Conclusion: The Mediterranean is yours for the taking. You own the most settlements around the important sea and it is ripe to be turned into a great trading empire. If Sicily can stave off Islamic and other Italian aggression then she will flourish into a mighty and wealthy empire. The cunning faction leader will need to either make peace or war with the Byzantines as they are guarding the gateway to the East and the rich holy lands.


    Portugal


    Strengths: Excellent naval power in the late game and in the beginning somewhat. Access to unique and powerful units in the high and late periods. Strong spear units and heavy infantry. Excellent unique cavalry and access to the Knights of Santiago. Easy access to the America's when they become available.

    Weaknesses: Less professional armies than the Europeans. Armies composed of more militia than most other factions. Has to fight for dominance over the Iberian Peninsula and against the hardy Moors. Also prone to aggression from Europeans in the north, namely France. Starts with only two regions under it's control which are cut off from each other by Spain.

    Conclusion: The Portugese position is an interesting one. It is a strong position but relatively insecure at the same time. The big task for Portugal will be to unite the Iberian Peninsula under one flag and to push out the Moors or destroy them completely. Expansion is fairly straightforward with the best avenues being into Africa or into Europe. To be successful the Portugese will have to consolidate it's position in Iberia and ratify a policy of strong expansion in one direction.


    Scotland


    Strengths: Strong and varied pike and spear units that defend extremely well against cavalry. The most secure and isolated starting position in the game. Only has the English to contend with in the beginning of the game. Mostly protected from the other factions.

    Weaknesses: Limited unit roster, with extremely poor cavalry. Lacks unique and varied medium and heavy infantry. Only limited ranged units. Primitive cannons and siege equipment in the late period. Only begins the campaign with a single region and no castle. Furthest faction away from the holy lands, meaning there will be next to no chance of religious glory or any meaningful relations or dealings with the Pope.

    Conlcusion: The Scots are a difficult faction to play and succeed with. They have a small starting empire that will struggle to survive if it does not expand quickly. Scotland can expect to fight with the English very early on and will be at a technological disadvantage until the empire can develop further while limiting English advancement. The only saviour for the Scots is their pike and spear units which are unrivalled in the Isles and northern Europe. Scotland will need to expand quickly and either destroy or pacify the English to stay alive.


    Denmark


    Strengths: Has a good mix of pikes, spears, ranged units and heavy infantry with access to powerful Norse units. Quite a secure starting position with regions to the north that are ripe for conquest. Has good access to the sea and sea trade, meaning Denmark can be a wealthy nation. Good secure position from which to strike at Europe.

    Weaknesses: Like the Scots, has only one region to begin the game with and no castle. Scandinavian regions are not as profitable as others and lack valuable resources. Very close to their toughest rival, The Holy Roman Empire. Quite far from the holy lands and somewhat isolated from the rest of the world.

    Conclusion: The Danes will find it easy to take the northern regions to consolidate their hold over Scandinavia. Expansion past this point however will not be so easy. Denmark can expect to come into contact with The Holy Roman Empire very early on and later in the game, the Poles and even the Russians. Denmark will need to stand firm in the face of foreign expansion and forays into Danish territory to eventually make there way to the rich holy lands and win the campaign.


    Hungary


    Strengths: Good access to strong horse archers and heavy knights. Unique access to the Hungarian Battlefield Assassins. Fairly close to the holy lands and all their glory.

    Weaknesses: Lacks strong spear and pike units, very weak militia units. Precarious starting position that can be difficult to hold and expand effectively. Surrounding regions are quite undeveloped and will need a strong investment in money, armies and time to properly develop. No sea access without expansion, cuts Hungary off from lucrative trade. Very close proximity to the Byzantines and Poland, two powerful empires.

    Conclusion: The Hungarians' position is a dangerous one. With strong enemies to the North, West and South, Hungary will have to be careful to choose the right factions to befriend and to wage war upon. If Hungary can secure an alliance with Poland, this will form a powerful Eastern front to prevent and hold the Mongols and other empires from expanding Westward. As Hungary conquers the East and South, she will need to decide what to do about the Byzantines as there is no room for uncertainty where they are concerned.


    Poland


    Strengths: Quite secure starting position, with many rebel territories in all directions, waiting to be absorbed into the polish empire. No immediate threats to the empire. Quite strong and unique cavalry in the early and high periods.

    Weaknesses: Limited infantry. Limited early spear units. Landlocked regions to begin with limiting trade. Will have to contend with the invaders from the East later on in the campaign.

    Conclusion: Poland is quite a secure faction in the early period. It's only neighbour is Hungary, which is a good sister faction to establish a strong alliance with. There are many opportunities for Poland to expand, the safest route being the regions to the North, but beware. Expansion is not endless and eventually Poland will come into conflict with Denmark, The Holy Roman Empire and Russia at some stage. The challenge will be to create an empire that can maintain it's borders against these factions and at the same time, being prepared for the Golden Horde.


    Russia


    Strengths: Isolated and secure position in the early period. Far from any other faction and interference. Lots of rebel territories for the conquering. Very good missle and melee cavalry, strong and well armoured. Good high and late infantry and ranged units. Access to Cossack Musketeers, a superb gunpowder unit.

    Weaknesses: Lacks good strong infantry and ranged units in the early period. Very lacking in spear units, poorly armoured. Very spread out regions, taking quite a bit of time to traverse the empire and much harder to reinforce regions. Directly in the path of the Mongols when they invade, usually. One of the only two Orthodox factions in the game.

    Conclusion: Russia is a faraway isolated faction that is very weak in the beginning. With few and poor early units Russia will find it more difficult than other factions to expand and hold territories. Access to good and reliable units will take time and Russia will need to hold out to develop it's cities and castles to access the superb high and late unit roster. Expansion should be West or South depending on the factions you wish to contend with. The biggest threat to your empire will be a strong Poland expanding Eastward or the Mongols when they invade near Sarkel and start to expand towards Kiev. The cunning leader will forsee these challenges and prepare the empire accordingly.


    The Byzantines


    Strengths: Very rich empire with the possibilities of getting even richer by controlling the Black Sea and surrounds. Very strong Horse archers and infantry in all periods. Very rich starting territories with rich surrounding rebel territories aswell. Very easy to link all your cities with trade. Uniquely positioned to control all faction traffic from the West going into the East and vice versa. Easy access to the rich holy lands, meaning your empire will only become more wealthy.

    Weaknesses: Very limited once other factions reach the late period. No access to gunpowder. Every faction wants a piece of your rich rich lands, meaning you are likely to be attacked considerably. Shares borders with the Turks, a faction that will want you dead. Also prone to some Italian aggression from the West as Venice and Sicily expand Eastward.

    Conclusion: The Byzantines are arguably the hardest faction to play. While they will not struggle to keep up with the other factions in the early and high periods they will fall greatly behind in the late period, due to having no access to the advanced technologies being discovered at that time. Your empire is very centrally located and all the factions will want to come through your lands for various reasons, a wise Emperor will let friendly and neutral factions pass through and hold your enemies to ransom at a crossroad. The Byzantines will have to deal with the Turks, preferably very early on, for if the Turks are allowed to advance and grow the task of destroying them will become that much more difficult. The Italian factions will also need to be pacified to a certain degree as they make their way East. It would not be wise for the Emperor to fight a war on two opposing fronts of his empire, lest he surely fail. Once the Turks have been dealt with, the Emperor should be free to deal with the menacing Italians and eventually the Mongol hordes that come from the East.


    The Turks


    Strengths: Very strong mounted ranged units and elite Janissary troops in the high and late period. Access to the powerful Naffatun and Janissary gunner units aswell as Hashishim. Strong starting empire with very good prospects. Plenty of rebel cities for the taking the in the rich fertile holy land. Fantastic late technology.

    Weaknesses: Close proximity to the mighty Byzantine Empire. Along with Russia, the first port of call for the Mongol and even Timurid invasions. Lacking in reliable infantry in the early period. Will have to contend with Egypt for dominance of the holy lands.

    Conclusion: The Turks are in a relatively strong state in the early period. They have well developed cities and are poised to take over all of Asia Minor and take the fight to the Byzantines early on. The holy lands to the south are rich in population and resources and should be conquered as soon as the Sultan can spare troops. A smart Turkish ruler will understand that hordes of Mongols will on his doorstep soon enough, and be well prepared for their arrival. If the Turks can consolidate their position in Asia Minor and secure the holy lands, the empire will be well positioned and reinforced to deal with any major threats from either the Egyptians or the Eastern invaders.


    Egypt


    Strengths: Powerful Mamluk cavalry, both melee and ranged. Access to both Tabardariyya and Hashishim units, also has access to the powerful Naffatun. Very wealthy regions with even wealthier ones easily conquered to the North-East. Very defensive and favourable desert terrain, easy to hold an enemy at bottlenecks.

    Weaknesses: Will most likely be at war with either the Turks or the Moors at some stage. Has to fight for dominance and commit a sizeable amount of men and resources to secure the holy lands. One of the first few factions to come into direct conflict with the Mongols and the Timurids. Lacking in strong early period units. A prime target for the Catholic crusades.

    Conclusion: The Egyptian empire must very quickly expand to survive. The holy lands to the north-east must be taken immediately if victory is to be assured. Once these lands are part of the empire, they need to be fortified and well defended and ready to face the hordes of enemies that come to claim them. Turkey will have to be dealt with at some stage in the campaign, when the Egyptians encounter them is up to the player and their pace. The Moors will on the odd occasion begin to look menacing from the West and may need to be taught a lesson or two to prevent Eastern expansion. If Egypt can secure wealthy lands and weather the oncoming storm, of Eastern invaders and the crusading Catholics, the empire will be in a good position to bounce back in full force and embark on a quest of world domination through Eastern Europe and Asia.


    The Moors


    Strengths: Secure starting position with only the Iberian's to worry about in the West. Very strong and effective spear units. Strong cavalry and infantry in the high period. Access to Christian Guard, both mounted and dismounted. Quite wealthy lands to be conquered in Africa. Easy access to the America's when they appear. Mounted spear units, unique and deadly to enemy cavalry.

    Weaknesses: Will have to contend with Spain and Portugal for domination of the Iberian Peninsula. Lacks some strong professional late period units. Some large spread out territories that can be hard to reinforce quickly. Will most likely be prone to Sicily expansion and possibly even the Pope's aggression. Sometimes attracts Crusader attention.

    Conclusion: The Moors position can be a difficult one, if an unwise Sultan lets the catholics take control of Iberia. The Moorish people must force the catholics from the Peninsula to ensure security and survival. Once Iberia has been freed from Christian hands, Western Europe is free for the conquest. The Moors will need to beware of Italian expansion southward, if the Italians gain a foothold in the Sahara it will be difficult to expel them back to their homelands. A strong leader needs to focus the empire's resources in Iberia while also maintaining a watchful eye on Eastern Moorish lands to counter any invasion force that tries to establish a presence in Africa.


    This concludes The Great Faction Breakdown of all the playable factions in the vanilla Medieval 2 Total War. I hope many people glean some valuable information from this short guide to factions and I wish you all the best in your campaigns!


    Updated Feb.19th The Glory of Merchants by Landtuber


    Spoiler Alert, click show to read: 

    The Glory of Merchants
    by Landtuber

    What are Merchants used for?
    Merchants are used to provide a flow of extra florins by sitting on, or "trading", the various trade resources scattered about the map. The amount of florins a merchant can generate from a resource is based on three things, his Financial Rating (discussed below), the value of the trade good and the distance to your capital. The farther a resource is from your capital, the more florins you can make from trading it.

    The resources, and their rough value ranking from 1-5, are listed below:
    Amber (3)
    Chocolate (5)- This is only available when you reach the Americas.
    Coal (2)
    Cotton (2)
    Dye (4)
    Fish (2)
    Furs (1)
    Gold (5)
    Grain (2)
    Iron (2)
    Ivory (4)
    Marble (3)
    Silk (5)
    Silver (3)
    Slaves (4)
    Spice (4)
    Sugar (4)
    Sulphur (2)
    Textiles (2)
    Timber (1)
    Tin (1)
    Tobacco (5) - This is only available when you reach the Americas.
    Wine (4)
    Wool (2)
    )

    Recruiting and Training

    1. Production

    A merchant can be produced at any city that has built at least the first level of trade buildings, a Grain Exchange (requires 2 turns to build, 600 florins). Once a Grain Exchange has been completed, a merchant may be trained for 550 florins.

    You can train 1 merchant per trade improvement you have throughout your entire empire. So if you have 7 cities with a Grain Exchange (or higher) built, then you can train up to a total of 7 merchants.

    2. Training Financial Rating

    Financial rating is a merchants ability to work with money. When created, a merchant starts with a random determined amount of finance between 1-3, with 3 being quite rare. This rating determines how many florins a merchant can make trading.

    There are 3 ways to increase a merchants finance rating.

    A) Use your merchant to "Acquire" another factions merchant. By right clicking your merchant on an enemy merchant, you can attempt to steal that merchants business, which can result in 3 things:

    Success, which entails you gaining a random amount of florins (between 500-4000 in my experience, based on your merchants financial rating) and the enemy merchant being removed. If your acquisition does succeed, your merchant gains one point in finance (up to a max of +4).

    Failure, in which your acquisition fails and both merchants remain in play. Whenever you fail to acquire an enemy merchant, your merchant has a chance to lose a point in finance and your enemy has a chance to gain one.

    Backfired, in which your merchant exposes his own business so badly when attempting to steal your enemies that he loses his own in the attempt. Your merchant is removed and the enemy merchant has a chance of gaining a point in finance. Note that if your attempt backfires you don’t lose any florins.

    B) Place your merchant on one of the many trade resources scattered throughout the map and leave him there for as long as possible. By simply sitting there and trading passively for you, he has a chance (which increases the longer he is sitting there) to gain financial rating.

    C)Build certain buildings or acquire a Merchant Guild to improve traits on creation of the merchant. This is explained in more detail below.

    3. Gaining/losing extra Financial Rating or other Traits

    Gaining Finance:

    Trait: Bean Counter (+1)/Bold Barterer (+2)/Commercial Conqueror (+3)/Robber Baron (+4)
    Each time you successfully acquire an enemy merchant you gain +1 finance, up to a maximum of +4.

    Trait: Legal Nouse (+1)/Legal Expert (+2)
    You have a chance to gain this trait by training a merchant in a city with the appropriate level of government building. You must have a Town Hall or better to have a 50% chance of gaining the Legal Nouse trait. If your merchant does gain this trait and the settlement has a City Hall or better you then have a 33% chance of gaining the Legal Expert trait, which gives you a total of +2 finance.

    Trait: Secure Assets (+1)/Protected Assets (+2)
    If your merchant survives an acquisition attempt by an enemy merchant, he has a 50% chance of gaining a level in this trait, providing up to a total of +2 finance.

    Trait: Knowledge of Customs (+1)/Graceful Traveler (+2)
    Whenever your merchant is farther than a distance of 40 from your capital and is trading a resource at the end of your turn, he has a 20% chance to gain a level in this trait, up to a maximum of +2 finance.

    Trait: Merchants Guild Apprentice (+1)
    When a merchant is created and your faction has a Masters level Merchants Guild or higher anywhere in your empire, he gains 1 point in finance.

    Trait: Financial Training (+1)
    If the city that creates a merchant contains any level of Merchants Guild, he gains +1 finance.

    Losing Finance:

    Trait: Loyal to Coin (-1)/Self Serving (-2)
    Whenever your merchant is trading a resource at the end of your turn and is at least a distance of 60 or farther away from your capital, he has a 3% chance to lose a point of finance. Yes, it sucks I know since distance increases profit.

    Trait: Quite Religious (-1)/Dogmatically Religious (-2)
    When a merchant is created in a city that has a 4th level religious building or higher (Cathedral for the West) he has a 50% chance of losing 1 point in finance. If he does lose this 1 point, he has a further 33% chance of losing 1 more point. Making money and being religious apparently don’t go well together in this game…

    Trait: Slightly Crooked (-1)/Shady Dealer (-2)
    If you create your merchant in a settlement that does not have a City Hall or higher then he has a 50% chance losing 1 point in finance on creation. If he does lose this point, then he has a 33% chance of losing an additional point. Note that since all religious people in this era were completely honest, your merchant cannot be both crooked and religious. Good old historical accuracy.

    Trait: Daft Dealer (-1)/Easy Target (-2)/Open Purse (-3)
    Each time you fail to acquire an enemy merchant and survive the attempt, you have a 33% chance of losing a point in finance.

    Gaining/Losing Personal Security:

    Once a merchant gets above 4-5 financial rating he is extremely hard to remove through acquisition. You would then be required to use an assassin, whose chance of success is affected by his own skill and the merchants Personal Security, which can be modified in several ways.

    Trait: A Few Enemies (-1)/Several Enemies (-2)/A Marked Man (-4)
    Whenever a merchant successfully acquires another merchant, he has a 25% chance of gaining one of the above traits, up to a max of -4 in security.

    Trait: Hires Guards (+1)/Employs Security (+2 PS, -1 Finance)
    If a merchant survives an assassination attempt, he has a 50% chance of gaining a point in personal security. Note that if he survives too many he loses one point in finance to trade off for the extra point in security. Someone has to pay those guards he hires.

    Monopolies

    Many people who are curious about merchants wish to know how to create a monopoly. After much in-game testing, I have come to the following conclusion.


    Spoiler Alert, click show to read:
    You Can't.


    The Monopoly trait does exist and you can help your merchants acquire it, but you can acquire it in any region with any trade resource. It appears to be a trait that you can gain randomly whenever you are trading a resource, and is not connected to any in-game events.

    I have had multiple merchants gain the trait by staying for many turns on one resource in a region that has other resources of the same type, different types and regions that have no other resources. The only connector appears to be that the longer a merchant stays on a single resource, the higher the chance he has of gaining a point in this trait, listed below.

    Trait: Capitalist (+1)/Market Controller (+2)/Monopolist (+3)
    If you want to gain this trait, park your merchant on a resource and leave him there till he dies. I’ve never seen Monopolist on one of my merchants who is under 45, it seems to take many, many turns to get to the final level of this trait.


    Strategies for effective Merchant use


    Once you understand the basics of merchants, they are pretty easy to create and use effectively. I recommend following several simple steps.

    Create your merchants in a city that meets the following 4 characteristics.

    1. Does not have any guild in it other than a Merchants Guild.
    2. Make sure the city has a Town Hall at minimum, preferably a City Hall to increase the chances of getting the Legal Nouse and Legal Expert traits.
    3. Do not build level 4 religious buildings or higher so your merchants can't obtain the Quite Religious or Dogmatically Religious traits.
    4. The city should be a high income trading city, for as you acquire higher level Merchant Guilds they will increase your income proportionally.

    Note that you should create all your merchants in the same city if possible, for every merchant you create increases your “points” towards acquiring the next level of merchant guild. Later game with a level 3 Merchant Guild and the proper buildings, it is not uncommon to have new merchants created with +5 or higher finance.

    The Joy of Acquisition

    Easiest way to train up your merchants skill is to send them out to wage “merchant war” on enemy merchants. This does not affect your relations with your target at all, you can wage this form of war on your allies just as easily as your enemies with no penalty.

    The AI seems to gleefully use their merchants to try to acquire yours whenever your merchant has 3 or less financial rating, I’ve never seen an attempt when my merchant has 4 or more. Also, enemy merchants will only attempt to acquire your business when your merchant is sitting on a resource, they will ignore him if he is just standing beside it looking pretty. Use these two facts to train up your merchants.

    The odds in an acquisition favor the defending merchant, so try to place your 1-2 finance merchants on resources that are close to the AI’s territory. At that point just hope you survive the acquisition!

    Also use your +3 finance or higher merchants to snipe new enemy merchants that are just leaving their cities. Once a merchant gets to +4 or above, it is generally safe to send him off too far off lands to start raking in the serious cash. If your heading for a really good resource such as gold or silk, it is generally a good idea to send along an assassin or two just in case there is a high finance enemy merchant sitting there.

    Also considering making “Merchant Fleets” to transport your merchants around. If your faction is near the Mediterranean Sea, put several merchants that you have trained up onto a small fleet and ferry them to the good resources (such as the silk by Constantinople or the gold by Timbuktu). This can dramatically speed up your merchants travels.

    What should I trade?

    When you first start using Merchants, they generally seem like a massive waste of time. Their high recruitment cost of 550 and low returns on nearby resources seem to make them a money sink you can’t afford in the early game (often a starting merchant will make less than 30 florins a turn). However, now that you understand how to make your merchants financial rating increase all you need to do is find the right resources to trade.

    Keep in mind that the farther away a resource is from your Capital the more florins you will rake in. Refer to the list at the top of this guide for the approximate values of each trade resource, and only place your merchants on resources of value 3 or above. A merchant who is trading on a level 1 or 2 resource, has 7+ points in finance and is across the world from his capital will only make at most 100-250 florins a turn. That same merchant placed on a value 3, 4 or 5 resource can pull in 500-1200 turn.

    Americas

    When your game gets to the point where the world has been discovered to be round, and you have the ships available to sail to the Americas, send over plenty of merchants! Extreme profits are to be had!

    North America
    7 Gold, 5 Chocolate, 4 Tobacco, 2 Dye

    South America
    2 Gold, 1 Chocolate, 1 Dye

    Resource Location

    Check out the pictures below for locations of all the resources level 4 or higher on the mainland. Each picture has the mini-map still attached and at least one city as a point of reference for easy locating.

    Gold /I vory / Slaves
    Spoiler Alert, click show to read: 


    Spice / Sugar
    Spoiler Alert, click show to read: 


    Wine / Dyes / Silk
    Spoiler Alert, click show to read: 


    Hope this helps anyone who is trying to figure out Merchants!


    Acknowledgments
    Many thanks to Salisian for creating his M2TW Traits Guide. (http://www.gamefaqs.com/computer/doswin/file/931592/50116)This guide provided me with percentage chances for acquiring traits to back up my own testing.
    Last edited by Silent Assassin; May 28, 2009 at 11:27 AM.
    TIME TO DIE!!!! Proud Son of Viking Prince

  5. #5

    Default Re: Please members don't post here as I'm updating th Great Thread for it to work better

    Updaded on Feb. 20th Faction Guide alias MILAN by Spartan90


    Spoiler Alert, click show to read: 

    Milan, or alternatively Genoa if you’re playing SS, is a city-state faction based in the congested but fertile lands of Northern Italy. It starts off with a small area primarily consisting of the maritime city of Genoa and the rich city of Milan.

    Its position is both powerful and weak. It is powerful because its two main cities – Milan and Genoa – start off relatively developed, and also have the potential to become major cities in the Medieval age. Genoa can rival cities such as Venice, Constantinople and Antioch in maritime trade, and Milan can develop tremendous wealth from its huge populations, fertile land and farming production, and to a lesser extent its land trade.

    The faction’s position is weak, however, that it starts off controlling a low amount of settlements, and that expansion into Rebel lands are quite limited. Basically, Milan is one of the few factions that have to fight another faction early on. Another downside to this is that the factions surrounding Milan are some of the most powerful in the game - France, HRE, Venice, and the influential might of the Papacy.

    Milan's strengths lie in its ability to generate huge amounts of cash. Its economy can stimulate more production growth in its rich cities, and can also train and maintain several armies. What makes Milan so rich is that there is no need in the entire game for Milan to build castles. It's strongest units are all militia based, and can be trained even in sparsely developed cities. As with all Italian factions, it's city-based forces are quite easily the best in the world. Its Italian Spear Militia and Geonese Crossbowmen Militia can dominate the battlefield early on. Add the Familia Ducale to protect your flanks, and you've got a very decent citizen army. On top of this, Milan has world class gunpowder units, and is quite easily among the elite in military terms when the late period rolls around. For the icing on the cake, Milan's navy is only out-classed by the Iberians.

    Focusing more on its militia armies, each type of unit individually is nothing special, but as a whole army combining spear, crossbow and cavalry militia, it is a devastating force. Going into more focus, I will now concentrate on Milan's battle strategies. It is best to fight defensively as Milan. When starting a battle, choose your ground and dig in. If possible, have trees or cliffs to further protect your flanks. This will mean that the enemy will have one front to face you, allowing your archers to decimate their ranks. The one thing that makes Milan a force to be reckoned with are that they are the only faction that has access to the most powerful and justly infamous Geonese Crossbowmen. Used correctly, these archers can rip apart an entire army. Their Armour Piercing arrows add even more pain to professional armies with shiny armour.

    Make sure that your Crossbowmen have a nice line of sight to shoot at the enemy. Much like a modern-day gun, the bullets / arrows do not arc, like a longbow, and therefore your crossbowmen have to be placed in front of your army. During the skirmishing phase, your crossbowmen - depending on how many you have - are able to kill hundreds. When the enemy gets close, engage their melee units with your spearmen. Allow your Crossbowmen to retreat to the back. Unfortunately, unless you are on high or angled terrain, your Crossbowmen are useless during the main phase of battle, as they cannot arc their arrows, and therefore will not risk shooting into the back of your own men. If able, move your Crossbowmen in a position where they can fire into the flanks of the enemy. Their right flank is the preferred one, as they do not have their shield to protect them. Shooting into their flanks will cause enormous damage physically, and with morale. During this time, your militia cavalry can either be guarding your own flanks, or if the situation allows, engage the enemy's flanks or rear.

    Milan's weaknesses are few. They will have to take on strong factions very early on - more than likely France or Venice. If it's of any help, France is in a weak position early on, trying to occupy its modern-day lands. They have a very weak military in the early stages, comprising of peasants, spear militia and peasant archers. As Milan is decent from the get-go, you may want to capitalize on this information. Their other weaknesses are that although Milan can spam their classy militia armies, they will be outclassed in the High era. The Italian Spear Militia can get some very decent armour upgrades, but they will still have little chance holding off more professional men-at-arms.

    For some campaign tips, you will most definately want to take the islands south of Genoa, and Florence more importantly. Try and buy Bologna off the HRE, and you have yourself some very decent settlements. When the eventual war with Venice rolls along, grabbing her beautiful capital will weaken her terribly.

    From here, your hold the gateway to the rest if Italy - more importantly, the Vatican's playground. Your grand cities have one of the best defenses to help keep enemies out - the Alps. There are only a few roads that go from Europe into Italy, so holding these choke points with forts is a necessary. If they can't keep back the enemy, it least they will be able to provide you with a couple turns minimum to be able to gather your defenses in Lombardy.

    The war down the Italian Peninsula is pretty straight forward, however I advise not to fight the Papacy until the end of the game. Or give them some weak settlement in the middle of Africa, then kick the Pope out of Rome. Northern Italy is comprised with by far the most richest cities in the game, and holding the "Big 5" of Genoa, Milan, Florence, Bologna and Venice, the world is your oyster. From here, either unite the Peninsula under one banner.

    Take the fight into the belly of Europe herself. Fight for the treasures of the Holy Lands. Cross the seas to Africa or Iberia and score its riches. Or control the entire Mediteranian maritime economy by conquering the Byzantines and take control of the Black Sea and Aegean trade. Good luck!

    Let me know how you like this guide, any mistakes, or if I should write on another faction.


    Updated on Feb. 23rd: Strategy Guide - Defending Against Mongols / Timurids by Spartan90

    Spoiler Alert, click show to read: 
    This guide is a thorough analysis of strategies to defend against the two most powerful and formidable, and equally famed and feared factions - the Mongols and the Timurids. They are two nomad horde factions that appear in enormous waves of troops during the late period of the game. Make peace with your current enemies, fortify your cities, and prepare for the most intense fighting you'll ever experience in the campaign.

    --

    Mongols

    The Mongols are the first horde to appear. They come in several waves during the start of the late period, and pop up near the east of the map, either near the extremities of the undefended Steppes of Russia, the eastern Turkish settlements or even more south than that. They are quite unpredictable, and I have personally seen them attack as deep into Europe as Poland and the Balkans before settling in. However, their main targets are generally Russia, Turkey and the rich Holy Lands - specifically Antioch. Generally, if the Player has settlements nearby, the Mongol AI seems to be more attracted to your cities.

    For the sake of this guide, let's hypothetically say you are in the area where the Mongols have invaded. The AI is hopeless at defending against these unstoppable hordes, and it will generally be up to you, the Player to stop this steamrolling faction. The Mongols tactics are very unpredictable, and may involve stumbling around for years in the Steppes, or get straight into their conquering and exterminating ways. Usually the latter is the case.

    The Mongols' strengths lie within their ability to fight in huge numbers. There will generally be around seven stacks of Mongols in close proximity, which means you will have to support enough forces to fight thousands of the strongest units in the game in one battle. Their other strengths - and more famed - are their incredible horse archers. Their cavalry are world-class, the Mongols seem to have learnt to ride a horse before they learnt to walk. Apart from this, they have a very decent backing of heavy spear infantry and some deadly archers.

    In the open field, you will get absolutely smashed by the Mongols. If you use spearmen to combat their cavalry, they will just sit at a distance and pepper away at your ranks of soldiers. If you fight them Horse Archer versus Horse Archer, you will face unnecessary casualties, which I’m sure no Player could really afford. Plus, there are easier ways…

    Any commander with half a brain will tell you that one of the best strategies to fighting the enemy is to fight them on your ground, your way. Many Players get intimidated with the hordes of Mongol cavalry sweeping through the Steppes exterminating everything in their way. Their strength is in their mobility. So all a good commander has to do is take that advantage away.

    The Mongols are unstoppable in the open fields, so try and fight them by blocking various choke points or behind castle walls. These are the two primary ways to fight the Mongols effectively. I will now explain them in further detail.

    --

    Strategy 1 – Bridges: The Mongols love fighting in flat open fields so that they can encircle you with their cavalry and unleash deadly volleys of arrows into all sides of your army. Fighting them at a chokepoint such as a bridge or a river crossing really limits their abilities to do anything other than fight in a concentrated frontal assault. Bridge attacks are very simple. All you have to do is have strong soldiers to hold the bridge, and have better artillery than the enemy if they try and outshoot you over the river.

    The Mongols will always send their infantry over the bridge. Meet them with your heaviest spearmen halfway and engage them of course. Now they will either send their cavalry across the bridge as well, if the AI is feeling stupid, or more sensibly sit at a distance and try to thin your ranks with their horse archers. This being said, you will want your artillery to be focusing on their horse archers. Their dismounted archers aren’t that much of a problem, as your own cavalry will be able to chase them down when the battle between the infantry on the bridge begins to waiver. Concentrate all artillery, archer and musket fire on the horse archers. You may not kill them all, but hopefully you can send them into a rout. When your infantry finally break through the ranks of your enemy, send your cavalry charging through to get rid of all routing units, and more importantly to dismiss their dismounted archers.

    Strategy 2 – Sieges: If you are okay with the Mongols devastating your lands, the more safer option is to hide behind your castle walls. Eventually the Mongols are either going to pass your lands, or lay siege to you. If the latter is the case, siege defense can cause catastrophic amounts of damage to the Mongols. If you have built cannon towers, you can wipe out huge chunks of their army while they sit outside your walls. If you still only have ballista towers, you can still thin their ranks quite effectively.

    The strategy is much the same as the bridge battle. You want to force them to fight in chokepoints, be it your gate or your breached walls. The upside to fighting in a siege instead of a bridge is that it least your towers can aid in your defense. Man the entire side of the wall that the Mongols are facing to get the most use out of your towers. Hopefully before there is a breach in your gates / walls, you should be able to thin their ranks by 10 – 20%.

    When there is a breach in the wall / gate, clog the area with a few units of your heaviest spearmen. Their cavalry will try and rush the breach, and in this confined area, you can really dish out terrible amounts of damage to their cavalry. Use your archers to shoot at any valuable units, generally horse archers or siege equipment. After a breach, send you cavalry out of a side entrance gate and surprise their siege equipment and archers that are firing into your city. With their horse archers occupied at the breaches, you should have no trouble dealing with this threat. Then charge your cavalry into the rear and flanks of their horse archers fighting in the breaches to completely surround them. Enjoy the slaughter!

    --

    Rinse and repeat either of these tactics to wipe out this nomad faction. It is a pretty good feat to be able to defeat the Mongols. Just know that the worst is yet to come..

    The Timurids

    The Timurids are the next and final horde faction. If you thought facing the Mongol horde was a nightmare, facing the Tirumids is the equivalent of going to hell and back – twice. They still have the formidable horse archers, but realizing their weaknesses in cavalry, they decided to upgrade. Meet the infamous, and near indestructible elephants. Not only will they wreak havoc to your infantry and cavalry using melee, but they also decided to whack on some cannons on the backs of these beats. Yes, I said cannons. Oh, and if that’s not enough, the Timurids also have rocket launchers. Yes, I said rocket launchers.

    Okay, so I’ve painted a pretty daunting picture of this faction, but there are some upsides that you can smile at. Firstly, the Timurids’ forces all come in one bunch, not in waves like the Mongols did, so you can deal with this threat knowing that when they’re defeated, they’re not coming back. The second and most important factor is they appear around 150 years after the Mongols, approximately 1360 – 1400. This gives you plenty of time to recover from the devastation of the Mongols, but more importantly, you may have finished the game by this time and have no need to fight the Timurids. But that’s no fun now is it?

    Although your tactics to fight the Timurids are much the same as fighting the Mongols, as their armies are still very cavalry-orientated, you have to use more strategies to combat their near invincible elephants. The Timurids will still attack the same areas as the Mongols, and will still usually exterminate any settlements they capture. So keep this in mind when you fortify your defenses.

    Let’s talk about strategy. The threat of horse archers are a thing of the past when you compare them to the Timurids’ new threats – elephants and rocket launchers. Although the latter is more of an eye-candy item, it can still dish out unpredictable and random amounts of damage to your infantry. They aren’t the effective against walls. What is effective against both walls and infantry are their elephants – quite easily the most deadly unit in the game. Their horse archers are still just as deadly as the Mongols, and the threat just as worrisome, but the elephants still take priority. Also, the Timurids utilize the strongest gunpowder unit in the game – the Monster Bombard. One shot from these bad boys can take down an entire wall. On the upside, it does take around 45 – 60 seconds to reload, so grab you cavalry and rush these cannons. Make them your number one priority in siege battles, in the field they are of less importance due to incredible inaccuracy.

    The “Fighting on the Bridge” tactic is near useless, as the idea is to fight in a concentrated mass on the bridge. When fighting against elephants, as you probably know, they can plow straight through the thickest of ranks, killing men faster than Rambo. If you have no choice to fight on the bridge, the only upside is that elephants are big targets and easy to scare. Use accurate gunpowder artillery and all your archers / muskets to concentrate firepower on these beasts. It should knock a few down, but more importantly, make them frightened and send them into a frenzy that will see them go wild, killing more of their own men than yours.

    The other upside for elephant friendly fire is that they are reasonable trigger happy with their cannons on their backs. This can result in heavy amounts of friendly fire, and they can hopefully send themselves into a frenzied riot with only a little encouragement from your basilisks.

    Fighting in a siege is exactly the same, when they breach the walls, clog it up. It is difficult with their elephants, so your main objective is to man all your cannon towers and hopefully you can knock a good chunk out of their elephants. Utilize your castle’s layered walls. Dish out as much damage from your cannon towers as possible, before retreating to the next ring and setting up a defense there. Each time, the Timurids should lose vast amounts of their elephants. Setting up stakes from your archers in the streets should slow them down during your retreat as well.

    --

    Much as the Mongols, rinse and repeat until all of the Timurids are gone. Congratulations on defeating the hardest horde, the strongest faction and the most difficult challenge in the game! Let me know if you find any mistakes, anything I can add or edit, or any other guides you would like me to write. +rep if you like my work!


    Updated on June 15 Other ideas to defeat the Mongols by Nazgul Killer

    Spoiler Alert, click show to read: 

    How to Bring Down the Mongols...
    I think we will all agree that the Mongols are a daunting force to be dealt with, however, there are plenty ways to deal with them, and I will name them and explain them now:

    1) Assassins - Using (Many) Assassins to destroy the Mongol generals before they even take a capital is one of the more common (And fun) ways of taking down the Mongols, will allow you a swift death (To the Mongols) but will take a lot of work.

    2) Head On Approach - Fighting them head on with your entire armies is not as common, but it also has many ways of success:
    *Stakes - Many archers or troops in the M2TW world uses stakes, using those stakes to form defensive lines, or setting stakes way in front of your armies and running back to your lines will make the Mongols cavalry run right through it and be decimated, this is a good way of taking down the Mongols but will need some sacrifices and a lot of micromanagement.

    *Cavalry armies - Fighting against the Mongols with their own weapons is like fighting fire with fire, you have a chance of success, yes, but you must feed your fire, continuing production and mass recruitment, the Mongol armies are gigantic, facing them in the open is again, a daunting task. (Should only be done with great missile cavalry factions, Poland, Russia, Turks, Byzantines, maybe Egyptians, Moors, Spain, Portugal and so on...)

    *Spearmen armies - This, most common of all, strategy doesn't work too well. The Mongol cavalry will not get close enough to you to allow you to spear them, this relies on that the Mongols will charge at you rather than fire at you from afar, this is why it is the least effective of all.

    *Combined mass archers armies - These armies consist of mainly archers and spearmen, and can be a good counter to the Mongols, the spearmen to guard the archers and the archers (If they have stakes, revert to the first section of the Head On Approach methods stated above) to fire at the Mongols, quite effective, but you will lose a lot of men.

    3) "Cheating" - Giving the Mongols a capital, far far away from them (Example, they appear at the Middle East? Give them a capital in Spain) and seeing them run all through these lands while you send assassins or armies after them, hoping they die, even if they DO survive, they will reach a very hostile environment, which will supply them a great challenge of survival.
    In addition, you can surround one of your cities with massive armies, gift them that city and take it down, this way you will destroy the Mongol faction for good.

    4) Alliance - If you want, you can simply ally with the Mongols, and with them, become a gigantic empire and rule the world.

    5) Wait - Allowing them to take a capital, and then throw a powerful strike at it, destroying it, will also destroy the Mongols (Another variation is found in section 3)

    These are the ways I know of (And have done) to take down the Mongols, if you have any more, please tell me, and I will supply them here and give you credit for them.


    Updated on Feb 24th All units stats by Ras'algul


    Spoiler Alert, click show to read: 
    All Units - All stats


    To see the unit tables you need to open the Html comment links below the images. Some of the tables are very large, you may need to scroll down. Sometimes additional info is noted at the bottom of tables.

    Additional info from the unit file:
    Mental stats:
    Discipline may be normal, low, disciplined or impetuous.
    Impetuous units may charge without orders
    Training determines how tidy the unit's formation is.
    Discipline the response to morale SHOCKS

    Weapon attributes:
    ap = armour piercing. Only counts half of target's armour
    bp = body piercing. Missile can pass through men and hit those behind
    spear = Used for long spears. Gives bonuses fighting cavalry, and penalties against infantry
    long_pike = Use very long pikes. Phalanx capable units only
    short_pike = Use shorter than normal spears.
    thrown = The missile type if thrown rather than fired
    spear & light_spear = The unit when braced has various protecting mechanisms versus cavalry charges from the front
    spear_bonus_x = attack bonus against cavalry. x = 2, 4, 6, 8, 10 or 12

    *Disclaimer*
    The mechanics of the battle engine have not been fully disclosed by CA. The performance of any given unit is not determined by the stats given here alone, but by a combination of these stats and the units' animations. This means that a unit may perform better or worse than the stats indicate. Keep that in mind when you compare stats.


    Open http://www.mizus.com/Ras/Infantry.html Warning: this will open off-site content.
    Close http://www.mizus.com/Ras/Infantry.html.


    Open http://www.mizus.com/Ras/Miss.Infantry.html Warning: this will open off-site content.
    Close http://www.mizus.com/Ras/Miss.Infantry.html.


    Open http://www.mizus.com/Ras/Cavalry.html Warning: this will open off-site content.
    Close http://www.mizus.com/Ras/Cavalry.html.


    Open http://www.mizus.com/Ras/Miss.Cavalry.html Warning: this will open off-site content.
    Close http://www.mizus.com/Ras/Miss.Cavalry.html.

    Last edited by Silent Assassin; June 15, 2009 at 07:52 AM. Reason: Updated with new guides
    TIME TO DIE!!!! Proud Son of Viking Prince

  6. #6

    Default Re: Please members don't post here as I'm updating th Great Thread for it to work better

    Updated on March 23rd, 2009 M2TW List of Cheats by Axnsan

    Spoiler Alert, click show to read: 

    The cheat console is summoned by pressing the ~,` button while on the campaign map.
    Note: underlined parameters are optional.
    Note: if you press UPARROW while in the console, it will bring up the last line you typed

    1.Money cheats

    Spoiler Alert, click show to read: 

    add_money "Faction Name" x
    where:
    x - amount between -40000 and 40000
    "Faction Name" - faction to add the money to.No faction means the money will be added to your faction
    *can also be used on AI factions

    examples:
    Code:
    add_money "The Papal States" -40000
    - substracts 40.000 florins from the pope
    Code:
    add_money 40000
    - adds 40.000 florins to your treasury


    2.Name syntax

    Spoiler Alert, click show to read: 


    Some traits (almost all ) require the names of characters/settlements to perform actions on.

    -for characters/settlemens with only one name the name can be written as normal:
    London, Henry, Bertha etc.
    -for those with two names, the name must be put between quotes ("...."):
    "Henry Plantagenet", "Anna Laskaris","Al Aqaba", etc.
    -for those with more names,the name must be put between "".Also there can only be one space between names, all the other spaces must be replaced with _.
    example:
    "Otto von_Something","Henry de_Something",etc.
    -characters that have epithets(e.g: Henry the Great) will use only the name:
    Henry
    -kings/princes must have their familiy name specified. it can be found if you go to family tree and hover your mouse over the king's daughter or wife portrait.


    3.Traits&Retinue


    Spoiler Alert, click show to read: 

    give_trait "Character Name" TraitName x
    where:
    "Character Name" - the name of the character to add the trait to. must respect the syntax above.Can also use "this".
    TraitName - name of the trait to add
    x - treshold. The treshold of the trait. no treshold value means the first treshold
    *can also be used on AI characters

    examples:
    Code:
    give_trait "Henry Plantagenet" GoodCommander 3
    - gives Henry Plantagenet the GoodCommander trait at treshold 3, which is +3 command
    Code:
    give_trait this NightBattleCapable
    gives selected character the NightBattleCapable trait at treshold 1, which is Night Fighter

    remove_trait "Character Name" TraitName
    where:
    "Character Name" - name of the character to remove trait from.Can also use "this".
    TraitName - trait to remove.No trait name means all traits will be removed.
    *can also be used on AI characters

    examples:
    Code:
    remove_trait this
    - remvoes all traits from selected character
    Code:
    remove_trait Otto GoodTrader
    - removes the GoodTrader trait from Otto.


    Spoiler Alert, click show to read: 

    Here are some traits.

    GoodCommander 5 - +5 command - The Mighty
    NaturalMilitarySkill 4
    GoodAttacker 5 - +5 command when attacking - The Attacker
    GoodDefender 5 - +5 command when defending - The Bastion
    Drink - +1 command, +1 popularity
    Sobriety - + 1 command, cancels out drink
    Scout 3 - +3 line of sight
    GoodAmbusher 4 - +4 command when ambushing - The Cunning
    Disciplinarian - +1 morale, +10% movement
    GoodSiegeAttacker 4 - +4 command when assaulting walls - The Unstoppable
    GoodSieigeDefender 4 - +4 command when defending walls - The Defender
    Brave 5 - +2 authority, +2 morale - The Fearless
    Energetic 4 - +2 authority, +25% movement
    Xenophobia - +3 personal security
    PublicFaith 4 - +4 piety - The Pious
    GoodAdministrator 3 - 10% trade bonus, + 3 law
    InspiringSpeaker 3 - +2 law
    RhetoricSkill 2 - +2 authority
    StrategicSkill 3 - +3 command
    TacticalSkill 3 - +4 command when ambushing, +3 line of sight
    MathematicsSkill 3 - +2 command when assaulting walls, +30 build points, 15% trade bonus
    PoliticsSkill 3 - +2 authority, -2 loyalty
    VictorVirtue 3 - +3 authority, -2 personal security, +3 popularity - The Conqueror
    Austere 3 - +2 loyalty, 300% increase to bribe, 10% tax bonus
    SpyMaster 3 - +1 dread, +2 public security, 30% agent discount - The Watcher
    AssassinMaster 3 - +3 dread, +2 personal security, 25% agent discount - The Killer
    CounterSpy 3 - +1 chivalry, +1 line of sight, +4 public security
    AssassinCatcher 3 - +2 chivalry, +1 line of sight, +4 personal security - The Fortunate
    HighPersonalSecurity 3 - +4 personal security
    Upright 3 - +3 loyalty, 300% increase to bribe, +6 law - The Just
    Authoritarian 3 - +2 authority, +3 unrest, +6 law - The Harsh
    Loyal 4 - +3 chivalry, +4 loyalty
    ContentGenera 5l - +5 loyalty
    GoodFarmer 3 - +3 farming output
    GoodMiner 3 - 30% mining bonus
    GoodTrader 3 - 30% trade bonus
    Just 3 - +3 chivalry, +3 law - The Just
    Noctophilia 3 - +3 command fighting at night
    Handsome 3 - +1 authority, +3 popularity
    Fertile 3 - increase the chance of having children
    GoodTaxman - 10% tax bonus
    GoodRiskyAttacker 2 - +1 morale, +2 command when attacking
    GoodRiskyDefender 3 - +1 morale, +3 command - The Steadfast
    Pragmatic 3 - +3 authority, +2 morale
    HaleAndHearty 3 - Increases the chance of having children, +6 hitpoints
    TouchedByTheGods 3 - +4 piety
    Bloodthirsty - +1 dread, +1 command, +1 morale
    Intelligent 3 - +3 command, 10% trade bonus, 10% tax bonus
    CrusaderHistory 3 - +3 chivalry, +3 piety, + command vs. Muslims - The Crusader
    AdoredByPope 3 - +3 piety, +3 command vs. Muslims - The Adored
    BattleChivalry 5 - +5 chivalry, +2 authority - The Saint
    StrategyChivalry 5 - +5 chivalry, +3 authority - The Saint
    RansomChivalry 4 - +4 chivalry, +3 morale - The Merciful
    GoodArtilleryCommander 4 - +4 commanding artillery
    GoodGunpowderCommander 4 - +4 commanding gunpowder troops
    Gregarious 3 - +2 morale, +3 popularity
    WifeIsCharming 3 - increases chance of having children, +2 popularity
    WifeIsFertile 3 - increases chance of having children
    WifeIsWise 3 - 15% trade bonus, 15% tax bonus
    FathersLegacy 3 - +3 authority
    ChivalryLegacy 2 - +2 chivalry
    TourneyKnight 5 - +3 chivalry, +2 authority, +2 commanding cavalry
    AcademyTrained 2 - +2 command
    ReligiousActivity 4 - +2 chivalry, +4 piety
    WifeIsNoble 3 - +1 public security, +3 popularity

    Merchant Traits
    NaturalMerchantSkill 3 - +3 finance
    GoodMerchant 4 - +4 finance
    Monopolist 2 - +2 finance
    LegalDealer 2 - +2 Finance
    SecureMerchant 2 - +2 Finance
    SecurityMerchant 2 - +2 personal security, -1 finance
    WorldlyMerchant 2 - +2 finance

    Princess Traits
    HumbleWoman 2 - +2 charm
    PrettyWoman 3 - +3 charm
    BraveWoman 2 - +2 charm, +2 personal security
    SpiritedWoman 2 - +2 charm
    FaithfulWoman 3 - +2 charm, +1 loyalty
    UnchasteWoman 2 - +2 charm
    EducatedWoman 3 - +2 charm
    PassionateWoman 3 - +2 charm, increases chance to have children
    TolerantWoman 3 - +3 charm
    DykeWoman - +1 charm
    FertileWoman 3 - increases chance to have children
    FairWoman 3 - +3 charm
    GoodPrincess 4 - +4 charm
    NaturalPrincess 3 - +3 charm

    Diplomat Traits
    NaturalDiplomatSkill 3 - +3 influence
    GoodDiplomat 5 - +5 influence
    Multilingual 3 - +3 influence
    BraveDiplomat 2 - +2 influence
    Secretive 3 - +3 influence, 10% bribe bonus
    SmoothTalker 3 - 30% bribe bonus
    Spy Traits
    NaturalSpySkill 3 - +3 subterfuge
    GoodConspirator 3 - +3 subterfuge
    GoodSpy 5 - +5 subterfuge
    Assassin Traits
    NaturalAssassinSkill 3 - +3 subterfuge
    GoodAssassin 5 - +5 subterfuge


    Priest Traits
    NaturalPriestSkill 3 - +3 piety
    Bishop - +1 piety
    Cardinal - +1 piety
    GoodDenouncer 5 - +5 piety - The Inquisitor
    Righteous 3 - +3 purity - The Righteous
    StrongFaith 4 - +4 piety
    Dogmatic 3 - -3 unorthodoxy
    Purifier 3 - +3 piety, +2 eligibility, +3 purity, +2 violence
    Missionary 3 - +3 piety, +2 eligibility, +3 purity, -2 violence - The Missionary
    Warmonger 3 - +3 violence - The Warmonger
    Peaceful 3 - -3 violence - The Peaceful
    SecretlyFemale - +1 piety, -1 eligibility, +1 purity, -1 violence


    Spoiler Alert, click show to read: 

    Here are some ancillaries

    give_ancillary "Character Name" ancillary_name
    "Character Name" - name of the character to add retinue to.Can also use "this".
    ancillary_name - name of the ancillary to add to specified character
    *can also be used on AI characters

    examples: Code:
    give_ancillary "Anna Laskaris" chastity_belt
    - gives the chastity belt to poor Anna
    Code:
    give_ancillary this brilliant_inventor
    - gives the Inventor ancillary to selected character.

    remove_ancillary "Character Name" ancillary_name

    "Character Name" - character tor emove trait from. can also use "this"
    ancillary_name - ancillary to remove. no ancillary specified will remove all ancillaries.
    *can also be used on AI characters
    examples:
    Code:
    remove_ancillary this
    - removes all ancillaries from selected character.
    Code:
    remove_ancillary "Anna Laskaris" chastity_belt
    - Anna is free again!


    Traits:

    Spoiler Alert, click show to read: 

    Academic_advisor 5% trade bonus, 5% tax bonus
    accomplice +1 subterfuge
    actor +1 popularity
    adultress + dread, -1piety, -1 morale
    adultress_foreign +1 dread, -piety, -2 morale, -1 popularity, decreases chance of children
    adultress_she_man +1 dread, -1 piety, -3 morale, -1 popularity, decreases chance of children
    albertus_magnus +2 law
    alchemist +2 hit points, +1 command
    aldus_manutius 20% trade bonus, +2 squalor
    amerigo_vespucci +15% movement, +3 line of sight, 10% trade bonus
    anthony_of_padua +2 piety, +2 squalor, +2 unrest
    apothecary +4 hitpoints, increases chance of having children
    architect 10% discount on construction, +2 squalor
    ark_of_the_covenant +2 dread, +1 command
    armour_custom +4 hitpoints
    armour_ornate +1 authority, -2 hitpoints
    arnold_von_winkelried +2 morale, +2 command when attacking, +4 hitpoints
    artist +1 popularity, 10% decrease to bribe, +1 squalor
    assassins_apprentice +1 subterfuge
    assassins_blade +1 assassination
    astrologer -1 piety, +1 command
    bard +1 morale, +1 command
    beguiling_bard +1 subterfuge, +1 personal security
    bertrand_du_guesclin +2 command, +2 morale, +2 command vs. English, +1 command vs. Spanish, +1 command vs. Porteguese
    biographer +1 authority
    black_stallion +25% movement
    bodyguard +2 personal security, -1 popularity
    bridle_of_constantine +1 piety, +1 personal security, +1 hitpoints
    brilliant_inventor +30 building points, +1 farming output, 20% mining bonus
    caravan_driver +25% movement, +1 line of sight
    catamite +1 subterfuge
    chastity_belt -1 charm, -10% movement
    chevalier_de_bayard +2 chivalry, +2 piety, +2 command, +2 line of sight
    choir_boy +1 piety, +1 unorthodoxy, -1 purity
    counterfeiter +1 finance
    courtesan +1 subterfuge
    crooked_judge
    crown_of_thorns +2 piety, +1 command
    dancer +2 subterfuge
    dark_apprentice +1 magic, +1 personal security
    deacon +1 piety
    delicate_blade +1 personal security
    diplomatic_escort +1 line of sight, +1 personal security
    doctor increases the chance of having children, improves the chances of casualties recovering from their wounds
    donatello +2 popularity, +3 squalor
    drillmaster +25% movement, 10% discount on training
    enchanted_broom +1 magic, +15% movement
    eunuch +1 authority, +1 personal security
    evil_mother-in-law -1 authority, -1 morale
    executioner +1 piety
    exotic_gifts +1 influence
    explosives +1 sabotage
    faithful_servant +1 charm
    false_documents +1 subterfuge
    false_relic +1 piety
    femme_fatale +2 subterfuge
    fine_cosmetics +1 charm
    foodtaster +1 personal security
    fool_brilliant +1 personal security, 5% trade bonus
    fool_usual +1 morale
    foreign_dignitary +1 influence
    fragment_of_the_black_stone +3 piety
    francesco_petrarca +2 piety, +2 popularity, +1 squalor
    francis_of_assisi +2 piety, +2 squalor, +2 unrest
    geoffrey_chaucer 10% construction discount, +1 popularity
    george_of_antioch +1 piety, +2 command, +2 popularity
    gerard_de_ridefort +1 command, +1 authority, +1 morale, +2 command when attacking
    hair_from_mohammeds_beard +1 piety
    handgun +1 assassination, +2 law
    harsh_judge -1 popularity
    herald +1 authority
    hildegard_von_bingen +2 piety, +1 authority, +3 popularity
    holy_chalice +1 piety
    holy_grail +2 piety, +5 hitpoints, improves chances of wounds recovering
    holy_lance +1 piety, +2 command
    holy_mantle +2 piety
    holy_prepuce +1 piety, increases chance of children
    holy_quran +2 piety
    holy_shroud +1 piety, +1 command defending walls, +1 personal security
    ibn_khaldun +2 piety, +2 authority, 15% trade bonus
    icon_not_made_by_hands +1 piety, +1 public health
    intrepid_explorer +15% movement, +1 line of sight
    iron_crown_of_lombardy +1 piety, +1 personal security, +1 hitpoints
    jan_zizka +2 command, +1 authority
    joan_of_arc +2 piety, +1 command, +2 morale, +2 command vs. English
    johannes_faustes +2 dread, -2 piety, +4 hitpoints, increases chance of children
    john_gutenberg 20% trade bonus, +2 squalor
    john_wycliffe +2 piety
    key_to_holy_kaaba +1 piety
    knight_beserker +1 command, +1 morale
    knight_chivalrous +2 chivalry, +2 command
    knight_crusader +2 personal security, +1 violence
    knight_dread +2 dread, +1 command
    knight_santiago +1 chivalry, +1 command
    knight_stjohn +1 chivalry, +1 command
    knight_templar +1 chivalry, +1 command
    knight_teutonic +1 chivalry, +1 command
    lancebearer +1 commanding cavalry
    librarian +1 piety
    lock_of_kaaba +1 piety
    machiavelli +1 command, +1 authority, +1 squalor, -1 unrest
    magician +1 morale, +1 popularity
    magician_pagan -2 piety
    marco_polo +15% movement, 10% trade bonus
    martin_luther +2 piety, -2 unrest
    master_mason 10% discount on construction
    master_of_archers +1 command
    master_of_assassins +1 personal security, 20% agent training discount
    master_of_horse +1 commanding cavalry
    master_smith 10% training discount
    mathematician 5% trade bonus, 5% tax bonus, +1 commanding artillery
    meister_eckhart +2 piety, +1 authority
    mentor +1 command
    mercenary_captain 10% training discount, 10% looting bonus
    merchant_clerk +1 finance
    michaelangelo +2 popularity, +3 squalor
    military_engineer +2 command assaulting walls, +50 build points
    mohammeds_footprint +1 piety
    money_counter 5% trade bonus, 10% tax bonus
    monk +1 piety, -1 purity
    musician +1 morale, +2 popularity
    naive_knight +2 personal security
    naval_gunner +2 command at sea
    naval_navigator +1 command at sea, +10% movement, +1 line of sight
    nicolau_copernicus
    niels_ebbesen +2 chivalry, +2 command, +2 morale
    nosy_mother -1 authority, +1 personal security
    nun +1 piety, -1 violence
    obsessed_suitor -1 charm, -2 personal security
    ordinance_master +1 commanding gunpowder, +1 commanding artillery
    overseer 1% construction discount, 1%mining bonus, +1 farming output
    paladin +1 personal security, +1 purity, +1 violence
    paracelsus +4 hitpoints, improves chances or recovering wounds
    pet_bloodhound +2 subterfuge, +1 line of sight, +1 personal security
    pet_guarddog +2 personal security
    pet_monkey +1 subterfuge
    peter_the_hermit +2 popularity, +2 squalor
    physician increase chance of having children, increases chance of recovering wounds
    pickpocket +1 subterfuge, +1 line of sight
    pierre_abelard +1 piety, +1 popularity, +1 squalor
    poisoner + 2 subterfuge
    priest +1 piety
    quartermaster +15% movement, 5% looting bonus
    raphael +2 popularity, +3 squalor
    roger_bacon +1 command assaulting walls, +2 commanding gunpowder
    roger_de_moulins +2 command, +1 authority
    royal_escort +1 personal security
    royal_seminarian +1 piety, +1 unorthodoxy
    runner +1 command
    scout +1 command ambushing, +2 line of sight
    scribe_ancillary
    seal_of_solomon +1 dread, -1 piety, +2 commanding cavalry
    secret_love -1 charm
    shard_of_the_true_cross +2 piety, +1 command
    shieldbearer -1 morale, +2 hitpoints
    shipwright +1 command at sea
    siege_engineer +1 command assaulting walls, +60 build points
    simon_de_montfort +2 chivalry, +2 command, -1 loyalty, +1 popularity
    sir_william_wallace +1 chivalry, +1 command, +1 authority, +2 morale, +3 command vs. English
    slaver 15% trade bonus
    smothering_bodyguard -1 charm, +3 personal security
    soil_from_mohammeds_grave +1 piety
    soothsayer +2 morale
    spyglass +2 line of sight
    spymaster +1 command, +1 public security, 20% agent discount
    standard_of_mohammed +1 piety, +1 command
    strapping_stallion +10% movement
    stunning_handmaiden -1 charm
    swift_steed +15% movement, +1 public health
    swiss_guard +1 personal security
    sword_of_mohammed +! piety, +2 command
    swordbearer +1 personal security, +1 hitpoints
    taticius +2 command
    tax_farmer -1 popularity, 10% tax bonus
    the_lemegeton +2 magic
    tooth_of_mohammed +1 piety
    torturer +3 dread, +1 authority, +2 public security, +1 unrest, +3 public order
    translator +2 influence
    treasurer 5% trade bonus, 5% tax bonus
    trick_abacus +1 finance
    trusty_steed +5% movement, +1 commanding cavalry
    tutor +1 piety, 5% trade bonus
    vasco_de_gama +15% movement, 10% trade bonus
    veil_of_veronica +1 piety
    veteran_warrior +1 personal security, +1 commanding infantry
    vlad_tepes +3 dread, +3 command
    witch_hunter +1 piety, -1 unorthodoxy
    yappy_little_dog -1 charm
    zealous_disciple +1 piety, +1 personal security


    4.Construction cheats

    Spoiler Alert, click show to read: 

    process_cq "Settlement Name" -will construct the first building in the queue of the specified settlement
    *can also be used on AI settlements
    examples:
    Code:
    process_cq London
    - will process the first building in London's queue


    5.Unit cheats

    Spoiler Alert, click show to read: 

    create_unit "Character/Settlement name" "Unit Name" a b c d
    "Character/Settlement name" - where to create units
    "Unit Name" - name of the unit to create
    a - number of units to create.1 to 5
    b - experience given to created units. 0 to 9
    c - armor level given to created units. 0 to 3
    d - weapon level given to created units. 0 to 3

    examples:
    Code:
    create_unit London "Yeoman Archers" 5 9 2 1
    -creates 5 yeoman archer untis with 3 gold chevrons, silver armor and bronze weapon

    madras - creates elephant gunners to selected army/city
    rogan - creates elephant cannoneers to selected army/city
    vindaloo - creates elephant rocketeers to selected army/city
    george - creates mercenary ribault to selected army/city
    houston - creates mercenary rocket launcher to selected army/city
    istanbul - creates mercenary monster bombard to selected army/ctiy


    6.Character cheats

    Spoiler Alert, click show to read: 

    show_cursorstat - shows x and y coordinates of the mouse cursor

    move_character "Character Name" x,y
    "Character Name" - name of the character to move.CAN'T USE "THIS".
    x,y - coordinates shown by the "show_cursorstat" command

    examples:
    Code:
    move_character "Grechin Ivanovich" 169,87
    -moves Grechin Ivanovich to specified coordinates

    character_reset "Character Name" - resets movement points of specified character

    examples:
    Code:
    character_reset "Henry"
    - resets Henry's movement points.


    7.Population cheats

    Spoiler Alert, click show to read: 

    add_population "Settlement Name" x
    "Settlement Name" - settlement to add population to
    x - amount of population betwwen -4000 and 4000

    examples:
    Code:
    add_population London 3500
    -gives London 3500 additional
    population
    Code:
    add_population Rome -2000
    - substracts 2000 population from rome


    8.Other cheats

    toggle_fow - reveals/hides the campaign map.
    jericho - causes walls to crumble in siege battles.


    I also added the following files from the game folder:
    -export_descr_character_traits, which shows all traits, their effects,counter traits and triggers *the triggers are in the lower half
    -export_descr_vnvs_enums, which shows a complete list of traits whitout their effects/triggers
    -export_descr_ancillaries, which shows all ancillaries, their effects,type and triggers *the triggers are in the lower half
    -export_descr_ancillary_enums, which shows a complete list of ancillaries without their triggers/effects
    -export_descr_units, which shows all units' ID's, which must be used for the create_unit cheat
    If you spot any spelling errors or something that's wrong, feel free to PM me or post it here
    Attached Filesexport_descr_character_traits.txt (445.2 KB, 1 views)export_descr_vnvs_enums.txt (74.3 KB, 2 views)export_descr_ancillaries.txt (160.6 KB, 2 views)export_descr_ancillary_enums.txt (11.6 KB, 1 views)export_descr_unit.txt (501.9 KB, 2 views)


    Updated on April 7th, 2009 Short Campaign Faction Strategy Guide to Medieval II Total War by Viking Prince

    Spoiler Alert, click show to read: 

    I have only provided the link to the thread as there will be more updates to it. Nice Work VP

    http://www.twcenter.net/forums/showthread.php?t=238094


    Updated on April 16, 2009 More Information on Reputation by Rebel6666

    Spoiler Alert, click show to read: 

    This came from a private message from a good friend of mine

    [PM byNazgul-Killer]I have recently won a campaign with Spain in which I held the Moors and the French as my vassals and helped them in wars (Sent 'expeditions' or random attacks on their enemies and kept big armies at their frontier terfs in a fort), however, I was wondering if there is a way to get a vassal with MORE than 1 region? I find it completely impossible, if you could tell me how, I'd very much like that. I found the usefulness of Vassals, as after I took both of them as my vassals I gave both of them 3 regions (France I gave 4) and I saw my income rapidly grow.
    Returning to my question; is it possible to get a vassal with more than 1 region?
    Thanks
    NK

    Reply by me
    Do you mind if I post this with my answers in the Great Thread to help others??

    Yes it is possible, it's harder and sometimes is easier. It's hard to explain because everything turns around Reputation and relationship with them

    For Example: Easy I was the Turks and I was Allied to Egypt on turn one, we were on turn 80 and one of their fleets blocks my ports and this automaticly declares War, the turn after they took it off my port. I have sent them a diplomat to ask them to become my vassals, they had around a couple of regions in Acre, Jerusalem, Gaza, Alexandria and the other one(forget the name). Before offering my demande I had a look at their answer to this request and it was balanced.

    So I offered them 100 000 florins and gaved them map Information, they accepted I was like WTF but the reason why it was so easy is that I had a perfect Global Rep and before they attacked me we had outstanding relationship.

    Hard: So where it harder is when you are at war for quite some time with that given faction, I have even seen a faction that would die before accepting allegience to me. This all roll around the Rep and Relationship.

    Conclusion: If you follow my previous guide and let them one city they become your vassals and then h=just give them back their lands you stoled them this will help alot your Reputation and also you relatioship with them. Giving them back their Capital is more than good for the player.


    Hope this answers your question.

    Regards
    Rebel6666

    Reply by Nazgul
    Thanks man, been a GREAT help.
    Regards,
    NK.


    Updated on April 27th The Russian Guide by Basileios Zacharias

    Spoiler Alert, click show to read: 


    The Russians,


    A people divided
    This is going to be the first guide I’ve ever written for twc so don’t be to harsh in your opinion about it. Why the Russians? Well to speak with a cliché: it’s my favourite faction in vanilla medieval II total war, I’ve never understand why so few like it, it’s a very challenging and with that it’s a interesting campaign. There already are some excellent guides written about them which can be found here and there. These guides certainly have influenced me so don’t look surprised when you find something you’ve read somewhere else because that’s quite possible
    In this guide I’ll carefully try describe how I play them and the way that works best for me. I hope you benefit from reading this if not I hope you at least enjoyed reading this.

    The contents I’m going to discuss are:
    Starting position in campaign
    The Russian soldiery
    - my early army
    - my high army
    - my late army
    The campaign
    - first turns
    - first targets and their use
    - diplomacy
    - strategy for later on


    Starting position in campaign
    As you can see the Russian start with one province with the capital city of Novgorod, three halve stacks, a diplomat in the form of a princess, a spy and a bishop. This region will be your most important region for some time, from here your early armies will march out and conquer those under advanced towns and forts that surrounds you. Until you get Smolensk and Kiev(both will be discussed in later topic) up and running this will be your primary source for that hard needed gold and men. You are very isolated at the beginning, completely surrounded by rebels with the nearest faction a few hundred miles away. People complain to me about this but I myself enjoy this thoroughly. Being at war with Poland or/and Hungary from turn 1 with your crappy early units will be a very hard battle, with all those rebels around you don’t have to worry about them while you noob your early steps to glory.


    The Russian soldiery and How I use them

    I always have a locked number of slots for units with specific functions. Normally this means: 8 slots for cavalry(including the general), 8 slots for infantry and 4 slots for dismounted ranged units. I do this to keep my army balanced. In this way it can be effectively fielded against any foe that crosses my path and I generally don’t need to make huge adjustments. I fight with a MLS(Multiple lines system) with usually spears as a front line, swords/axes behind them, two handed swords/axes on the flanks of the second line and a third line which consists out of the ranged infantry. The cavalry goes logically on the flanks and fulfil mainly a flanking role.
    My first line is usually made of simple and weak infantry. In short they serve as cannon fodder and are destined to break the first charge of the enemy. When the enemy charge is halted I retreat my first line and order my second line to charge. Meanwhile I order my flanking infantry and cavalry to the flank and rear of the enemy army and when they are in position I surround the enemy a massive rout is usually the result. The number of friendly casualties vary from very low to a quarter of my army but victory is almost always the result.


    My Early Army


    The early Russian army is in comparison to it’s direct rivals not so good. Especially with the absence of a castle/wooden fortress in the beginning you will have a hard time with fielding an effective force. I rely heavily on the Kazaks. These early mounted archers can win a battle for you. In terms of heavy cavalry you only have the general’s bodyguard at your disposal.
    In terms of infantry you will have to work around with spear militia, woodsmen and spearmen. Spearmen will come available later on but when you get access to them immediately let them replace your spear militia. Who are even worse then a town militia of a western European faction.
    I find woodsmen ideal flankers. With their heavy two handed axes they must never be positioned in the front line and also look out for archers with their low defence stats they will be slaughtered when standing under fire.
    Spear militia just suck, the moment I can get something better I disband all my spear militia and leave two of them in my capital to guard it free. Nevertheless that something better won’t come for another 15 turns or so and you’ll need to keep up with the other factions who are looking very hungry to those empty provinces near you. The only upside about them is that the rebels near you in most cases don’t have something better either.
    The last empty slots in army are reserved for the ranged units. You won’t have anything better then peasant archers, I find these guys always useful but I prefer an extra kazak unit instead of a unit of peasant archers.

    Early Army composition:
    2 generals(you really need a decent force of heavy cavalry), 6 spearmen/spear militia, 4 woodsmen(2 on both flanks), 5~6 kazaks and 2~3 peasant archers.


    My High Army


    I know that the game calls these guys early but by the time you can finally get to them the game is far enough to call it a high army. With these guys we are beginning to come somewhere. With the coming of Druzhina you will finally be able to put those tired generals in their cities/castles and let these new guys do the job. Though I prefer lances above spears for their higher charge value, these guys will do a good job when they attack our enemies from behind and in a close combat battle they even have an axe as secondary weapon!
    With the high army we also gain two new ranged cavalry units: Boyar sons and Cossack cavalry. They are a logical substitute for the Kazaks, whose new function will be to clear the many rebels out of our empire. I never put both in the same army because that will resolve in having to much mounted cavalry according to my army build up. Both can hold their own in melee combat excel the old Kazak cavalry units on all fronts
    In terms of infantry we can now call on Dismounted Druzhina and Dismounted Boyar sons. They both have completely the same in terms of stats and finances. I like the Boyars better because of their armour and thus I rarely see dismounted Druzhina in my field armies. They will fulfil the role of flankers in my army and with that the role of the woodsmen is played.
    I still use spearmen as my main line infantry. Spears serve better as defensive weapons then axes and are a perfect anvil.
    On the ranged infantry unit part we get dismounted Cossack cavalry and crossbow militia. I prefer the latter for their armour piercing ability and of course the only thing that makes militia actually worth spending money on them: Their free upkeep in the cities that spawned them.

    High Army composition:
    1 general, 3 Druzhina, 4 Boyar Sons/Cossack Cavalry, 4 spearmen, 4 Dismounted Druzhina/Dismounted Boyar sons, 4 crossbow militia

    If you compare it with my early army composition you will see that not much has changed. The number of cavalry units remained the same only the addition of regular heavy cavalry gives the army a new weapon and a strong flanker.


    My Late Army


    Now we have the big guns. The Tsars Guard is your finest cavalry unit and you shouldn’t think long to replace your old fashioned Druzhina with these guys. These are your ultimate heavy cavalry guys and the only heavy cavalry unit you can field without disgrace against the Mongol - and Timurid hordes. They fulfil the same role as any heavy cavalry: To flank and rout the enemy. Due to their axes and high defence they will surely be a hard nut to crack for any opposing heavy cavalry.
    We get another very strong cavalry unit in the form of Dvor cavalry. These heavy mounted archers will never disappoint you. Their only downside is their relatively slow speed in comparison to other mounted archer so use them wisely! Because even though they have “high” defence and melee stats, horse archers are not meant for melee. But they will make up for it with their volleys. These guys can beat Mongol horse archers and that means a lot in my opinion. They will replace the Boyar Cavalry and the Cossack cavalry, who are usually disbanded or if they have 9 experience I use them in a secondary field army fighting against rebels.
    Our infantry arsenal is strengthened with the coming of one new unit. The Berdiche Axemen who are in my opinion one of the coolest looking units in game. I’ve read a lot of threads about them in which people complained that these guys can’t hold a line. Well if you look at their charge value and compare it to the legendary Tsars Guard you will learn that to hold a line is entirely not their function! They are not meant to hold a line against hordes of enemies but they are meant to full fill the role of flankers. When you use them for that matter you will fall in love with them again.
    When we arrive in the late period of the Medieval ages we can make use of gunpowder. The strongest unit ranged units can be created with them and will prove very effective in siege defence and attack. The two gunpowder units that are available to the Russians are the Cossack Musketeers and Arquebusiers. When you compare them I don’t think you will disagree with me when I say that I ignore the Arquebusiers and focus all of my attention on the Cossack Musketeers. The Musketeers simply outclass the Arquebusiers on every front and that’s reason for me to stick with the Musketeers.
    But even though the age of gunpowder has begun the age of bow and arrow is not yet over. I usually evenly divide the number of available slots between the Musketeers and the Dismounted Dvors. The Dvors are needed for their fast reload speed while the Musketeers have time to reload their deathly barrels. Though the Dvors are a superior missile unit of their own right and I sometimes prefer them above Cossack Musketeers when fighting against a superior missile faction(f.e. The Mongols)

    Late army composition:
    1 general, 3 Tsars Guard, 4 Dvor Cavalry, 4 spearmen, 2 D. Boyar Sons/D. Druzhina, 2 Berdiche Axe men, 2 Cossack Musketeers and 2 D. Dvor or 4 D. Dvor

    Again not much change in comparison with the previous armies. A larger variety in infantry is present. The D. Boyars or Druzhina no longer serve as a flanking force however. They now take over the entire second line from the spearmen. This is done to give the infantry part of the army a chance against infantry heavy armies as that of the English and the Danes.


    The Campaign
    Many find the campaign of the Russians hard or challenging. I can’t say that I disagree with them. Especially in the early campaign things are difficult as you suffer from a very poorly trained and equipped army. You will be almost always in disadvantage when fighting against other factions in the early campaign. When the high army units becomes available things get easy and you no longer need to perform Alexander actions to win a battle without delaying the campaign with retraining time. However the developers thought that it would be fun to make the Russian campaign even more hard and decided to throw in the Mongols and Timurids. How to deal with al these difficulties I’ll try to explain in the following chapters.


    First Turns
    As you can see in the above picture I have drawn red lines towards one army and then a white line from that army to the south. I don’t think that needs much explanation but to clear it up a bit. The red lines are the actions you must perform the first turn. All of the available units you have must be formed in to one large army/stack. This army is going to be your blitz army early on. In order to keep up with your direct rivals(the Hungarians and Polish) you’ll need to conquer some cities/castles asap. I always take the spy with me, with some luck he can open the gates for me which will make sure that I don’t have to wait that very important turn to capture the settlement.
    While your army is moving south I usually sent my princess south to sign trade rights with everyone who I meet and eventually ends up marrying with Prince John of the Byzantines(In a way historical accurate). Meanwhile in your capital build things to increase your economy(this shouldn’t be to hard, Novgorod is usually the richest city in all of my Russian games) and I tend to build ballista and catapult makers early on. Everything is vital to give you that single edge in battle.


    First Targets and their use
    Speed is the keyword in the early Russian campaign. It’s vital for the Russians to quickly gain a military powerhouse and a province bordering the black sea to get access to the wealthy trade of the Mediterranean. The most likely targets and those I always go after first are the wooden fortress of Smolensk and the large town of Kiev. Now you need to act fast to get quickly enough to Kiev. Both the Hungarians and the Poles are always in love with this city and are constantly blitzing towards it. Make sure you get there first to claim it as your price. If all has gone according to plan Kiev will profit enormously from the newly laid trade routes and thus your treasury as well. I find it a must to have Kiev in my possession early on. Kiev has also much natural riches such as slaves which is a very valuable resource to put your merchants on.
    Smolensk features a whole different role for the Russian Empire. It’s the most advanced castle building near you so capturing it quickly to start developing it is important. If you decide to go for Kiev it’s on your way so you’ll get there sooner or later.
    The next city/castle I always go for is Vilnius. Vilnius usually acts as a forward post and watch tower in my campaigns for the Polish and Hungarians. Together with Smolensk Vilnius are always my military powerhouses. I tend to specialise as well; Smolensk acting on behalf of my melee infantry and cavalry needs while Vilnius acts on behalf of my ranged infantry and cavalry needs. Of course this can also be the other way around .

    The last settlement I take before settling down is Riga. Some take it with a force fresh from Novgorod, I take it with my battle hardened veterans from Smolensk, Kiev and Vilnius. Riga will serve as an extra trading port in the Baltic sea where trade can be rich as well. Though it takes time and money to develop it.


    Diplomacy
    The Hungarians and Polish are most likely the factions you will encounter first. Eventually they will declare war on you or you on them but for the beginning they serve as distant trading partners. Once Kiev is under your control however you can expect a Hungarian or Polish army ready to attack it and declare war on you. If ,with some luck, they declare war on each other then be prepared to take on the survivor who will surely come after you(actually Kiev but with an assault on Kiev they declare war on you).
    I always make myself ally with the Byzantine Empire, partly because of the historical accuracy(the Russians were responsible for the Byzantine Varangian guard) and because the trade is so lucrative. For some reason I’ve never crossed swords with them and so both sides can enjoy the trade. As an ally they probably won’t be much of help, perhaps warring with Hungary but I’ve never seen the Byzantines destroying them.
    One of the handiest factions in MIITW for the Russians are the Danes. Once the Danes conquer Scandinavia and get access to the gold mines and other riches laying there, you can benefit greatly from trading with them. Trade rights with the Danes is a must. In my experience they go after my ports once I’ve aligned myself with them but they don’t declare war on me if I stay neutral. Strange but I can live with only trade rights.
    Another direct trade partner is the Holy Roman Empire. It won’t be as beneficial as with the Byzantines or Danes but trade is trade and it will always bring up something.


    Strategy for later on
    As you can see in the above pick I strongly advice you to not go after the hinterland of modern day Russia. Those regions are poor and need to much time and money to get somewhere. Plus the time you need to actually have those regions in your pocket takes long to. To long in my opinion. Plus when the Mongols and Timurids come these rebel cities/castles serve as a perfect buffer zone. You don’t need to deal with those pesky horse riders destroying your land and armies. However arm Kiev to the teeth. If they emerge above the Caspian they most certainly go for Kiev and then you must be ready for a hard fight.

    Caffa is situated on the Crimean peninsula and is not a bad place to expand your trade interests to after you have consolidated your rule over Riga, Vilnius, Kiev and Smolensk. With an extra port in the black sea there is an extra port to which rich trade is shipped to. Plus the natural resources on the peninsula(slaves) ensure it will be a rich city once it grows up.
    Helsinki is at the other part of your empire north of Novgorod. Though it begins as a castle I usually convert it to city to maximise the trade income from the Baltic sea. You don’t need a castle so deep in your own regions.

    Now once I’ve done this then there are two directions in which I usually expand.
    Option 1: expand towards Western Europe.
    This mainly means that you take Scandinavia and declare war on the Danes, be prepared for many infantry battles with sturdy bowmen(Norse archers). Capturing their cities with your inferior infantry will prove tricky but is doable. After you’ve captured Scandinavia and put a monopoly on the Baltic sea trade you can sandwich the northern regions of the HRE and the Polish. Attacking from two directions you’ll always have one direction who is open for attack. The Polish have a same sort army as you but beware of their mounted crossbowmen(Strelcy) they can inflict serious damage on your infantry and cavalry with their armour piercing ability. The Polish nobles are also a very strong unit both the dismounted and mounted version of it.
    The HRE has very strong heavy cavalry(mailed knights, feudal knights) and strong infantry(armoured sergeants and dismounted feudal knights) taking the HRE over the knee will prove difficult and not an easy campaign. Make sure you have a large enough force to deal with any counter attacks.
    Once you have subdued the HRE and the Polish you can expand in any direction. By now you are the strongest faction and you probably won’t meet any strong resistance.

    Option 2: Move south.
    This is pretty straightforward; take your armies, sail them across the black sea and conquer Asia Minor. From there you can go north via the western shore of t he Black sea, in the meantime conquering all what stands in your way. Or you go south to the holy land. Be aware that this option will most certainly bring you in to contact with the Mongols and Timurids. Make sure you are ready for them!

    One last note of advice: Don’t forget the importance of priests. As an orthodox faction you will rarely step in to a foreign territory where your religion is dominant. As a result you will face riots and uprisings. Priests are a key in this. Send priests forward in the regions you are about to conquer so that the population is already partially converted and makes accepting you as their new ruler far more easier


    Last edited by Silent Assassin; April 27, 2009 at 08:47 AM.
    TIME TO DIE!!!! Proud Son of Viking Prince

  7. #7

    Default Re: Please members don't post here as I'm updating th Great Thread for it to work better

    Updated on April 30th How to choose a faction who is right for you and your style by Rebel6666


    Spoiler Alert, click show to read: 

    All faction have their up's and down's you need to try them, people that have stated factions did so by their preferences.

    play
    To choose a faction you would like you need to think of what kind of :

    1- What kind of campaign you want to
    2- What type of religion
    3- What position would you like to start off with (On an Island like England or the Danes) or in the middle of a bloodfest like HRE, Venice, Hungary
    4- what kind of units do you like best
    5- What ennemy do you wish to face
    6- How would you like your empire to be in the end
    7- Do you want to start with a small or big empire i.e. Danes start with one region, French with 5

    You need to keep this in mind

    Hope this helps you more find you path


    Updated on May 5th, 2009 Diplomatic Venice Guide by Rebel6666


    Spoiler Alert, click show to read: 

    Diplomacy Venice Guide for M2TW with Vanilla Map and playing with Mod Lands to Conquer


    I have done multiple guides but it’s my first faction guide, I’ve never done one so please don’t be hard on me. There are a couple reasons why I chosen Venice; No full guide on them yet, it’s the first faction I played with in my first campaign with M2TW.

    This guide will reflect my last campaign as them, I’ve decided to play the game differently as I would but I would keep my game as diplomatic as possible including: Global Rep and my relationship with other factions and the Pope. My guide will not be too much detailed like: what I recruit, build what I do with my agents …. I will focus more on how to develop your Empire without going to much at war. Don’t kill prisoners, don’t sack on execute captured cities don’t use Assassins!!!

    So as a lot of you know already Venice starts with 3 regions the city of Venice as their Capital, a castle in Ragusa and a little city on an island called Iraklion formally know as Crete Island in RTW.

    OK so let’s start: Remember that I always play my games on Medium for campaign and very hard for battles, the first on is very important, playing on higher level of difficulty will break the diplomacy.

    First turn: Right on the first turn after you have decided what to build and recruit I try to buy off Bologna from HRE. Here is what you should offer and should work. (Please keep in mind that their reactions can vary in each campaign) Your Demand: just ask them to give you Bologna and in exchange you will give them an alliance with trade rights and your map information, make the offer then they will come back to you with another demand which will be a regular tribute per turn, probably around 2 300 florins per turn. It seems a lot but do it anyway. You could try to have little lees to give but they won’t go below 2000 florins. On the same turn send your army that stands between Venice and Zagreb to take Florence.

    Important information: Don’t engage Catholic faction, don’t start wars with them let them do that or your Global Rep and the Pope O Meter will drop and this you don’t want. Don’t make alliances with any other religions. Don’t recruit merchants yet keep this for later.

    Second turn: Attack Florence, alsosend your diplomat to Rome and offer them: Alliance, trade rights, map information and give them Iraklion. The Papal State will accept if not take out Iraklion from your offer and make it a gift on the next turn.

    Third Turn: Take Florence and prepare yourself, two medium stacked armies to go into the Byzantines territory, one will go to Thessalonica and the other to Corinth. P.S. Bring a diplomat with you in their lands. Send a small army to take Ajaccio.

    So after a couple of turns, around 10 turns: you are now at war against Byzantines you should have taken their two regions. The regions under your control are now: Venice, Ragusa, Corinth, Thessalonica, Florence, Ajaccio and Bologna. Your Italian cities will bring you Great income if developed properly.

    Right after you have taken those two regions from the Byzantines, send them your diplomat; their priority will be peace as they will be busy with either Hungary or the Turks. So make peace with them with trade rights and give them your map information.

    Turn 11: Send your diplomat to Durazno, Sicily will probably have taken this one, negotiate with them and ask them to sell it to you in exchange of Alliance, trade rights, map information and a regular tribute (that is yours to see the amount). In the meantime, upgrade your lands and cities and try to build two ¾ stacks with 4 priests 2 for each armies. Equip these two armies with good generals with a lot of loyalty and piety if you can and finally a good diplomat.

    Important: You should be attacked by Milan soon watch Venice, Bologna and Florence. They usually go for Venice as they want to hurt your economy. Here is a little Hint take your general from Venice with 4 units of spearmen 4 units of pavise crossbowmen and if you have build up enough a unit of catapult and put them on the bridge in front of Venice.

    Turn 12 to 20: Send one of your 2 armies with 2 priests to Algiers and the other one to Tunis, depending on each campaign, let hope that Tunis as been taken by the Moors. Attack those two regions at the same time. Send your diplomat to one of their armies or at Marrakesh. Keep their regions under siege don’t attack them before your diplomat tries to negotiate with them. Their prioritize will probably be ”Peace” Which you will grant them but only if they give you Tunis and Algiers, add to that trade rights and map information. They should accept without giving them any money. You will have to be careful because they probably have taken Timbuktu already. Which should be your next target including taking care of Milan. Don’t be the aggressor!!!

    By this time you should be able to call a crusade against them (Milan) Call it against either Milan or Genoa your choice but I would tend to say Milan (Their capital) but here is what I did: called the crusade against Milan, sent my army besieged it, Milan had units in Genoa that they’ve sent in reinforcement to attack my army in Milan and then I attack and took Genoa by behind, the turn after Milan was mine.

    Update on your campaign: So you now have in your possession: Milan, Genoa, Venice, Florence, Bologna, Tunis, Algiers, Corinth, Thessalonica, Ragusa and Durazno. Your Global Rep should be at least Very Reliable; you should have at least HRE and Papal state as your Allies, your economy should be good, your campaign should be enjoyable with fewer battles and more diplomacy tactics.


    Turn 20-40: A couple of things to do:

    1- Now it’s time to pressure the Moors, get Timbuktu, send a couple of priest before to convert population because Timbuktu is hard to keep if that region as not been converted properly. Then when all under your control recruit merchants and build up mines to get more florins.

    2- In, send some priest to Arguin which is just under Marrakesh passed the mountains. After enough population are converted take it. In the same time try to take Marrakesh.

    3- Take Constantinople from the Byzantines

    4- Try to buy off Zagreb from probably HRE are any other faction that occupies it. Also Sofia who is probably owned by Hungary.

    So at turn 40 your Empire should look like this (from Right to Left): Constantinople, Thessalonica, Sofia, Corinth, Durazno, Ragusa, Zagreb, Venice, Bologna, Florence, Milan, Genoa, Ajaccio, Tunis, Algiers, Timbuktu, Marrakesh and Arguin. Your coffers will be full of money, your Rep will be at the top, you will be one of the strongest factions alive.

    So this is not a full campaign guide but after you do everything here you can choose the path that you wish but let me tell you one thing you will defiantly be a powerhouse as you will have wealth and good armies with Heavy Infantry, Venetian Archers, Monster Ribault and more.

    P.S.: Please keep in mind that each time, each game you play with a faction you’ve already played things can be different in which you will have to adapt to each situation.

    Please feel free to ask questions or comments.

    Regards
    Rebel6666


    Updated on May 7th, 2009 A guide for the Turks by Rebel6666

    Spoiler Alert, click show to read: 

    The Early to Mid game Turks Guide

    Ok so here my guide for the Turks:

    The Turks starts out with IMO a bit a spread out empire with Iconium, Caesarea and Yerevan and Mosul: that are at the far right part of the map.

    Hint: The first turns are the ones that are the most important ones for the Turks this can be crucial for their survival.

    Here’s what I do on the first turn: As the Turks you have to know that if you don’t do something early on, you will have a 2 front war with Egypt and Byzantines. Your choice is yours but I would try being friendly with Egypt.

    OK so here is what I suggest, send your diplomat right off to the Egypt side, this will probably take two turns depending if you play a Mod, movement distance of agents can be different.

    Offer them an Alliance, trade rights, give them your Map information and give them Yerevan and Mosul for money, they will accept. If your offer isn’t big enough or you ask for too much money they will be more incline to refuse because from the start your Relationship with them isn’t that good. If you don’t have to worry about them this and if you succeed ion this agreement it will probably the best alliance you’ve done in this game.

    You will need to try and get Antioch and Adana ASAP and prepare Iconium to defend against the Byzantines attacks who usually doesn’t take long for them to do so. Change Caesarea in a city.

    Turn 5-15: After you capture Adana and Antioch, make sure you make Adana a city it will be one of your good cities after Antioch. You will also need to capture Aleppo and keep it as a castle and try to upgrade ASAP the buildings to upgrade your archers (I will explain later on if you don’t understand now). You could also take Damascus and Acre if Egypt didn’t already.

    Build up your economy, believe me you will need it. Try to build Merchants with Antioch, near it there are a lot of good trade resources that will bring you income and try to have the Merchants Guild and its upgrades to settle within it.

    Try to send a diplomat to the Byzantine Empire to make a alliance that maybe won’t be for long (usually, every campaign is different) but at least it will give you more time that if you wouldn’t.

    Update on your Empire: Your Empire should look similar to this: Iconium (city), Caesarea (city), Adana (city), Antioch (city), Aleppo (castle) and Damascus (city) Acre (city).

    Turn 16-25: Try to take Smyrna and keep it as a castle. If you are not at war with the Byzantines this is good for you but put watch towers near the North of Iconium and Caesarea the Byzantines will probably take Trebizond and Tbilisi, the latest depending on how Egypt is doing.

    Important: You need to upgrade and protect Antioch this city will be the backbone of your economic wealth. Same goes with your only castle as Aleppo, this castle will be your recruitment factory lol….

    Continue to build your economy and your castle Aleppo as fast as you can.

    Turn 26-50: Ok here, around this time is where they may be some action, you could be already there are you could not even be there yet but Byzantine will surely attack you (like I already said each campaign is different).

    In Aleppo when you will be able to recruit Ottoman Archers please do a couple of them and put them in Aleppo and Antioch. In Antioch when you can recruit Saracen militia do so they are a very good defensive unit, (look at their stats).

    Hint: something weird can happen in your campaign doesn’t mean this will happen to you but I have seen the AI do this a couple of times, this is what happened to me: Egypt from some odd reason, I had an outstanding relationship with them and my global Reputation was almost perfect, but they attacked my port.

    On the next turn they lift it up and sent me one of their diplomats. They offered me Ceasefire, so here is what I did: counter offer them with become my vassals and gave them 60 000 florins. They accepted, the next turn they gave me back my money but with a bonus of 25 000 florins. They were strong, they had Gaza, Jerusalem , Cairo, Alexandria, Yerevan, and Mosul they could also have Edessa and Bagdad depending on their campaign. So each turn they gave me around 25 000 florins.

    Turn 51-90: Now the time to prepare and to see if you upgraded enough your realm to encounter the Mongol invasion. Usually the Mongols either go for Kiev or Antioch, in my campaign the Mongols always or 90% of the time goes for the human player.

    Get Prepared for the Mongol Invasion: here is what you need to do;

    Aleppo: build everything that you can from there the best Archers (Ottoman or even better if you can Janissary Archers), Nanafut and artillery like Catapult and Trebuchet.

    Now you will need 2 armies with 2 good generals and a good defence in Antioch, they won’t attack Aleppo or Adana but they will go for sure at Antioch.

    Your two armies should be placed directly on the two bridges so that way the only way they can attack Antioch without passing by the bridges is be Acre, in that case it won’t be a problem to move one of your 2 armies to counter them.

    Each army outside Antioch should have theses in it:

    2 generals
    2 Artillery (your choice of Catapult or Trebuchet)
    8 good defensive units (Saracens or Janissary Heavy Infantry, my suggestion Saracen they have better defence).
    7 Ottoman archers
    1 Janissary Archer to be able to put stakes in front of the bridges

    Now here is how they should be placed:

    - All Archers behind except for the one Janissary Archer to lay down stakes in front of the Bridge, when the battle start bring him with the others.
    - All Saracens behind the stakes
    - Artillery behind the Archers with the general

    The Army in Antioch should be composed of:

    1 General
    2 Artillery of your choice
    4 Janissary Archers
    2 Nanafuts
    8 Saracens
    5 Ottoman Archers

    If you are attacked in Antioch you should do this:

    - Place 1 unit of Janissary Archer in front of the gate and deploy stakes
    - Place 1 unit of Saracen behind the stakes for cavalry who could pass the stakes
    - Your 2 nanafuts on each side of the stakes in front of the gates
    - Another Janissary Archer unit on the main road to your city center
    - The rest of your archers far back of your city center
    - Artillery behind your Archers
    - Your general close by and
    - All of your Saracens to protect your archers.

    When the battle starts bring back your Janissary archers with the others in the city center

    After the Mongols are dealt with you will need to be watchful for THE TIMURIDS

    Hope this guild helps you remember the Turks are a hard faction to play!!
    Rebel6666


    Updated on May 12th, 2009 Early to Mid game Denmark Guide by Rebel6666


    Spoiler Alert, click show to read: 

    Early to Mid Denmark Guide

    Here is the Early to Mid Denmark campaign guide.

    Introduction: The Danes starts with only one region called Arthus (Capital City) in Scandinavia. The faction starts with one Princess, a Priest a Merchant and a spy. They have a very good, well all-around mix of military assets. Here is what you need to do to have a good start with them. Like I said in my other faction guides your couple of first turn will play a big role on your position for your campaign, to be able to get through it easier and at the same time enjoy it.

    Turn 1: Here is probably the most important move to have a good start in your campaign. Take your two armies that you have near Arthus and bring them to take Hamburg ( bring them separately don’t join them as you won’t be able to siege it on turn one and HRE will beat you to it. as fast as you can, after you have laid siege send that army some reinforcement from Arthus. After send you’re Princess to Poland, use her as bait for a strong Alliance with them. Also bring your Priest to Stockholm land’s to start and convert some population.

    Turn 2-10: In these turns you will first capture Hamburg, this castle will protect you lands to the North from HRE, believe me they will try to attack you, let them do so, don’t be the aggressor before they get excommunated. So develop Hamburg and Arthus. Make a marriage alliance with Poland as you couldn’t get it on the first turn. Recruit a diplomat to make more agreements with other factions. And start to build two half stack armies to take Stockholm and Oslo.

    Turn 10-20: At turn # 10 you should have taken Stockholm and should be sieging Oslo, you need to take it before Scotland or England claims it. Now until turn 20 you just need to be prepared in Hamburg for HRE to attack it and develop your economy as stated in Fornlope’s Economic Guide here in the Great thread.

    Note: You should be in good shape economically, and you’re Empire should look as: Arthus (wealthy city) Hamburg (your first line of defense), Oslo and Stockholm your future money rolling cities.

    Turn 21-30: Here is where you will have to choose where your empire will grow. You have three choices: I will explain what will be the good and bad.

    1- Going towards HRE and the Center of the catholic lands
    Pros:
    If HRE is Excommunated go through them and try to make them your vassal.
    IF you go towards HRE your expansion will be more through south as you will try to hurt HRE by taking Frankfurt, and this should be done by means where HRE would be Excom. This can take time and you will need to be patient.


    Cons:
    The Bad part for this IMO is that by running through HRE’s lands you will now be surrounded by all other factions like when HRE starts their campaign and you will always have problems with your Global Reputation as you will be fighting against other catholic factions. . This is the main reason why I don’t choose this path.

    I personally I would go for one of these two.

    2- Go towards Russia: Russia land could be a good option and here are the reasons why:
    Pros:
    - You would fight another religion which would benefit everything as your relationship with the Pope, your Global Reputation and your relationship with your fellow Catholics.
    - Some of the lands in Russia (the ones closer to you) can be good for money and trade.

    Cons:
    - You will be faced with lands far away from each other depending on how far you are going into the Russia lands.
    - You’re surely will be confronted to the Golden Horde.


    3- Try to surprise England and Scotland on their Island
    Pros:
    - This would be great for your Empires economy
    - The Island would be easy to protect from invaders
    - You could forge good alliances or have good Vassals in England and Scotland
    - You could have a couple of territories easily and without having to go to war with them, by buying their lands from them and become stronger
    - Wait for them to become Excom. To take advantage of it
    - A good position to start an invasion of the New World and become the Wealthyest faction in the world

    Cons:
    - Depending on how you play this could be a double edge knife for you
    - Your Global Reputation, your relationship with the Pope could suffer greatly
    - If not patient you shouldn’t take this path.

    Note: You could also try to reach the Muslim area and growth from there but you will not only face the Golden Horde but the black one also.

    From here it’s up to you, the player to decide what path you want to take, depending on how you want to play, if Reputation is important or note, if you want to Pope to like you are not, Etc… Choose wisely my young padawan the Dark Side or the Jedi side


    Last edited by Silent Assassin; May 12, 2009 at 09:47 AM.
    TIME TO DIE!!!! Proud Son of Viking Prince

  8. #8

    Default Re: Please members don't post here as I'm updating th Great Thread for it to work better

    Updated on May 20th M2TW Units Guide by ForlornHope.


    Spoiler Alert, click show to read: 


    Updated on May 20th, Early to Mid Campaign as Egypt by Rebel6666


    Spoiler Alert, click show to read: 

    Early to Mid Campaign as Egypt

    Ok so before I start with this guide I would like to say a Big Thanks to Commander5xl who has helped me, create this guide to all of you. FYI I won’t elaborate much about recruiting and building you should be able to do so, if not in the Great Thread there is a lot of guides for that.

    Here is what you as the player are stating with on the first turn:

    Starting Settlements:
    Gaza - Castle Governor Mubarak

    Cairo - City (stone wall upgrade) Governor Crown Prince Al-Mustansir

    Alexandria - Large town (wooden wall upgrade) Governor Sultan Al-Zahir

    Agents:
    Tamer - Spy residing in Gaza

    Fahim - diplomat residing in Alexandria

    Mahfouz - Imam residing in Alexandria (able to call Jihads, from the beginning of the game

    There is also a Captain with an army at Gaza, of 2 spear militias, and 2 peasant archers.

    So what are you going to do on the first turn:

    Army:
    Your Sultan will probably die on the first turn so take your Crown Prince and join the little army you have near Gaza don’t forget to bring some Saracens Militia with him. Have your Imam call a Jihad on Jerusalem; take it with your Prince’s army.

    Diplomacy:
    On the same turn send your diplomat to see the Turks; your diplomat will take around 3 turns to get at Iconium unless he encounters a Turk army on the way
    (we will play it like you didn’t cross path with them).

    Developing:
    Build your cities with trade more importantly your Roads and Ports to start with. Recruit Saracens Militia from Cairo to full your other nearby cities with them as they are one of the best Spearmen units in this game.

    Turn 2 to 20:

    Army:
    We are now on the second turn; you should now have in your Empire Jerusalem.
    Take your other general and prepare a no more then a half stack army to take Dongola, south of the map and from Cairo.

    You should try to take Acre with a part of the army that helped you take Jerusalem, in Jesrusalem build up more men for then take another settlement as in Damascus.

    Depending on your money and how things are going you could also build another small half stack army to take Jebba, South West of Gaza.

    Diplomacy:
    You should conclude an agreement with the Turks as is:
    - Trade Rights
    - Give them your Map Information
    - Alliance
    - And to help your relationship with them a bit of money.

    Then not far from there you should also conclude an agreement with the Byzantine Empire:
    - Trade Rights
    - Give them your Map Information
    - Alliance

    Recruit another diplomat ( from Cairo) and send him to discuss an agreement with the Moors

    Hint: They will accept be always have a cautious eye on them

    Update on your Empire after around 15 turns:

    So your Empire should look similar to this: You should have in your possession (or close to) the following regions: Cairo, Alexandria, Gaza, Dongola, Jebba, Acre and Damascus.

    You should be allied with The Turks, The Moors and the Byzantines

    Turn 20-50:

    Army:
    Now is where you will need to take choices on where you would like to go, I will make a couple of suggestions and will limp you in on what I would do.

    Option 1: You could go for Antioch and Aleppo and move further more to the North towards Russia. IMO for me this is a bit boring

    Option 2: You could go for Tripoli and Tunis. This is good but you won’t get further because the Moors will already maybe have Tunis, Timbuktu and all of the other eastern regions, but this would enable you to go for Antioch.

    Option 3: You could try to get into Greece via Corinth. Going to war against the Byzantines that will probably already have backstab you would be a good option.

    Option 4: You could try any other naval invasion, like on the English Island, Iberian Peninsula ( this one would be a bit close to the Moors).

    Option 5: You could also try this; this is what I’ve done: a naval Invasion on the Italian Peninsula. IMO this is the most interesting option

    So getting ready for Option 4, you will need 2 full stack armies with two good generals you will need to be fast and effective, you will need a couple of Imams to send with the two armies I suggest 4 per army if you can. Now you need to siege both Naples and Palermo at the same time, by taking these you will destroy Sicily unless they have captured either Tripoli or Tunis, you will bother with them after.

    After talking both of those, stay quite at least a couple of turns to convert the population to your religion and also try to convert some of Rome’s population. Then you should know what to do.

    When Ready attack and take Rome!!!!

    You could also in the same time create an army to take Tripoli which will probably be owned by Sicily and destroy them, usually I would put them as Vassals, but in this case I wouldn’t because of religion differences as it would make your relationships with the Moors and the Turks drop down.

    Create another army at least half stack to capture Iraklion, this will bring you alot of trade.

    Other things you will have to do:

    Develop all of your cities and Protect Cairo, Alexandria at South, maybe Sicily will attack you after what you did, only if they were able to capture Tripoli or Tunis. Also you will need to have good protection against the Mongols you will need to protect Damascus and Acre against not only the Golden Horde but the Black one also.

    Forget about Antioch unless you really want to have trouble and multi front wars (remember that you are in the middle of the catholic factions in the Italian Peninsula) and we all know the Mongols will go for Antioch. If you do so your economy will drop, you will surely fail and not long after your Empire will fall into the Darkness. So depending on the option you choose Antioch could be your objective. But not with my option, unless you cheat!!!

    Update of your Empire after around 50 turns:

    You should have in your possession (or close to) the following regions: Cairo, Alexandria, Gaza, Dongola, Jebba, Acre, Damascus, Naples, Palermo, Tripoli, Iraklion and Rome.

    You should still be allied with The Turks and The Moors

    Enjoy


    Updated on May 28th, 2009, Nazgul killer own faction guides by Nazgul Killer

    Spoiler Alert, click show to read: 


    Updated on June 1st, 2009 Hungarian guide by Kallum


    Spoiler Alert, click show to read: 

    The Hungarians,


    The Heirs of the Huns


    So here I am again writing my second guide. After the unexpected successes of my first guide I’ve decided to write another one based on another favourite faction of mine: The Hungarians. I’ve been around here for almost two years and everywhere I go read that most people don’t play the Hungarians or don’t like them, I was stunned when I read that as I personally think that the Hungarian campaign, if played correctly, can be one of the most difficult and therefore the most enjoyable campaign(behind the Russians and Byzantines) of the game.
    Just as in my last guide I’ll try to tell you how I play the Hungarians and with luck try to convert some of you to try them as well with a different eye

    Table of Contents:
    Starting position in Game
    The Hungarian army
    - my Early Army
    - My High Army
    - My late Army
    The Campaign
    - First turns
    - First targets and their use
    - Diplomacy (your allies and enemies)
    - Strategies for later on


    Starting position of the Hungarian Empire

    As you can see the Hungarians start out with two fairly developed cities: A castle in the form of Bran and a large town in the form of Budapest. They also have 4 medium sized stacks, a princes, the legendary general Istvan, a cardinal and a spy. You are surrounded by the potentially very strong Holy Roman Empire in the west, the Poles in the North, the Byzantines in the south and the Venetians are near you as well. In the east you are backed by the Black Sea and the first means of expansion primarily exist out of the rebel settlements in the east and south.


    The Hungarian Army

    The Hungarian army is in the beginning a typical eastern styled army with strong mounted archers and with poor infantry, later on their army evolves to a more western styled army and they get the availability of knights and heavy shock infantry. If you have read my Russian guide then you know that I fight via a MLS(multiple line system). This system is based on the early Roman Legionary system with some adjustments so it works like I want it to work.
    I work with three main infantry lines: The first line usually spears to decrease the number of casualties from enemy charges, the second line consists out of heavy shock infantry, I use this second line to flank the all ready engaged enemy infantry. The third line consists logically out of archers to pummel the enemy as they close in or to provide support for my engaging infantry. Besides these three main lines I have the rest of the army composed out of cavalry, preferably mounted archers supported by heavy knights. The heavy knights are used to close the final at the rear when the second line has outflanked the enemy infantry.


    The Early Hungarian army


    You can compare the early Hungarian army in a way with the early army of the Russians, they both get a “strong” spear unit and they both have to rely on the mounted archers. Just like every eastern European faction they get very crappy militia units. In Western Europe and especially Italy you can get around with these guys for quite some time, in Eastern Europe not. But the great bonus that the Hungarians have above the Russians is that they start with a castle in Bran, which can very quickly be upgraded so that you can get more reliable soldiers.
    Your infantry department consists out of slav levies, pavise spearmen, the infamous spear militia and the Croat axemen. Now dump the slav levies and the spear militia and you are left with two units you can use quite nicely. Though in the very early beginning of the game you won’t have access to the axemen and pavise spearmen but that doesn’t matter, you’ll get them soon enough.
    In terms of cavalry you have the Magyar mounted archers. These guys come in handy but they aren’t top notch. Don’t expect to defeat the strong mounted archers of the Byzantines with these guys! You won’t get heavy cavalry other then your general’s bodyguard but these guys are formidable and very reliable to beat other heavy cavalry regiments of your enemies.
    The missile infantry you get are of course the peasant archers who are handy in the beginning but must be replaced as soon as possible. The first replacement you get are the Bosnian archers who aren’t perfect either but are better.

    Early army composition:
    4 Croat Axemen, 4 Pavise Spearmen/ 8 spear militia, 4 peasant archers/4 bosnian archers, 6 Magyar cavalry units and one general.
    As you can see I’ve left one slot open, this slot is for a mercenary unit or a siege weapon like a ballista.


    The High Hungarian Army


    The High Hungarian army is immediately a lot stronger then your early Hungarian army. With the addition of Dismounted feudal knights you get a very strong and very reliable heavy infantry unit, these guys take over my entire infantry section as soon as I get them. They are strong enough to sustain against a heavy charge and can hold their own in a prolonged melee battle.
    In the cavalry department you get your first heavy cavalry battalion and they aren’t least either. Feudal knights are top notch cavalry, can be used till the end of the game and have very few downfalls. The only problem you have now is to choose whether or not you use more of these guys or more of the Hungarian nobles who you get to. The Hungarian nobles are very able mounted archers and also better then the Magyar cavalry. These guys act as my personal police force in my battles against rebels. And stay in my army till the end of the game.
    In the missile infantry department you can also notice a strong improvement in the form of pavise crossbow militia and the regular crossbowmen. I prefer the first as they can be kept freely in your cities and they have a higher defence rate and missile damage rate.
    Medium army composition:
    8 dismounted feudal knights, 4 pavise crossbow militia, 3 Hungarian nobles, 3 Feudal Knights and one general.
    Again one slot is open for a mercenary unit or a siege weapon. Sometimes I fill this slot with an extra cavalry unit.
    The tactics used with this army differs almost nothing with the early army except perhaps the role of the heavy cavalry. Dismounted feudal knights can hold against heavy charges but not as well as spearmen. Here the cavalry comes in to play. Besides their natural role of a flanking force I also tend to use them as a distraction for the enemy cavalry parts. Together with the Hungarian nobles I shred the enemy cavalry to pieces before I launch my rear charge with my own heavy cavalry. This way I’m certain that my infantry can be used for another battle rather then seeing the nearest recruitment depot for a quick retrain.


    The Late Hungarian Army


    The High Hungarian army is in my opinion the finest army of the eastern European world. They have a strongly balanced cavalry department with a strong infantry unit to act as an anvil. Together with the invention of gunpowder, you have access to one of the most strongest ranged units in the game. Along with the addition of cannons as basilisks and serpentines nothing can stop you.
    In the cavalry department you now have access to the strongest cavalry of your arsenal: the Royal Banderium, the chivalric knights and the Hussars. There is no difference between the Royal Banderium or the chivalric knights, but I prefer the Royal Banderium because they look better.
    Hussars are light cavalry who can be very handy to take on fleeing enemy cavalry regiments and that cowardly general that you see running every now and then. Plus they can be a key weapon against the Mongol and Timurids. I always have a hard time deciding what my cavalry part of my late army looks like because I always stick to my standard slots for cavalry and infantry, so I look at my enemy to base my cavalry on that.
    In the infantry department you get your finest addition: the dismounted chivalric knights, they are way better then the Berdiche Axemen and can hold their own against Venetian infantry. There is nothing that they can’t beat but that doesn’t say that they are invincible.
    The missile infantry part of the army is reinforced with Arquebusiers. You don’t get a uber missile unit like the dismounted Dvor cavalry of the Russians so with these guys you are on your top. I don’t really like them as they have that crappy fire by rank rule which makes them useless in my opinion. I rarely use them but if I do use them I combine them with pavise crossbow militia.

    Late Army composition
    For your European adversaries:
    8 dismounted chivalric knights, 3 pavise crossbow militia, 3 Royal Banderium, 3 Hungarian Nobles, 2 serpentines and one general.
    For your Eastern styled enemies(aka lots of mounted archers)
    8 dismounted chivalric knights, 3 pavise crossbow militia, 3 hussars, 3 hungarian nobles, 2 serpentines and one general.

    This time no slot is free for a mercenary unit or a siege engine as I’ve added the extremely useful serpentines to my army, for those of you who don’t know them use them once and you understand why I put them in my army. These guys wreck through enemy battle formations as a knife through butter. I don’t think that I have to explain the use of heavy cavalry against Europe and the use of light cavalry against Asia right?
    The cavalry for the Asian conquests is primarily to attack the enemy cavalry. Your own infantry beats the Asian infantry without many problems, though be aware of the Hashashim of the Muslim factions, they can be a tough nut to crack.


    The Campaign

    Many consider the campaign of the Hungarians to be dull or uninteresting. I can’t say that I agree with them. In my opinion this is one of those campaigns that give you thrills at times especially in the beginning when you face some very strong competition in the form of the HRE, Byzantines and certainly the Venetians. I’ve never had any troubles with the Poles but that doesn’t say that they are pushovers. You are in close proximity to Kiev and Asia minor so you will encounter the Mongols and Timurids if you play for long enough that is.


    The first few turns

    As you can see in the picture above I usually combine my two field armies with the armies in the city they are standing next to. With these large armies I usually blitz my way south and south west. The army near Budapest should go to Zagreb at all costs, whilst the army of Bran should go south.


    First Targets and their Use

    If you succeed in capturing Zagreb before the Venetians do then you have a very big advantage but also a enemy right from the start as the Venetians always seems very eager in taking that small city. Zagreb’s province has gold so a potential money maker is in the making. But as said be prepared to take on the Venetians. When you succeed they will come at you(they will come at you anyway sooner or later but in the beginning they have a strong advantage with their Italian spear militias).
    The army of Bran led by the legendary Istvan should turn south. With these combined forces you should have no problems in capturing Bucharest which is a must. Bucharest will be your trade capital for the black sea. From here luxury goods from Asia Minor, Greece and the Caucasian mountains will flow to your lands. In my games Bucharest is always the top money maker until I get access to a wealthier dock like Iraklion on Crete.
    When you have captured Bucharest there are two options for you: You could go north and conquer the small castle of Iasi, or you could go south and capture the small castle of Sofia. This is one of those rare occasions that I agree with AI. I tend to go south and blitz Sofia before the Byzantines can have it. Sofia is strategically the castle that will defend your entire southern border in the beginning of the game. It is the gate way through your core regions. When the Byzantines get it before you do they have a open road towards your heartlands.
    That doesn’t say that Iasi isn’t a bad option either as it shields your northern approach against future attacks of the Russians, Poles and possibly Mongols and Timurids. But in my opinion Bran is perfectly able for this task as well. Another advantage of Sofia over Iasi is that it shields your going to be trade capital Bucharest.
    When you are pushing southwards don’t forget to pump out some extra soldiers from Bran or use mercenaries. Sofia has a relatively large garrison and if you lose to much men at Bran then you might face some stout resistance. You’ll have to capture it the first try because when you don’t the Byzantines will most likely take it and then you have a problem as you’ve lost to much time to go north to conquer Iasi who at that time will probably have been captured by the Poles.


    Diplomacy


    As Hungary you are surrounded by potential enemies and allies. As I’ve said in the above you are facing the poles in the north.
    The HRE and the Venetians in the West
    And the Byzantines in the south.
    Alliances
    Now in all of my campaigns I always end up crossing my swords with the HRE and the Venetians. Based on my personal preferences I always send my princess towards the Byzantine city of Thessalonica to arrange a marriage alliance along with the luxurious trade rights. Trade rights with the Byzantines are a must in my opinion as they will earn you a lot of money over time. Plus alliance with the Byzantines means an ally against the Venetians. In my experiences the Byzantines rarely betray me so they are a useable ally, sending them some cash every now and then will stabilize and enhance your relations even further.
    The Poles are another faction with whom I rarely cross swords with. I’ve no interest in the cold forests of the Baltic coast and in all of my games the poles don’t seem to have interest in expanding southwards. Trade rights is always good as it will always earn you a few dozen florins at least and an alliance with the Poles means an ally against the HRE. Just as with the Byzantines I’ve rarely seen the poles betray me but I’ve seen them blitzing all the way to the Caspian sea. So if you want those regions for yourself then I advice you to spy them every now and then with your agents to see what they are up to.
    Of course when you are thinking of going all the way south towards Greece and it’s isles then you could ally yourselves with the Turks. They will come in to war with the Byzantines sooner or later and with a combined front the Byzantines will quickly prove to be unable to fight this entire threat of. Alliance with the Turks is not necessary but beginning and maintaining diplomatic relations with the Turks is advisable.

    Enemies
    When I think of enemies that you encounter as Hungary then Venice and the HRE are the first that I can think of. Venice are like the Nazis of the second world war. Searching for lebensraum in the Slavic lands. I find them a trouble as their infantry especially in the beginning outclasses your own. Especially with their early heavy cavalry(the mailed knights f.e.) they can be a true headache in field battles. Their weakness is that they are very spread out and just as you they face many potential enemies, once they are cut of from Zagreb and you are able to halt their advance in to the Slavic lands then taking Ragusa is a priority. When Ragusa falls they no longer have access to their knights and then their Italian spear militia is a lot less imposing.
    Along with the Venetians you will very likely face the HRE as a opponent as well. Their empire is vast and they can throw a lot of soldiers at you because of this. Their soldiers come in quantity but also in quality. When they come alone at you then be prepared for a hard fight against multiple stacks consisting out of armoured sergeants and such. Luckily for you a large empire also brings a large number of enemies so they will probably to much spend to pay all of their attention to you. When this happens you can very easily sneak attack some settlements from them like Vienna. But be prepared to fight against the finest of the reich as in most of my Hungarian games they seem addicted to Budapest.


    Strategies for later on

    In my opinion there are three ways you can go by as Hungarian lord.
    1st way going west: After you have consolidated Sofia, Bucharest and Zagreb turn your attention towards the that big black blob in the centre of Europe and take it down. Don’t go all the way north leave some for the Poles, Danes and French, you won’t want to go at war with them do you. From there go south, and capture the Italian peninsula. Leave Rome alone as you don’t want every catholic church on your tail. But take Venice and Milan. When you’ve done that consolidate your holdings. Build up your armies and upgrade your cities and castles. Take some time off and wait for a chance to meddle in already existing conflict between your neighbours. By this time you are so powerful that all of your enemies are just a walk in the park. Though I would remind you of the devastating power of the Mongol and Timurid hordes. You don’t have a proper weapon against them and you need all of your tactical skill to defeat their armies.

    2nd way: going South: Basically this means that after you’ve conquered Sofia, Bucharest and Zagreb you are turning further south and take what’s left of the former Roman Empire. They have a very strong mix of cavalry with strong infantry and if they have build like I do then prepare to face the earliest heavy infantry possible in the game. After you have taken Greece then I would urge you to make the jump to the heel of Italy and from there go north whilst you are attacking out of Zagreb from the north. With this you’ll have a nice pincer move and the Italian states will be chocked by your powerful hold. When Italy and Greece are firmly under your control you are again powerful enough to be feared rather to fear and you can expand in every way you like(please HRE)

    3rd way going north: Basically this is very simple, you just expand north and ignore the riches of the south. You take Poland on first who shouldn’t be to hard. With the regions of Poland there should be enough rebel cities near you to take. When you’ve done that you should be the most powerful nation in the area and again you can expand in every way you like. Though I personally don’t like expanding in this way as the area north of Hungary is poor and underdeveloped. I rather prefer a buffer state as Poland to take on any threats from the north like the Russians, Danes and HRE, while I work my through the first or second way.

    Now I see you think: Why the hell didn't he named the battlefield assassins anywhere in this guide(they are the special unit of the Hungarians) well I can answer that question very easily for you. I'm a Napoleonic thinker, and thus I believe in the quantity of troops. Dismounted knights are formidable on their own and if my calculations are correct battlefield assasins have double hit points but halve the number of men. So technically they present one full battalion of knights, why throw away 60 men if you can get the same quality in a battalion of 120 men. On top of that battlefield assasins can't be retrained everywhere you want where as knights can be retrained in any of your highly advanced castles.


    I hope you enjoyed reading my guide and learned something from it or felt the need to immediately begin playing the Hungarians. If the latter has occurred I feel that my mission is a success


    Updated on June 2nd, 2009 How to be friend with an long time enemy by Nazgul Killer


    Spoiler Alert, click show to read: 

    How to make your worst enemy, your best friend?

    We all know, in all Total War games, that every single faction has an early enemy to start with, I'm going to teach you how to make your worst, first and most natural enemy, your best and most powerful ally.
    To start off:
    Develop your relations early on, getting an alliance and a trade agreement (Even if you must add some florins on your part to the equation) will be your first move, don't move any armies around its borders and only take half the settlements you wanted to take that are bordering you (For example, if you are England, take York or Caernarvon, not both, so the Scots can have one of those).
    The best way to start an alliance to get him to be your best friend is marrying your faction leader/heir to their princesses or vise versa, the more marriage alliances the better!

    Now, after this, fight off your ally's natural enemy, in some positions it is tough, as you are its natural enemy, but this is doable. I will give an example:
    France, worst enemy? The Holy Roman Empire. Oh wait, I mean, best friend
    Take Metz early on and let them take Bern, now, after that, wait for someone to attack them (For example, Milan) and crush them under your fist, charge full strength ahead, call a crusade! Doesn't matter, just crush them and your ally will love you.

    In addition to that, your allies love money, so giving them regular gifts (A regular tribute of 400 for 20 turns may sound a lot to the AI, but it really isn't if you get 4000 florins per turn) or military assistance as a gift can really boost your alliance, now, in addition, you can offer to trade settlements or give them settlements, and before you say it's a bad idea, here's why I say it's a good idea:
    For example, you just conquered Gaza, Jerusalem, Acre and Antioch. You need a buffer state between you and the Egyptians, right? Give your ally Gaza! As a gift, or as a (Generous) trade for another city, if needed, give him florins so he will be extra happy. If the deal is balanced, they will be happy that you show such devotion, if the deal is generous they will really be happy and if the deal is very generous they will never, ever, double cross you again.

    Now, once you trust your ally a lot (It hasn't attacked you and is attacking your enemies all the time), it's time to take your relationship to the next level! Military Access! This is mostly taboo around M2TW players, but the key to this is having mutual enemies and giving them (Small) gifts (That look big to the AI). Military Access can help you in so many ways, in my latest campaign, with England, I had just invaded the Danes because they invaded Scotland (My ally), my full force was at Norway and Sweden, fighting off the (gigantic) Danish armies, and guess what? France decides to attack me! 10 turns earlier, I gave Scotland Bruges and Antwerp. Guess what happens? Not only do the Scots attack the force which is besieging Caen, they charge at Paris and Rheims and take them down, crippling the French. Our relations were Outstanding and Perfect, and have remained that way for over 30 turns, unchanged!

    It seems a daunting task to make your best friend happy, but it really isn't. When you can, go to wars in his name. When you can, give him a gift. When you can, generously trade him cities while supplying your own need for a buffer state or a good trade alliance, also, when you can, military access (WHEN YOU TRUST HIM! Don't start a military access with him right away and come back screaming that it didn't work!), and this is my guide to making your worst enemy, your best friend...

    However... One must remember one thing... Amongst one of the evils being unarmed brings you, it causes you to be despised... Don't rest when you see you're friends, don't be afraid to show your power and go to war, or no one will be afraid of you, and one must always remember that your current best friends, was once your worst enemy...

    Last edited by Silent Assassin; June 02, 2009 at 08:03 AM.
    TIME TO DIE!!!! Proud Son of Viking Prince

  9. #9

    Default Re: Please members don't post here as I'm updating th Great Thread for it to work better

    Updated on June 11th, 2009 Pre-battles speeches by Rebel6666


    Spoiler Alert, click show to read: 

    Here are some nice pre-battle Speeches:

    "And, at the last-GOD'S NIPPLES! Who drank the rest of my ale?"

    "You wanna fight, eh? You and what army?"

    With Venice "Men, let's get this done quickly, I don't want to be at this all day. I have other things in mind for my evening : a bottle of wine and a wench, f'r'instance !"


    an HRE one went all zealot/preacher on me : "I thought I had died, and went to hell for my sins, as I see nothing but the hideous grins of demons everywhere. Gott sei dank ! It's only the enemy !"

    Click on a Sicilian army when your playing another faction , and sometimes they"ll say "You talking to me ?!" ala Robert De Niro in Taxi Driver .

    My faction Heir was classed as "completely insane" or somesuch... in the pre-battle speech he announced ;

    "and as to my recent madness, I can assure you it was only a passing whim, ~I have talked it over with my horse, and he is of the opinion I have not been getting enough rest, after the battle I think I shall follow his advice..."


    One of the Scottish armies responded like this when I clicked on them:
    "I'm gonna rip off your head and spit down your neck."

    "They say those Milanese are good accountants. This will help them, when they count their dead."

    At another fight against Milanese troops my general yelled: "I want them dead, DEAD, DEEEEAAAAAAAAD, DEAD like a scot's soul". I'm playing the English as you might have guessed ;-).

    "...our dead enemies will be worth looting. Their pockets are always full of money. I don´t belive they´ll leave it at home with their wives"

    Byzantine general referring to the Milanese as "...goat fondling arse monkies".

    An English general about Welsh rebels : "Well, these lads are either sheep, or Frenchmen !"

    A Polish one : "You know, it will be an act of christian virtue to rid this village of so many of its idiots !"

    English general speaking of the French:

    "Satan must be missing some pimples on his a$$."

    "they say these french men are better lovers then fighters. i ndeed this is true, ask any farm animal" lol

    "The enemy would only stand a chance if my mother-in-law was with them... what if she is?!? If she is, we're all doomed!!!

    When playing as the Milanese I kept getting one about the Portugese.

    "they smell like fish and will acknowledge our domination. Why? Because they are all fisherman!"

    playing as england with a "dislikes scots" trait; (heard awhile ago, may get slightly wrong)

    "...but we do them a kindness if we kill them, for then they can escape for their shrill loathsome wives! who are better suited to gutting fish then pleasing men!"

    My Russian king was facing some rrebels behind a stone wall and said
    "…Wait here my fellows while i go and kick down their walls! Do not worry, they're all sodomites so they wont fight back!


    Just for Lol


    Updated on June 29th, 2009 Diplomacy Guide bu Claudius2007

    Spoiler Alert, click show to read: 

    I am not sure if prior approval is necessary for posting such a guide, I am relatively new to the forum and have been greatly inspired by some of the postings here. I am a proud owner of all Total War games so far and over the years I have found more and more joy from the games. In response to recent topics regarding diplomacy I have decided to write a guide, mainly because I have been fascinated with the politics of Total War games ever since Shogun. Moreover, I know there is an important amount of frustration from experienced players as well as new players over the correct use of diplomacy in your campaign. This thread hopefully builds on some of the great work done by Rebel6666 in his Great Thread. Some of my inspiration came after reading his work. My experiences are recorded here as encountered in the vanilla version of the game on a Very Hard/Very Hard Battle and Campaign difficulty. I am not one of these people that like mods too much but I am not the guy who hates mods either. I understand that different people have different interests in the game and that is what makes it awesome.


    DEDICATION

    To all of you who consistently get betrayed, blockaded or in other ways destroyed by those you fail to understand.


    INTRODUCTION

    Unless you are a fierce warlord on the battlefield and prefer to spend your time mostly in the multiplayer lounge, the single player campaign map is probably where you spend most of your time in the wonderful world of Medieval 2 Total War. You build great empires that stretch from Lisbon to Novgorod, gain utmost glory in holy crusades, role-play your family members lives and perform complex subterfuge missions that would make current governments look like lost children. All this is often described by experienced players as "sugar coating" the game and it is perfectly OK. In fact most people do it at levels I couldn't begin to imagine. In this respect I believe my sugar coating of the game has always comes through the diplomatic evolution of the game. (yes, I was that history nerd in high school ) I can't help it, I love role-playing history. This has led to a significantly better understanding of why an AI suddenly decides to attack you in most situations, how agreements are made or what motivates a faction to take a certain course of action.

    Sure, there will be cases when there is nothing you can do to anticipate a completely cunning AI that seems to want war for no reason. But in most cases, the backstabbing AI has a solid reason for attacking you that has eluded you in the complicated diplomacy scroll. Diplomacy is complicated in the game because there are FEW METRICS for it. The only things you really know is your relation level with another faction. But what does that really mean? Should I stay unarmed because I am loved? "You can do more with a kind word and a gun than with just a kind word." This thread hopes to shed some light on the various diplomacy features of the game and help you improve or change your game style and overall experience.


    1. DIPLOMACY BASICS

    Diplomacy is the most complex aspect of the campaign map and is often easily misinterpreted. Hopefully, after reading this guide you will find yourself more in control of what is going on your campaign, more engaged in your decisions and better informed when making them.

    The agents needed to perform diplomatic missions are your diplomats or your princesses. Their skill is a scale that measures the chance they have to perform tasks. Naturally, the skill is affected by the traits of the characters and these traits evolve based on their in game experiences. The main difference between princesses and diplomats are that princesses can marry foreign or national generals whereas diplomats have the special ability to bribe enemy armies. Otherwise, they may both be used to propose treaties or negotiate deals with other factions. At the beginning of the campaign you start with either a diplomat or a princess and need to make good use of them until more agents are recruited. Using the agents often in deals also increases their skill and obviously their chance of obtaining even more favourable deals.
    While princesses usually appear in the regions their fathers serve as commanders, diplomats can be trained easier in cities than in castles. The castles eventually get the option to build a library later in the game and can then train diplomats there.

    When requesting an audience to a foreign faction, you are shown the diplomacy interface. This contains useful additional information to consider before engaging in deals with the other part. Some of the information displayed on the top left and right of the screen are the two nation’s statistics, direct relations, reputation and what the other faction is believed to want from yours. This last piece of information is often unknown but throughout negotiations MAY CHANGE unexpectedly. When visible it is a great indication of where you may take negotiations further and negotiate a deal or improve your diplomat's skill. Some people have suggested that having a spy in the region you are engaging in negotiations may improve your chances of knowing your opposition's intentions. I do not have enough evidence at this time to verify this claim but feel free to explore.

    There are several different treaties you can negotiate with a faction:
    -trade treaty (allows settlements to trade with other faction's settlements)
    -alliance (allows enemy armies to reinforce you in battle and vice-versa; is also a great indicator of a faction's foreign policy and interventionism level in the game: hawk(more likely to be aggressive) vs. dove(less likely to be aggressive)
    -military access (allows one of the sides to march troops through the others lands without a deterioration in relations)
    -demand attack on another faction(is a purely formal agreement that one of the sides will attack another faction; the faction is however completely free to not honour their agreement, so depending on the course of action decided, the respective faction will witness an increase or decrease in reputation.)
    -demand vassalage (the other faction becomes your vassal and contribute to your national income as well as your territory count; you become allied with them and have military access in their puppet nation)

    There are also several deals you can make:
    -exchange regions
    -exchange money
    -exchange map information
    -a combination of the above

    In the case you are a Catholic faction and are excommunicated when talking to the Pope you can request a reconciliation. This is usually very difficult to accomplish and will require something substantial in exchange. Another request you can make is request Cardinal votes in case one of your cardinals is running in the Papal elections and you need other factions to support you. The Papal relations topic will be covered in more detail in a following chapter.

    Throughout the campaign you may diplomatically engage anyone with any offer but just like in real life, people tend to be wary of the ones that either do not honour their promises or cannot correctly evaluate their own capacity to do what they promise. In other words, trust is hard to build and very easy to shatter in one second. Keep that in mind every time you agree to anything. What is significantly more interesting is that you will be responsible with trusting several factions not just one and vice versa. This creates what is usually called a diplomatic context, a specific setting of relations in which anyone can affect the others. If you cannot or will not keep your word, there will be consequences, which I will explain further. And yes this applies to everything, even trade rights.


    2. TRADE RELATIONS

    Trade is usually the biggest contributor to your national budget so maintaining a solid trade empire without a high defence cost is beneficial and dare I say even necessary for quick expansion. In consequence it is beneficial to sign trade treaties with some of your neighbours early on. Be VERY AWARE however that trade treaties in themselves are a sign of friendship that automatically influence your relations with that faction as well as your relations with that faction's potential enemies or friends. While trade is so beneficial for your yearly income it is also the easiest part of your empire to exploit by hostiles. In this respect, a very frequent mistake is to sign lots of trade treaties and have no navy. This is an invitation to what you may call backstabbers to paralyze your entire nation. So there you are thinking "What did I do to deserve these cunning attacks?" and there is the AI thinking "I am going to try to expand and take this guy over instead of upsetting my other neighbours." which is actually the best thing for him to do in the given circumstances.

    Sign trade relations with nations that you are likely not to be in conflict with for as long as you can imagine. Also understand that signing trade relations will mean your relations with that faction will start fluctuating now based on both the diplomatic decisions your countries make with others. If you want to keep the money coming in home, make sure you have a diplomat in your most important trade partners factions for quick negotiations. Your diplomats are literally your diplomatic arms. The more they are the farther and faster you reach. Don't sign trade treaties with your friends enemies. This will negatively influence your reputation, and as we will short see your reputation is the core of your diplomatic abilities. Be careful however, as stated previously reputation increases very hard and decreases very easy. You want to keep doing the right thing if you want to be taken seriously. Avoid trading with warmongers or countries with very low reputation. If you want to get this to work you need to accept the hard facts. The increase in reputation will greatly counter the decrease in money. A good strategy to start with is to become trade partners with future allies and nations you do not intend to attack or intervene militarily in under any circumstances. Keep a navy proportional to your trading capability at least in the beginning, when factions tend to act unpredictable.


    3. FORGING LASTING ALLIANCES

    This is probably the most important topic pertaining to the interaction between diplomacy and war. Choosing your allies or even choosing to have allies are decisions that should be carefully thought out in consideration with the current territorial situation of the game. Basically ask not whether you want to be allied with someone but rather whether that someone wants to be allied with you. An alliance is an important commitment from a military perspective as factions in search for alliances are not factions bored by the perspective of peace. It is also interpreted by the AI as a "show off" as you are literally agreeing to intervene militarily on a faction's side if needed. This makes you look bold and hawkish so be prepared to stand by your word. If you successfully do so you will be regarded as efficient and respected not only by your people and allies but by your potential enemies and other warmongers out there as well.

    A common mistake players make is to go around in the beginning of the game signing alliances with almost everyone. Then as soon as for example two wars break out, in which the player is not necessarily directly involved, his reputation becomes horrible for not being able to help anyone, his trade income is greatly reduced and invasion by a warmonger is imminent as a result of the economic weakness. This is a catastrophe scenario you can avoid by being a little more modest until you are truly capable to blossom. If you are terribly worried about one neighbour AND that neighbour is acting belligerent then you should seek an alliance with another neighbour that is not a threat to you, and shares your concern. You should try to keep the number of allies you have proportional to the size of your armed forces. If you cannot commit to assist someone then just tell him the truth and don't. You can easily do this by counter-offering some gold or something to make him forget the bad news. Beware however in using counter-offers: you cannot get away with it all the time! It is sometimes a lot better to just say NO than weasel your way out of a proposition you don't like.

    If your reputation is very good (trustworthy or better), you can easily request military assistance from your allies in a common war. This is the easiest way to put diplomacy to brutal use. A good diplomat and a good offer of gold can get any good ally to help you out. Similarly, an ally may request help against someone, or gold in case of war. It should be your priority to commit to the alliance with either resources or troops whenever this is required. Committing to an alliance is almost never beneficial, but is always a great way to increase your reputation and your ability to obtain amazing deals with other factions.

    For Catholic factions the game usually revolves around two main mega alliances. These alliances do not always necessarily form literally (meaning each nation is allied with the other) and may not always contain the same factions, but are overall formed in a similar process. I will call these factions the Hawks and the Doves. The Hawks are factions like Milan, Portugal, Sicily, Holy Roman Empire and England that are eager to expand mainly because of their inherent historical identity. These countries all exhibit fierce expansionism:
    -HRE has set as its goal to become the next Roman Empire
    -Milan needs territories so it can consolidate its weak starting position
    -England is controlled by William the Conqueror (need I say more?)
    -Portugal has weakened starting position due to their divided territories
    -Sicily... God don't even get me started on Sicily

    The other countries are Doves, countries that are more concerned with consolidation and expansion over rebels than invading someone else. The Doves are usually France, Russia, Poland, Hungary, Byzantines, Egypt. What usually happens is that some of the Hawks attack some of the Doves and then all hell breaks loose. The two mega factions, although different in each game, compete fiercely for territories, trade and control of the papacy. Deciding if you are a Hawk, a Dove or neither is a big step in figuring out who your best bet for allies are going to be. The non Catholic factions usually get sucked in one of these alliances or remain isolated from the Catholic world.

    Another issue that is very important in dealing with allies is to be careful to request reasonable things. Requesting a war declaration from a Dove on someone neutral is usually a good way to ruin your relation with him and your reputation shortly after. Allies that you are in great relations with are less likely to consider attacking you even in a major international crisis. In several of my campaigns I was able to maintain perfect relations with one neighbour for the entire duration of the game. When you reach a high level of understanding with your allies you may propose a common military access policy. A good way to achieve this is by first showing a clear demilitarization of your common border. You may keep troops in the regions adjacent to your border regions, in order to be able to reinforce the regions in one turn. You will find forts to be of great help when doing this. A military access treaty is only useful (and is only likely to be accepted) if you actually share a border with your ally and there is a clear need, whether because of road distance or otherwise, for both of you to march troops in each others territory. This is often a sign that an ally trusts you with his life. You can profit from this by assisting him with troops in his struggles and maintaining a top notch reputation.


    4. REGION EXCHANGE, EXPANSIONISM AND VASSALAGE

    Obviously expansionism is an essential part of the game, how else would you win? Expansionism needn't be unprovoked or unnecessary though. Every time a faction captures another settlement they become stronger and their competitors also become warier. A good way to use diplomacy to deal with military expansion penalties on your reputation is to provoke a future enemy at the negotiations table. Bad deals are also a good way to justify a war, as once your relations with someone decrease you may inform him of trade cancellation. This will anger them considerably and you can expect to be attacked shortly after. The great news now is that you are defending and they will most likely be excommunicated or otherwise in trouble within their own diplomatic relations. This represents a great opportunity to counterattack and capture some provinces at a minimum penalty.

    However expansionism comes into play as early as fighting the rebel settlements around you and may have a fatal effect on your future reputation even though you are not at war with anyone yet. We will further develop this topic using an example. Consider the starting position of the Holy Roman Empire for a minute. Expansion to the north taking Hamburg will make the Danes wary and have territorial claims on you. Expansion towards Prague will cause a similar reaction from Poland. Each decision to expand is tempting but taking them all at once is a recipe for war on all fronts. The lesson from this is that you have to realize early on that the more you are pushing into someone the more likely it is they will permanently regard you as hostile.

    Region exchange is pretty rare but may occur if you have large amounts of cash (around 15000-20000 for a settlement should do if you are in good relations with the faction you are buying from). Another way to request settlements is when another faction requests you to be their vassal. If you accept your economy will be slightly affected but you will have the chance to make the counter offer of your life and accept vassalage in exchange for 1-2 enemy settlements. Although vassalage means a complete reshuffling of your diplomatic relations it can be beneficial in some extreme circumstances. The reverse works as well: you may offer regions and cash to heavily hurt foes in exchange for vassalage.

    Expansionism is tied in very closely with another concept we have already encountered in this guide: militarization and demilitarization of regions. Although apparently not related to diplomacy the movement of your armed forces is of great important to your relations. A great way to deter warmongers and backstabbers is to keep an armed force proportional in size to that of the potential attacker in the respective province. The same goes for ports as discussed in the section describing trade relations. The AI usually attacks positions that he considers weak: weak garrisoned settlements, undefended ports or trading empires and is completely right to do so. Wouldn't you attack an undefended city across the Mediterranean if you knew it would be ungarissoned when you got to it? Yes you would.

    5. PAPAL RELATIONS AND CRUSADES/JIHADS

    Regardless of whether you are playing as a Catholic or a non Catholic faction your relation to the Pope will determine the limit of your Hawkishness. Catholic factions usually should seek to ally with the Pope early on. The purpose of this is twofold: it acts as a deterrent against Catholic warmongers and it consolidates your relations with the Papacy regardless of the nation that has the Pope. If you are playing a non Catholic faction you may find it useful to send gifts to the Pope and have him like you in order to avoid Crusades.
    An alliance with the pope is not too demanding since few factions will have the audacity to attack the Papacy so you will almost never need to intervene directly or not. Joining Crusades is a great opportunity for legitimate conquest and escaping the Hawkish image of an invader.

    As your religious infrastructure is expanding try to train priests and compete for the Papal seat. Manipulation of the Papacy is a great tool to permanently damage the diplomatic relations of your enemies with the Pope. This may require intense negotiations with other factions for their votes. Usually cash, regions and sometimes military assistance can earn you their support. This is another example of diplomacy used purely as a weapon. Beware not to get excommunicated as much as possible as this will have disastrous effects on your reputation and it is very likely that you will never be able to recover from it, fighting multiple fronts for the duration of the game.


    Updaded on July 20th, 2009 How to Hot seat muli-player by PO14K


    Spoiler Alert, click show to read: 
    Ok, so I'll just reiterate everything I know about this.

    The hotseat multiplayer allows you to play as more than 1 faction. With the code in red below, you will be able to defend battles as well as attack. Attacking/Defending against a faction that is humanly controlled I have not tested. So far, I have picked only 2 factions at a time and made them allies. As for diplomacy, you send a diplomat to them and talk to them and give/demand whatever you want and then on the turn of the other faction, before the scrolls come, the diplomacy window will show up and you will accept or reject.

    Here is the code;

    [multiplayer]
    playable = true

    [hotseat]
    autoresolve_battles = 0
    disable_console = 0
    disable_papal_elections = 0
    save_prefs = 1
    update_ai_camera = 1
    validate_diplomacy = 1
    turns = false
    scroll = false

    Now, I will explain what each of these does;

    playable = true under [multiplayer] allows to choose more than one faction.

    0 is false/no, 1 is true/yes

    • autoresolve_battles, when enabled (1), makes ALL battles resolved automatically.

    • disable_concle = 0 enables the console (command prompt that pops up when you press ~ (used for cheating, I personally keep it enabled, only because I don't like fog of war.)

    • disable_papel_elections disables papal elections

    • save_prefs, I BELIEVE allows the preferences in the cfg file to be saved in the save file when you save the game. In other words, if you were to load another non-hotseat game, the preferences would go back to normal, but then when you load the hotseat game, they go back to the above.

    • update_ai_camera makes the camera reset to the capital of whichever nation's turn it is (when you click end turn, all other nations get their turn, the camera (when enabled) will lock on to their capital if you have no units by any of theres. If their unit moves, and you are able to see it, the camera will relock on to the movement. This is assuming fog of war is off.)
    • validate_diplomacy = 1, I have not testing this option yet, so I do not not know what it does, anyone? I think, though, that if you disable it, then human to human diplomacy will be auto-accepted/denied based on the status of the offer (from very demanding to very generous)
    • turns = false Now, I believe this is the most important string. In order to defend AI attacks, this MUST be set to false. What this does is set a password on each human player's turn, so on your turn you have to type the password in. This would disable defending battles because then you could end up with a situation that a human wants to attack a human but the defending human isn't there (i.e. next to the computer). This option is used for long-distance player, or online play (which I have not done). If you want to set this to true, I recommend autoresolve_battles to be set to 1 also, to make it fair.
    • scroll = false I do not know what this does. Anyone?


    Deceitful Diplomacy by PO14K

    Spoiler Alert, click show to read: 

    So I came up with this tactic as a way to gain territories off my allies, enemies, neutral parties, and mostly allies who I will soon betray.

    So, what you do is send a diplomat to them and ask for a region. (Do this first when your turn starts, so you have the most dispensable income)

    Ask for any region you'd like from them and it'll probably say very demanding. Give them map information too (and trade rights if you haven't already done so, and an alliance if it changes the states from very demanding to anything else). Now, offer them a regular tribute of 10000-50000 for 3-6 turns. Play around with these numbers and see if you can get them to say generous.

    Most of the time it will be very demanding or balanced. If it is balanced, your heading for the right track, but sometimes, if you offer too much (dunno how this is possible), they will say very demanding. My friends and I call this, "Them catching on to our scheme."

    Once you have found an amount for x turns that is either generous or very generous, click make offer. If they don't accept try to increase the numbers by a little to make it very generous if it is not already. If it is very generous, your out of luck and they won't do it. Try another city.

    If they accepted, then your in luck, click make offer again and click cancel tribute. Now you've essentially received a city for free (not counting map info, alliance, etc.).

    WARNING: Your reputation will drop 1 place every time you do this tactic. The lowest I've gotten it was Very Deceitful (hence the name of the topic ) It'll be harder to do regular diplomatic relations with a poor reputation and your allies might back stab you.

    Although very unrealistic, it is a cool loophole to buying out a country.

    e.g. I am playing a campaign now where I eliminated HRE and Denmark with Milan. My next target was Poland. They were very good allies with me, so instead of attacking, I decided to implore this tactic. I got them down from 8 territories to 1 by just doing this. I then marched my army in and betrayed them, taking their last city with the pope nonethewiser.


    Tiny Castle to Large Town by PO14K

    Spoiler Alert, click show to read: 
    In many occasions, converting from a castle to a town is desired. There is a very simple and fast way to do this.

    Instead of converting it to a town and then waiting forever before it becomes a large town, here is what I do.

    When a new settlement that is a wooden castle or a mote and bailly is conquered (though occupation, not sacking/exterminating). Convert it all the way up to a castle. Usually most newly converted wooden castles will be able to convert into a castle right away, while newly conquered wooden castles, will be able to be converted to a castle right away.

    When the castle staged is reach convert it to a town, you will notice that your new town isn't a town, but a large town. Converting from Village or Town > Large town takes MUCH MUCH longer than converting a mote and bailly > Large town.

    Neat little trick I picked up awhile back that I use every time.


    Luring out the enemy by PO14K

    Spoiler Alert, click show to read: 
    I found this neat little trick that works every time in every type of siege (excluding fort sieges, the strategy might work, I just haven't tested it yet).

    I personally come well prepared to every siege I do, so I don't really lose them (unless my general dies), and I like to get the battle over with fast so I can move on.

    When attacking a fortress (or citadel) (works for cities and castles, but the strategy is kind of pointless), click start deployment and press ctrl+A to select all of your troops, now move them as far up as they will go next to the line facing the door your about to go through. When you click start battle, 75-100% of their army will be on/by the walls. This way, you can open the door, and kill most of there army right there instead of having to go through successive doors and get rained on by arrows. After you kill this army, you can slowly, and without resistance go through the remaining doors and kill the remaining army. Usually the army thats left is their general or cavalry units.

    I've noticed that if you don't move your men up in the deployment stages the first set of doors are empty and this causes you to open the first door without resistance, but then you have to walk through the town and get rained on by arrows. I also play with the battle time limit, so I don't have time to waste trying to navigate through the fortress (or citadel) to the next level while avoiding arrows.

    So, I found an instance where this doesn't work, and that is if your not attacking the 'front door'. If the fortress/citadel in question is being attacked from a weird side or its on a hill, you might not be attacking the front gate. If you aren't, then move your armies to the front because this trick doesn't work if you attack the side door.

    Last edited by Silent Assassin; July 24, 2009 at 06:51 AM.
    TIME TO DIE!!!! Proud Son of Viking Prince

  10. #10

    Default Re: The Great M2TW Information Thread

    Updated August 5th, How to Deal with the Pope (Papal State) by Rebel6666

    Spoiler Alert, click show to read: 

    So I’ve seen too many posts here on “how to deal with the Pope” now don’t get me wrong here I don’t have a problem with people asking questions on what to do with him. I will clear things up in this post.

    Introduction:

    In M2TW the Pope is the center of the game, even more truely when the player is a catholic faction. All your actions will lead to different events, missions, interactions with the Pope but also with your fellow catholic factions.


    The Pope is Immortal:

    For those who don’t know yet he is un-killable, meaning that even if you take Rome and kill the Cardinal that is the Pope at that time, another cardinal will raise and become Pope. They maybe won’t have lands to prosper on but the Pope will still be alive. Another catholic faction could give him a region.

    Inquisitors:

    Those pesky agents, they are assassins but only for the Pope, they have better skills and traits than yours. Be wary of them, usually they will wander around a faction from another religion, near a catholic faction that as a lot of Witches, rebel priests on their lands or if a catholic faction is excommunated.

    The Pope “O” Meter:

    To help us see what the Pope thinks of us CA / Sega decided to add a Pope “O” Meter that includes all catholic shields to identify them. There are crosses on top of each faction shield that determines how much the Popes likes your faction, or should I say your leader. The Pope “O” Meter also enables you to call a crusade if the Pope loves your nation enough to grant it to you. It also determines if you are excommunated no more crosses mean trouble for your nation.


    Getting into more details:


    Crusades:

    Like I said earlier in this guide crusades can be called by the Pope, by you or any other catholic faction depending on your relationship withy the Pope. Crusades can be called against rebels, other religion or excommunated factions. If you don’t get along you will disappoint the Pope and lose points on the Pope “O” Meter

    Excommunation:

    Here is where everyone has problems: “Why does the Pope hate me, why does he send Inquisitors to kill my family members and agents……. And so on” well here is why:

    - Don’t be aggressive with Catholic factions, even if they are the ones always sieging and attacking you. Don’t sally out against them or you will receive a global Rep hit but also a great hit on your relationship with the Pope.

    - Never be the first one to draw swords, blockade ports with Catholics.

    - Never destroy churches.

    - Don’t use assassins against your fellow Catholics or directly against the Pope himself.

    - Don’t participate to crusades.

    - After a battle against a Catholic faction never kill prisoners, don’t exterminate a populace if you take their city via a crusade.

    - Make alliances with faction that as another religion (Yes I know sometimes the Papal states does it) But If I may add here if you are allied with a Muslim faction for example your Global Reputation will go down the hill in the long run, more turns your alliances is kept less your relationship with your fellow Catholics and the Pope will be, even more if a crusade is called on them.

    Here is what you need to do to make him like you:

    - Build churches to the highest level and recruit priests.

    - Kill witches and rebel priests.

    - Convert the population on the lands hold by other religion factions.

    - Participate to crusades.

    - Ally with the Pope

    - Give them gifts (a region or money each turn).

    - Don’t initiate attacks on Catholics unless they are Excommunated.

    Getting Reconciled:

    There is a couple of ways to get reconciled:

    - If the current Pope dies / assassinated or not. But I have seen exceptions now if the faction that is excommunated is at war with the faction the Cardinal was elected, the excommunated faction won’t get reconciled, so your reputation with the given winner of the Cardinal Election as an effect on that.

    - If your faction leader dies, if this happens you will be reconciled.


    Hints on how to play with the Pope to have him help you in your game:

    Crusades:

    When attacked by a fellow Catholic, let him be just defend yourself, be patient, they will be excommunated soon, when they are ask the Pope to have a crusade on them, if you have enough crosses he will accept ( before asking get ready prepare yourself a good general with at least 6 units then ask him to call it). By doing this you will gain a lot of things:

    - Some that were allied with them will break their alliances, less wars for you and maybe now more friends.

    - By joining the crusade you will gain in the Pope’s favour.

    - Your general will gain a lot in Chivalry.

    - If you capture the city, your units will gain experience and you will also win money.

    - By doing this and being successful you will hurt your enemies economy and Empire at the same time.


    You’re Borders:

    Sometime campaigns can be a real pain by having multiple war fronts with more than one enemy. I have found useful to use the Papal State at my advantage, being a Catholic faction I was allied with them having perfect relationship. I have decided to give him a gift a gift that at first will make me loose money but in the end could save my campaign.

    i.e.: I was HRE, I don’t know why but everyone didn’t like me: Venice, Poland, Hungary and Milan. They were all attacking me and from all sides 3 of them were excommunated. I sent my diplomat to make an agreement with the Papal State, offered them Vienna, Prague on the right side of the map and on the left Bern and Frankfurt on the left as I changed my capital to be Nuremberg. After that called a crusade against Venice (Venice) their capital and captured it.

    You will say but you have almost given half of your Empire?? I will say yes but I can assure you one thing this helped me get back up on my feet because having a multiple war front with more than one faction is hard on your economy. I made the same amount of money but without being siege 3 regions at the time. I have taken out Venice who became my vassal and then Hungary.

    The Mongols and Timurids:

    I have used the tactic mentioned just above to receive help from the Papal State with those two powerhouses of destruction. Give them a couple of regions in that area and I can assure you that you will have some assistance from the Pope.

    It’s all for this subject, if you have any questions don’t hesitate to ask here or in the Great Informative Thread.

    Regards
    Rebel6666


    Updated August 13th, 2009 The Grand M2TW Economy Guide by Nazgul Killer

    Spoiler Alert, click show to read: 
    The Grand M2TW Economy Guide


    Economy - The base drive for all conquests, the foundation of every true army and the lifeline of every nation... What is it exactly? How does it work? Well, here I will explain, everything.

    Trade - The trading system in M2TW is quite simple compared to say, E:TW (Empire Total War); You build a port, it starts to trade.
    Important thing: The trade is apparently NOT run by your own government but by inside merchants, so having trade rights with a nation doesn't matter that much, it will not stop you from trading with said nation, however, it will grant you more income.

    The fact is, that even if you do not have trade rights with a nation, you will trade with it, only you will have less trade routes with it and much less income, allowing your people trade rights with their will boost your income and will allow you even further trade with them.
    A question I have been hearing lately a lot is "Is trade really that good?" Yes. (I know, sounds like a commercial...) I recall several times in which I got well over 20,000 florins a turn from just naval/land trade, I'm not speaking of Merchant Trade just yet.

    Trade is also influenced by several things:
    Resources - What indigenous do you have in your lands, the more, the better, the pricier, the more money you get.
    Ports - Naval trade depends on your ports. When you expand your ports and develop them you will see a little section which says "Allows more trade routes", this means that if from a certain port you have 2 possible trade routes, after the upgrade you will have 4.
    Roads - Land trade is reliant heavily on roads, without roads the trade will either be minimal or non existent. With dirt roads your trade will improve, but as said in naval trade before, you will have approximately 2 - 3 trade routes, when you get paved roads, this will develop to about 6 - 8. Land trade can very good.
    Marketplaces - These buildings give you a hefty bonus to BASE trade, this means it allows you further trade in land and sea, also it boosts your trade in ways you didn't even imagine, allowing you even more money from trading partners.
    In addition, Marketplaces give you more Merchant agent limit to allow you to build more of them, but more on that, later on.
    Wars - Pretty obviously, a nation at war with you will not trade with you, and vise versa.

    Blockade - A blockade on one of your ports blocks trade and access to that port, but not land trade.
    Siege - A siege blocks ALL trade relating to the besieged settlement.

    In a single trade route you can get endless resources, depending on what that province has to offer, a province with no natural resources will give you resources from its farms and markets, also known as Common Goods. Common Goods are the least profitable of all resources, however, no trade is a bad trade.

    Merchants, or Merchant Trade, is probably the best means of income in this game;
    Merchants can 'stand' on resources to start trading them, and can generate from 5 florins per turn to 2100 (The most I've ever seen) per turn!
    Merchants, in addition, are free of upkeep, meaning they do not cost you any money to maintain per turn, so sending these Merchants around to valuable resources all around the globe and forgetting about them won't really hinder you.
    Which resource is best, one might ask, and one will get the following answer: Ivory. Found only in N. Africa in three different spots, Ivory is the best resource in the game, followed by either the Silk in Constantinople or Gold all around, these are followed by Slaves. Those are the four best resources.
    How can I tell how much I will get? Hovering your mouse over a resource you had 'discovered', meaning you have it in your line of sight or had it in your line of sight before, or you got map information from your fellow nations, will tell you how much exactly can this Merchant generate out of this resource, also, the amount of florins generated from a certain resource will vary in according the Merchant's finance level.

    Taxes - Taxes will be your prime monetary generating tool (Arguably, as Merchants can generate almost just as much), taxes are collected from every settlement you have through-out your kingdom each turn from your people, in castles, the taxes are permanent on "Normal", whilst on cities, you can change them according to whatever you feel.
    Taxes are very good for many reasons:
    1) It allows you control of your population happiness.
    2) There's rarely a difference in income between High and Normal tax rate, or Normal and Low, allowing you to control your civilization's happiness with minimum monetary problems.
    3) Taxes do not rely on anything aside your population size, and since (For most cases) population size only increases, it is a very reliable source of income.
    Now, taxes are blocked by sieges but not by blockades, making them sometimes also quite vulnerable, but not too much.

    Farms and Mines - These two are a very good money generator for you, they are available at almost every settlement and can never be a bad thing.

    Farms - These allow you further growing of your civilization by giving you a bonus for health and sanitation, thus allowing your citizens to reproduce more. Farms also generate a lot of "Common Goods" resources and allow you further inland and by sea trade.
    I have heard one advice, sadly, a stupid one, and I advise ALL of you not to heed it: "Do not build farms because they boost squalor", squalor can easily be countered by traits your generals have, tax level or improvements to your city, clogging down one of your best money production resources, farms, for stopping squalor is not ill advised, it will be your demise.
    Mines - Mines can only be built in provinces where there are resources that can be mined, such as Tin, Coal, Gold, Iron and so on and so on. Mines are also a very good source of income, however, also a very costly one. The mines give you a certain income level depending on their level, the monetary value of the mine-able resources you have and how many of said resources you have.
    Mines boost your trade by giving you more and more of that resource and allow you to trade it more, however, as far as I can see, merchant income does not increase by mines.
    Important thing about mines - They usually cost in the 2000s, or even more, so getting a mine to gives you 100 florins a turn for 2000 florins right now is a waste of your money, however, mines that give you 350 per turn for 2000, is money well spent.

    Traits - Your generals get economy boosting traits or ancillaries either when they are spawned or when they stay long enough in a city, the traits usually say:
    "+10% to tax income"
    or "+10% to trade"
    This means, that the tax income you get per citizen will increase by 10% and (or), that the income you get from each trading resource will also increase by 10%.
    There is also the "+1 to farming" trait, which gives you literally +1 to farming, meaning more bonus for citizen reproduction and common goods for trade.

    Upkeep - Upkeep plays a very big role in Medieval 2 Total War and greatly affects your economy, building too many troops and not being able to support them with your income will easily throw you into bankruptcy, and buying too little troops could mean your demise against your enemy, so you should find a very nice balance between both.
    How do you do this? Easy! Open your financial expectation menu, look at the total "Income" and "Expenditure", it should be at the bottom part of the scroll, in bold black.
    Now, this should easily tell you how many soldiers you can keep supplied and ready, with these few brief pointers:

    Instead of starting to calculate how much each unit costs, there are arbitrary numbers, in average, of how much every branch costs in upkeep.
    Earlier and cheaper archers cost around 100 upkeep (Per unit), when more expensive ones (Later) cost around 200-300.
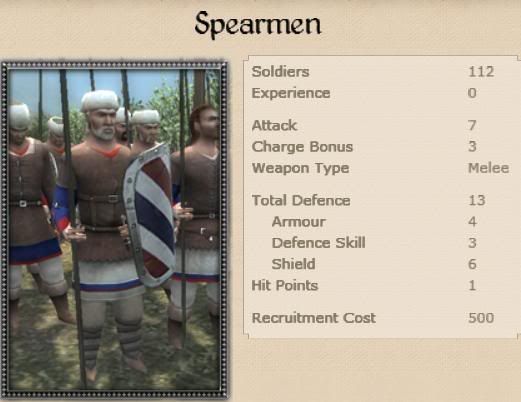
    Earlier and cheaper infantry (Light Infantry usually, this includes Spearmen!) cost around 90-150 upkeep, and the later, more expensive (Mostly heavy infantry) cost up to 400-500 upkeep.
    Earlier heavy cavalry cost around 200-300 upkeep, and the later ones cost up to 1000 - They are easily the most expensive unit branch in the game.
    Light cavalry and missile cavalry cost around 300 - 400, even 500, to all stages of the game.
    Artillery units cost around 400 - 600.
    Ships can cost up to 1000 or so, Cogs around 200-300.

    You can average up all these numbers, and easily find out how much of your army you can support, if between your expenditure and income you have a (positive) difference of 2000, meaning you get 2000 florins per turn, you can support a half stack of an army, with about 3 archer units, 1 light/heavy cavalry and 4 infantry.

    These calculations will become far simpler as time passes, and you won't even have to remember the numbers since you will remember from past experiences.
    However - You must remember that the numbers you calculate with are arbitrary average numbers, meaning that the costs can easily divert to both sides, so it is far safer to take around 100 florins more than the average, this way you will easily avoid bankruptcy.

    Bankruptcy - Bankruptcy is a situation in which you and your nation go into the "Red Minus" section of your balance, meaning, you spend more money than you should, or you spend more money than your income allows you, and as I had already covered the ways to try and avoid it, it is time to address the way of how to get out of it.

    Most players panic when going into bankruptcy, and you shouldn't. You have plenty of ways to get out of it, and the most common way of getting into it is going on an all out war, and building too many troops.

    So, the solution is right here? Isn't it? Wrong.
    You still need to support your war, don't you? So here's what you should do.
    1st stage - You have just reached the "Red Minus" section of your balance! This is usually caused because of lack of trade, so your first step should be getting trade rights from whoever you possibly can.
    2nd stage - At the same turn, go to all your large cities (Bigger than Large Towns) and turn them to "High Tax Rate" or "Very High Tax Rate" as long as the population happiness DOES NOT go under 120%!
    3rd stage - Go to the rest of your settlements, find those with 140% population happiness (Or more), and disband units there until you reach 120% (No less). Now, if you have already moved the taxes to "Very High" or "High", DO NOT disband units there as you will need anything you possibly can to keep the population high.
    In addition to that, do NOT disband units who are in free upkeep slots! (Background of unit card in the settlement is blue instead of gray) - It will help you if you need an emergency response army to an attack while not affecting your upkeep.
    4th stage - Cut down your army.
    Yes, you have a war, and you are most likely on the offensive if you lost all that money, so what you should do is cut down on the offensive.
    If you had 4 full stacks roaming around, demolish 2 of said stacks and use the other 2 to conquer CITIES, not castles. If you conquer cities, you will help your economy recuperate, and in addition to that, removing half of your army or so will drastically improve your income.
    Important! If you have ONLY 2 full stacks (Or less) - DO NOT cut down in your army as it will most likely cause you to lose the war, instead, simply fall back to your settlements and bunker up until this crisis passes.
    5th stage - I'm in the green!
    Great work, you're now in the green, BUT, you are not out of the woods just yet, you just passed the swamp, but the woods are still filled with bandits.
    You need to now develop your economy sufficiently to once again go on the offensive in this war, so what you should do is build the least expensive trade generating or income generating buildings (Markets, roads, ports... And the likes) in anywhere possible, meaning, if you have 3000 florins and can build Dirt Roads in 3 cities, or one Paved Road in one huge city, build the 3 Dirt Roads instead as to boost up the overall trade, you will easily get back on your feet.
    6th stage - Now that you get around 2000-3000 florins per turn, you can regain the offensive.
    7th stage - This is just a pointer really - Try not to move your armies in open fields too much, capture cities as fast as possible, both to avoid too much upkeep costs and to reduce the chances of being ambushed by a far superior army.
    8th stage - Another pointer.
    Merchants.
    Merchants will easily keep you out of bankruptcy, simply throw them on a resource and forget all about them, they cost you no upkeep and they become far better in what they do over time, giving you more and more income, so building about 3 - 4 of them will easily keep you out of bankruptcy and also (If, for example, each of them generates only 100 florins per turn) give you the ability to support around 1/5 of a full stack, and whilst this may not sound like a lot, remember that 1/5, out of 20 units (In a full stack) is 4 units. 4 units is a lot of money down the drain.
    What I'm trying to say is, the more merchants, the better.

    This should easily bring you out of your bankruptcy and keep you out of it, good luck!


    Updated Sept. 2nd, 2009, How to use Crossbow units by Zyxos

    Spoiler Alert, click show to read: 


    Updated Oct 4th, 2010 The importance of maritime monopolies by moddog

    Spoiler Alert, click show to read: 
    Trade is inevitably a driving force in M2TW. Trade routes, on both Land and Sea, are invaluable. To this end, any maritime state - i.e. one with a significant reliance on sea power and sea trade (particularly the following: Venice, Milan, Sicily, Byzantine Empire, Egypt, England, Scotland and Denmark) - they must field a powerful, active navy to keep their trade routes open and free from pirate activity.

    My suggestion however revolves not around powerful navies, but control of ports. Having a monopoly of the coastlines around any discrete body of water is a MAJOR way to make money. Yes, any coastal port is good, and numerous ones are better, but it is only by controlling distinct regions of trade that any real money can be made.

    Take the Aegean sea for a particularly good example. (thats the one surrounded by Thessalonica, Constantinople, Iraklion etc). The Byzantine Empire can make good money by building up trade in their coastal cities here - so thats Constantinople, Thessalonica and Nicaea, and to a lesser extent Corinth, Smyrna (if they have it) and Rhodes (if they have it - note Rhodes is most useful as town). They can quite happily control a huge trade network there without having to really expand. However...

    Anyone who has played as either Venice or The Byzantine Empire will know that these two great powers inevitably go to war. Ever thought why? Not only the obvious: they share borders, there is a history of violence between them, and the Venetians are looking for a non-Catholic faction to beat up in order to avoid annoying the Pope. No, its more financial than that. Control of the Aegean creates a powerful trade unit that is greater than the sum of its parts

    Historically, the Aegean sea was a huge trade arena - the Hellenistic world was built on trans-Aegean trade, the Roman Empire relied heavily on it (although this is less relevant as the Roman Empire controlled the entire Mediterranean!), and in Medieval times this didn't change. Not only is the Aegean surrounded by populous cities, but it also boasts some quite calm waters, making trade easier. This isn't unique to the Aegean, any large body of water that is easier to cross than go around, that has many people living on its shores, and that is relatively easy to cross, will be crowded with trade ships.

    My point.... (yes I know i took a while to get there)

    - Any discrete, indentifiable body of water is an economic powerhouse waiting to happen. You don't need particularly large numbers of territories to make money - you just need the right ones. I.e. you need ones that together form a trade unit. (this applies to a lesser extent on land - look at the northern Italian bloc of cities - on their own they are powerful trade centres. Unite under one ruler however... they become greater than the sum of their parts!)

    I think perhaps a list (from the top of my head) of maritime trade units is probably a useful idea to illustrate my point - note that these are by no means isolated from the others, they just (from my experience in game) work particularly well as a group, and can produce more money per city when working together than they can when in separate political domains, even with trade rights alliances and good relations helping the mix.

    - As said before the Aegean sea (Greek sea) - Constantinople, Nicaea, Smyrna, Thessalonica, Corinth, Rhodes and Iraklion
    - The Adriatic (between Italy and Croatia/Dalmatian Coast) - Venic, Ragusa, Naples, Durazzo (to a lesser extent Corinth)
    - The Tyrhennian Sea (framed by the ports of Palermo, Rome, Ajaccio, Calgiari, Florence and Genoa, with Tunis and Marseilles chipping in to an extent too)
    - The Black Sea - (Constantinople, Sofia, Bucharest, Iasi, Kiev, Caffa, Trebizond and Tbilsi)
    - The Gibraltar straights (and surrounds) - Lisbon, Marrakesh, Cordoba, Granada, Algiers, Tunis, Valencia (to a lesser extent Leon too)
    - The North Sea - Inverness, Edinburgh, York, Nottingham, London, Caen, Bruges, Antwerp, Arhus, Oslo
    - Eastern Med - Iraklion, Alexandria, Gaza, Jerusalem, Acre, Antioch, Adana, Iconium, Nicosia and to a lesser extent Rhodes
    -Baltic Sea - Novgorod, Helsinki, Stockholm, Riga, Stettin, Thorn and Hamburg

    Control one of these units of maritime trade, and keep it safe, and you will quickly make a LOT of money.
    Last edited by Silent Assassin; October 04, 2010 at 02:19 PM. Reason: Updated with new guide
    TIME TO DIE!!!! Proud Son of Viking Prince

  11. #11

    Default Re: The Great M2TW Information Thread

    Thread updated with Spartan90 Milan guide in post # 5

    Thx Spartan

    If anyone else would like to contribut just let me know via PM

    Regards
    Rebel6666
    TIME TO DIE!!!! Proud Son of Viking Prince

  12. #12
    Mega Tortas de Bodemloze's Avatar Let's Get After It
    Join Date
    Jan 2008
    Location
    Fort Hood, Texas/Parramatta, New South Wales, Bristol, Tennessee
    Posts
    11,588

    Default Re: The Great M2TW Information Thread

    Phenominal...Heculian efforts here Reb...Kudos & +Rep to Rep Whores Globally...
    A Lion serves in Winter, then perhaps a Unicorn for the Spring.


    ****************
    If you cannot stand behind what you say.... then do not speak. If your words are taken out of context,
    then the weight of the evidence will still fall in your favor and carry the day

    The Casual Tortoise: Mega's Guide to Fast Turtling

  13. #13

    Default Re: The Great M2TW Information Thread

    Nice re-org...

  14. #14
    eggthief's Avatar Praepositus
    Join Date
    Sep 2006
    Location
    Netherlands
    Posts
    5,562

    Default Re: The Great M2TW Information Thread

    Quote Originally Posted by Mega Tortas View Post
    +Rep to Rep Whores Globally...
    Hey man don't steal my lines.

  15. #15

    Default Re: The Great M2TW Information Thread

    Good to see my guide made it in there. Very useful information in this thread.

  16. #16

    Default Re: The Great M2TW Information Thread

    Nice, a clean overview of all guides

  17. #17

    Default Re: The Great M2TW Information Thread

    Quote Originally Posted by Conquistatore View Post
    Good to see my guide made it in there. Very useful information in this thread.
    Yes it's finaly there, sorry it took some time but I had probelms with the other thread.

    Quote Originally Posted by Abel12512 View Post
    Nice, a clean overview of all guides
    Thx my friend

    Updated with the second of Spartan90 guides

    Enjoy
    TIME TO DIE!!!! Proud Son of Viking Prince

  18. #18

    Default Re: The Great M2TW Information Thread

    Wow, there is now 18 guides here, now that is what I call a GREAT THREAD nice Job everyone

  19. #19

    Default Re: The Great M2TW Information Thread

    Aye, this truly is a great thread! Any chance of you making a Empire one? I mean you'll have help from trusty supporters but will you?
    You cant spell Slaughter without Laughter!

    For the Motherland
    a Russian AAR

  20. #20

    Default Re: The Great M2TW Information Thread

    Quote Originally Posted by Last of the Mohawks View Post
    Aye, this truly is a great thread! Any chance of you making a Empire one? I mean you'll have help from trusty supporters but will you?
    Maybe this will depend if I buy it or not... But for what I've heard from the demo I will likely not buy ETW
    TIME TO DIE!!!! Proud Son of Viking Prince

Page 1 of 36 123456789101126 ... LastLast

Posting Permissions

  • You may not post new threads
  • You may not post replies
  • You may not post attachments
  • You may not edit your posts
  •