


")
")
")


Introduction to Mapping
Setting up your files:
Download the course files that I have packaged up. Inside the MapClass Files folder you will see a folder called MapClass, two batch files and a text file. Place the MapClass folder and all of the batch and text files into your main M2TW folder. Then double click MapClasscfgFixer.bat. This will create the .cfg file you need to ue these files. It copies your original medieval.preference.cfg file and adds some lines to it. Your MapClass mod is now installed and ready to use. This mod will run in Windowed mode to make editing easier.
Choosing a map.
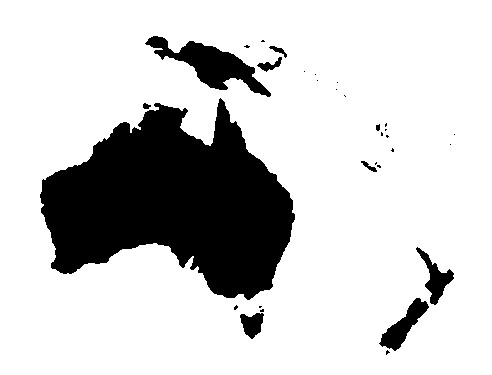
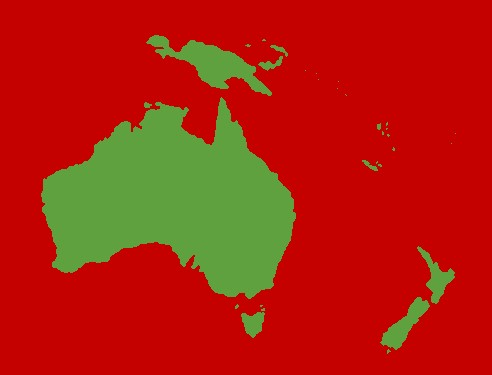
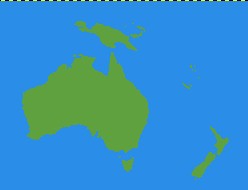
For this class I suggest choosing a fairly small map. I will be using Australia and the surrounding islands for all the examples, but you are free to choose whatever you want. If you choose to create a large map then you will have to add more than the 10 regions listed in the Course Outline for it to load and run properly. This is the map I am basing the course on:
Click to view content:
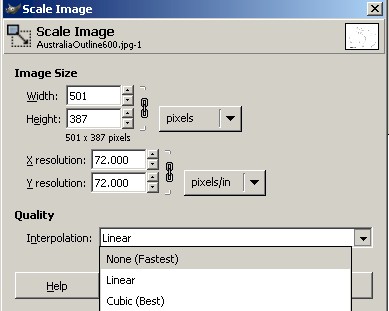
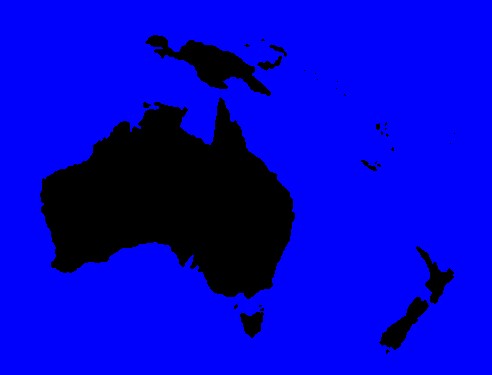
Once you have chosen your map you need to get it sized to something you can use in the game. The maximum size for map_heights is 1021 x 1021 and for map regions 510 x 510. The larger you make your map the more work you will have to do, and the harder it will be for you complete the chapters in a single week. For reference the vanilla file size for map_heights is 591 x 379 and for map_regions is 295 x 189. The size of the Australia map I am using for the tutorial is 600 x 464. Whatever size you choose for map_heights it needs to end in odd numbers. My Australia map obviously doesnt't end in odd numbers, and it's actually bigger than the vanilla files, so we will resize it to something a little easier to work with. For this class we will make it 501 x 387. This gives us a map small enough to complete over the course and big enough to do some serious tweaking to. Open the image in Gimp, select Image/Scale Image. Type 501 in the width, then In the Quality section select Interpolation, None (fastest) then click Scale. In Photoshop this option is called Nearest Neighbor. This will prevent color distortion on the edges. Always use that option when resizing map files.
Click to view content:
Outlining the Landmass
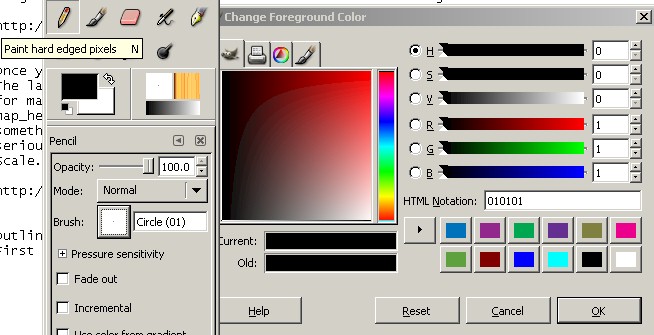
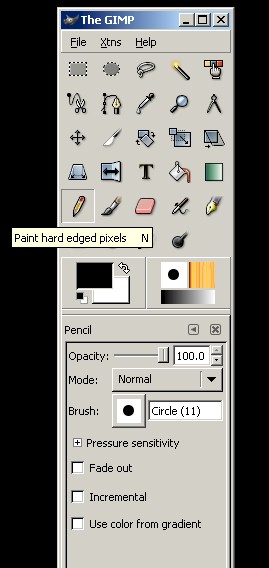
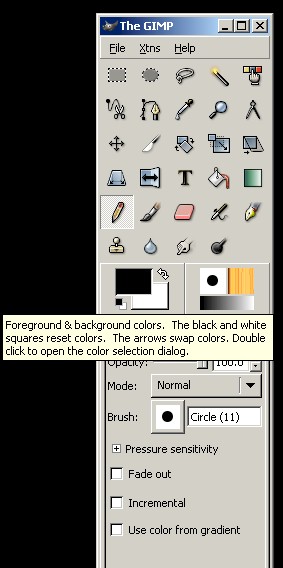
First we will follow the outline of the coast, then we will fill the inside. Select Paint hard edge pixels, set your Circle 01, and select 1 1 1 for the RGB colors.
Click to view content:
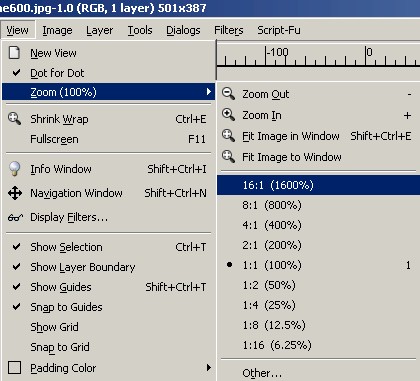
Then use the zoom feature to zoom in to 1600% and work at the pixel level. Get used to this you will be doing it alot.
Click to view content:
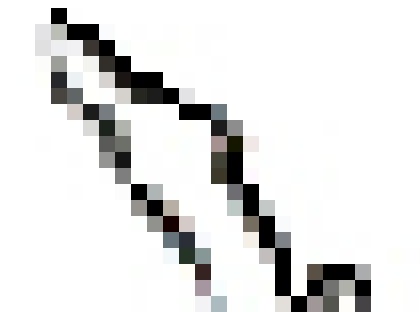
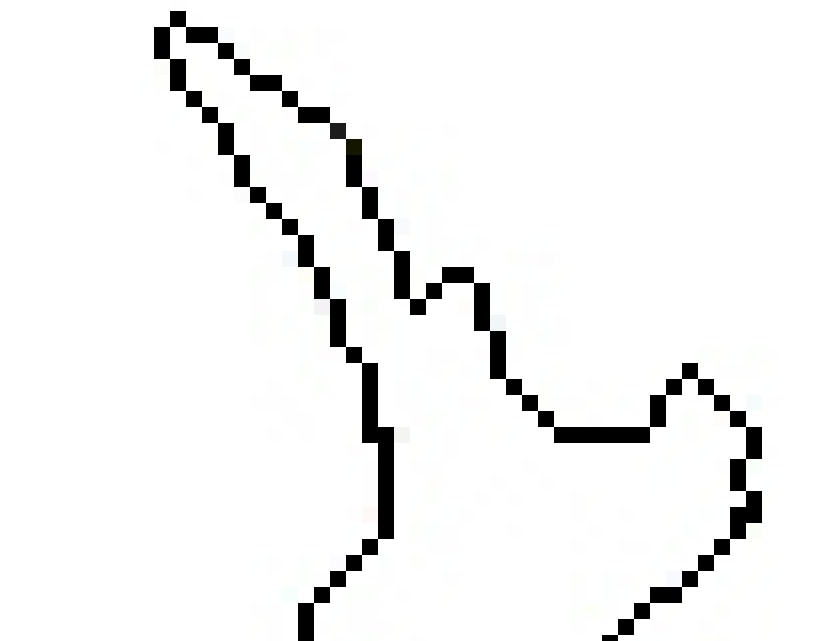
Follow the coastline one pixel at a time. Your coast needs to have a one pixel thickness all the way around to make it easier for smoothing later. Your coast will be fuzzy at this point, just pick a line and go around it. The small island and reefs you dont have to outline, go ahead and color them all 1 1 1 . Try to avoid right angle turns in your coast, these will make your map look blocky in the game. Instead go diagonal when you can, more on that a bit later.
Click to view content:
When you are done drawing the outline you can clean up all the extra pixels by setting your color to 0 0 0, then clicking Select regions by color on the Gimp interface. Click one of the off color pixels and it will select every pixel of that color on the map. Right click the pixel and select Edit/Fill with FG color. This will replace every pixel of the color you selected with white. Do that for all the extra pixels and you will have your outline. If you missed a pixel here or there then just paint that individual pixel white. When you are done you should have a single pixel outline that looks like this:
Click to view content:
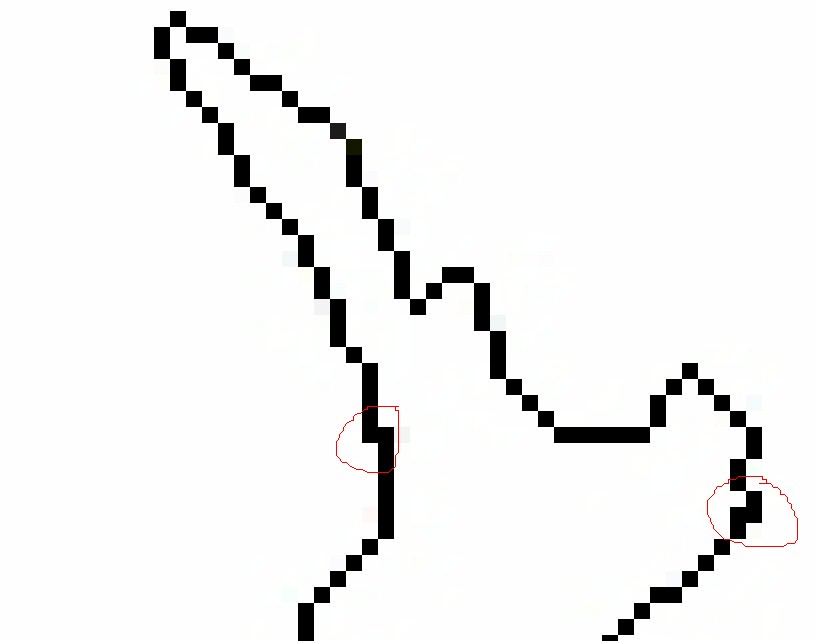
Now take a look at the edges of your map. What you are looking for are those bad corners I mentioned earlier. Here are some examples circled in red:
Click to view content:
Clean those up by replacing the extra black pixel with a white pixel. Here are the fixed edges:
Click to view content:
Get all your coasts done all the way around, make sure there are no holes in it. Then set your RGB color to 5 5 5. The reason we are using 5 5 5 is so that rivers will flow properly. Then using the Select contiguous region tool we will fill the land mass with black. If your entire screen fills with black then it means you have a hole in your coast somewhere. Click Undo, go fix your coast, and refill it. When you are done it should look like this:
Click to view content:
Now that you have your landmass done, its time to do the water. Select 0 0 253 for your RGB color and fill all the water areas. When you are done save it in the data/world/maps/base as map_heights.tga. When you are done it should look like this:
Click to view content:
To make map_climates we just need to change two things. Change your RGB color to 196 0 0 and recolor the water areas with that. THis will give us sea_shallow that ships can navigate in. Use the Select regions by color tool to change them all at once. Then set your RGB color to 96 160 64. This will give us a ground type of fertile_medium for the land areas. Recolor all the land areas just like you did for the water. Then save the file in data/world/maps/base as map_ground_types.tga. When you are done it should look like this:
Click to view content:
Now it's time to make the map_regions file. First we have to resize either map_heights or map_ground_types. It doesn't matter which one, just pick one. Map_heights is twice the size of map_regions plus one pixel. This is the reason we needed an odd number for the size of map_heights. Our map_heights file is 501 x 387, so subtract 1 then divide by two. The map_regions file should be 250 x 193. Scale the image and make sure you use either the None (fastest) option for Gimp or the Nearest Neighbor option for Photoshop to prevent our colors and edges from distorting. Zoom in and make sure the edges are sharp before you continue, if not then click Undo and try it again.
Set your RGB color to 41 140 233. This is the color of water in map_regions. Color all the water area by using Select regions by color. Save the file in data/world/maps/base as map_regions.tga. When you are done it should look like this:
Click to view content:
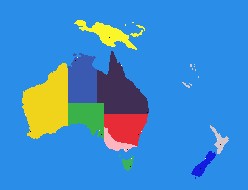
Now its time to add the actual regions. In the files I packaged I removed everything except the first 10 regions listed in descr_regions.txt. We will use those colors and ignore the names for now. Our goal is to get the map to load, after it loads we can change the settlement and region names to whatever we want. You can also draw the regions any shape you want, you will not be judged on the accuracy of your regions. However I did find a map of Australia that has 7 regions including Tasmainia, and since we also have 3 other islands it works out perfectly. Use it if you wish.
http://www.auinfo.com/australia-hotels.htm
The region colors tell the game how to draw the map and they must match exactly to the entries in descr_regions. The region colors we will be using are:
212 198 206
20 25 225
255 180 190
252 245 42
66 47 85
241 211 25
58 89 177
58 177 75
58 177 95
232 41 55
Start at the top color, set your RGB to match, and draw a one pixel border for the region. Then fill the inside using Select contigous region. For the islands you dont have to draw the border just fill them in. Zoom in to 800% or 1600% to make this easier. For the little islands and reefs just pick the closest landmass and make them part of that region. We will make it so troops can't land there using ground_types later. Make sure every single pixel of the region is covered or you will get funny little pink spots all over your map. When you are selecting areas click Select and then None when you switch back to painting hard pixels. Try to avoid putting similar colors next to each other so its easier for you to tell the regions apart. It doesnt matter where you put which region as we will be renaming them later.
Once you have all your regions drawn change your RGB color to 0 0 0, this is the color used for cities. Place a single black pixel where you want your city. It cannot be touching the edge of the region or the water and there can only be one settlement per region. Then change your RGB color to 255 255 255 for ports and place a single white pixel in each region you want to have a port in. Ports must be touching the water on at least one side and you can only have one per region. Save your file as map_regions.tga. When you are done your file should look something like this:
Click to view content:
Almost done with Lesson 1, the next ones will go quickly. First is disasters.tga. This is a required file but it doesnt have to be anything other than a black image the same size as map_regions.tga. Make a copy of map_regions in case you screw up, then paint map regions all black 0 0 0 and save it in data/world/maps/campaign/imperial_campaign as disasters.tga.
Save the same file as radar_map1.tga in the imperial_campaign folder, and save it again as map_features.tga in the base folder. Then save it again as map_trade_routes.tga. Then scale it up to 500 x 386 or exactly twice the size of map_regions and save it as map_roughness in the base folder. Then save it again as radar_map2.tga in the imperial_campaign folder.
Scale that image up to the same size as map_heights and change the RGB color to 236 0 140 for the mediterranean climate and save it in the base folder as map_climates.tga.
Then change your RGB color to 255 255 255 white, and recolor the entire image. Save that in the base folder as map_fog.tga. These are the files you should have created:
In the data/world/maps/base folder:
map_heights 501 x 387
map_ground_types 501 x 387
map_climates 501 x 387
map_fog 501 x 387
map_roughness 500 x 386
map_regions 250 x 193
map_trade_routes 250 x 193
map_features 250 x 193
map_FE.tga and water_surface.tga were provided by me.
In the data/word/maps/campaign/imperial_campaign folder:
disasters 250 x 193
radarmap1 250 x 193
radar_map2 500 x 386
Then open the descr_terrain.txt file in the base folder and change the map size to match map_regions.tga file size. In this case it should say 250 x 193.
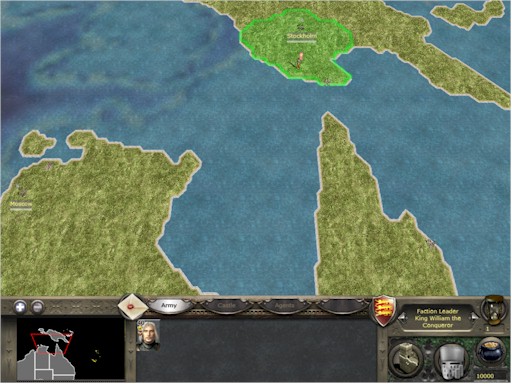
Go into your M2TW folder and run MapClass.bat. When the game starts it may hang for a few minutes as it creates some files. How long it hangs depends on your machine, but dont stop it even if Task Manager says M2TW is not responding. Start the Grand Campaign as England, it will start slow while the game creates map.rwm and then it should load. You will have your basic map up and running with one army.
Click to view content:
What to check if it doesn't load:
Make sure you start as England, they are the only faction with units at this point.
Open M2TW/logs/MapClass.system.log.txt and look for map file errors.
Make sure you have created all your files.
Check all your file sizes, .tga files of the wrong size should be reported in the error log.
Open map_regions and make sure all your colors are correct, use the Pick colors from image tool to selct every region and compare it against the colors listed above.
Post a couple of screen shots of your new map.


 Now uninstalling 5.0 somehow removed my uninstallation file for Medieval 2, so I'm deleting the files and then am going to remove it from the registry before reinstalling. Then I have to patch and unpack. BUT after all that I'll be ready to roll.


")
")


